| Previous Page |
PCLinuxOS Magazine |
PCLinuxOS |
Article List |
Disclaimer |
Next Page |
Setting Up A DIY NAS With OpenMediaVault, Part 1 |
|
by David Pardue (kalwisti)
As a holiday splurge, I bought a used Dell OptiPlex micro PC as the hardware for our NAS. This article describes the procedure that my son and I followed to set up the hardware, install OpenMediaVault and configure it for SMB/CIFS file sharing. I will also explain how to access the NAS in different editions of PCLinuxOS. The process is not as intimidating as it sounds, and the results are rewarding. If you have never set up a home NAS, I hope my article will save you some time and effort.
You will need two disk drives: one to hold the OS (OpenMediaVault); another to serve as actual NAS storage. My son donated his spare Toshiba 256 GB M.2 NVMe SSD (which we used as the OS drive) and I purchased a new PNY CS900 500 GB 2.5 ”SSD ($70) to use for NAS storage. 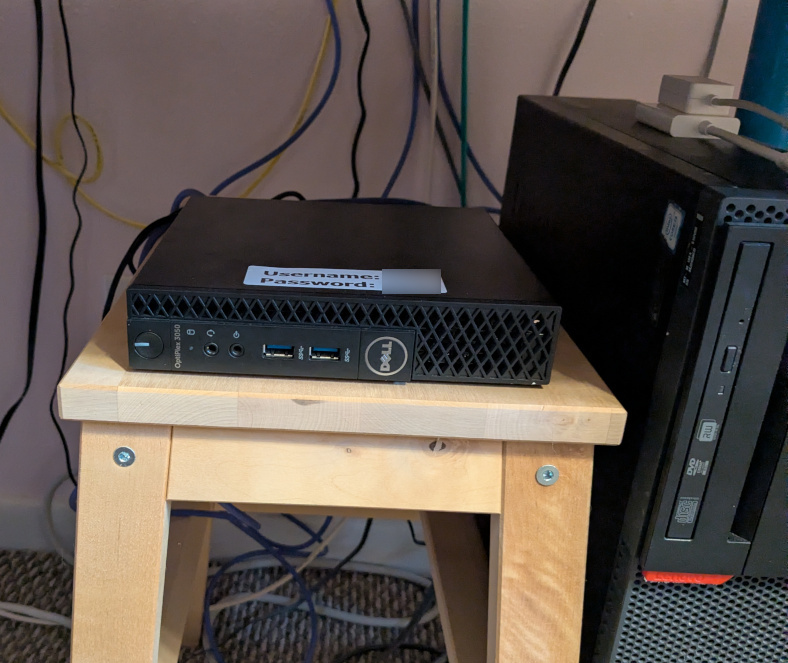
 If your budget allows you to consider buying a new Mini PC, the market space for them has exploded and there is a dizzying array to choose from. Mini PCs are compact, quiet, energy-efficient, modular and often less expensive than a traditional desktop PC. As a starting point for your search, I would like to mention the “2025 General Mini PC Guide USA,” a meticulous Google Docs spreadsheet compiled by Redditor SerMumble (who is an engineer). However, one of the advantages of OpenMediaVault is its modest hardware requirements; if you have an older, unused PC, you can repurpose it as a NAS PC and save it from becoming e-waste. Keep in mind, though, that a tower PC will not be as power-efficient as a Mini PC.
Network management has always been mysterious and is typically viewed as a black art, understood only by technical gurus. OpenMediaVault (hereafter abbreviated as “OMV") is great software for content storage which enables an average user to create a NAS file server and achieve digital autonomy at an affordable cost. OMV works well for home or small office networks. It contains services like SSH, (S)FTP, SMB/CIFS, RSync and many more, ready to use. Thanks to the modular design of the framework, it can be enhanced via plugins. Since OMV is based on Debian GNU/Linux, it can be used on nearly any hardware that is supported by Debian. OMV is developed by Volker Theile. He was initially involved as a developer with the FreeNAS project. In 2009, he decided to begin rewriting FreeNAS's code base due to its shortcomings and its time-consuming package management. However, Theile wanted to switch to a Debian base; the FreeNAS community was unhappy with the prospect of abandoning its FreeBSD base, so he began OMV. The invented name reflects the project’s function and goal. “Open ”for 'free and open/extensible'; “Media ”for 'data/media/music/video'; and “Vault ”for 'secure/vault.'  Typical usage scenarios for home users include the following: home office file sharing; automated backups of PCs; media streaming via Plex or Jellyfin; surveillance camera recording storage. OMV requires a 64-bit CPU and at least 1 GB RAM — 4 GB is recommended (and 8 GB “for best practice”). My periodic monitoring shows RAM usage hovering around 550 – 600 MB. As mentioned previously, OMV requires 2 drives: a system drive (4 GB or larger, the OS occupies 2.9 GB) and a data drive(s) for network storage.
First, you need to download the OMV ISO file [1.2 GB], verify its sha256 checksum and write the ISO to a USB flash drive. I used the “dd ”utility from the Terminal/Konsole for this, but you can also use PCLinuxOS's GUI utility, ddCopy. The current stable version of OMV is 8.0.4 (codename “Synchrony”), based on Debian 13 (codename “Trixie”). (When my son and I installed OMV, the stable version was 7.7.24 (codename “Sandworm”) which was based on Debian 12 [“Bookworm”]. So, all my screenshots of OMV's workbench/control panel show ver. 7.7.24. Note: Your NAS PC will eventually run headlessly, i.e., without a monitor, keyboard or mouse. However, at this stage you must temporarily connect your NAS PC to a monitor, keyboard and an Ethernet cable — a mouse is optional. In order to boot your NAS PC from the OMV flash drive, you may need to access the BIOS to set the USB flash drive as the primary boot option. Depending on your specific hardware, you may also have to disable Secure Boot. OMV's installer is the traditional Debian text-based installer. OMV's website has thorough, illustrated instructions that walk you through the installation process. Since this was my first time installing OMV, I accepted its default values for hostname [“ openmediavault ”] and domain name [“ local ”].
Important: Please remember that installing OMV will delete everything from the system drive of your NAS PC, as it is an OS install, not an application install. When the OMV install finishes, and you reboot the NAS PC, you will boot into a CLI interface. It will display its local IP address, which you can use to access OMV's web control panel / online workbench. Write this IP address down because it is one of the primary methods to access OMV's web interface: 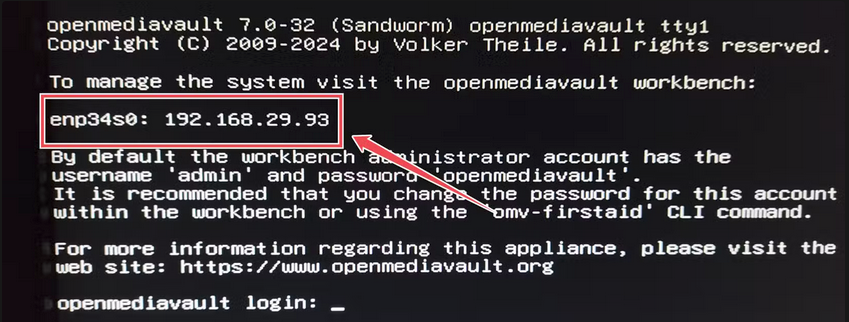 Tips: If you forget OMV's local IP address, you can use the “ping ”command to find the address:
david@debian-trixie:~$ ping openmediavault.local An alternative method is to open a browser and navigate to your router's IP address. (You can often find this information on the back of the router, printed on a reference card that came packed in the original box, in the device's manual, or online [the manufacturer's website]. In most cases, the IP address will look like 192.168.X.X.) In my TP-Link Wi-Fi router's management page, there is a handy 'network map' feature which displays the IP addresses of devices connected to the network: 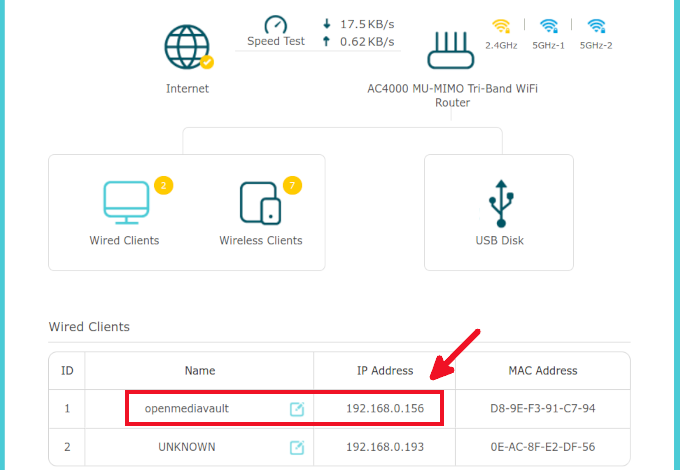 Christopher Barnatt of the Explaining Computers YouTube channel points out that the OMV IP address was assigned by your router (and might possibly change after a system reboot). If you did not choose to set up a fixed local IP address, he recommends accessing the OMV workbench by entering the hostname and domain that you chose during installation. The default is: openmediavault.local
Now that the OMV installation has finished, you will be running the NAS PC headlessly; therefore, you probably need to relocate the PC to your desired work area. (In our case, we placed it on top of an IKEA step stool which also supports a refurbished Lenovo ThinkCentre M800 SFF PC.) First, you must log in to OMV and safely shut down the system. Log in as root:
Username: root Then type: # shutdown now Now you can disconnect the monitor, keyboard, etc. and place the NAS PC in your desired location. It will run headlessly, i.e., with just power and Ethernet cables connected to it.
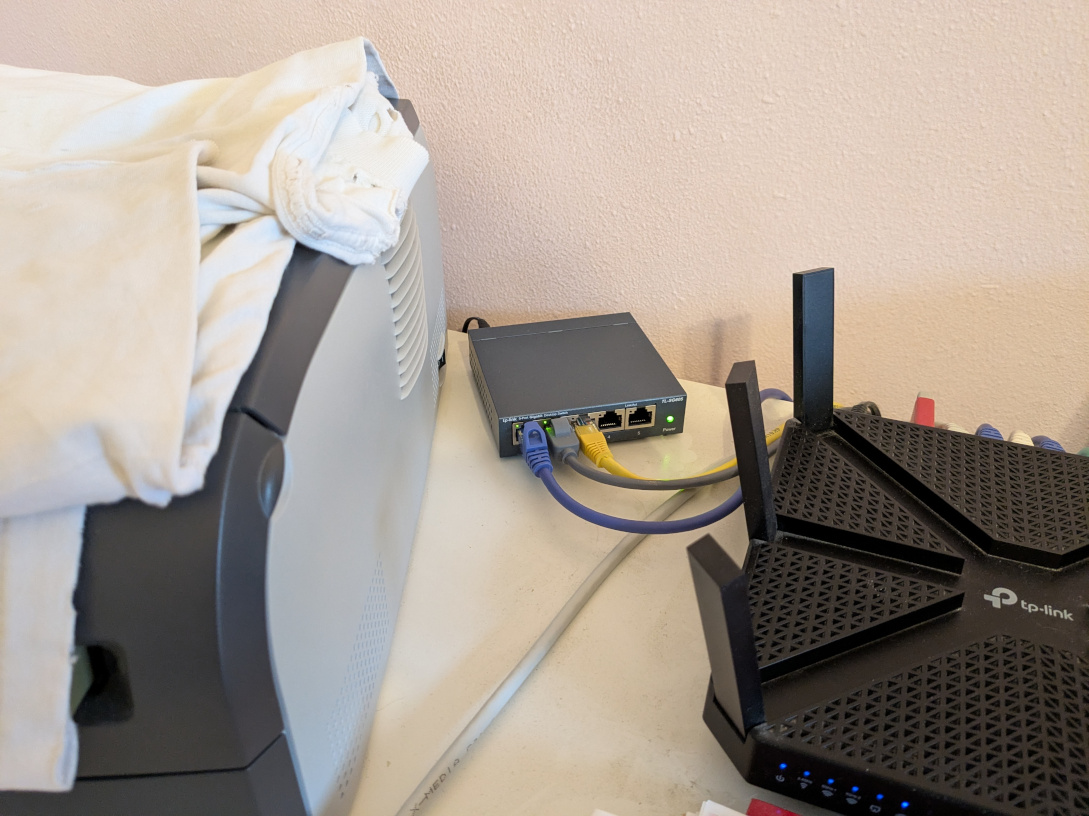
After moving the NAS PC to your chosen spot, reconnect its power and Ethernet cables, then turn it on. Since it is running headlessly, you must access/control it via another computer (with a monitor attached) which is connected to your local network. That machine can either be a desktop PC with a wired Ethernet connection to your network, or a laptop with Wi-Fi access to your LAN. You will administer OMV via its web interface — this eliminates the need for a desktop environment within OMV itself. The web interface looks like a neat welcome page, with a Categories tree on the left and categorized content on the right. From the workbench, you can enable SSH, SMB/CIFS, FTP, NFS, Rsync and other access protocols, as well as adding users and managing the system. OMV’s control panel is easy to use, but it presents a plethora of options; you need to know what you want to set up. The most helpful video tutorial that I found was created by Jeremy Leik: Leik, Jeremy. Practical IT with Jeremy Leik. “"OpenMediaVault 7 Setup Guide That Actually Works".” YouTube, 22 Mar. 2025. (13 min., 59 sec.) My son and I followed the instructions above and successfully configured OMV for SSH, SMB/CIFS and FTP. I cannot repeat each step here due to space limitations; instead, I recommend that you carefully watch the video and pause it as needed. I will only cover a few of its main points. Here is an outline of the steps demonstrated in J. Leik's Practical IT video:
The workbench's login page: 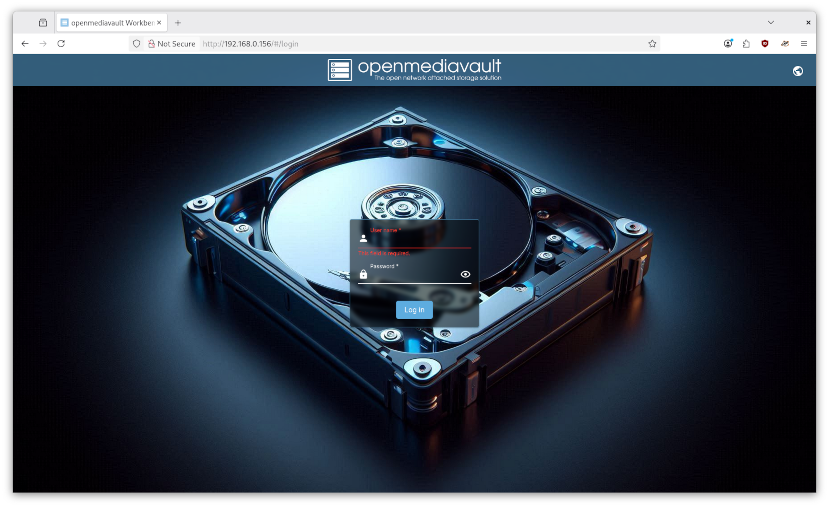 Default username: admin Default password: openmediavault Changing the default administrative password is probably one of the first things that you will want to do. Find the User Settings icon in the top right corner of the toolbar and click on it:  Next, click on the Change Password option in the menu:  Type in the new password, then type it again to confirm the change. The toolbar also has a Power icon which enables you to Reboot, Shutdown or place OMV in Standby mode:
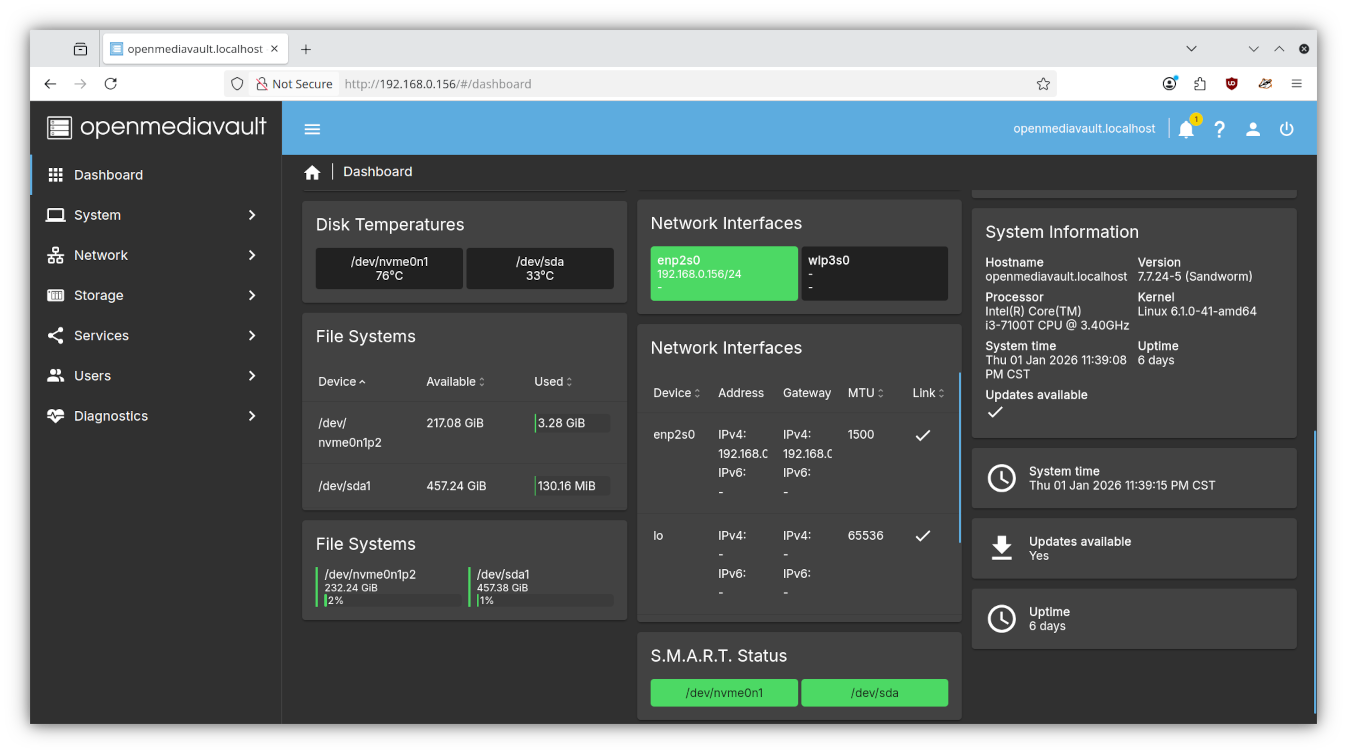
 OMV's workbench has a Dashboard that offers a variety of widgets for monitoring purposes. (Specific widgets can be enabled via the User Settings icon > Dashboard option.) 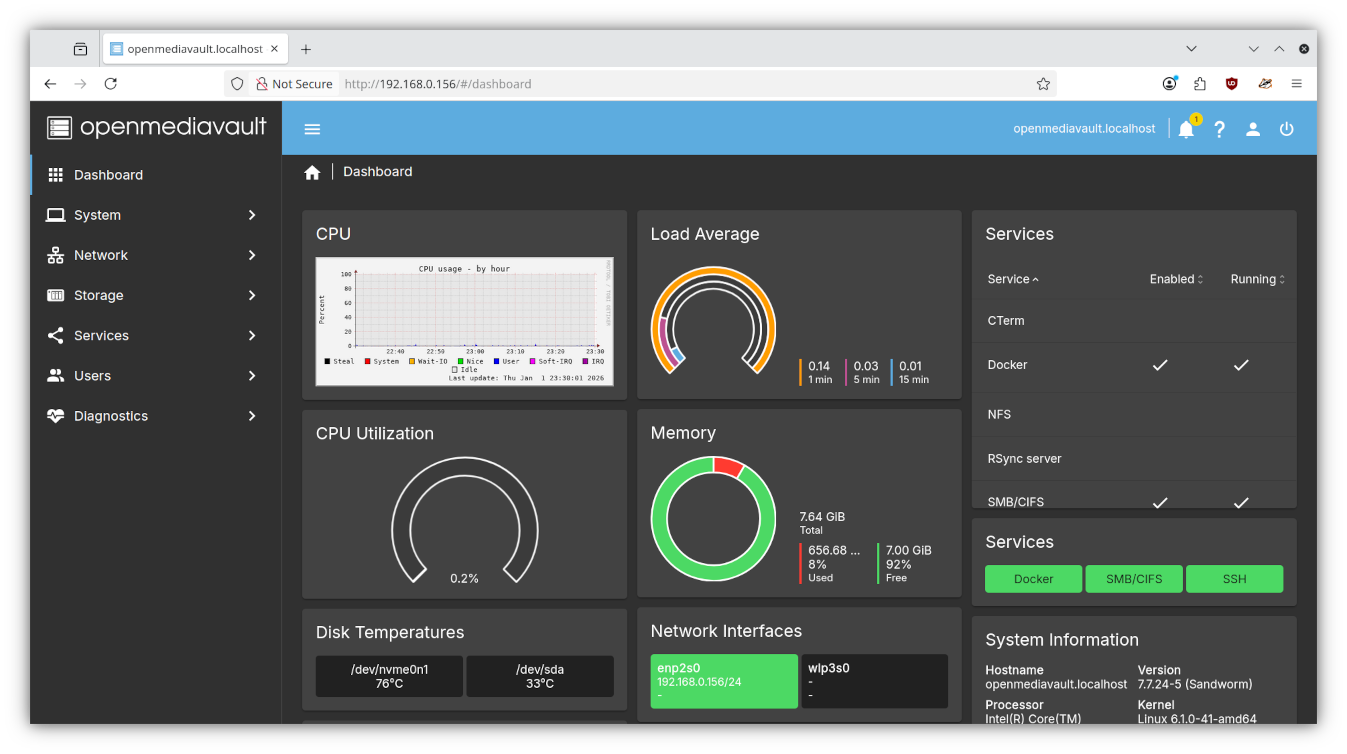
 When OMV system updates are available, you will see a message indicator beside the Notifications icon.  By clicking on the Updates Available widget, you can view the changelog of the packages marked for updating/upgrading. (If you did not enable the Updates Available widget, you may look for updates under the System menu > Update Management > Updates). 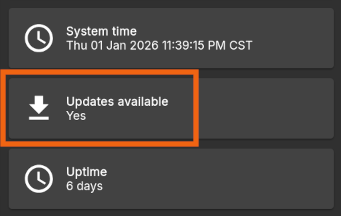 After reading about the pending updates [1], click on the Install Updates icon (which looks like a Download arrow) [2]. You will be presented with a Confirmation dialog [3] to proceed with downloading the updates and installing them: 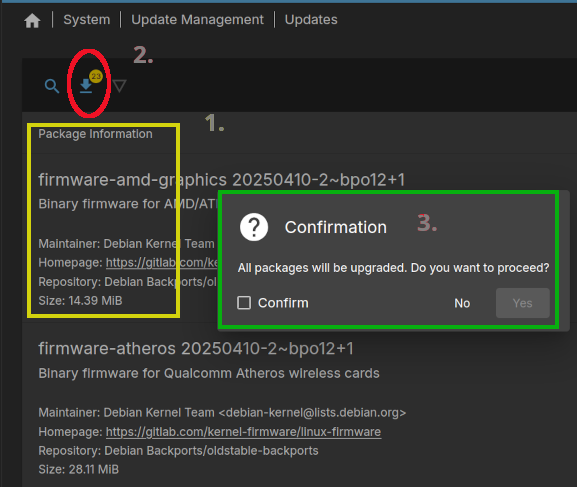 After confirming that you wish to apply the updates, a new dialog window opens; it displays the CLI output of what is happening under the hood: 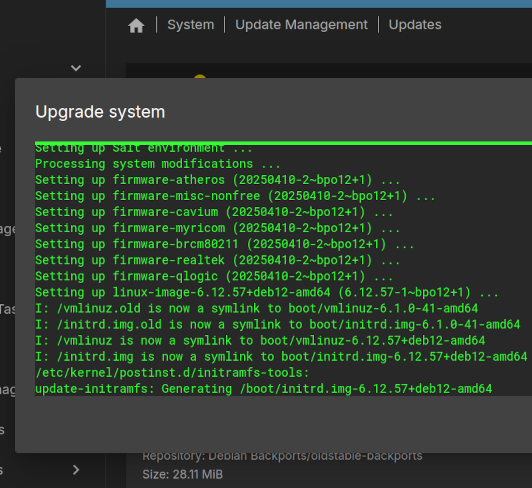 In addition to English, OMV's workbench interface is available in 20 other languages – including Dutch, French, German, Italian, Polish, Portuguese and Spanish (although some languages are not fully localized). To change the interface language, click on the User Settings icon > then select the Language option: 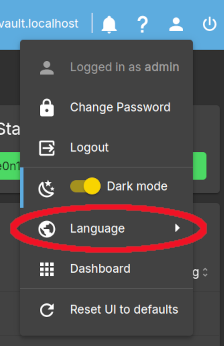 Next month, I’ll discuss accessing your shared folder in five different editions of PCLinuxOS: KDE Plasma 6.5.x, Xfce, MATE and Openbox / LXDE. |