| Previous
Page |
PCLinuxOS
Magazine |
PCLinuxOS |
Article List |
Disclaimer |
Next Page |
GIMP Tutorial: Using The Curves Tool |
|
by Meemaw While looking at some of my photos, I see some that aren't quite as vibrant as I remember them when I took them. One of the tools that GIMP has is the Curves tool, which adjusts the color in a photo. It's easy to use and fun to play with. Load a copy of your photo into GIMP. As we have learned over the years, if you screw up the only copy of your photo, then you have lost it. Working on a copy preserves the original. Here is the photo I'll work on first. It's a pretty little grove of trees I saw on a four wheeler ride in Colorado about seven years ago. While the colors are nice, they don't really "pop" and they aren't nearly as bright as I remember. 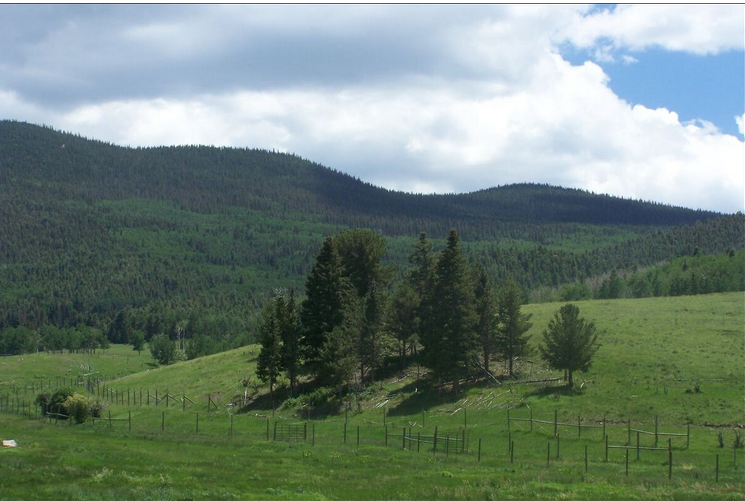 To try to fix this, we'll use the Curves tool, in the Colors menu. It allows one to do color adjustment fairly easily. The window looks like this: 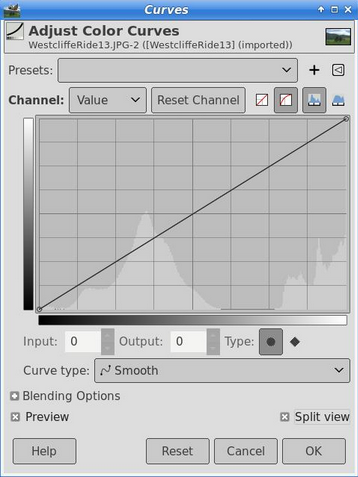 The main feature is the square in the center with a diagonal line. The bottom left corner represents the darkest color in your photo, and the top right corner represents the lightest color. To help you with your work, make sure "Preview" at the left is checked so you can see the changes. Then check "Split View" on the lower right of the window. Split view divides the photo in half and allows you to compare what you have done to what you started with. We'll attempt to edit our photo by pulling the diagonal line in different directions, the lower being darker and the higher being lighter. The first thing I did was to grab the line in the lower left part of the square, and pull it towards the bottom a bit. With Split View chosen, you can see what's happening. 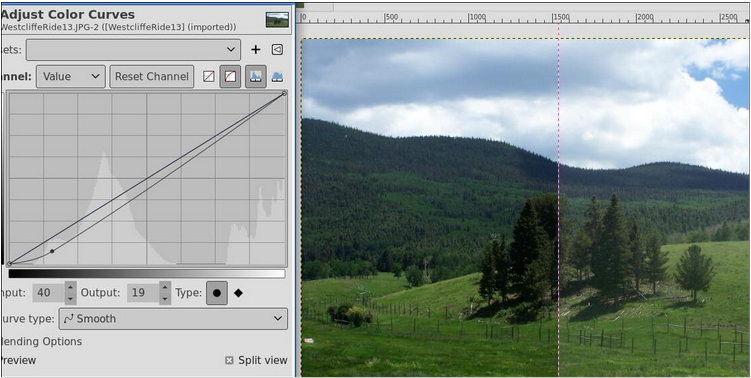 I've only moved it a little, but the image is more colorful already. Playing with the location you choose and distance you move the curve makes a big difference, but play with it a bit to get the effect you want. I'm also going to grab the other end to lighten it up a bit. It was a sunny day, so it should have been brighter. 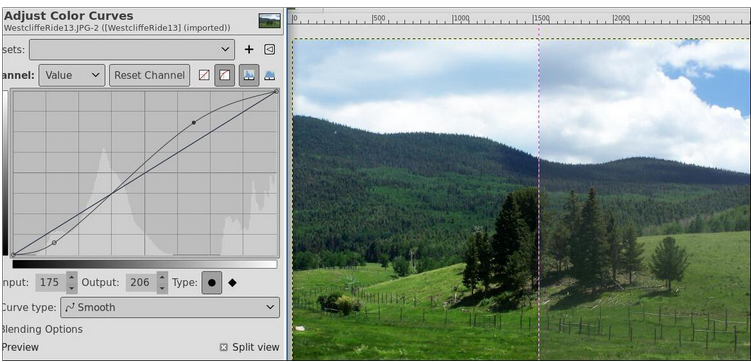 You may have to play with yours a bit, but I was happy with mine, so I saved it. 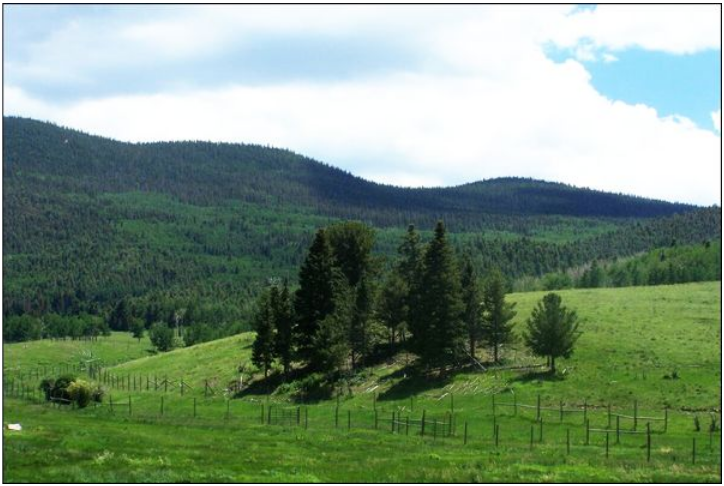 There's a bit more to this tool. At the top, there is a "Values" dropdown. If you feel like there's a predominant color you need to tone down, you can choose it from the values and again use the line to change it. This can happen with night shots. Some cameras (or some photographers) will shoot something at night, and the camera will pick up the darkness with an orange tone. I was in San Diego, CA ten years ago and took a photo of the Old Town Plaza just as it was getting dark. I want to work on this one. 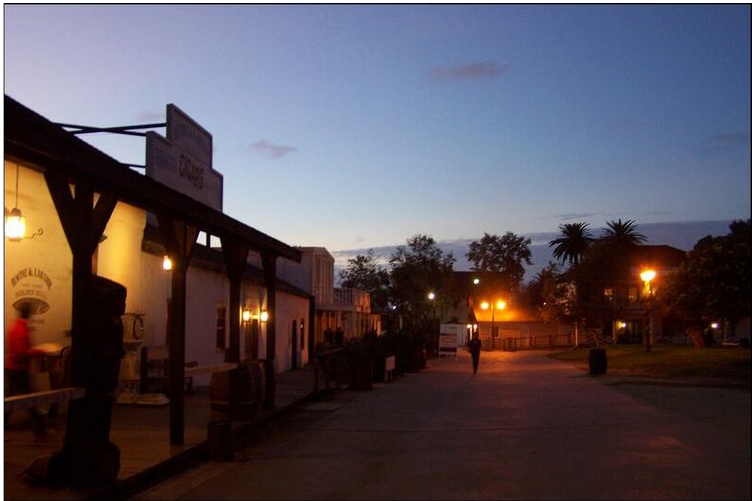 It looks pretty close to what I remember, but I'm going to see if I can make it a bit better. Loaded into GIMP and using the Curves tool, I get this: 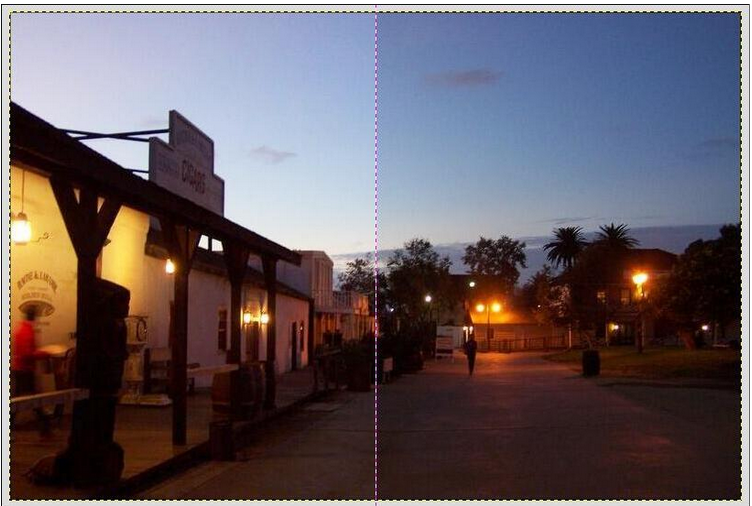 The right side is what I had to start. While it was getting dark, I don't remember it being quite that dark yet. Choosing the red in Values, it brought out too much green, so I clicked on "Reset Channel" next to the Values dropdown. I ended up using just the Curves tool without changing the values, but you might try it with your photo, and it may help. Mine is not too much different, but it looks better to me. 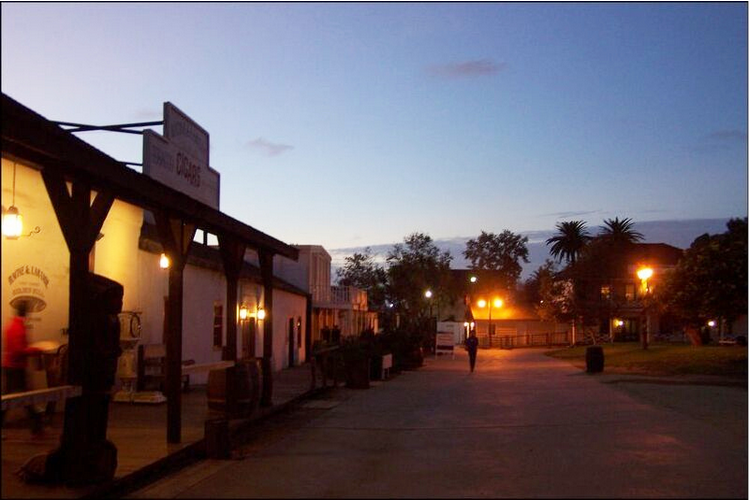 I hope this helps you in your photo editing! If there's a tutorial you'd like to see, feel free to PM me on the forum, or email me at meemaw@pclosmail.com. |