| Previous
Page |
PCLinuxOS
Magazine |
PCLinuxOS |
Article List |
Disclaimer |
Next Page |
Inkscape Tutorial: Vector Image Trace |
|
by Meemaw I'm always on the lookout for new tricks to use in any of the graphics programs I use. I saw this one on YouTube in a video by Logos By Nick. While you may have already learned this little maneuver, it was a bit new to me. It takes a bit of practice, at least for me. This method works well on a photo you want to trace. Maybe you are creating an advertisement and you have a photo of what you want, but you need clipart instead. You can always do a trace of the photo to use. We'll be using the Bezier tool. Open your photo in Inkscape. In the video I saw, he recommends that you turn off your page border. Make sure you bring in a bigger copy of your photo if possible (because images can be scaled smaller without quality loss, but not bigger). After you have it imported, add a layer to your project. You'll do your work on the new layer. In celebration of Linux's birthday this month, I'll use a photo of a penguin.  After you have it imported, set the opacity down a bit. We'll work on sections, so zoom into your photo. With our Bezier tool, we'll outline the different colors in the photo. I'll start with the yellow areas. Choose a section of your area and click on the edge. Click at another point on the edge where you want to draw a line, but instead of letting your mouse button up, drag the mouse away from your second spot. You'll see the line curve, and using a little bit of experimentation with the mouse button held down, you can line it up along the edge. When you are satisfied with the curve, let go of the mouse button and press <Enter>. I've found that if you want the curve to resemble the left side of a circle, you drag up or down to the right (depending on how you are drawing your curve). Sometimes it takes a bit of experimentation, but you can figure it out pretty easily. You can see me dragging the mouse in the image below. 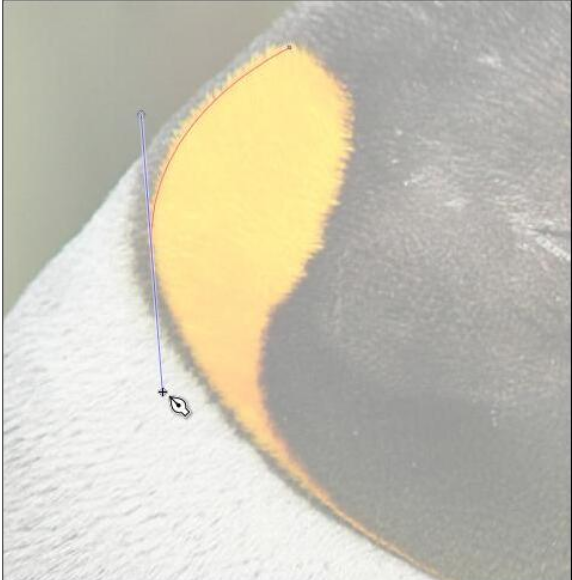 When you finish your first curve, leave it selected. Hover your mouse over the end in preparation for your next curve, and you'll see a handle on the end. Click there to start the next curve. When you do that the two curves will be combined and when you get all the way around, you will have one continuous curve, rather than several separate ones. This is the idea, since you probably want to fill this curve with a color. NOTE: You can always choose your Nodes tool and make any minor adjustments that you need. Now it's just a matter of outlining every color (click, click, drag) until you get everything traced. 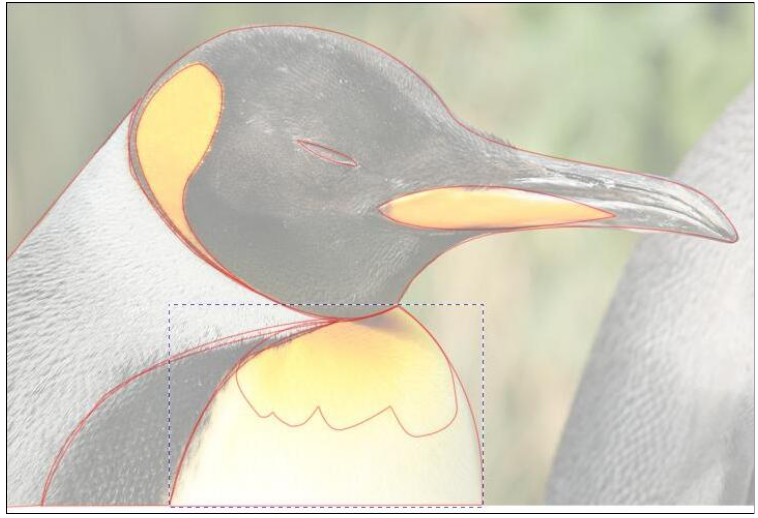 It's ok to overlap at places because when you put the color in, there won't be any gaps. After I got all the curves in, I made the photo layer invisible so I could see the drawing. Then I filled each curve with color. 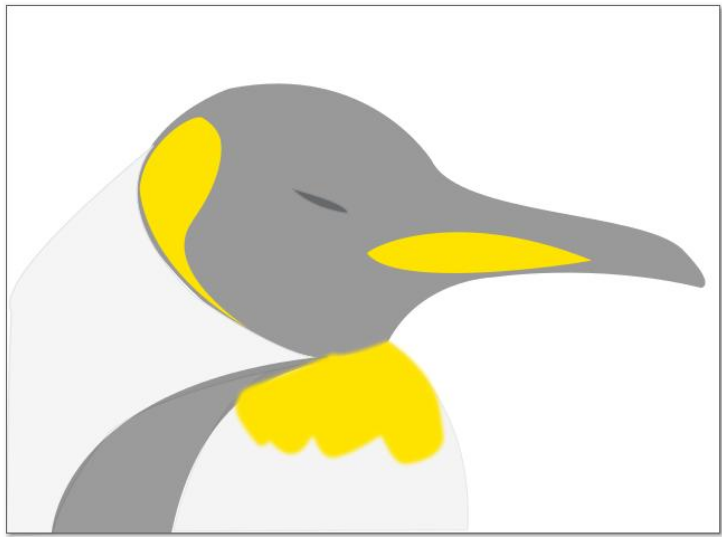 Bear in mind that this will be much better with a little more detail added (and with a steadier hand than mine). You can export it as an image file. |