
| Previous
Page |
PCLinuxOS
Magazine |
PCLinuxOS |
Article List |
Disclaimer |
Next Page |
GIMP Tutorial: Photo Filmstrip |
|
by Meemaw Last month, we saw a Repo Review of the program PhotoFilmStrip, which allows you to create a slideshow from your chosen photos. However, if you want a single image that includes several photos, you can create something like the following in GIMP. I've seen this done by others but we've never covered it in these tutorials, so I thought I'd do one. In this tutorial, we can make a filmstrip out of several photos we load, and use the Curve Bend filter to make it something other than a straight rectangular strip. 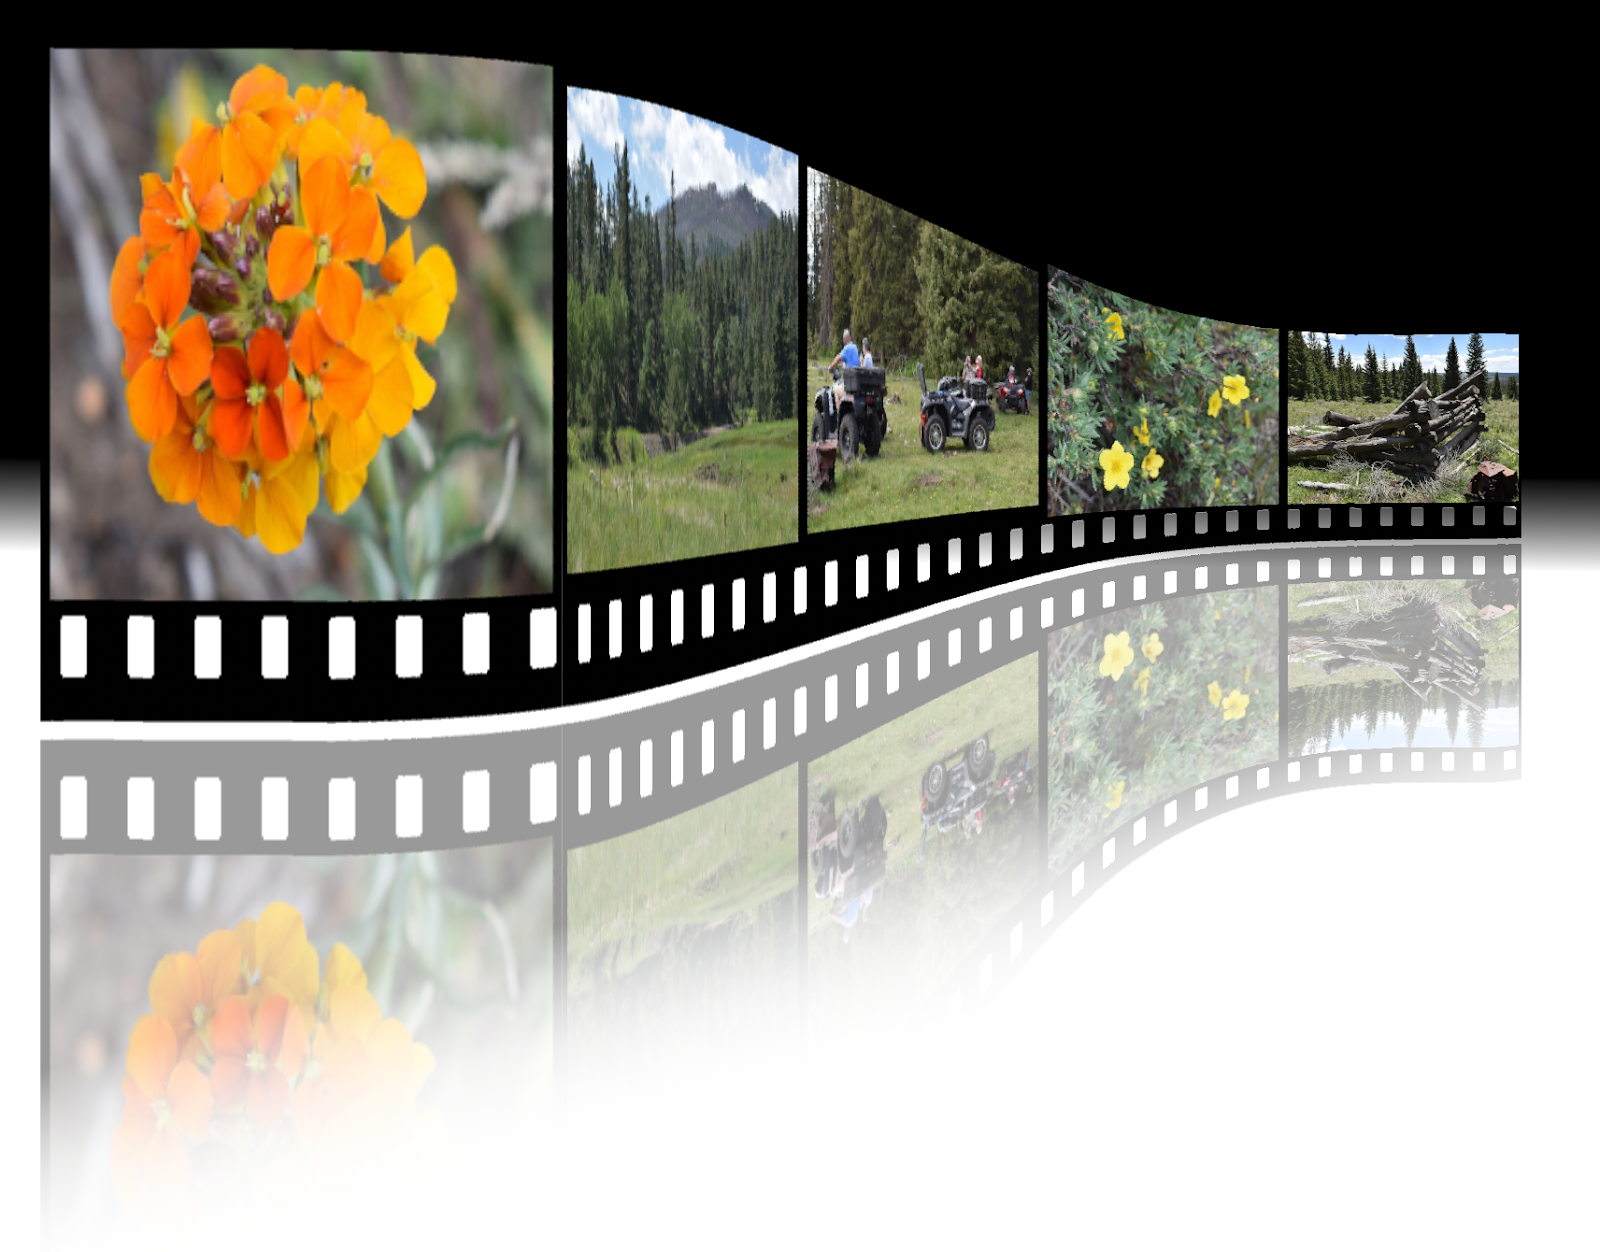 I used 5 photos from a recent trip to the mountains. You could use less or more, I'm sure. When you have your photos selected, open GIMP and choose File > Open As Layers. Your photos will open in one GIMP project, and you'll be able to see them in the layers window. 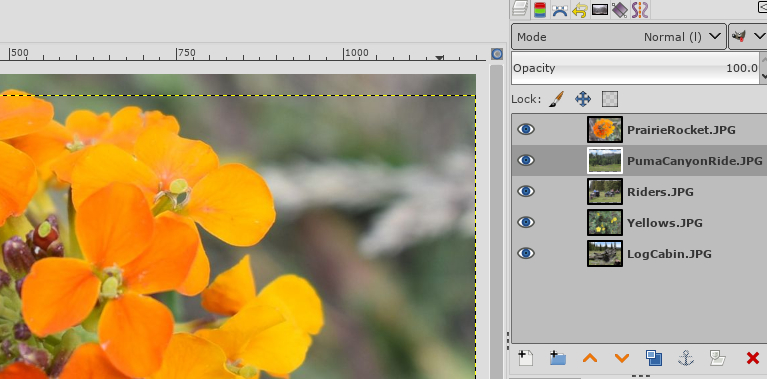 While you are here, you can reorder your photos into the order you want them by moving the layers. When you are satisfied, choose Filters > Combine > Filmstrip. In the window, you can keep the defaults and click OK. I unchecked the boxes dealing with showing the numbers on the filmstrip.  You'll get a new project with the filmstrip. If you want to, you can delete the first project with the photos opened as layers. 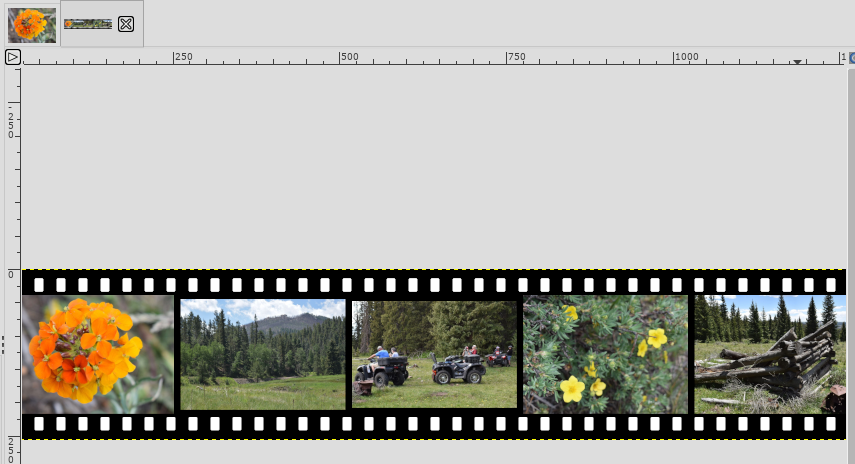 To give yourself room to work, add a transparent layer 2000px by 2000px. Then click Image > Fit Canvas To Layers. 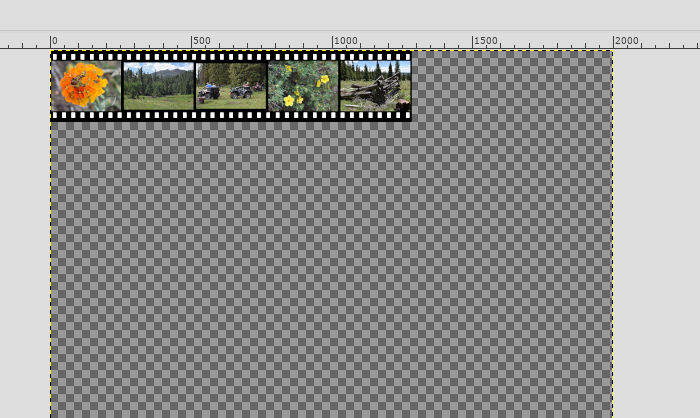 Choosing the layer with the photos, and using the Move tool, move the filmstrip to just above and to the right of the center of the canvas. : The openings in the filmstrip are still white and we want them transparent like the background. First, right click on the layer and choose Add Alpha Channel. Click on the Select by Color tool and then click on one of the white rectangles to select the color white. Now, choose the eraser tool. We're going to start our eraser on one end of the filmstrip and use that tip we learned a few issues ago. Click on the end rectangle, then holding down the Shift key, click on the rectangle at the other end to erase them all. Merge your layers. We need to stretch out the first photo so it will look right when we bend our filmstrip. With the Rectangle Select tool, select the first photo, then choose the Scale tool, and move the border of your selection to the left so it's just over twice the length that it was, and click Scale. 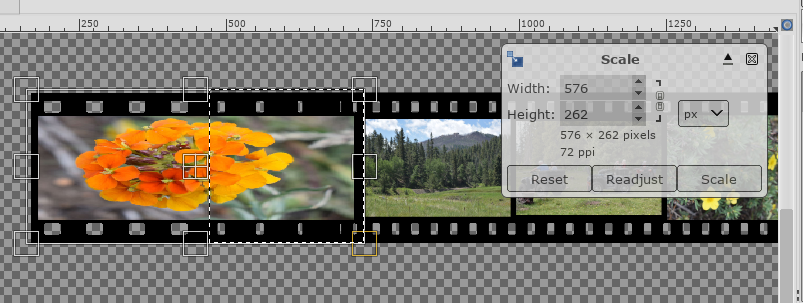 Make a copy of the filmstrip by clicking <CTRL> + C, then <CTRL> + V. The copy is over the original, of course, but in a floating layer. Flip the copy vertically, then move it beneath the original, and then set the opacity to about 40%. 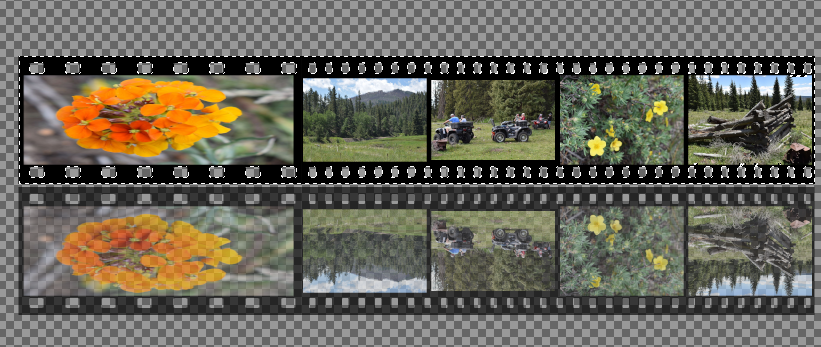 The copy is now on a floating layer, so you should anchor it. Using the rectangle select again, select both filmstrips, then click Filters > Distorts > Curve Bend. You'll get the first window below. In the center you'll see the setting "Curve for Border". Click on Upper first, and drag the left end of the line from center to the shape you see in the second window below. Then choose Lower, and drag the center line to the lower shape. 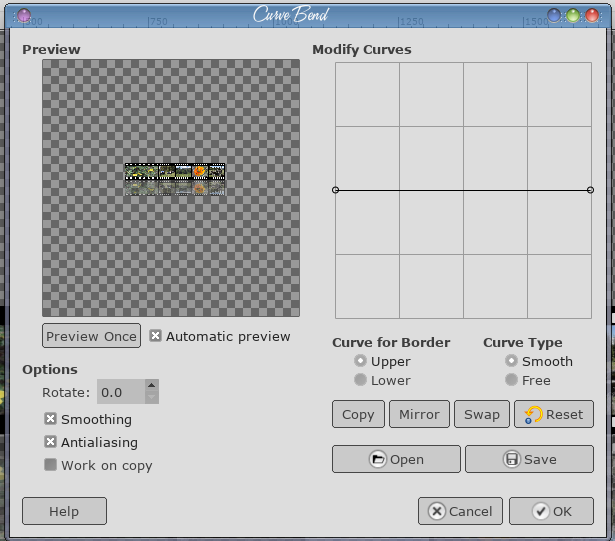 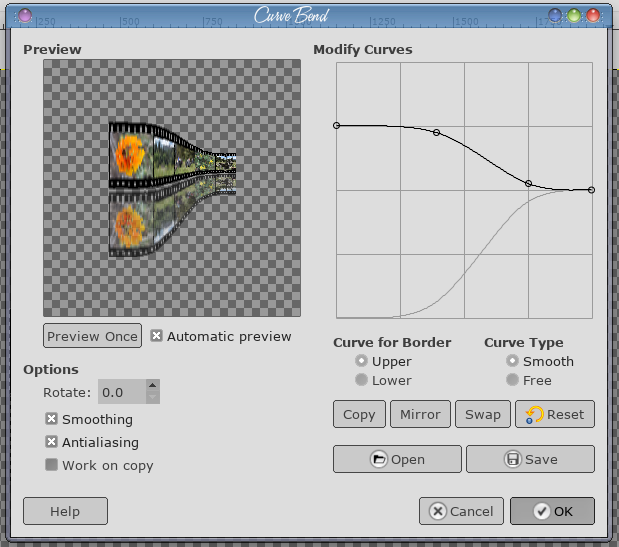 Click on OK. This filter takes a few seconds to work depending on your system. Notice that this is also put on a floating layer, and you can see the original strip below the curved strip. 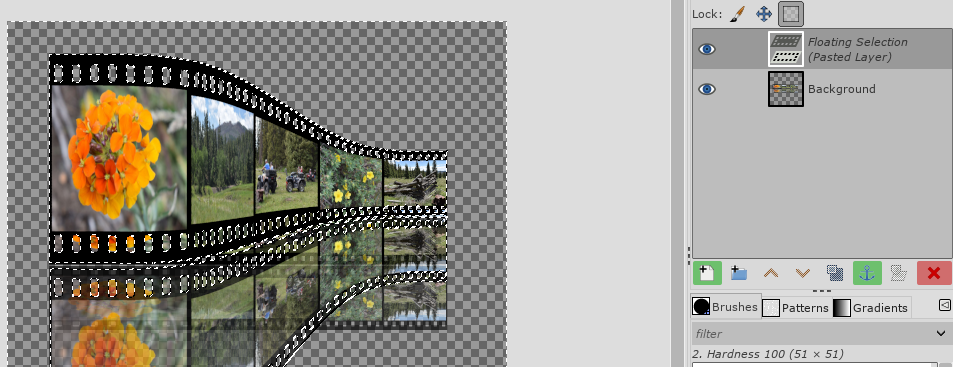 Right click the floating layer and choose "To new layer". You can now delete the layer with the straight filmstrip. Let's give this a background. Create a new transparent layer and move it underneath your filmstrip. Choose the Gradient tool, FG to BG, and make your foreground black and your background white. Start at the top of the top strip and drag to the top of the bottom strip. 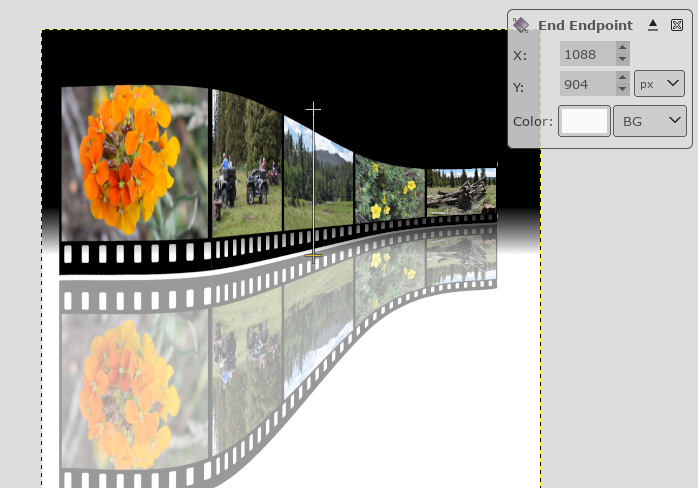 Let's also make the reflection fade out a bit like it should. Choose the filmstrip layer, right click it and click Add Layer Mask. In the Add Layer Mask window, make sure White is chosen. In the Layers toolbox, click on the layer mask next to the filmstrip and using your gradient again, click from the bottom of the window a little diagonally and up into the strip a bit so the mask fades out the bottom part of the strip. How far you go is up to you. 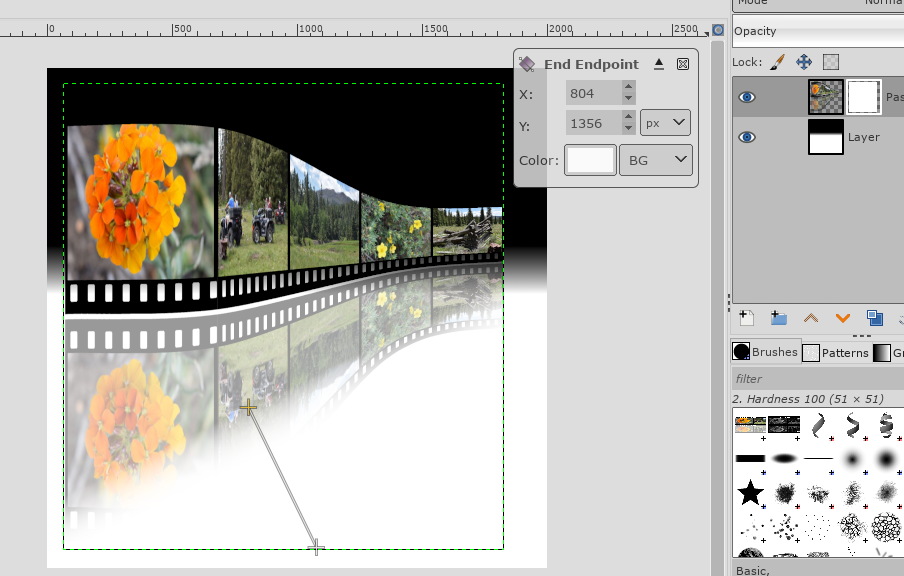 Now you can merge your layers, and crop your creation, and you're finished! 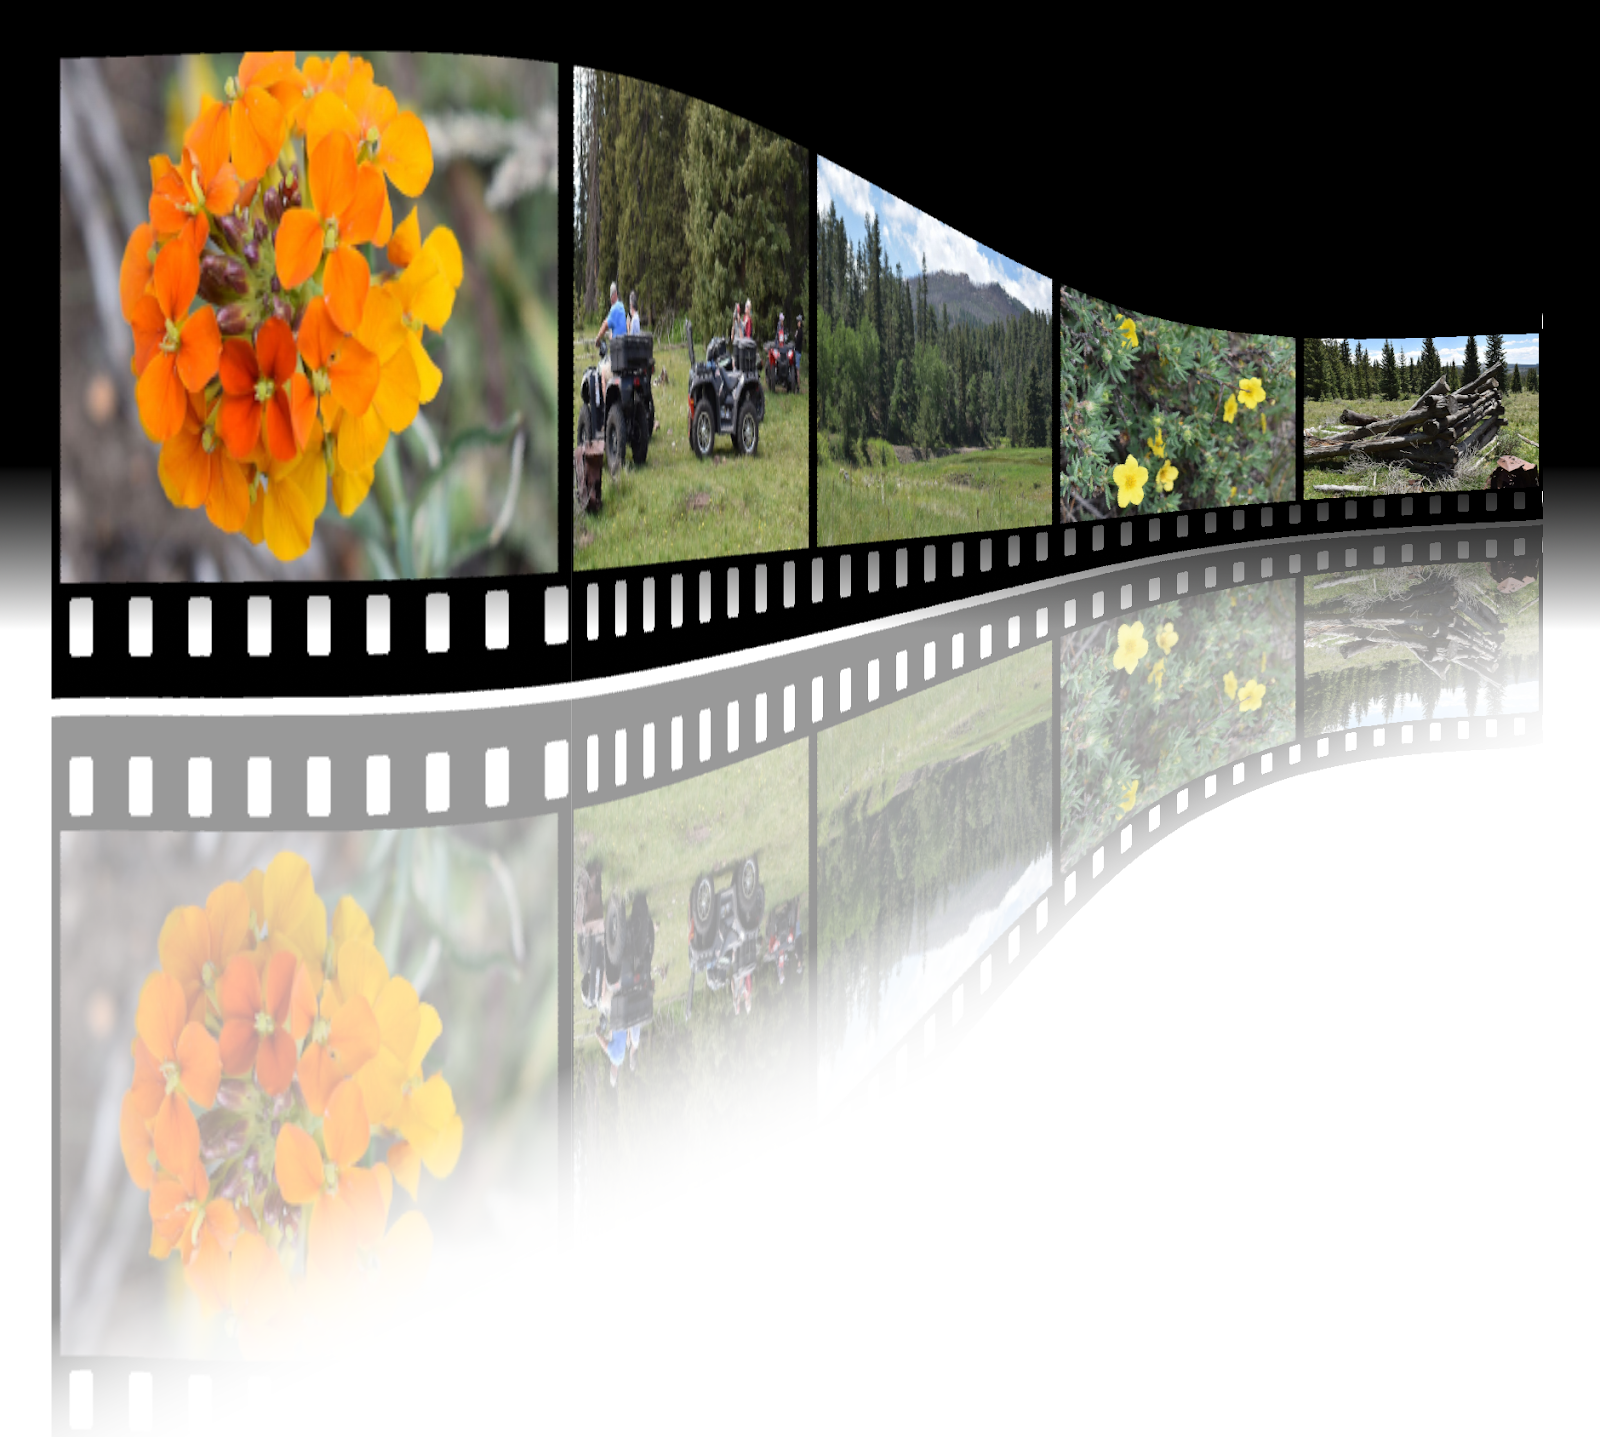 |


