| Previous
Page |
PCLinuxOS
Magazine |
PCLinuxOS |
Article List |
Disclaimer |
Next Page |
Print Your Poster With Ease |
|
by Meemaw Once a year, my company helps sponsor an Earth Day celebration to help educate local students about many aspects of agriculture, including conservation. In the course of preparation for the day, one of my jobs is to create and print a large poster to be displayed, thanking everyone who donated funds or materials to our project. The finished poster is usually 45" by 45" and is attached to a large board so everyone who passes it can read it easily. Before I started using Linux, I used a Windows program called Print Artist to make the poster and print it out on 8.5" by 11" sheets of paper, and then taped them together into the poster. Now that I use Linux, I can create the poster using Scribus, but I have had trouble finding a Linux program that will print it. The pdf viewers don't seem to print poster sizes yet, and Scribus doesn't either, so I was stuck.... until I found PosteRazor. PosteRazor is a handy program which converts the poster you want to print into a set of pages in pdf format, which can be printed and taped together into your finished product. From their website: The PosteRazor cuts a raster image into pieces which can afterwards be printed out and assembled to a poster. PosteRazor is in our repository. After installation, you are guided through five steps to your finished product. For this article, I will use a png of Tux dressed as Indiana Jones. The program defaults to English and centimeters as your unit of measure. If you need to change either of these, click on Settings at the bottom left of the window. 1. Designate the file you are using. Your project in Scribus, or whatever program you use, should be saved as an image file. I saved mine as a png. The window to load your file is shown here. 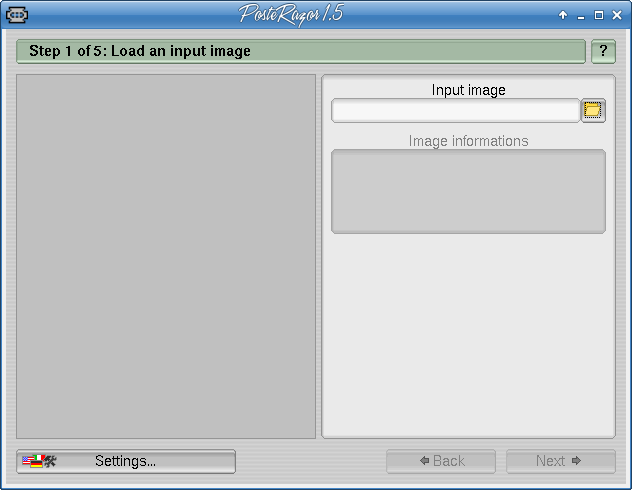 2. Indicate the paper size you are using to print - plus the orientation & margins you need. 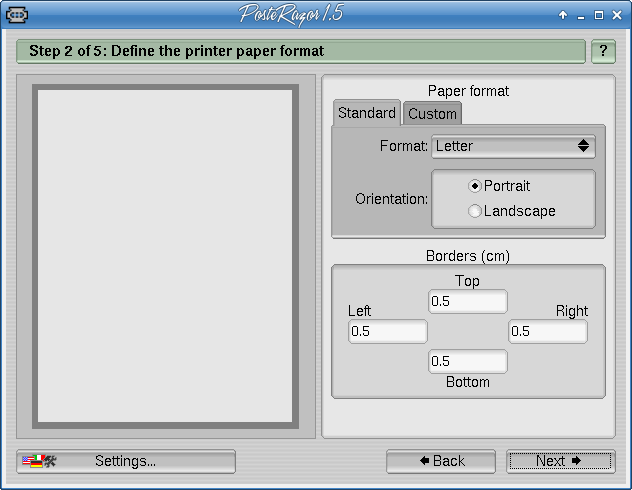 3. Decide how much and direction of overlap. When you tape your poster together, it will be easier to match up the edges of they overlap a bit. 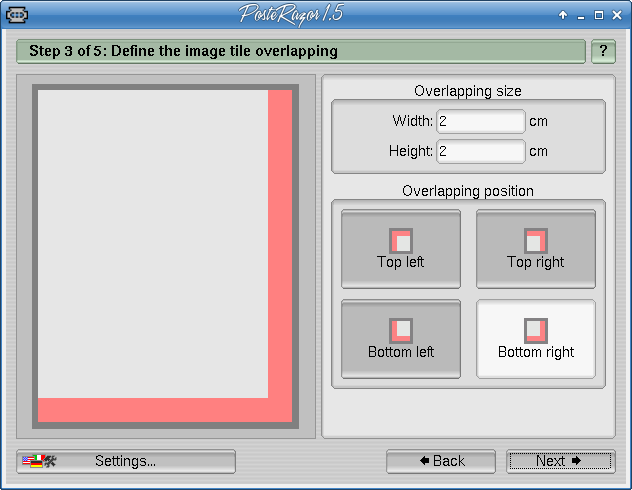 4. Enter the number of pages wide the finished product should be (the length will adjust), and how you want it aligned on the pages (top left, centered, etc). I chose top left, but you could center it, and then you probably wouldn't have to trim anything off the sides. If you need your poster a certain size (like 48" x 36"), click Absolute Size rather than Size in pages. I originally picked 5.5 pages (because that would be 44") but it didn't come out correctly, probably because of the overlap, so you need to designate an absolute size if you need it that way. You can also choose a percent, so if your picture is a certain size and you want to increase it 300%, you can do that. You will have a preview as well, so if it isn't the way you want it, you can change the settings before you save. 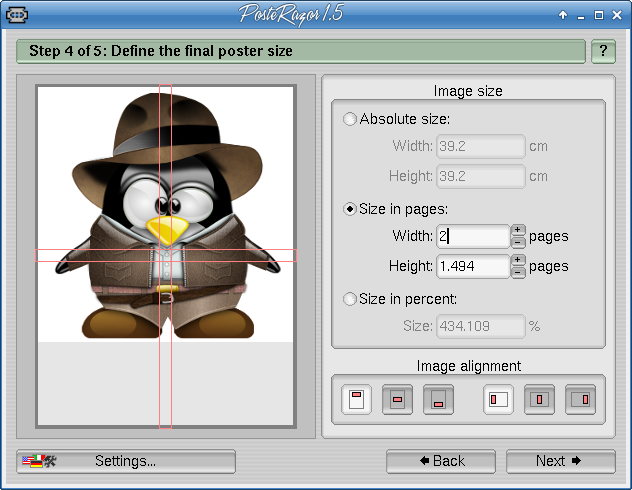 5. Save your poster with a meaningful name - it will save as a pdf. 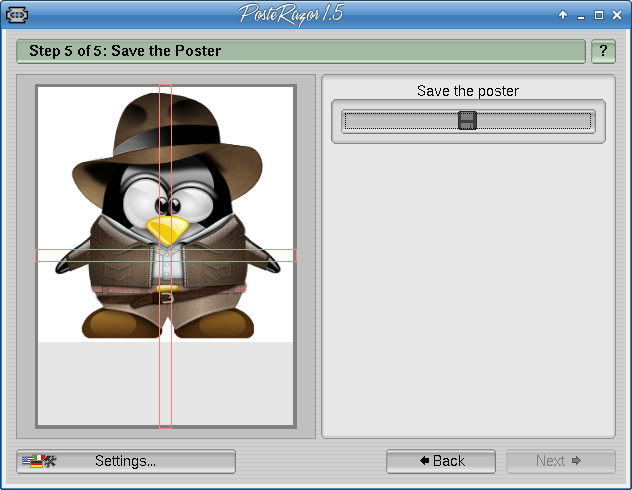 When you open it in your favorite pdf viewer, you will have a multi-page document to print and tape together. Here you can see the pages in a pdf viewer. 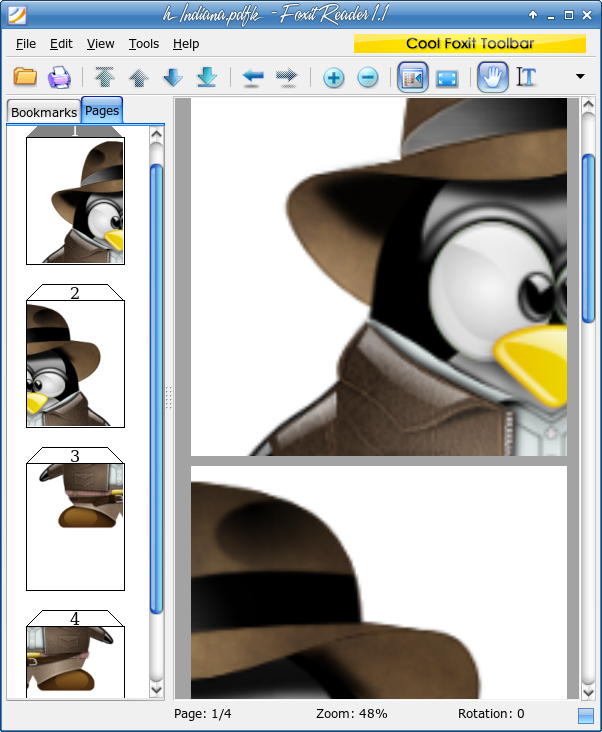 For the big poster at our event, I printed it on about 20 pages, and taped it together. I'm so glad I found this program! It's really easy to use. Oh, yes.... the event was great! |