| Previous
Page |
PCLinuxOS
Magazine |
PCLinuxOS |
Article List |
Disclaimer |
Next Page |
Gimp 8: Colorizing a Photo
|
|
by Meemaw I have several old photographs of my grandparents. One of my favorites is a shot of my grandmother as an infant. I have always wondered what that photo would have looked like if color photography had been available in 1893. I have scanned and saved this photo to try to colorize it. 
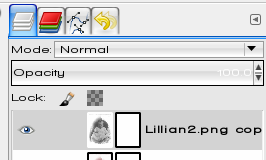
The first thing I am going to do with it is to open a copy of the photo in Gimp so I still have the original. This way if I mess up, I won't have to re-scan. In addition, I am going to make a copy of that layer, so I will still have the original I opened and can delete any layer that's messed up. You may try a lot of options on this project, and having a copy of a layer is one way to be able to undo something you did that didn't turn out as you wanted it. Remember, you can always use the undo key combination <CTRL> + Z. It's also a good idea to give each layer an appropriate name to make things less confusing during this project, since there will be several layers. Next, you should right click on the image and create a layer mask (Layer > Mask > Add Layer Mask) 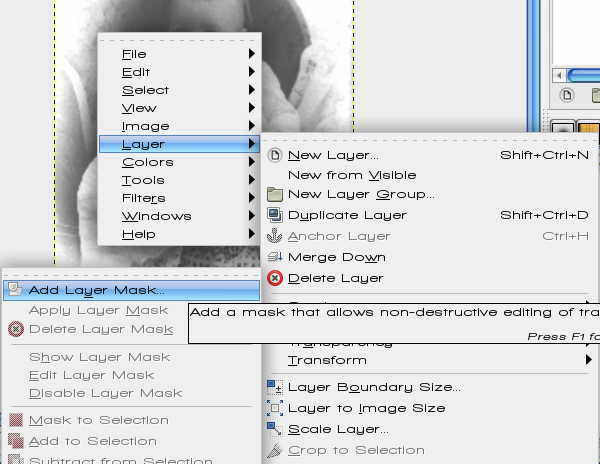
Set the background as white. 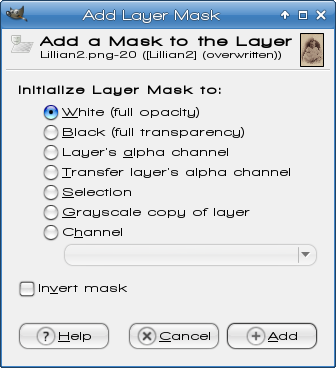
Make a copy of this layer as well. Then you will need to make sure that the image is not in Grayscale mode. Go to Image > Mode > RGB and set the mode to RGB. 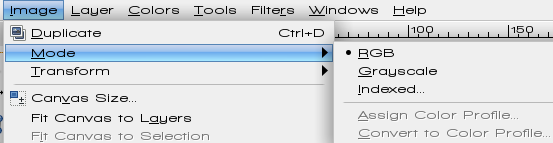
Now go to colors and select Colorize. Color Balance or Hue-Saturation could be used as well, but we'll colorize this one. 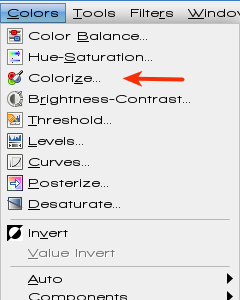 For the Colorize dialog to actually come up, we need to make sure our image is
selected and not the layer mask (below). The image is on the left and layer mask
is on the right and when either is chosen, it is outlined in white. The image is
chosen here.
For the Colorize dialog to actually come up, we need to make sure our image is
selected and not the layer mask (below). The image is on the left and layer mask
is on the right and when either is chosen, it is outlined in white. The image is
chosen here.
With Color Balance or Colorize, we will now want to try to get the image to be same color of the object we want to color. I started with the skin. I made sure I created a copy of the image and layer mask I could use specifically for the skin. When you choose Colorize, your photo will start out bluish/turquoise. Adjust the hue until you find the color you like. Below are the the screens I adjusted to do the blanket in light blue. 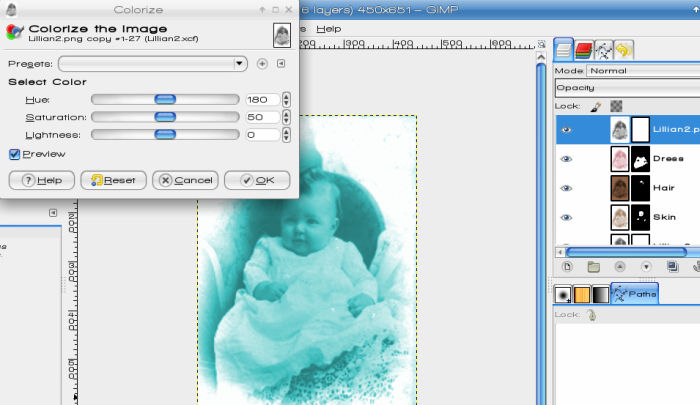 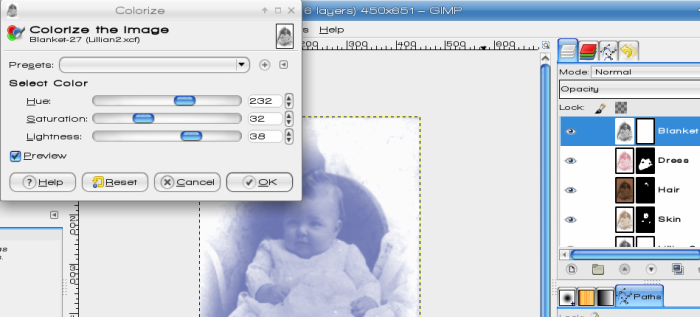
After you have the color you want, you will now need to select the layer mask by clicking on it. Now go to Colors > Invert to invert the colors. Once the colors are inverted, it will look like the original without any color. Next I used paint brush, selected the white color and painted. You can use the selection tool, outline the object you are colorizing, then fill it with white, but using the paintbrush is easier. As we did on the other layer mask, you can outline with a smaller brush, then fill in with a larger one. 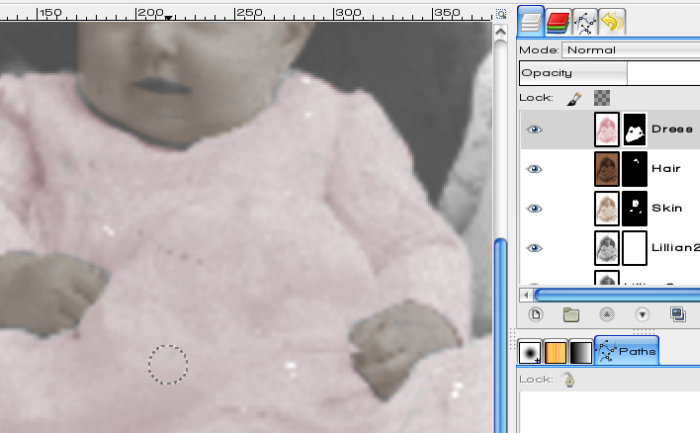
Once you have that layer the way you want it, create a new copy and repeat the process for another portion of the photo. For my next layer I did the dress. Keep on repeating the process for every object that is a different color. It can be quite tedious but it's fun. I ended up doing the skin, hair and dress and decided against doing the blanket. 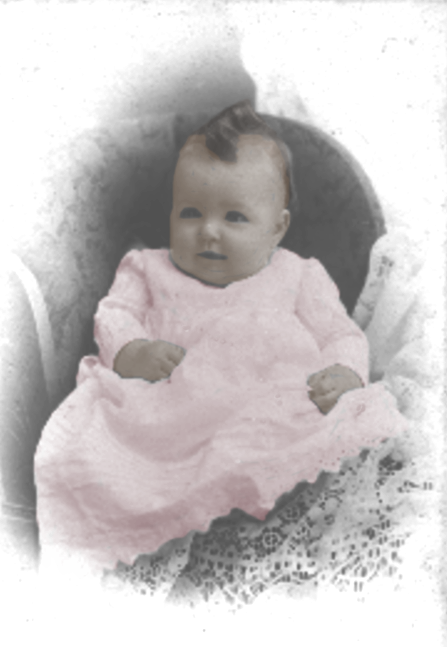
Don't worry too much about getting the colors exact. Changing the colors later is quite easy. If you decide you want to go back and change a color, just select the layer and go back to colorize (make sure the layer mask is NOT selected). After you do all the layers, you can go back and adjust the opacity on the layers to make it look a bit more natural and not over saturated. Once you adjust the opacity on the layers, you are done! Export your photo. As a finishing touch, I opened the finished photo and took out the white spots (blemishes on the original photo) using the Clone tool, like we did the road sign a couple of months ago. |