| Previous Page |
PCLinuxOS Magazine |
PCLinuxOS |
Article List |
Disclaimer |
Next Page |
Alternative Methods of Installing Typst Locally |
|
by David Pardue (kalwisti)
Linux allows you the flexibility to install a third-party application such as Typst in multiple ways. I will discuss one installation method in detail, and mention three other options you might want to consider in the latter half of my article. If your computer is a single-user, single-disk machine, then where you install Typst is not a crucial matter (personal opinion). However, if your system has multiple users and/or multiple disks, you should evaluate all these options carefully before making a final decision. Before proceeding, I should mention this violates one of the standard rules of PCLinuxOS system maintenance: to only install programs from the official PCLinuxOS repository. However, in this case, I can assure you that installing Typst is safe and will not bork your PCLinuxOS installation. I have not experienced any glitches or breakage since I began using Typst locally in 2024.
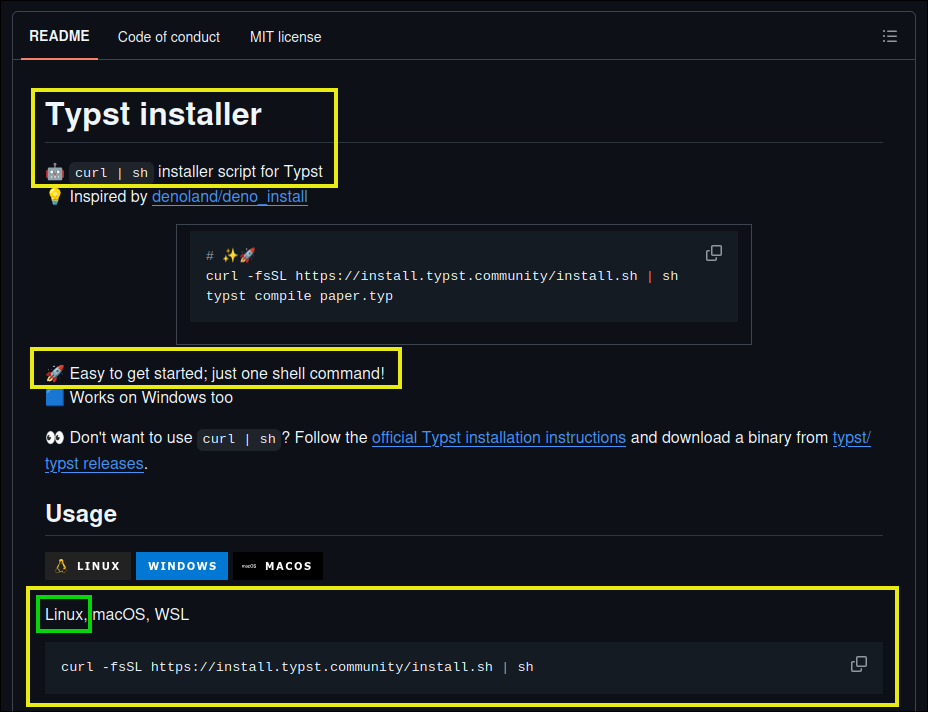 Copy and paste this command into a Terminal. (You can do this as a regular user; it does not require root or sudo privileges.)
After running the script, you will see output similar to the lines below. It provides almost all of the post-installation instructions you should follow:
Downloading Typst from https://github.com/typst/typst/releases/latest/download/typst-x86_64-unknown-linux-musl.tar.xz Typst installed to /home/david/.typst/bin/typst Manually add the directory to your $HOME/.bashrc (or similar) export TYPST_INSTALL="/home/david/.typst" export PATH="$TYPST_INSTALL/bin:$PATH" Example: echo 'export TYPST_INSTALL="/home/david/.typst"' >> ~/.bashrc echo 'export PATH="$TYPST_INSTALL/bin:$PATH"' >> ~/.bashrc Run '/home/david/.typst/bin/typst --help' to get started Stuck? Open an Issue https://github.com/typst-community/typst-install/issues 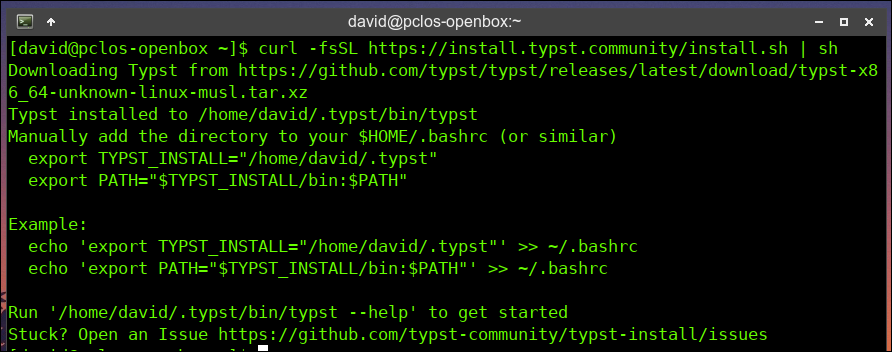 Place the Typst Binary in Your $PATH
As stated in the Terminal output above, you must now place the
A path — or the search path — is the list of directories that will be searched for anything you type on the command line. After editing your path, when you call/invoke Typst, the system will look for (and find) the
Open a Terminal, and copy and paste the two commands below separately (as a regular user). They will add the appropriate entries to the echo 'export TYPST_INSTALL="/home/david/.typst"' >> ~/.bashrc
(Note: Change “
To double-check the result of these commands, open your
You should see something like this screenshot: 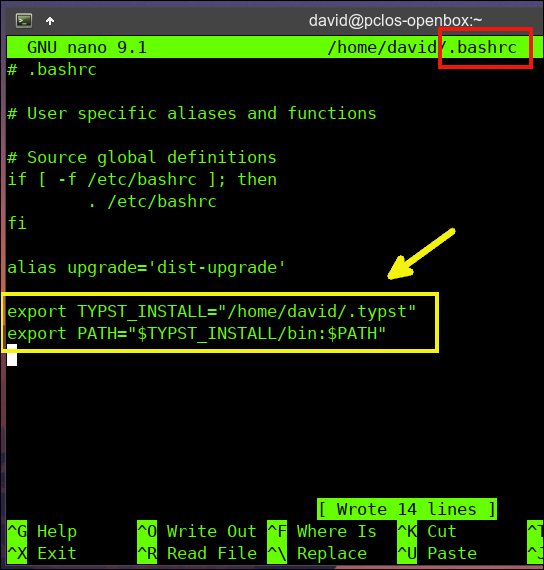 To apply this change permanently to your $PATH environment variable, open a Terminal and issue the command:
Alternatively, you can log out of your current session, then log back in to make sure the change takes effect. To verify this change, type the command:
Your results should look something like this: 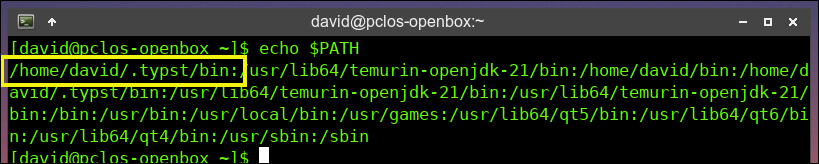
This screenshot montage shows the directory structure (~/.typst/bin/typst) created by the 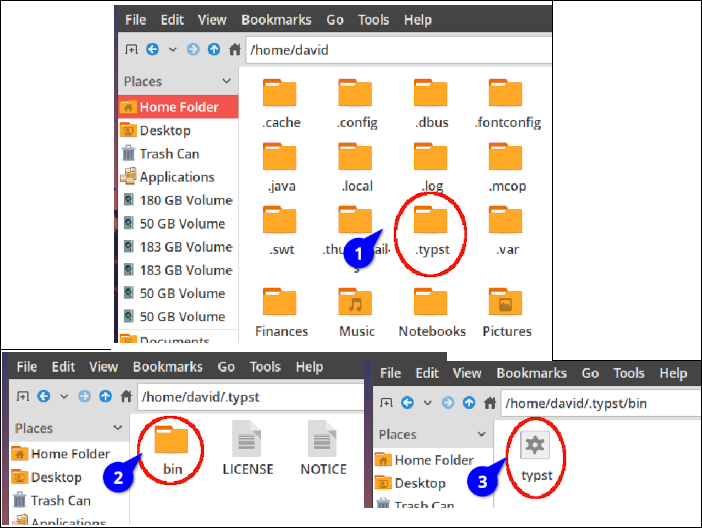 Typst is now ready to use. You may use Typst via the CLI, with a terminal-based text editor such as Vim, or with GUI-based code editors such as VS Code / VSCodium or even with Geany.
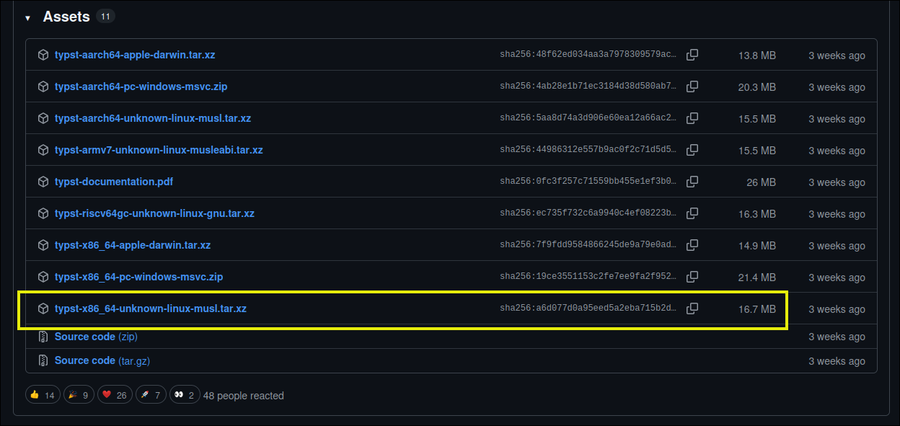
(This contains the Typst compiler and its CLI, which is everything you need to compile Typst documents locally.)
As mentioned above, when deciding where to install Typst, an important factor will be whether you are the single user on the PC and will be the only person using Typst, or whether your goal is to make Typst available to multiple users.
If it is a single-user system, this is another viable option. It was suggested by member
to create the required /bin subdirectory. (The “-p” flag enables the command to create parent directories as necessary.)
Afterwards, you should manually add the Typst directory to your
After saving this edit and exiting your text editor, issue the command: Alternatively, log out of your current session, then log back in for this change to take effect.
This approach is sensible if you wish to adhere to the Linux Filesystem Hierarchy Standard (FHS) and/or need to make Typst available to multiple users. “The ~/bin directory is a good place to put scripts intended for personal use. If we write a script that everyone on a system is allowed to use, the traditional location is /usr/local/bin. Scripts intended for use by the system administrator are often located in /usr/local/sbin. In most cases, locally supplied software, whether scripts or compiled programs, should be placed in the /usr/local hierarchy and not in /bin or /usr/bin. These directories are specified by the Linux Filesystem Hierarchy Standard to contain only files supplied and maintained by the Linux distributor.” — William Shotts, The Linux Command Line (2026), p. 386.
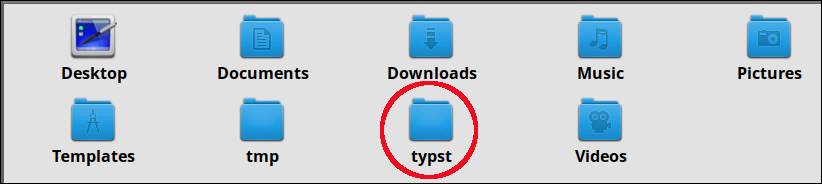
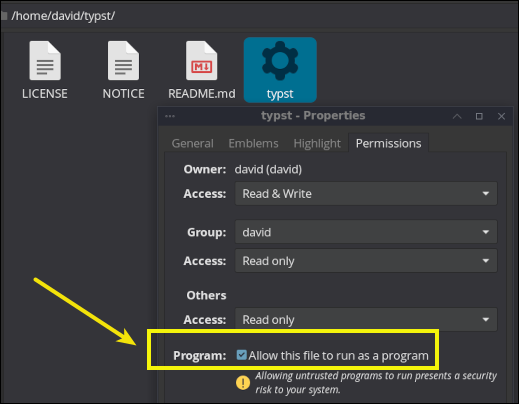 However, if you copy (or move) the entire typst folder and its contents — the typst executable, its License, Notice and README.md — you will have to manually add the path to that directory in your ~/.bashrc file:
Issue the command:
/opt is intended for files of third-party applications which you want to make available to multiple users. This directory can store programs outside of your distribution’s control, i.e., not available in the PCLinuxOS repository. After you copy (or move) the typst folder to /opt, manually add the $PATH to the Typst directory in your ~/.bashrc file:
Issue the command: After applying Method B, C or D, Typst will be ready to use. You may use Typst via the CLI, with a terminal-based text editor such as Vim, or with GUI-based code editors such as VS Code / VSCodium or even with Geany.
Linux gives you the freedom of choice to install an application like Typst in multiple ways, depending on your preference and needs. This article has presented four different methods of installing Typst locally. Although using Typst's cloud editor is a pleasant experience, sometimes I want to work offline, use a custom font installed on my computer and/or not worry about maxing out the storage limit of my Typst web account. My local Typst installation allows me the flexibility to do that. I tested each method and they all work smoothly. If you are the sole Typst user on your PC, I recommend that you try Method A: the "Typst-install" script. It is a clever kickstart-type file which will set up Typst easily and quickly. If you need to make Typst available to multiple users on the system, you should consider Method C (perhaps a slightly more "purist" approach) or Method D. |