| Previous
Page |
PCLinuxOS
Magazine |
PCLinuxOS |
Article List |
Disclaimer |
Next Page |
Grisbi Revisited: Tips For Beginners, Part Two |
|
by kalwisti
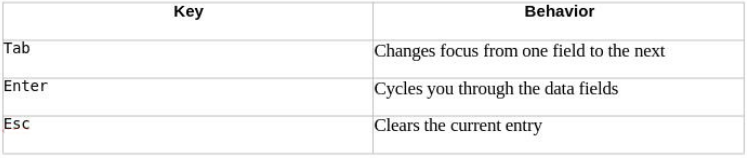
Last month, we re-introduced you to Grisbi to manage your finances. This month, we'll take a look at actually setting Grisbi up for use. Getting Started When you start Grisbi for the first time, a series of helpful wizards/assistants will lead you through the process of creating a new account file. The wizards' instructions are clear and self-explanatory. I will not devote much space to this topic because it is covered in two other sources. First, Meemaw wrote an overview of Grisbi in an earlier issue of our community magazine (Vol. 65, June 2012). Second, you can refer to Grisbi's User Manual [English translation, illustrated PDF version], Chapter 3, "First Start of Grisbi", pages 13-17. Working with Transactions Despite Grisbi's import capabilities – it can import files in CSV, QIF, OFX and .gnucash format – I decided the cleanest way to begin was by manually entering "fresh" transactions beginning with my January 2022 bank statement. I plan to write a continuation of this article which evaluates Grisbi's performance with importing and exporting other file formats, as well as importing downloaded bank files. Categories Grisbi includes a large assortment of standard Categories which is adequate for personal use. Nevertheless, you may modify them to meet your individual situation. One possible caveat involving categories is that Grisbi's are a bit Francocentric; you might wish to edit them. For example, the category Housing [French 'Logement'] includes the subcategories Electricity, Gas, Phone, Water, etc. English speakers might be more inclined to place those subcategories under a new parent category called Bills, or, Utilities. For educational expenses, Grisbi has the category Studies [French 'Etudes'], with the subcategories Books, Lessons, School Fees. English speakers might prefer the parent category to be called Education. Creating New Categories It is easy to create a new category in Grisbi. The GUI method involves selecting Categories in the navigation panel, then clicking on the "New category" icon in the toolbar. 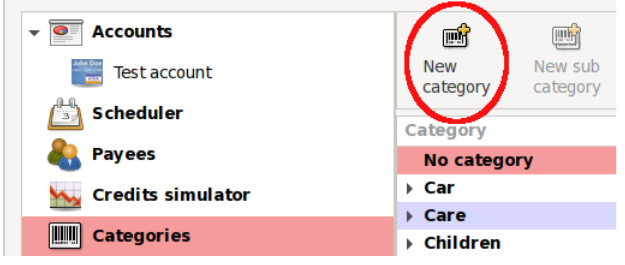 A dialog will open, in which you type the name of your new category and indicate whether it is classified as a Credit or a Debit. 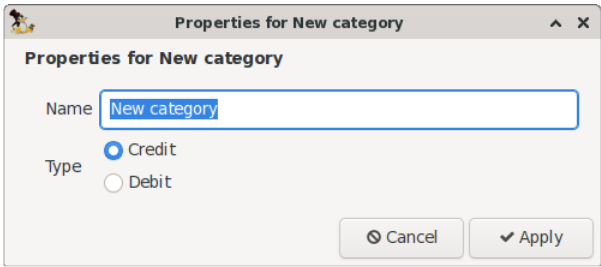 In this example, I will create a Postal category to track postal expenses. 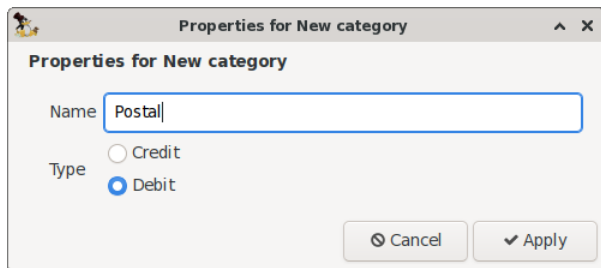 Click on the Apply button to finish creating the new category. Creating New Subcategories To create a new subcategory, be aware that the 'parent' (or top-level) category must already exist. If we continue from the example above, let's create the expense subcategory Stamps under our new Postal category. Choose Categories in the navigation panel, then click on the Postal category to select it. Next, click on the "New sub category" icon in the toolbar. 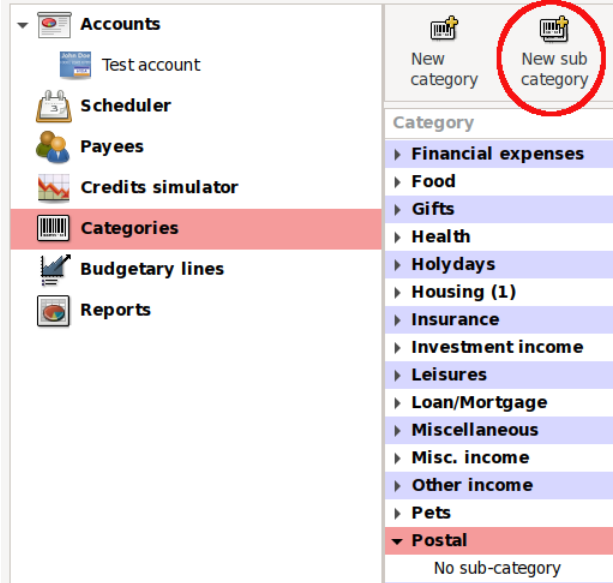 A dialog will open in which you type the name of your new subcategory. (Note: You do not need to indicate the subcategory type because its parent category, Postal, has already been classified as a Debit.) Click on the Apply button to finalize this step. 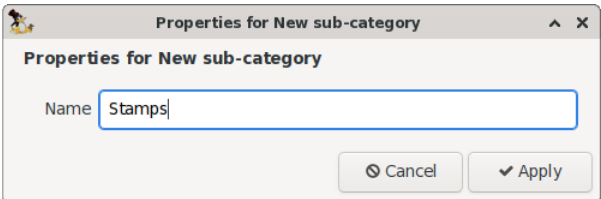 Creating (Sub-)Categories on the Fly Grisbi also allows the creation of categories on the fly, i.e., while you are entering data for a transaction. In the Transaction form of the ledger, type either your new 'parent' category, or the 'parent' category with its 'child' subcategory. (Note: If there are two elements, you must have a space on each side of the colon for the software to recognize it correctly.) In the example below, I will simultaneously create the expense category Memberships and the subcategory Fees. 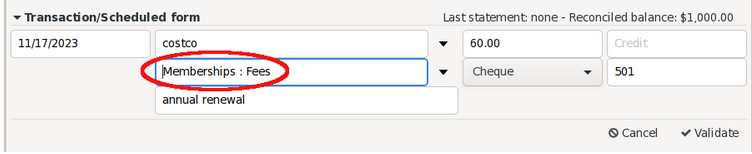 The new categories will appear in the Categories list after the transaction has been validated/entered.  Split Transactions A split transaction – also known as a "split" – is a transaction that can be assigned to more than one (expense) category. Some financial apps make entering split transactions cumbersome; however, Grisbi handles them capably. While entering your transaction, enter the usual data (viz., Date, Payee, Amount of debit, Notes). However, in the Categories field, type in the text "Split of transaction". Then, click on the Validate button.  Grisbi will notify you that there is a variance. The ledger's red font color alerts you that there is an error in the transaction data.  In the Debit field, enter the amount of the first expense category. In this case, it is $42.24 assigned to the Gifts category. Next, click on the Validate button again.  Grisbi will recalculate and alert you that there is still a variance of $17.50. (The font remains in red).  In this example, the remaining amount was spent on household items, so I will assign it to the Housing category and press the Validate button.  If the amounts of the split balance out correctly, the ledger entry will change the color of its font back to black.  By clicking on the flippy triangle (circled above), you can expand the ledger entry and verify that the split amounts are correct.  Reconciliation Grisbi's user manual recommends that you reconcile your account regularly, to ensure its accuracy and avoid accounting errors. Reconciliation will help you catch mistakes -- such as a business charging you the wrong amount, or you transposing numbers while entering a payment or deposit. To begin, click on the Reconcile button in the account ledger's toolbar.  Notice that in the Reconciliation reference box, there is an auto-generated reference (consisting of a text string plus a number). Grisbi will auto-increment this string as you do subsequent reconciliations. 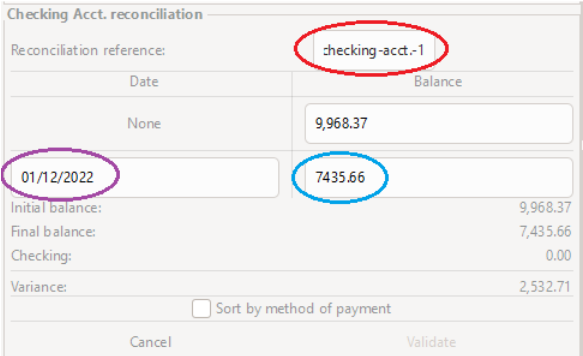 On Line 2 of the table, type in the Date [ending date of your bank statement] and the Balance [ending statement balance]. (Note: After you complete your very first reconciliation in Grisbi, the program will prompt you to set the initial date of the reconciliation, i.e., the opening date of your bank statement.) In the main ledger area, look for the column labeled C/R (with boxes underneath it). 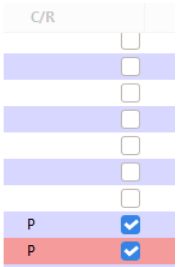 Work through your bank statement, and check/tick the box beside each matching transaction. Verify that the transaction amount listed in your bank statement matches the amount in your Grisbi checkbook register. Alternatively, you can highlight the transaction's line and type Ctrl+P. A "P" will appear beside the box. This means the transaction has been "pointed," i.e., ‘flagged prior to reconciliation.' As you point transactions, you will see that the Variance changes. In the example below, almost everything has been pointed; a Variance of only $86.00 remains. 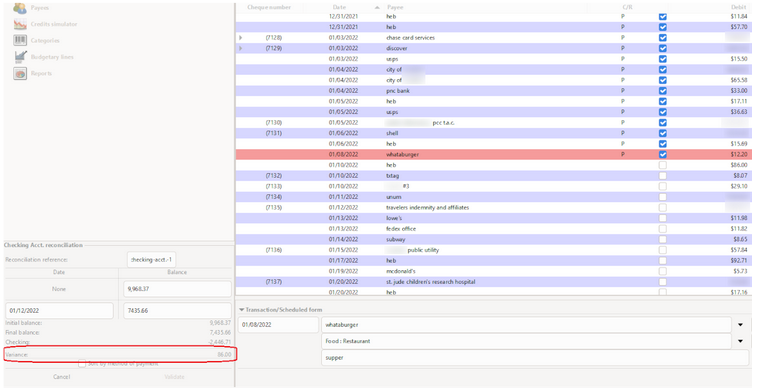 When all transactions have been pointed, the Variance should show as 0.00. 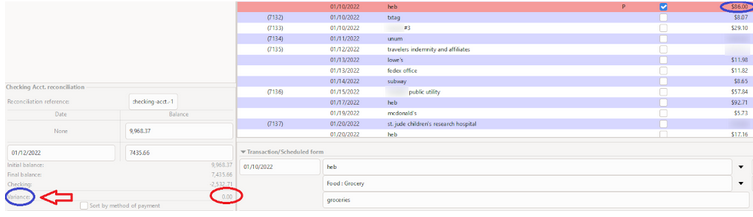 (If at any time, you wish to pause/interrupt the Reconciliation process, click on the Cancel button. Transactions will remain pointed; however, when you resume, you will have to input the ending Date and ending Balance again.) When you are completely done, click on the Validate button. (Note: The button will not become functional/active until the Variance is 0.00). In the C/R column, all the Ps will change to Rs [for 'Reconciled']. After the very first reconciliation finishes, a pop-up dialog will appear. 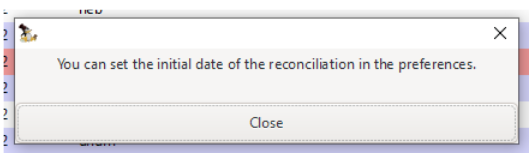 To set the initial reconciliation date, go to Edit > Preferences > Transactions > Reconciliation. 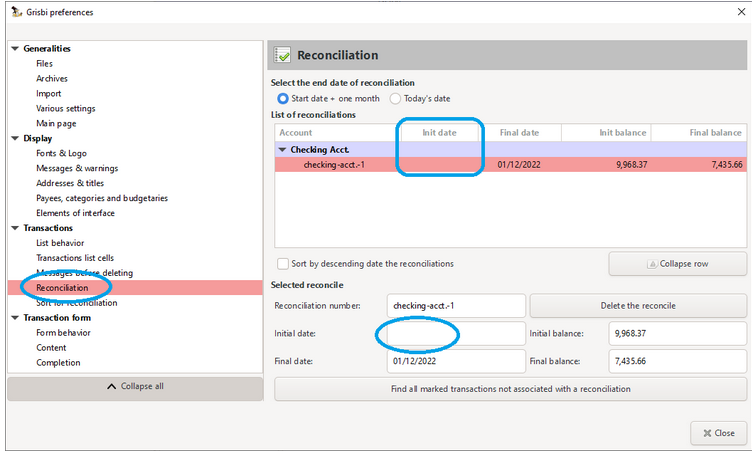 Fill in the Initial date field. The final results should look something like the image below. 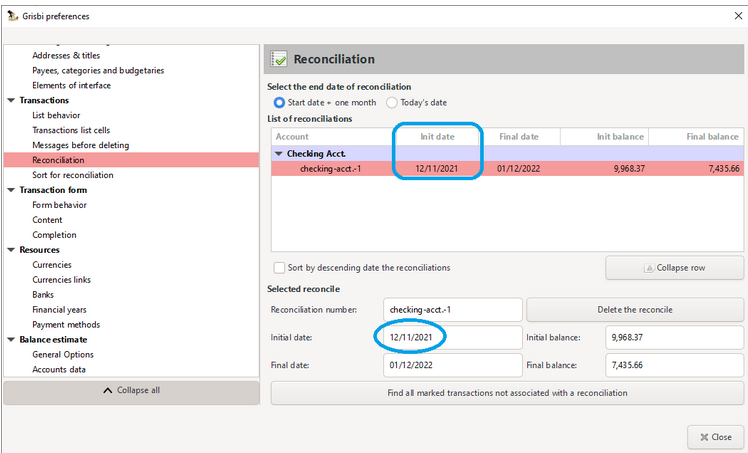 After the Reconciliation process is complete, by default reconciled transactions will disappear from the checkbook register. If you wish to unsuppress those reconciled transactions, click on the View button in the ledger's toolbar and select/tick "Show reconciled transactions." :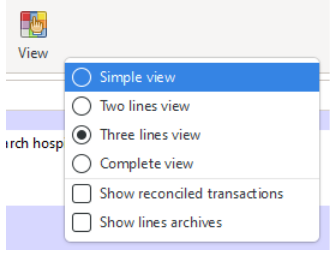 After making this selection, reconciled transactions will reappear. 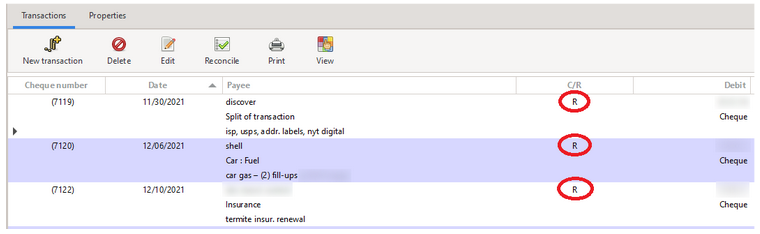 Note: After a transaction has been reconciled, is it only partially editable. The Amount is fixed/frozen as per standard accounting principles. I mentioned earlier that Grisbi will automatically increment the Reconciliation reference string as you do subsequent reconciliations. If you are curious about how this looks, here is a screenshot, shown below. 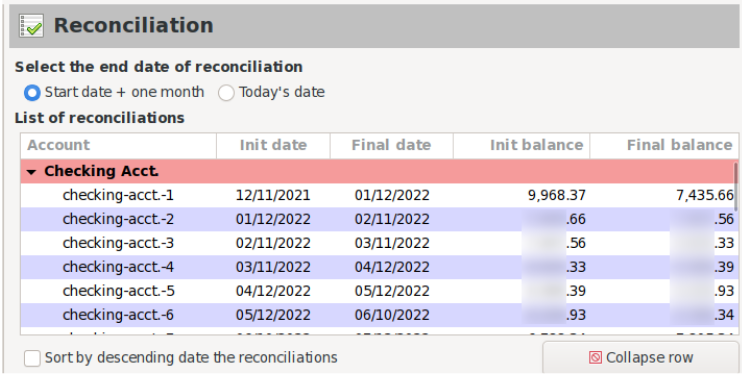 Add a New Payment Method If you need to add a new payment method – with a digital service such as PayPal, Zelle or Venmo – Grisbi makes it straightforward. In this example, I will add Zelle as a payment option. From the Edit menu > choose Preferences > Resources > Payment methods. Then click on the Add button. 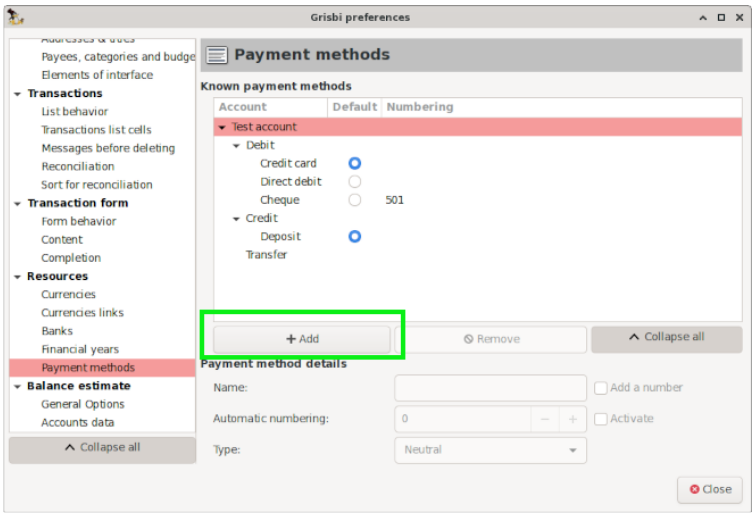 Fill in the relevant information; when you finish, click on the Close button. 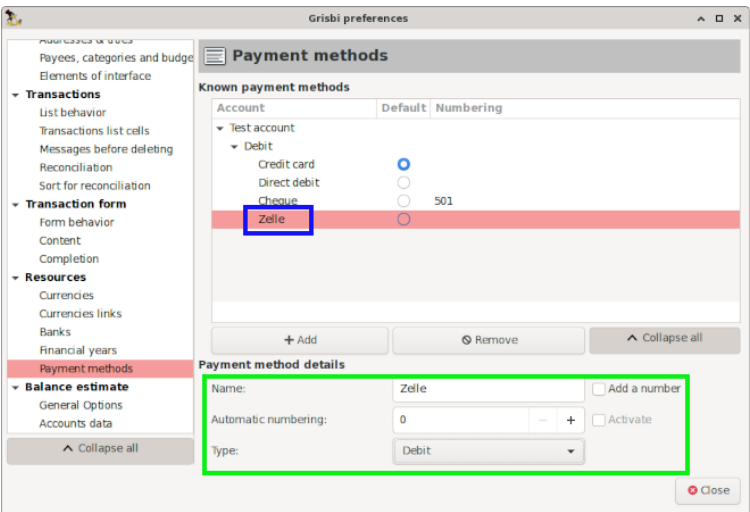 Afterwards, "Zelle" will appear as a payment option in the Transaction Entry form when you are entering data.  Useful Data Entry Shortcuts The F11 function key toggles Grisbi's display between full screen or normal display. To create a 'New Transaction' in the account ledger, type Ctrl+T. When entering transactions, to change the Date field more quickly:
 Configuration Tips Auto-load Last File on Startup When Grisbi opens, its Start Page displays by default the icons for your three most recently opened files. 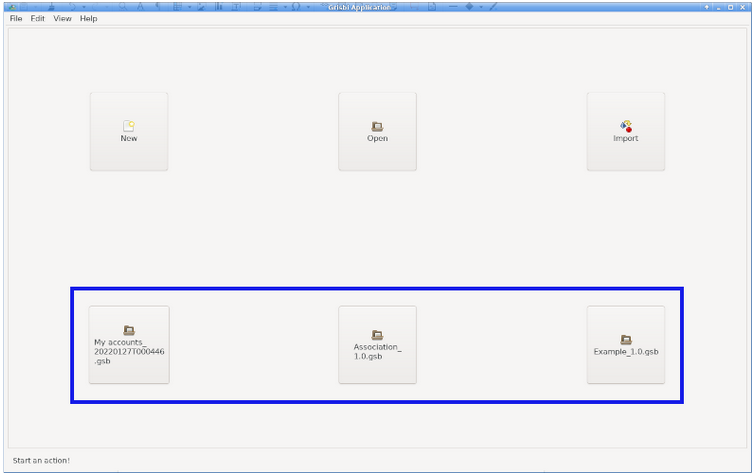 If you work with only one account file and would like to change Grisbi's behavior so that it auto-loads your last file on startup. Under the Edit menu > choose Preferences > Generalities > Files. Check/tick the option "Automatically load last file on startup" and change the value of "Memorise last opened files" to "1." (Note: Be careful this value is not set to "0.") 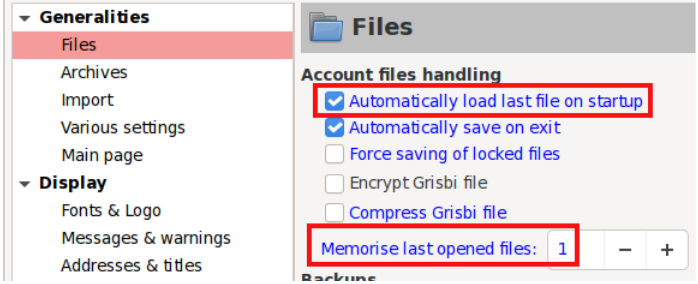 Suppress the Default Dialog Box before Closing Program When you exit Grisbi, a dialog appears, asking if you wish to save your changes before closing. 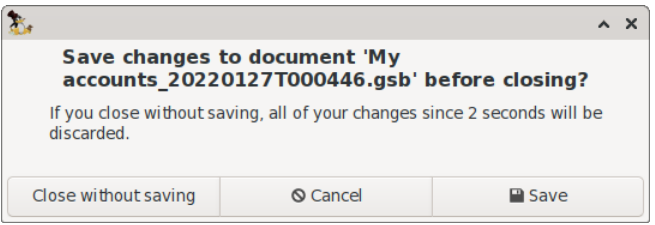 If you would like to change this default behavior and suppress the message. Under Edit menu > choose Preferences > Generalities > Files. Then, check/tick the option "Automatically save on exit." 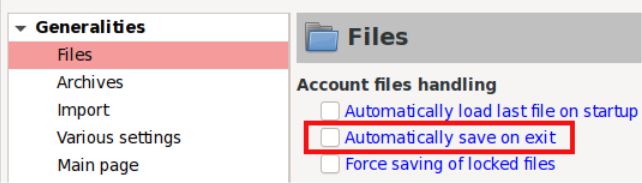 Reports Although Grisbi lacks the charting/graphing options of other personal finance programs (e.g., HomeBank and Skrooge), it features powerful reporting capabilities. Grisbi offers several preformatted reports. To access them, select Reports in the navigation panel > click on the New report button > and choose your desired template. 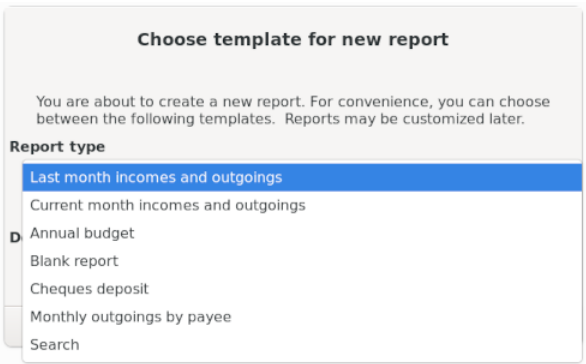 If you wish, these preformatted reports can be modified and used as a basis for custom reports. Reports can be exported in CSV or HTML format, printed and/or saved as a PDF file. Alternatively, you can choose the "Blank report" option. All the information contained in a transaction – such as Time period, Account(s), Payees, Categories, Payment methods, etc. – can be used as sorting criteria. You can add and chain practically as many criteria as there is information, in order to obtain all types of representations imaginable. Although this might sound intimidating, the process of creating a blank report is fairly straightforward because it is GUI-driven. The Grisbi User Manual [English translation, illustrated PDF version] covers reports in depth, in Chapter 20 (p. 163-167) and Chapter 21 (p. 169-192). Searching for Transaction Details Technically this is not a report but I would like to mention Grisbi's transaction search feature, which allows you to search for text (strings) contained in the Notes field. This is useful for retrieving details which might otherwise be difficult to find, e.g., When did I last buy mealworms for our platform bird feeder? (Of course, this assumes that I included the term "mealworms" in the Notes field when I originally entered the transaction. I did, as we shall see momentarily.) In Grisbi's account ledger, click on a transaction to highlight it. It does not matter which one you choose; any transaction will work. Then, right-click on the highlighted transaction and choose the Search option. 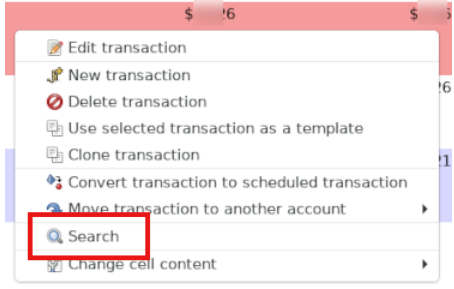 A "Search" dialog will appear. 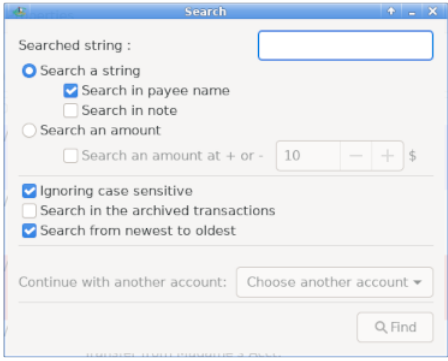 Check/tick the option "Search in note" and type your desired search term in the box.  Click on the Find button. If any matches are found, the Search dialog will indicate "[x] transactions found" and automatically highlight the first matching transaction in the ledger. (The details will be visible below in the Notes field of the Transaction Entry Form.) In this example, the first (of two) matching transactions is dated 12/17/2022.   To see the second matching transaction, click on the Find button again. It is from 1/22/2022. :  Conclusion If you are considering an offline application to manage your finances and GnuCash is overkill, Grisbi is an attractive option. I encourage you to give it a try. I have enjoyed becoming reacquainted with Grisbi. The program has demonstrated its accuracy and reliability. Grisbi is beginner-friendly, with an intuitive user interface, easy access to repeating transactions (via the Scheduler), the ledger and payees. The program comes with a large number of predefined categories designed for personal use, and it is fairly painless to import downloaded data from bank websites. In addition, Grisbi can export its files in QIF and CSV format. |