| Previous
Page |
PCLinuxOS
Magazine |
PCLinuxOS |
Article List |
Disclaimer |
Next Page |
Overview Of The New PCLinuxOS "mylive-install" Installer |
|
by David Pardue (kalwisti) Texstar wrote in his 2023.07 release announcement that the new "mylive-install" installer has replaced the previous "draklive-install" which seasoned PCLinuxOS users are familiar with. Texstar also noted the following information in his announcement:
I would like to mention two more points which have been discussed recently in the PCLinuxOS User Forum:
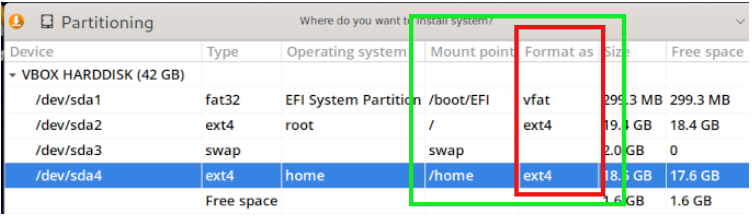
The new installer is essentially the 17g installer, which is itself a fork of the Linux Mint Debian Edition (LMDE) installer. It is similar to Calamares but built with Python and GTK to be lighter and require fewer dependencies. Calamares is a customizable, distro-agnostic, graphical system installer for Linux. Calamares is used by EndeavourOS, Manjaro, the Live medium of Debian, Q4OS, Peppermint OS, Lubuntu and other distributions. The installer was a joint effort between Upgreyed, Texstar and TerryN, who helped fix various bugs. (Thanks to TerryN for this technical background.) Not only has the installer's appearance changed to look more modern, but the sequence of steps is different from what we are accustomed to. I decided to create this brief tutorial which provides an illustrated overview of the new "mylive-install" installer. I hope that it will simplify the process and spare you some surprises. (The screenshots were taken in an Oracle VirtualBox 7.0 session, running PCLinuxOS KDE Darkstar 2023.07. I was not able to capture screenshots of every possible variation; however, the procedure's major steps are covered). As the first step, click on the Install Me desktop icon in your Live session: 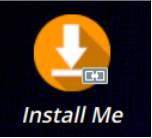 Welcome Screen You will be greeted by the installer's Welcome screen. Click on its Next button to proceed. 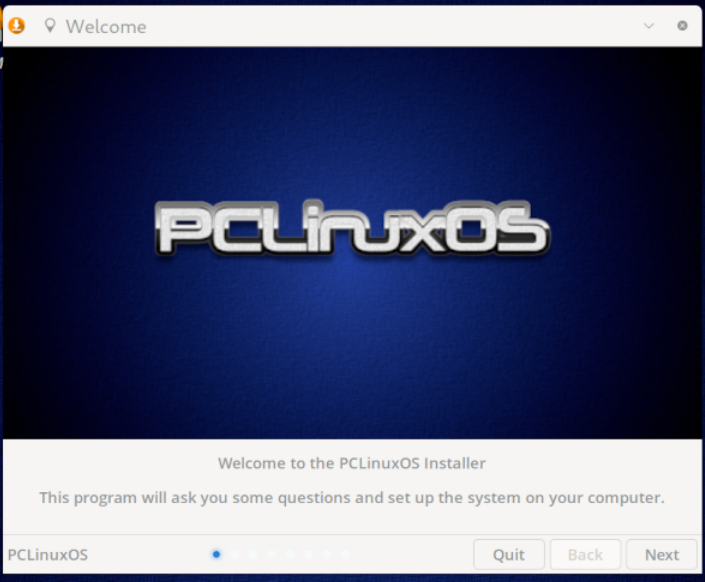 Language Select your country and the language you wish to use. Then, click on the Next button. In this case, Language refers to what language will be used by the installer - not the language of the final, installed OS. The installed language will be English. So, if you wish to add a non-English language to your system, you must still use Pinoc's addlocale script after your initial installation has finished. [Pinoc updated all the addlocale language archives in November 2022] 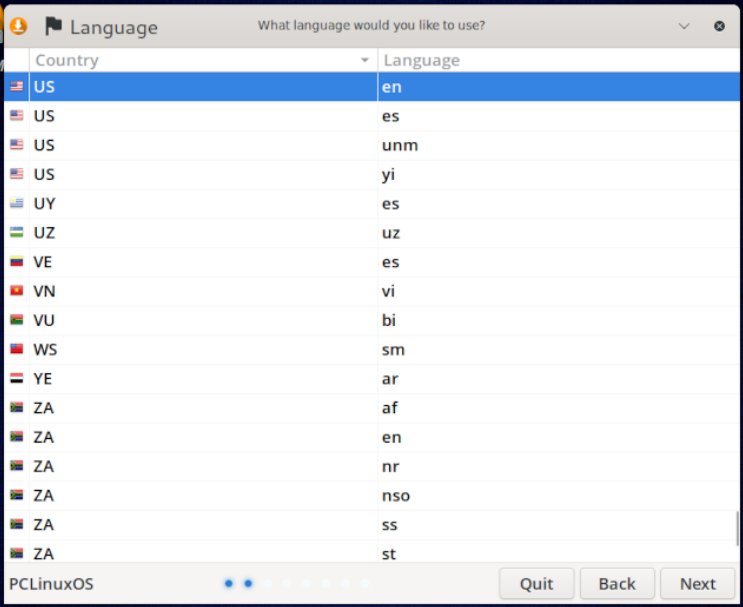 Keyboard Layout Choose your keyboard layout, then press Next to continue. 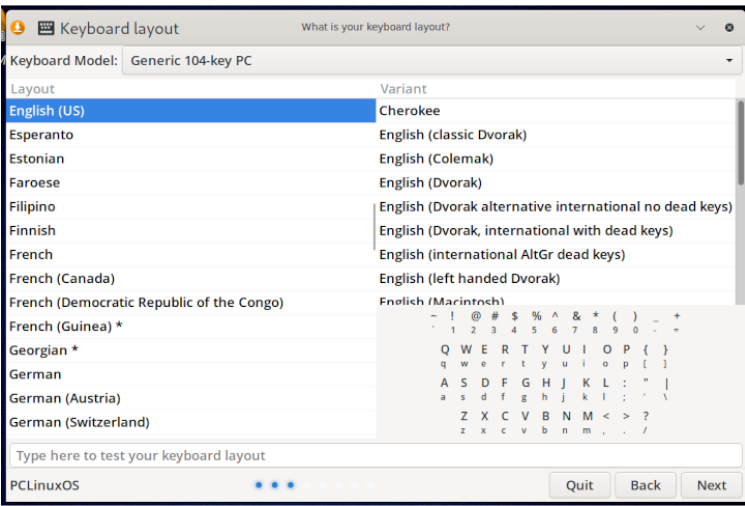 Time Zone Indicate your location and time zone. Then, click on the Next button. 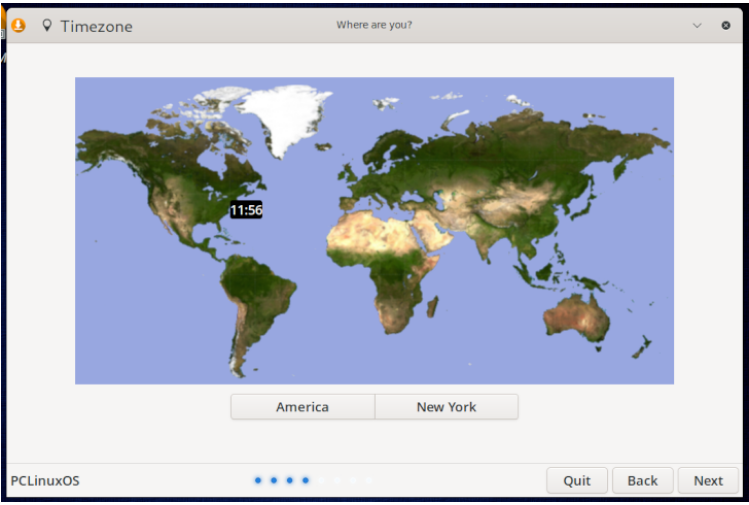 As an alternative to clicking your location on the world map, you may also click on the Continent button itself and/or the City button, to list the available choices. 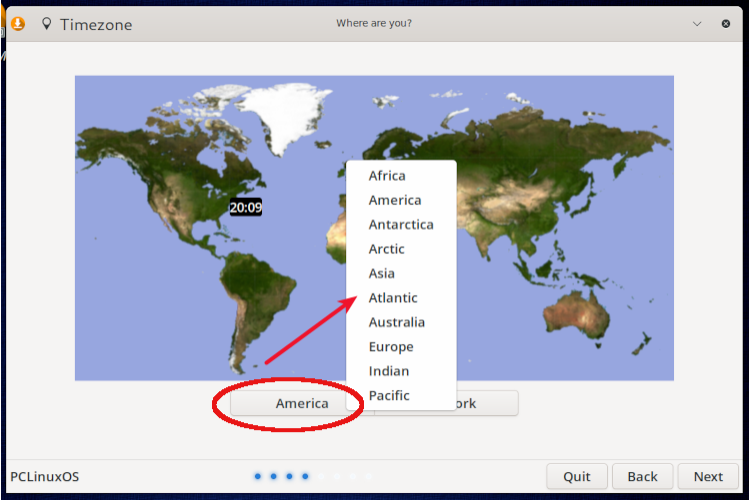 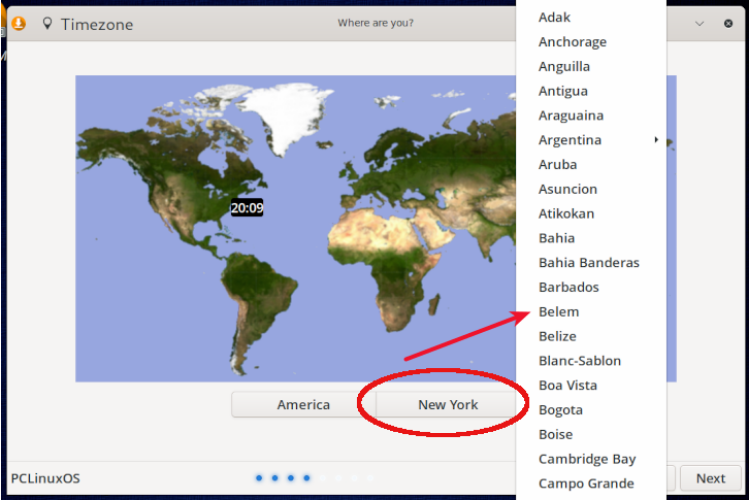 Disk Layout At the partitioning stage, you have several different options: You can do an Automated Installation (aka unattended installation). You can manually partition, if you wish. There is also the option of Install system with updates, if you are installing with an active Internet connection (Ethernet or Wi-Fi). It is currently recommended that you not select this option because some users have reported in the PCLinuxOS Forum that this significantly lengthens the installation process. The default repository mirror is NLUUG (in The Netherlands), so depending on your location, that may result in a slower download speed. Automated Installation 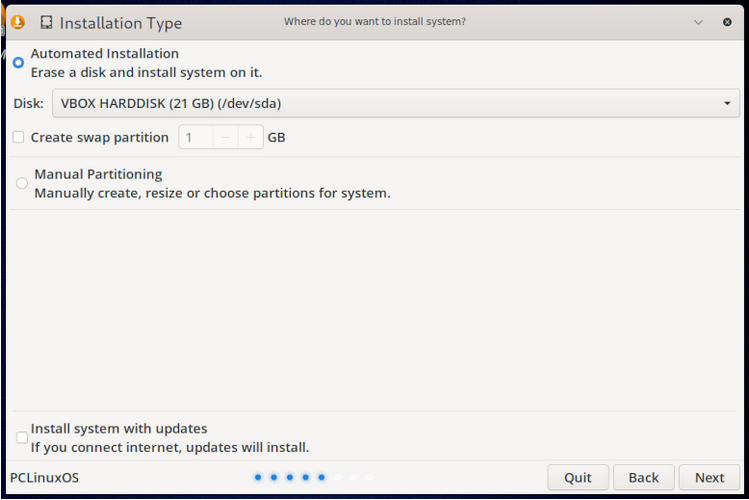 If you choose this option but leave the Create swap partition unchecked/deselected, the installer does not create a swap partition automatically. 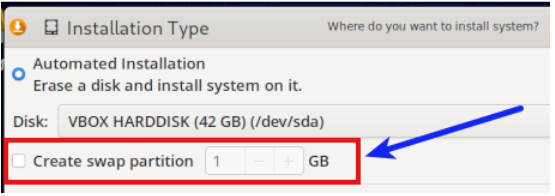 If you wish to do an Automated Installation and need — or want — a swap partition, make sure to check/select the Create swap partition option and indicate its desired size in GB. If you need advice on the amount of swap space to allocate, Abhishek Prakash's article "How Much Swap Should You Use in Linux?" (ITSFOSS, 6 Jun. 2021) has reasonable guidelines. His guidelines assume that you are using an SSD. I should also mention that an Automated Installation will not create a separate /home partition. The installer will create one large root (/) partition. Manual Partitioning If you select manual partitioning, you will see something like this window: 
I recommend that you watch monbureaulinux's excellent video on the new installer. He demonstrates the manual partitioning process. It is 12 minutes long, is well worth your time, and is easier than wading through a multitude of my screenshots. His original French-language version of the video — which also clearly demonstrates the manual partitioning process in more detail — is available here. The segment on manual partitioning runs from 16:58 - 19:31. Based on my experiments with this installer module, I can offer these three tips:
When you finish setting up your partitions, click on the Next button. The installer will display a warning that all data on your drive will be deleted soon. It will ask you to confirm whether you want to format the partition(s). 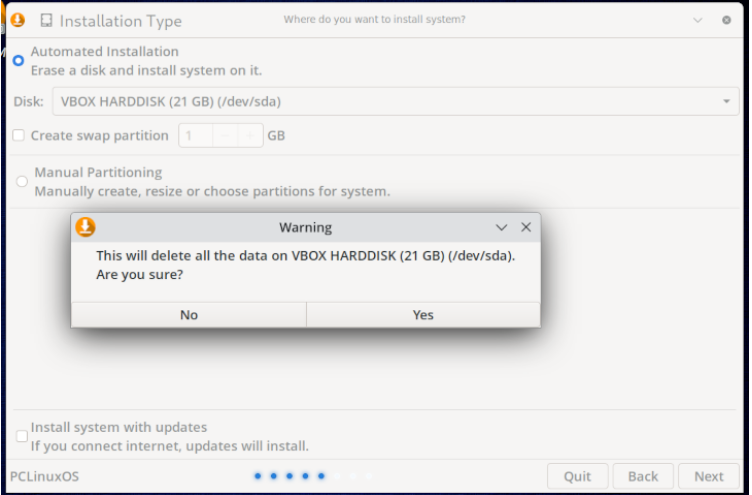 Note: Answering "Yes" does not yet trigger installing the OS to disk. We will reach that stage in a few minutes. Create User Account Clicking the Next button takes you to the step of creating your user account. Type in the requested information, then press the Next button to continue. 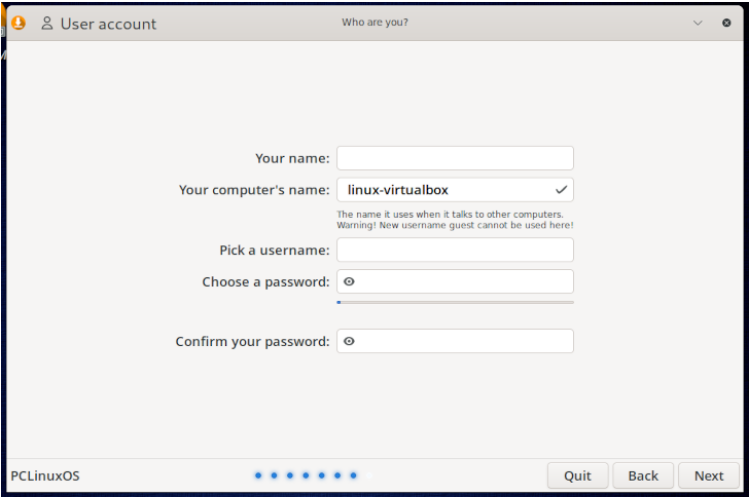 The following substep is somewhat confusing — in my opinion — because it is quite different from the old draklive-install procedure, which involved setting the root password separately. You will see this dialog advising you that your username password will be (temporarily) used as the root password. Don't panic, though ... you can easily create a "true" root password after the installation finishes. 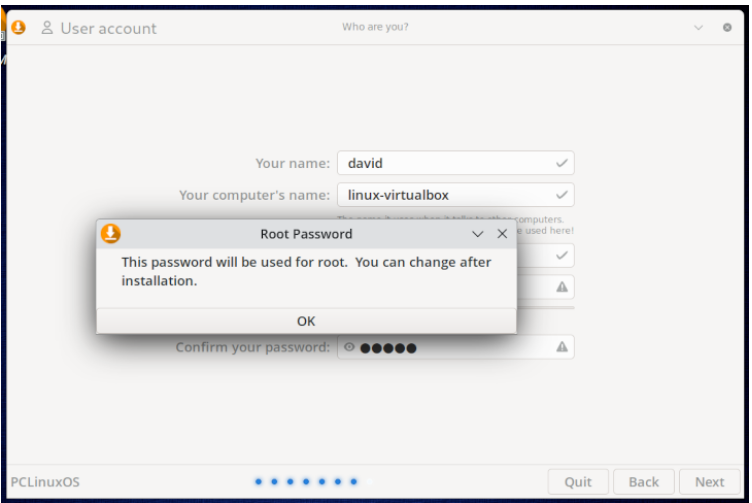 Summary Screen The installer now displays a Summary screen which gives you the opportunity of checking that all information entered is correct before you commit to the actual installation. If you are satisfied the Summary instructions are correct, then click on the Install button. 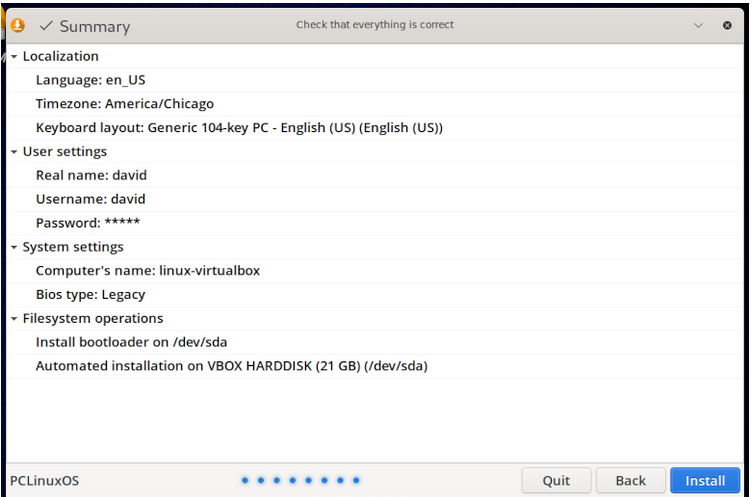 Installation At this point, the mylive-install installer will begin copying PCLinuxOS to your SSD or hard drive. Based on my experience installing KDE Darkstar 2023.07 and Xfce 2023.07 to an SSD, the process was noticeably faster than with the old draklive-install. As the installation proceeds, a message displays at the bottom of the screen: "Please do not turn off your computer during the installation process." 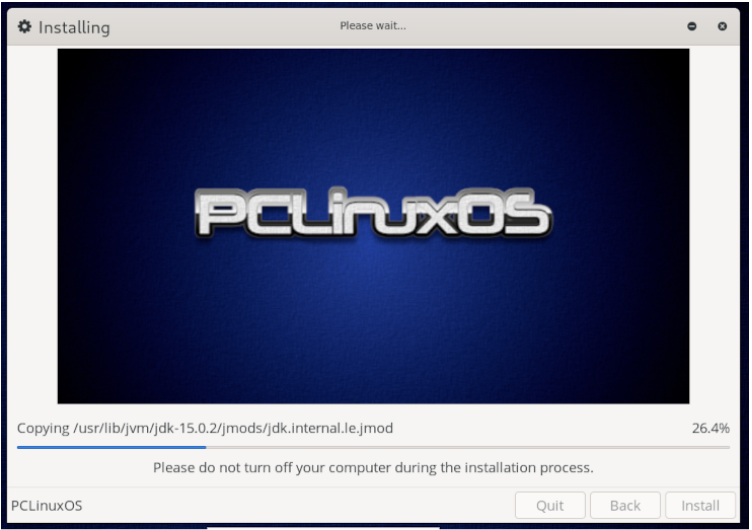 The closing stages of the process will be: "Install the bootloader" and "Check the bootloader ..." When the installation finishes, a confirmation message will display. 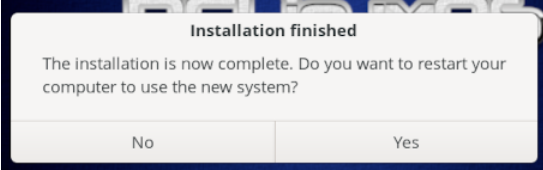 Click the "Yes" button to restart your computer into the freshly installed PCLinuxOS. The message prompting you to remove the installation medium no longer appears. So be sure to remove your USB device before the machine reboots. Post-Installation: Configure Your Root Password When you boot into your new system, it is recommended that you first configure a personal root password (so that you won't forget about this step). A simple GUI-based tool called "myrootpassword" helps accomplish this task. Go to the Configuration menu > Configure your Root password. The menu item on the KDE Plasma: 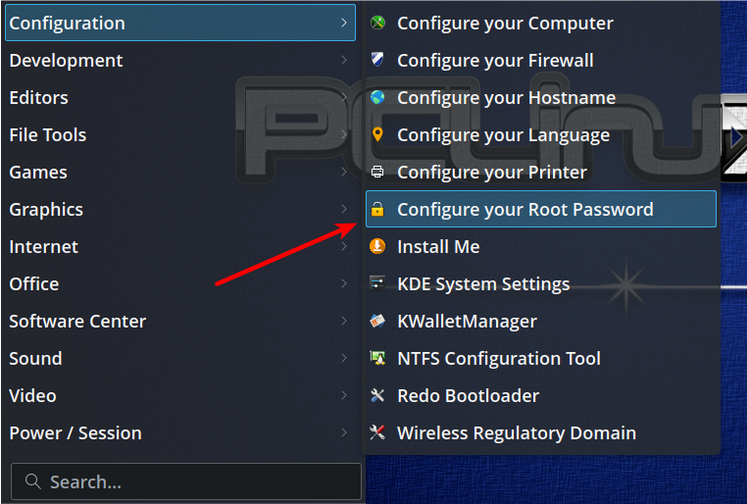 The menu item on Mate 2023.07: 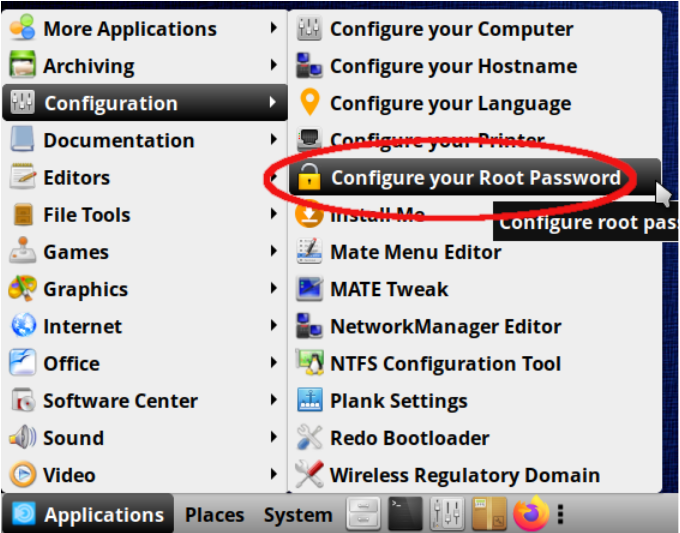 The menu item on Xfce 2023.07: 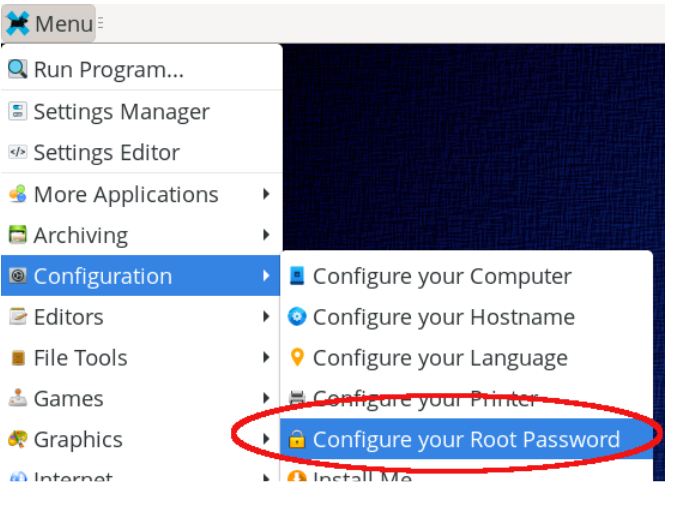 Type the current root password. Then, you will see this dialog: 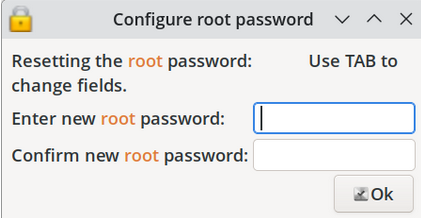 Follow the instructions and click on the OK button. You will see a confirmation dialog. Click the OK button, and you're done. 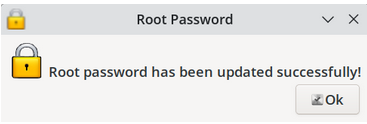 Good luck and enjoy PCLinuxOS! |