| Previous
Page |
PCLinuxOS
Magazine |
PCLinuxOS |
Article List |
Disclaimer |
Next Page |
Inkscape Tutorial: Draw A Rope |
|
by Meemaw 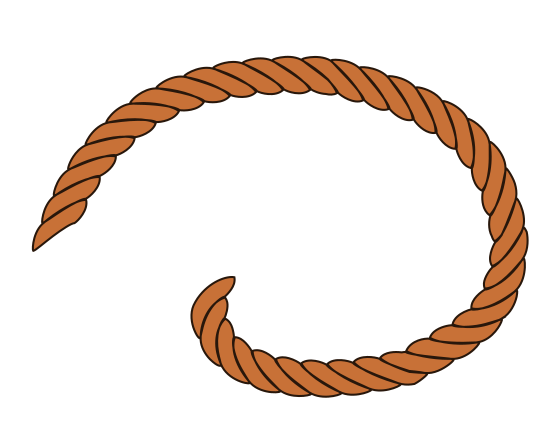 I saw this tutorial recently, and thought of an advertisement that I had done for my job. It was an ad for a rodeo book, so I wanted it to have a western theme, including a rope. The art department at the main office did it for me, but with this tutorial, I might be able to do it myself next time using the Pattern Along Path effect. Let's get started. Using the pen tool in Inkscape, draw a shape that will make up the part of our rope that will be repeated. 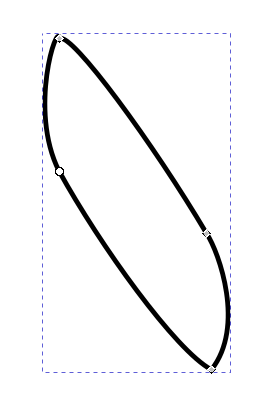 Next, create the shape that you want to apply to your rope. This can be any shape. In this example, I just used a simple curve. 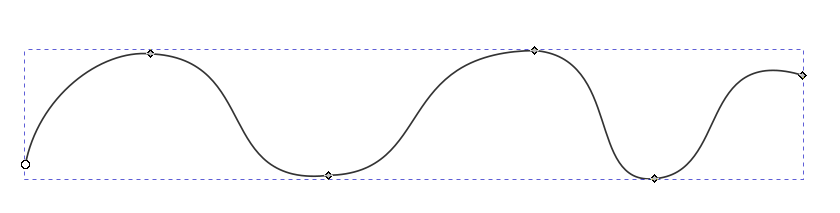 With the path selected, open up the Path Effects dialog by clicking Path > Path Effects, Click the + button, and choose the Pattern Along Path option from the dialog. It will add the Pattern Along Path effect. Note, however, that nothing will change yet. 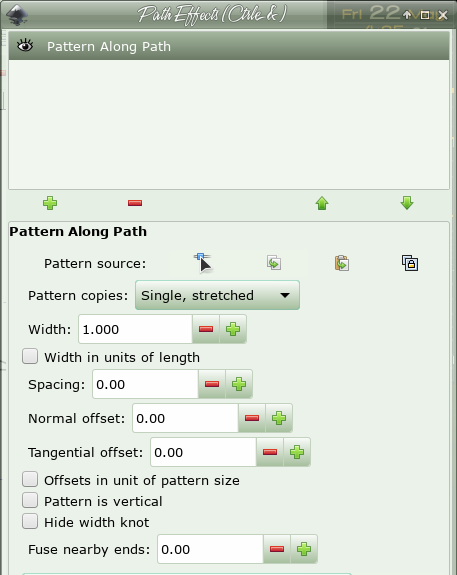 Now, select your shape, and copy it to the clipboard with Edit > Copy or Control+C. Once copied to the clipboard, select your path again, and in the Path Effects dialog, press the Link to Path on Clipboard button (it's the last button in the Pattern Source section, with the tiny lock on it). After doing this, your path should look different -- the shape will be stretched out over the length of the path. 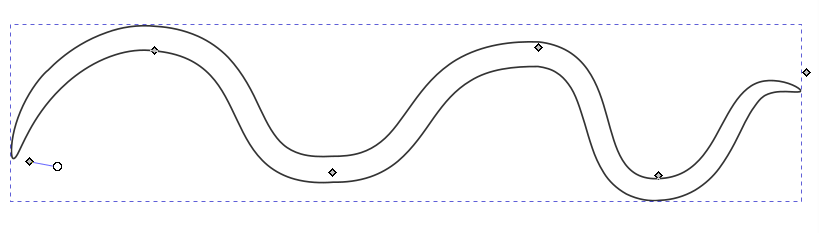 Well, that doesn't look like a rope! Let's change some settings. With the path still selected, change the Pattern Copies dropdown to Repeated, and mark the Pattern is vertical checkbox. I have changed the Spacing value because the shapes weren't touching each other. The number is going to be a negative number, but will vary widely depending on the size of your image. If a setting of -1 doesn't change your path much, try a much larger number. My setting turned out to be -10. Change your value until the rope edges line up fairly cleanly. 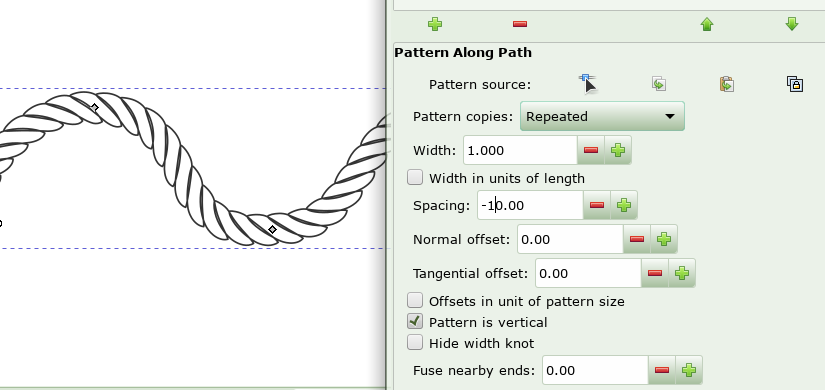 The spacing is pretty close, but when you zoom in on the shapes, they may not fit perfectly. Using the original shape, adjust the nodes until you can see that the shapes fit together better. 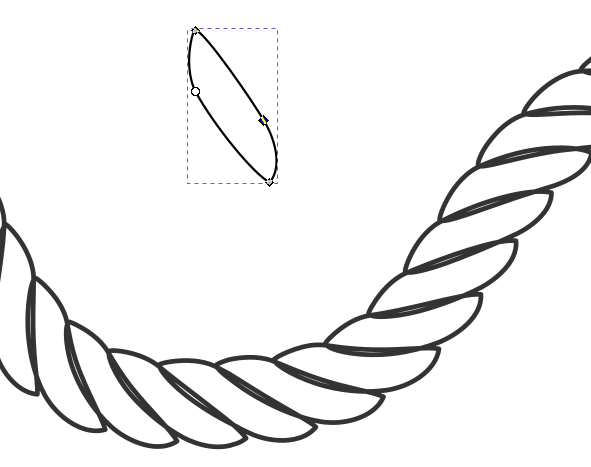 The key here is that the outside edges line up neatly. Don't worry too much about the inside edges. The result should look something like this: 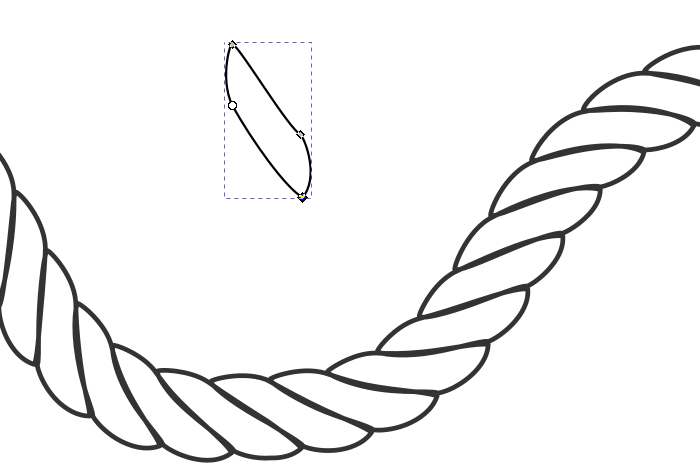 My finished rope looks like this: 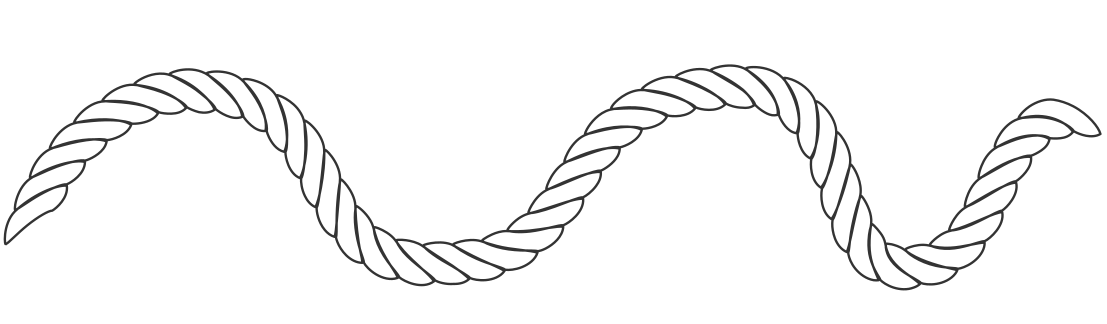 You can also select your p Path and tweak the shape of it if you want. Once you are happy with the shape, convert it to a path with Path > Object to Path. NOTE: Once you do this, you can't change the shapes anymore. 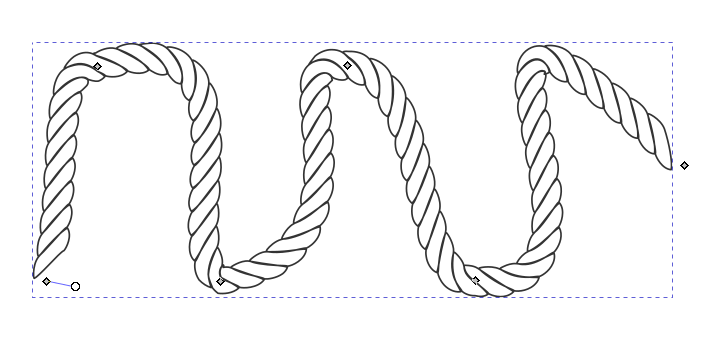 You can also break your path into individual shapes with Path > Break Apart, and set the fill colour and stroke to what you want. Once you set the fill colour, the inside overlaps will be covered up. You can also experiment with moving around different sections of your rope. Here, I took out a couple of shapes and rotated the middle section. 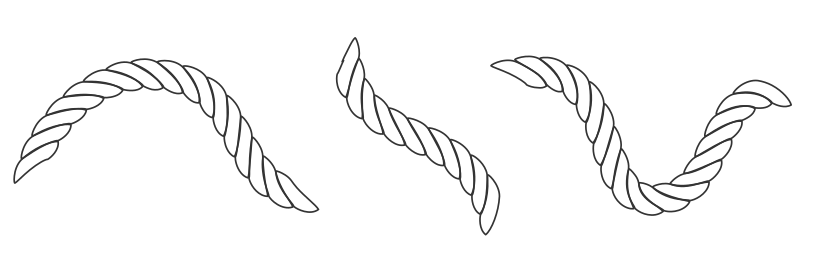 Depending on what shape you use, you can make all sorts of shapes with your length of rope! 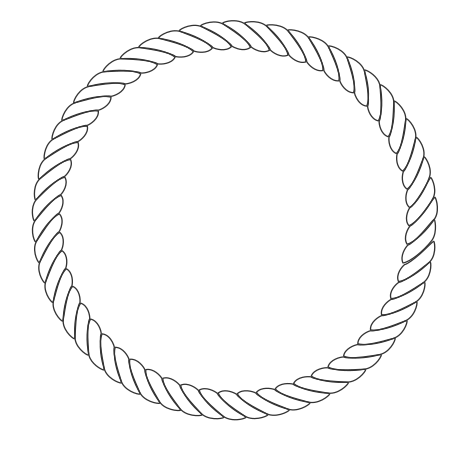 |