| Previous
Page |
PCLinuxOS
Magazine |
PCLinuxOS |
Article List |
Disclaimer |
Next Page |
GIMP Tutorial: Photo Editing Revisited |
|
by Meemaw I recently found another tutorial about photo editing which has some tips we know, plus some we don't, so I thought I'd share it. We always want the photos we take to look their best, so here are more tips. Straighten the Horizon Sometimes we shoot a photo “askew” for artistic reasons, but most of the time we need it to be level. Unless you have the uncanny ability to shoot everything level automatically, it's going to be off. Luckily, it's easy to fix. I actually did another tip for this in an earlier article, but this method works better. This barn photo was taken on one of my trips to Colorado, USA. The horizon isn't off much, but it will look better when it's straightened.  Select the Measure Tool from the Toolbox. Click on a point on the horizon in your image, drag your mouse along the horizon line, then release the mouse button. Now, under Tool Options, set Clipping to Crop to result, then click Straighten. You will see the photo turn so the horizon is straight, plus crop a bit of the outside to compensate for the rotation. 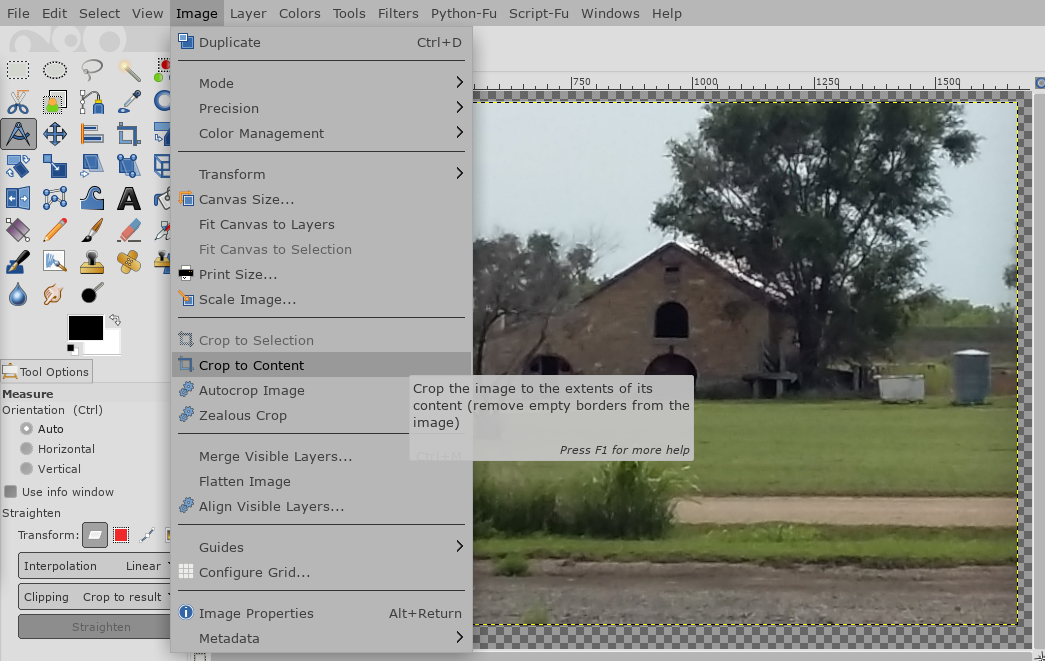 If it looks better to you, finish the job going to Image > Crop to Content to remove any blank areas around the corners of the canvas. If not, click Edit > Undo and try again. Cropping Photos in GIMP We've done cropping before, but some of the tool options should probably be explored. Select the Crop tool (Shift + C). Now click and drag inside the image to draw the outline of your new crop. You can hold the Shift key to maintain the photo's original aspect ratio, but if the tool is set to retain the aspect ratio, you're good. 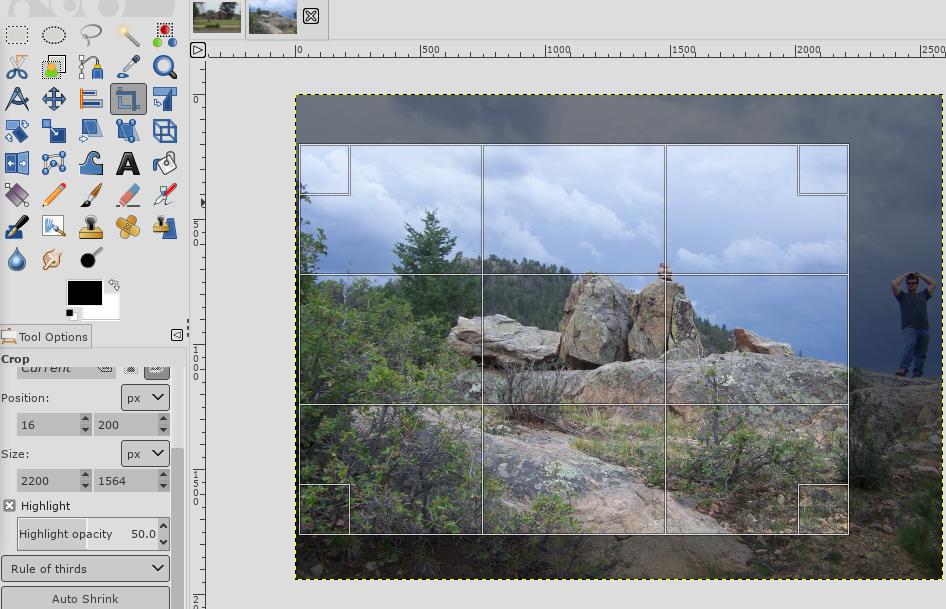 Just like the Rectangle Select tool, you can hold your mouse in the corners or edges of the frame and then drag in or out to correct. You can also click in the middle of the frame and drag to reposition the cropped area. Hit Enter to apply. You should also experiment with the composition guides in the Tool options. This enables you to overlay several grids (including the rule of thirds grid) to aid with your crop. Improve Exposure If your photo is too light or dark, or contains highlights where the brightest parts of the frame are rendered as pure white with no detail, you need to fix the exposure. I have a photo that's too dark. 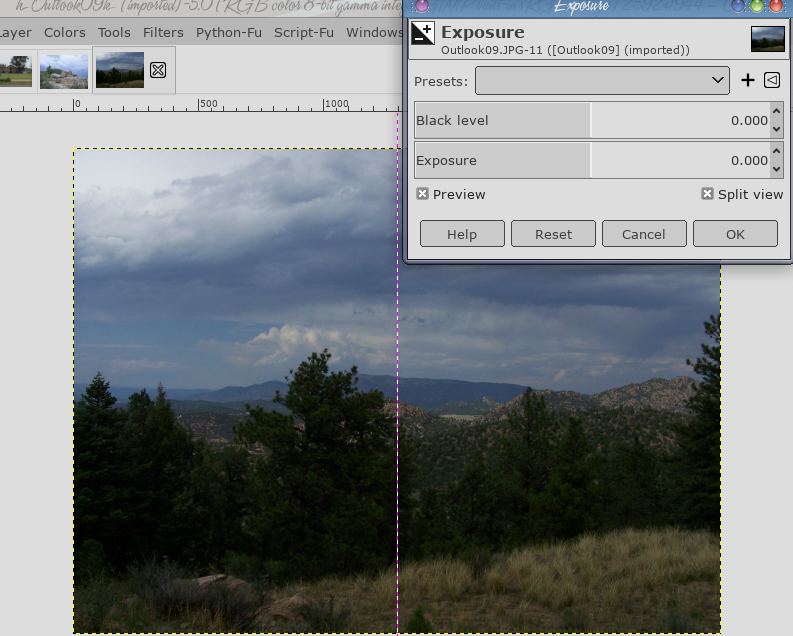 Go to Colors > Exposure. In the dialog box that opens, drag the Black level slider to the right to darken the blacks in your image. Drag the Exposure slider right to brighten the image, and left to darken it. Make sure Preview is checked to show the real-time effect of your changes, and select Split view to see the before and after effects in the same image. When you're satisfied, click OK to apply the change. The black level slider gave me a result I didn't like, so I moved it back to zero. However, the exposure slider, moved right, made a change I thought was good. The right side is the original, and the left side is the changed photo. 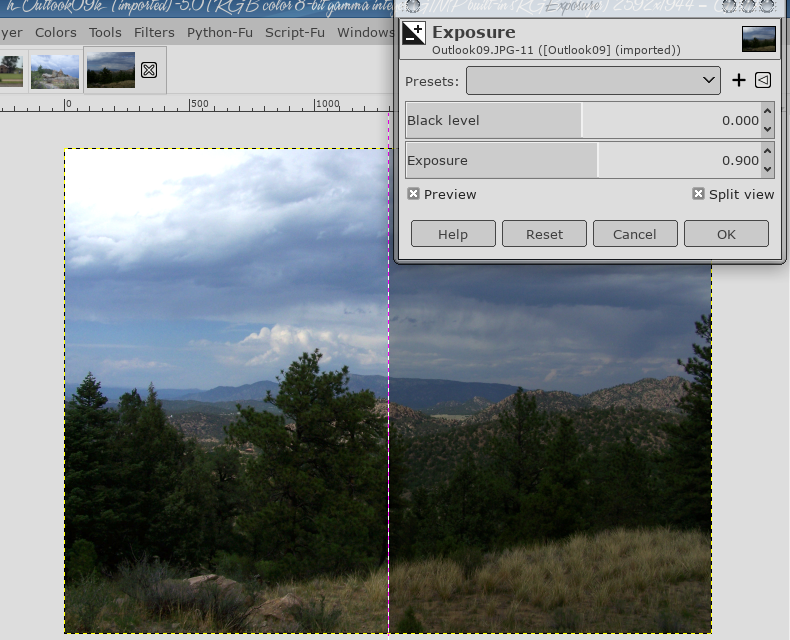 If you're working with JPEG files, you should be careful with the exposure tweaks, because you can risk introducing noise or otherwise degrading the image. Resizing Images The last job in editing your photos is to resize them correctly. If you know how big you want to make your photo, click on Image > Scale Image, then under Image Size enter a new width for your image, in pixels. Interpolation is usually set to Cubic (I think it's the default), which is the slowest but also the best quality. Ideally, you should only ever make your images smaller. If you do need to make any of them bigger, you should do it in increments of 10 percent, and inspect the result carefully before doing another 10 percent. If you want to resize your photos to print them, you can use Image > Print Size instead. This window will let you set the size you plan to print your photo. 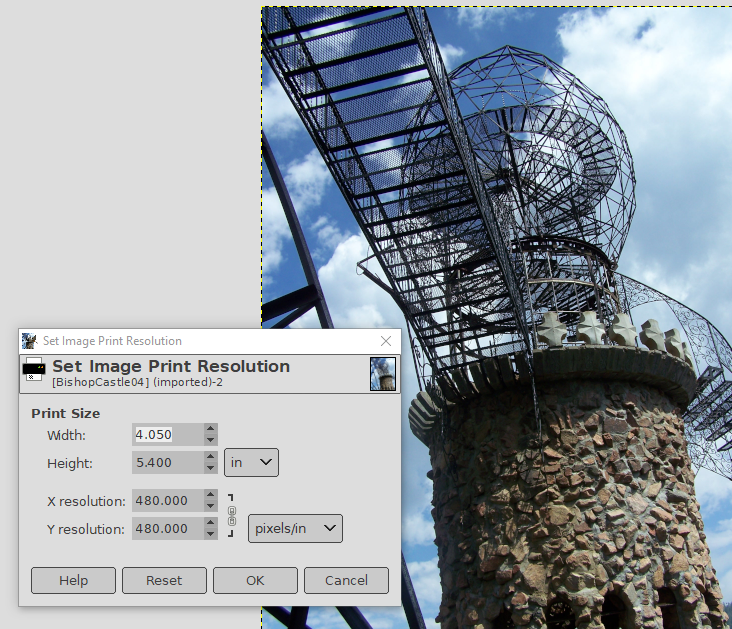 One tower of Bishop Castle, in South Central Colorado, USA Hopefully, you have gotten a few more tips on making your photos look their best! |