| Previous
Page |
PCLinuxOS
Magazine |
PCLinuxOS |
Article List |
Disclaimer |
Next Page |
GIMP Tutorial: Reflective Water Effect |
|
by Meemaw This is a tutorial for adding a water effect to a photo. I saw two of them on YouTube - there are actually many GIMP tutorials on YouTube, if you just search for GIMP. I grabbed a photo of the Grand Teton mountain range from WikiMedia Commons. Most of these are free-to-use images - however, you should check on each photo to see if you need to credit the photographer/artist. This one was taken by Michael Gäbler. 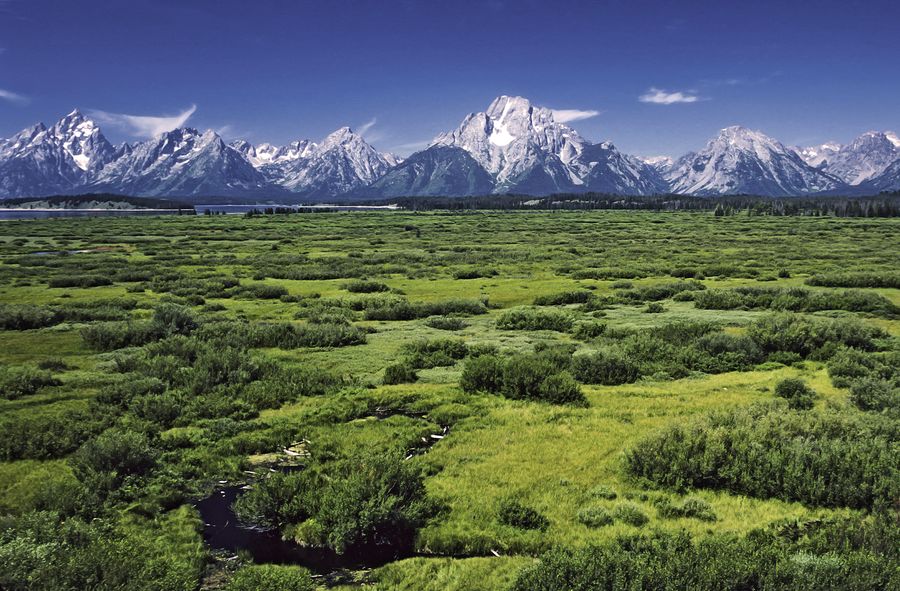 I also found a photo of some water we'll use. There is a little bit of water in the photo, but I want to make more. The first thing you want to do is duplicate your layer (because we'll need two). Then, you want to add an alpha channel to your top layer by right-clicking the layer and choosing "Add alpha channel". An alpha channel adds transparency to the layer, so if you delete part of that layer, as we're about to do, the layer underneath shows through. If there was no alpha channel, and you deleted part of that layer, you would see whatever background color you have at that moment (mine would have been white). For now, turn off the visibility of your bottom layer. Then, with your top layer selected, choose your Lasso Tool and outline the area in your top layer photo that you want to change to water. I made mine just the slightest bit wavy at the top, since lake shores don't usually run in a straight line. 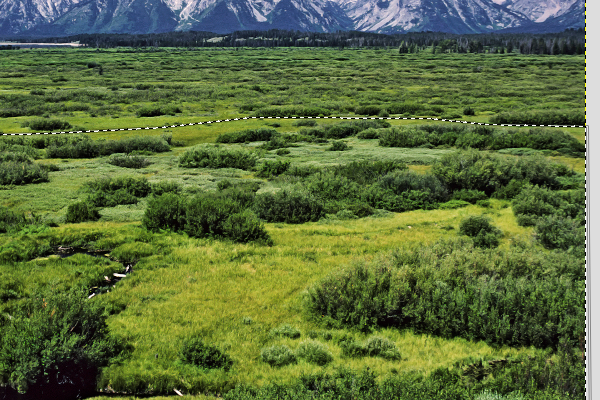 The next thing you want to do is use your Bucket Fill tool and fill this area with a grey. If it only fills a few little bits of the selection, go to your tool settings and choose "Fill whole selection".  I want to make a small border between the fill and the photo, so go to Select > Shrink, and shrink your selection about 7 pixels (although you can use whatever looks good to you.) 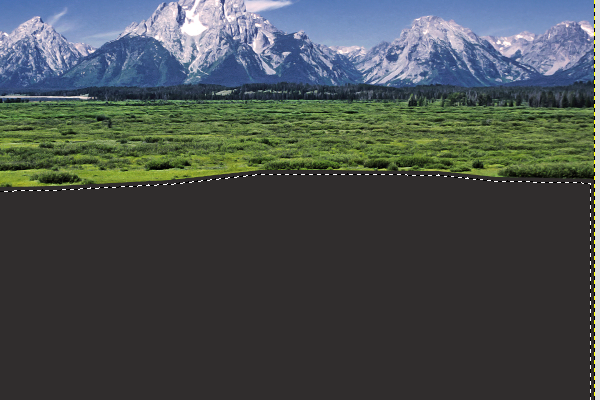 Now, press the delete key. You'll see everything within the selection is gone and that part of your photo is transparent. 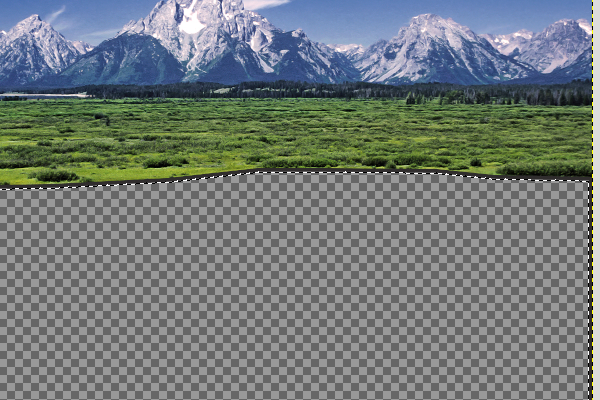 Now my aim in leaving the small grey border was to have a slight change between the vegetation and the water, so the only border I need is the top one right next to the plants. Choose Select > None to deselect the area, then use your Eraser Tool to erase the sides and bottom lines.  Now we're going to start the reflection. Turn on the visibility of your bottom layer, choose it, and select Layer > Transform > Flip Vertically. Choosing the Move Tool, move your layer up until the reflected part at the bottom matches up pretty well. You can see the border between them at the grey line. 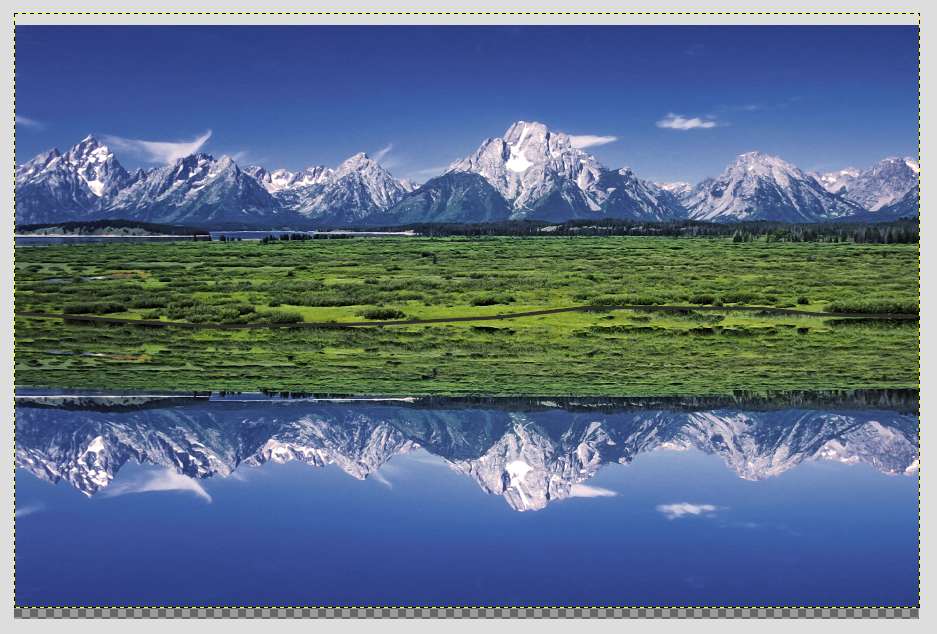 Now we want to give the reflection a wavy effect, so choose Filters > Distorts > Ripple. In this newer version of GIMP, I hadn't used Ripple yet, but it's not hard. Make sure that Preview is checked, and you can also check Split View, which shows a before and after view of your screen, so you can compare. When you see a reflection in the water, it is nearly always wavy, except for those times that the water is absolutely still, and then your reflection may still be distorted. In the filter, Ripple, I used the following settings: Amplitude - 6, Period - 240, and left everything else at default. However, you can experiment to see what you think looks best. 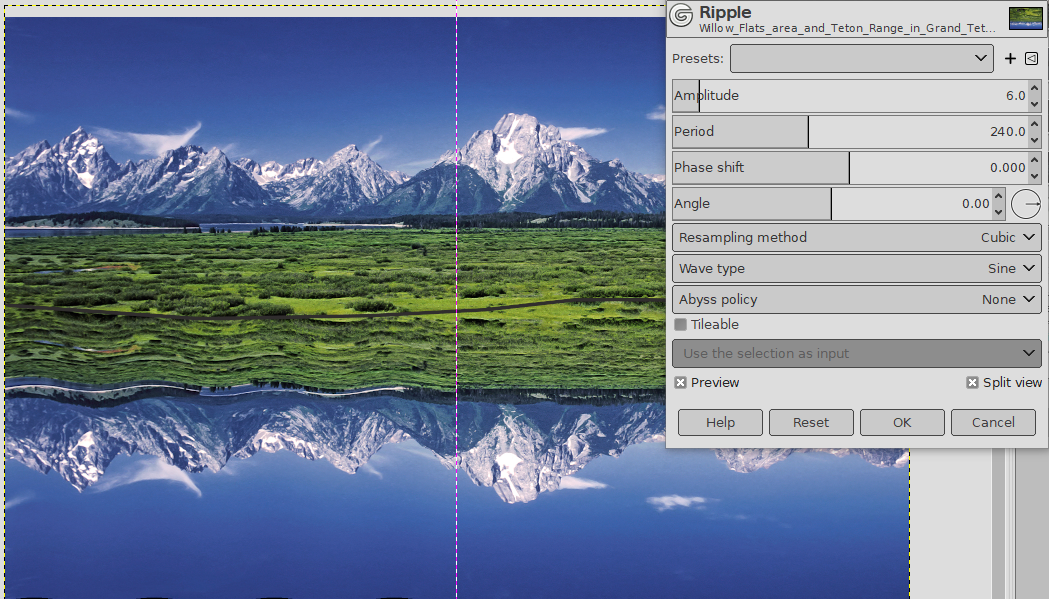 Now that we have our reflection looking more natural, we'll add some actual water to the picture. I saved a picture of water from another photo and will use that. 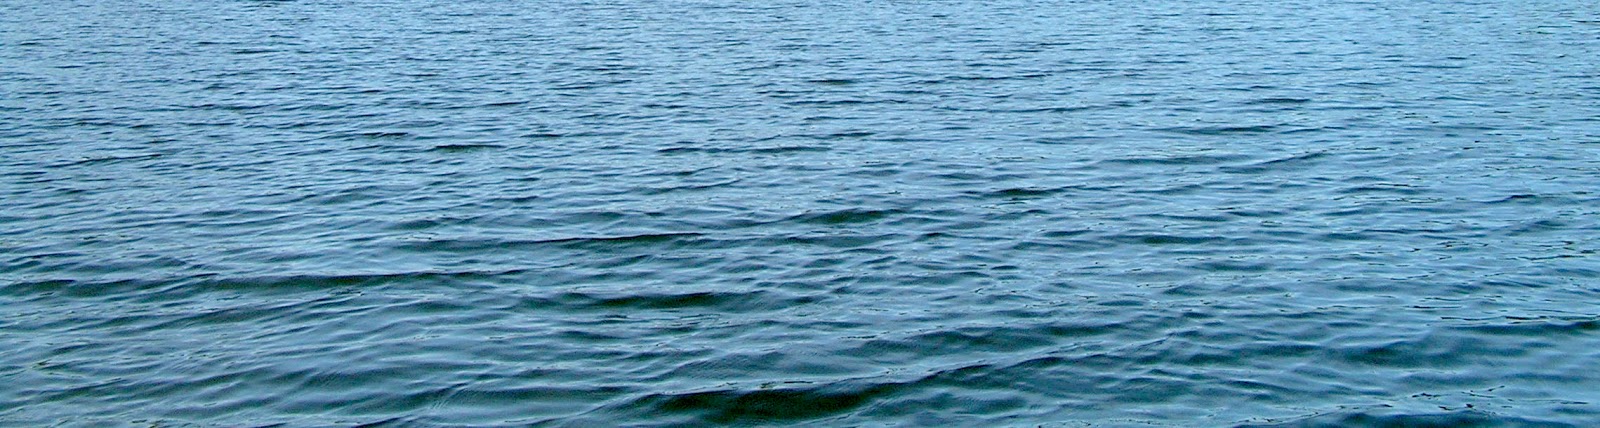 Add a new white layer between the two layers you have, and open the water picture. Copy and paste it onto the new layer. You may also have to scale it to make sure it will fill the area you have over the reflected layer before anchoring it as well. Right now it will completely cover the reflection you just worked on. With that layer still chosen, go to the layer attributes at the top of the layer list and set the opacity down to about 20, but you may want to experiment there as well. Now you can see the reflection through the water. 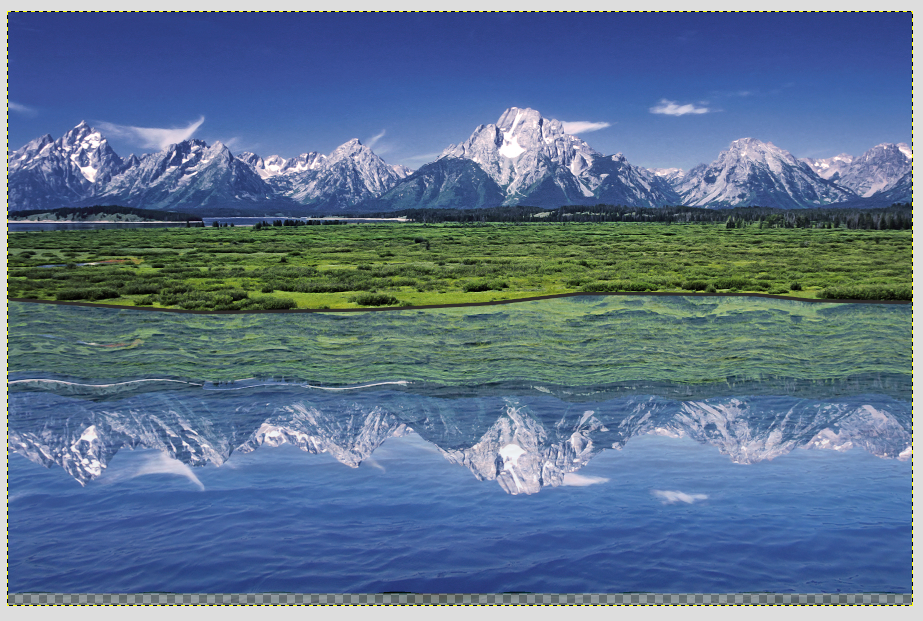 Before you finish, you may want to crop your project (I see some transparency at the bottom of mine). Also, our grey line is still in the middle of the picture. We want to smudge that just a bit to just make a slight shadow between the scenery and the reflection. You might have to zoom in to do that. Every time I'm zoomed in, working on something, I want to look past the edge of my project, and sometimes GIMP won't let me. However, see that plus sign in the bottom right corner of your canvas? Grab and hold that and move your mouse. GIMP will move your photo however far you want to move it, giving you a view of the edge (and past it) that you want. 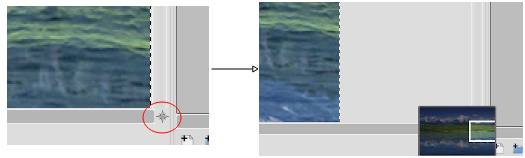 When you finish your image, and are satisfied with it, save and export it. I did two... one with the border between the picture and reflection, and one without. Do yours whichever way you like best. 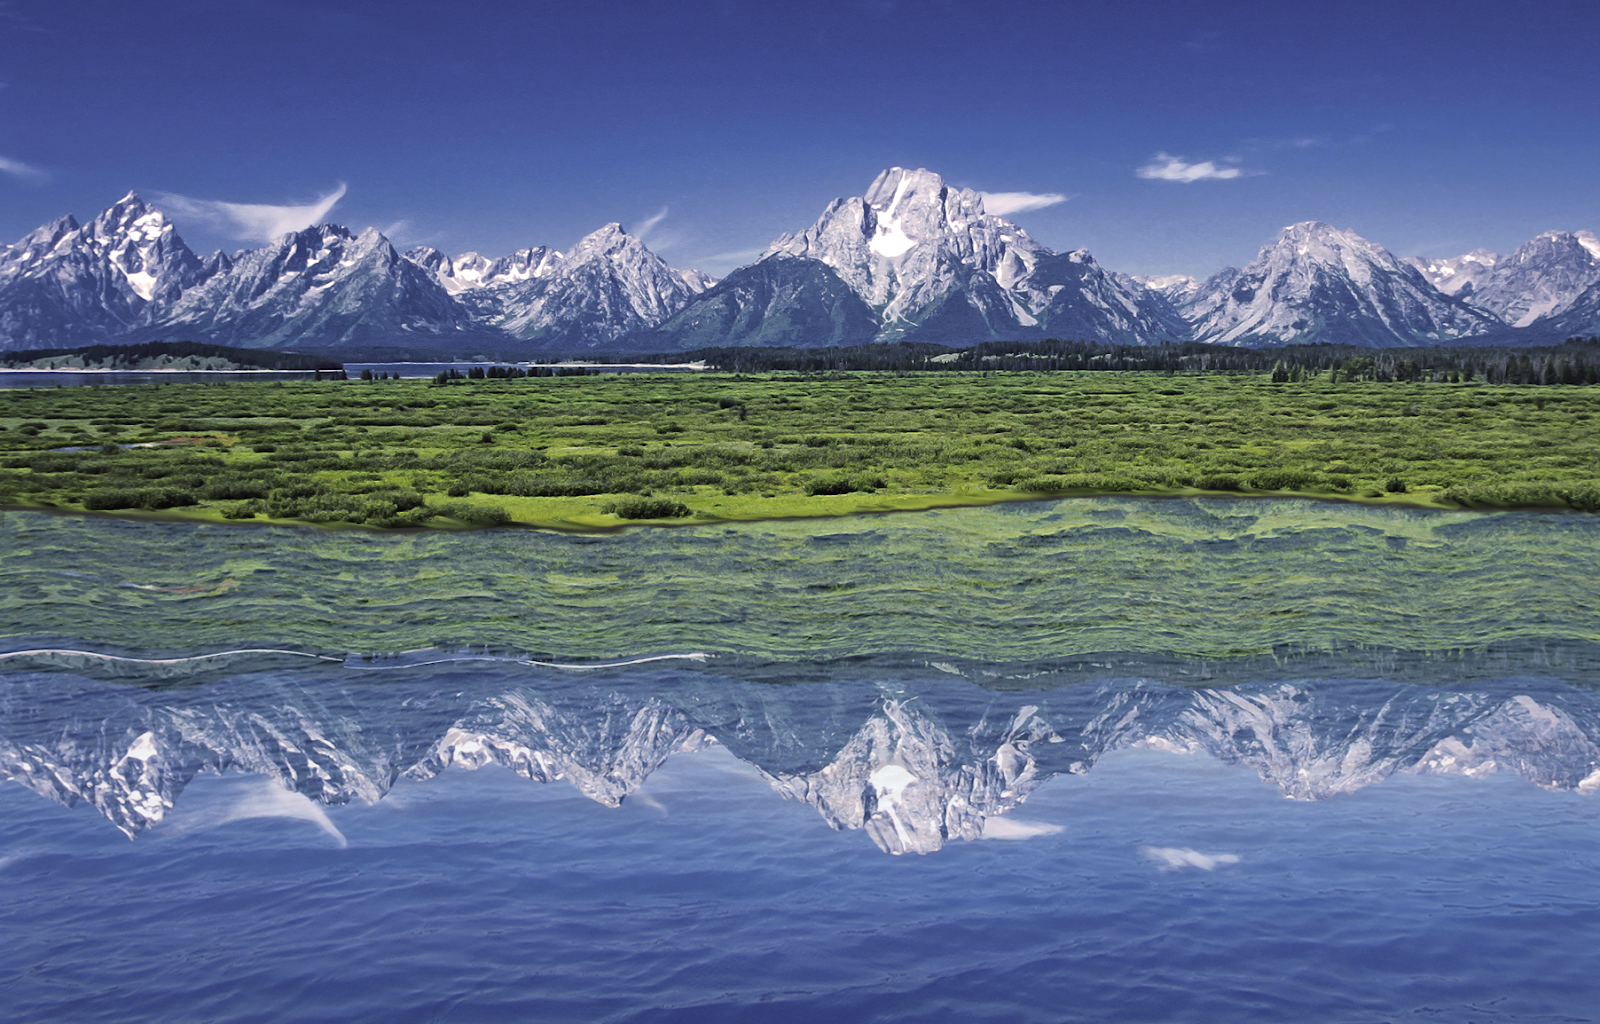 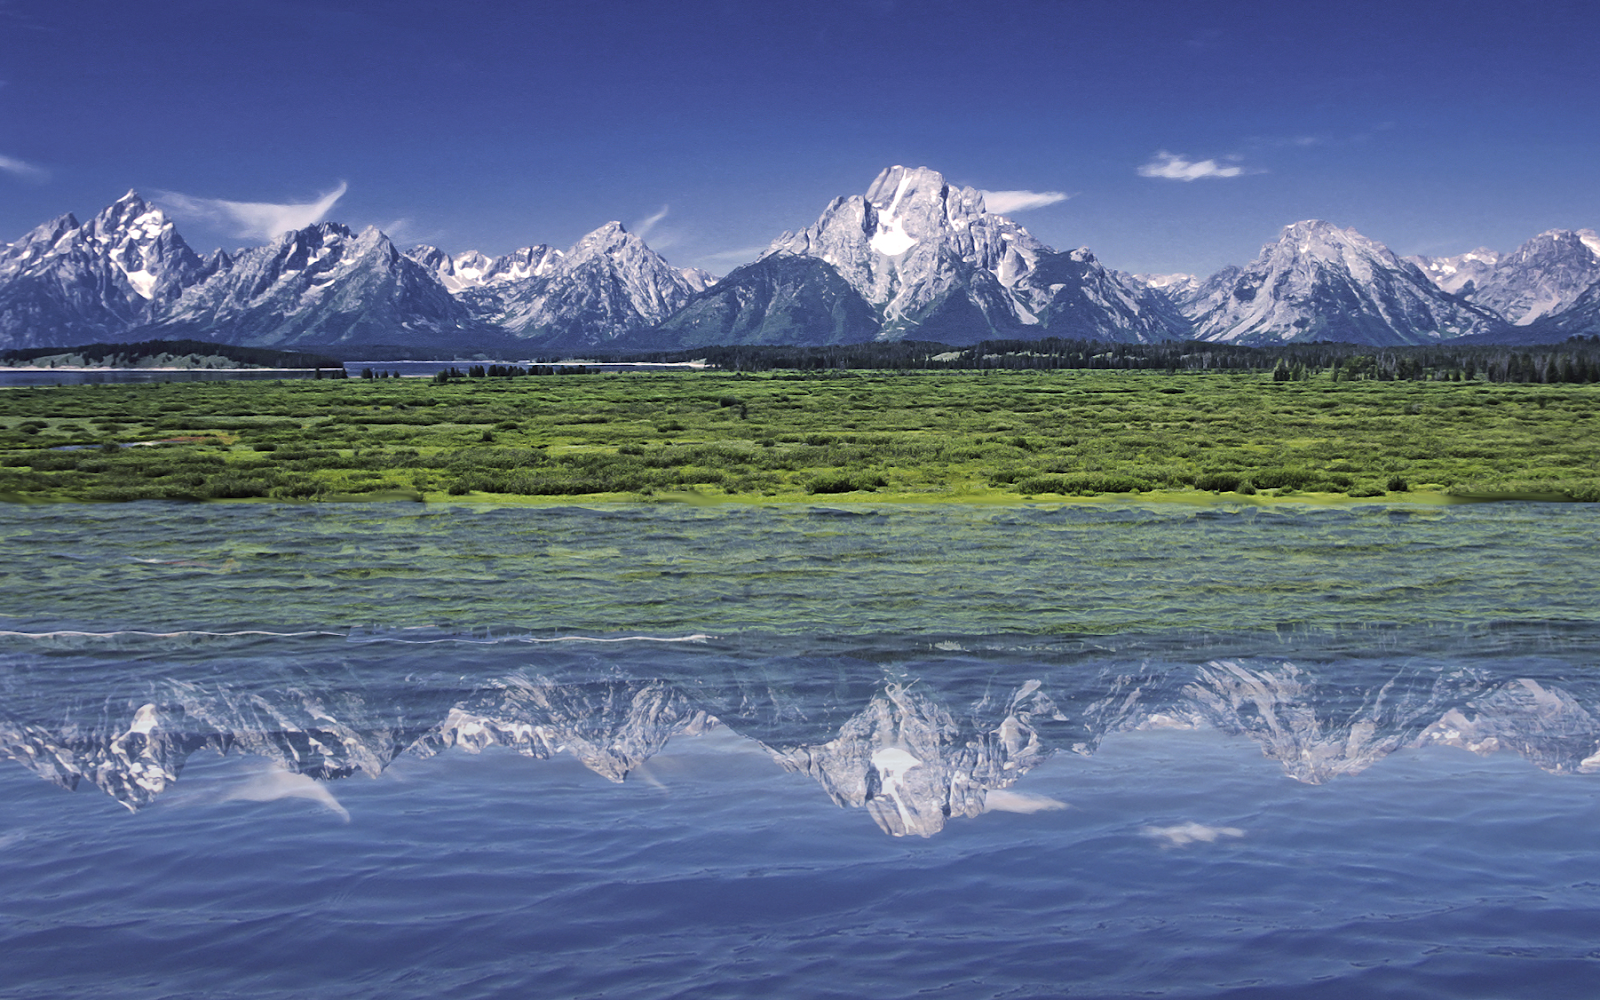
|