| Previous
Page |
PCLinuxOS
Magazine |
PCLinuxOS |
Article List |
Disclaimer |
Next Page |
Inkscape Tutorial: Five Inkscape Essentials |
|
by Meemaw I found this tutorial while I was looking for some technical information about Inkscape, and I thought maybe there were more than just me who didn't know some of these methods. As I've said before, I don't know everything about Inkscape, so I'm constantly searching for articles or tutorials to expand my knowledge (I believe I actually only know enough to be dangerous!) Erasing in Inkscape Every time I chose the eraser tool in Inkscape, I was disappointed because it didn't work like I thought it should. Just goes to show what I just said about not knowing everything. Technically, you can't "erase" with vector design. Everything is based on points and lines, so you'll actually have to add/change the points in order to give the illusion of erasing. Let's see how we do this using a circle: 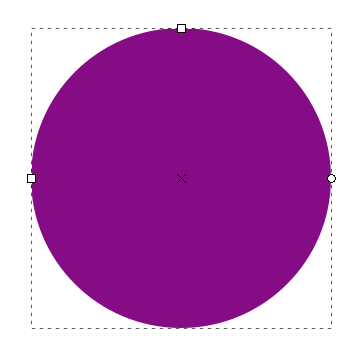 Choose the Eraser tool, change the mode to Cut out from objects, and set the brush Width: 25. Erase across your circle.  Yikes! That's not what I wanted at all! Using the eraser added about 100 nodes to our simple circle. It also looks really rough. 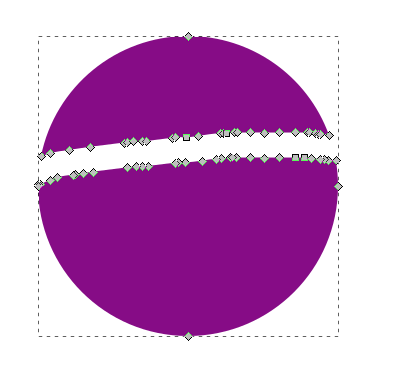 The best way to erase in Inkscape is to use boolean path operations. Instead of the eraser, we'll be using the Pen tool to draw a line similar to the previous eraser scrub. The good thing about this is that you can adjust your nodes before you erase. 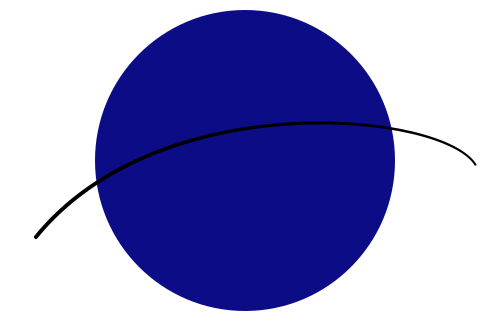 We wanted a larger area erased, so we'll adjust the stroke width. While you have the line chosen, click on Path > Stroke to Path. Then, go to your Properties window and adjust the stroke size to however wide you want. I made mine 12 but you can make it any size. 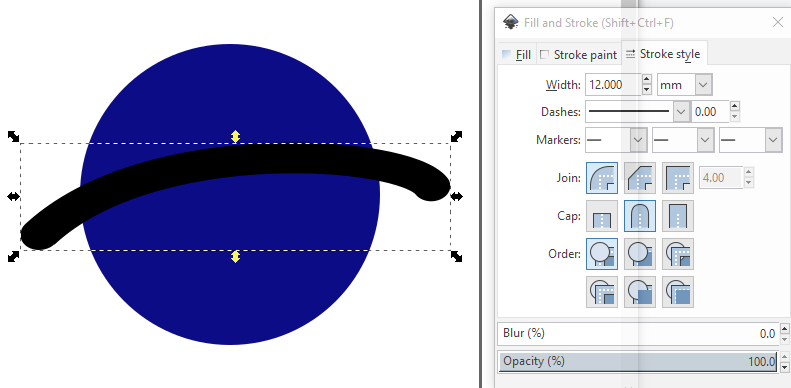 With both the circle and the line selected, go to Path > Difference complete your erasing. This looks much smoother than the first try. 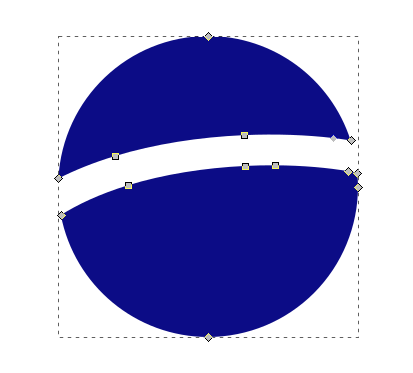 Here you can see the difference in the two methods. The one on the left was done with the eraser tool and the one on the right was done with the pen tool and Path > Difference.  Curving Text Sometimes in your graphics creation, you want something that's not just straight text, but you want it to have some shape to it. You can draw a line to illustrate the curve you want your text to have, but what to do next? Fortunately, I found out, this is fairly easy in Inkscape. Create your text, configuring it however you want, then draw a line with the bezier tool, and edit the line so it has the curve you need. 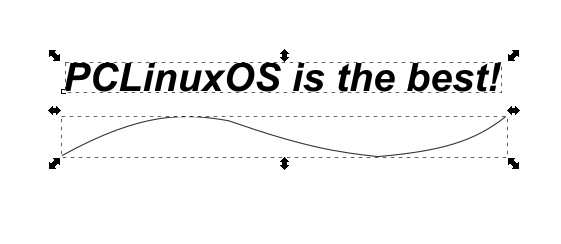 Select the text and the curve, then click on Text > Put on Path. 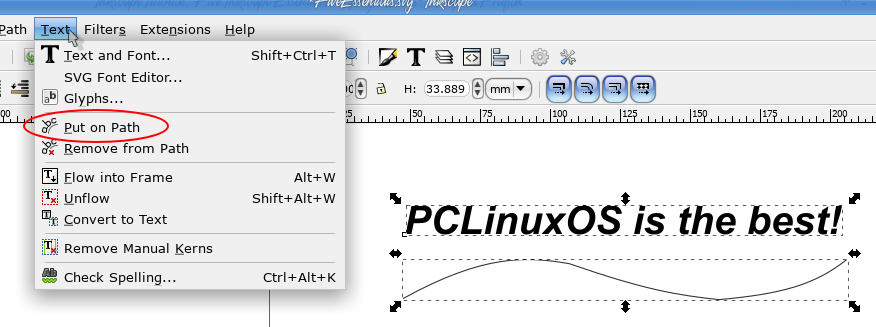 You can change the color of your line (or make it transparent) so it's not visible in your project. To move your text easily to where you want it, you should group the text and line as well.  Cropping an object Sometimes you want to use a certain object but it needs to be cropped. In other programs, you just draw the rectangle and choose "Crop", but Inkscape doesn't work that way, so we'll have to do it differently. Import the object you want to use, and size it down to the size you want. I have an image of a penguin I want to use for a Christmas project, but I only want the head, so I will import the image, then draw a rectangle (or even a circle) over the area I want to use. I made the rectangle a little transparent so I could see what I was cropping. 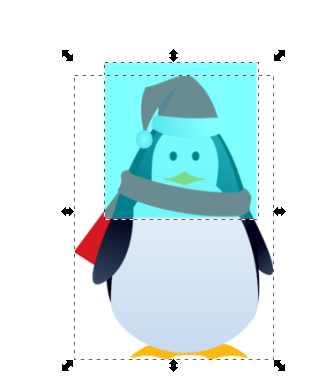 Select the image and the rectangle (making sure the rectangle is on top) and click on Object > Clip > Set. Everything within the rectangle will be visible, and everything else will be invisible. What makes this nice is that you don't have to stop, open another program, and crop your image there - you can stay in Inkscape.  Merging Layers The first thing you need to know is that merging layers in Inkscape doesn't work like it does anywhere else - so let's look. I have drawn some rectangles and circles in two layers. The rectangles are in layer 1 and the circles are in layer 2, above layer 1. Open the Layers toolbox to get started. 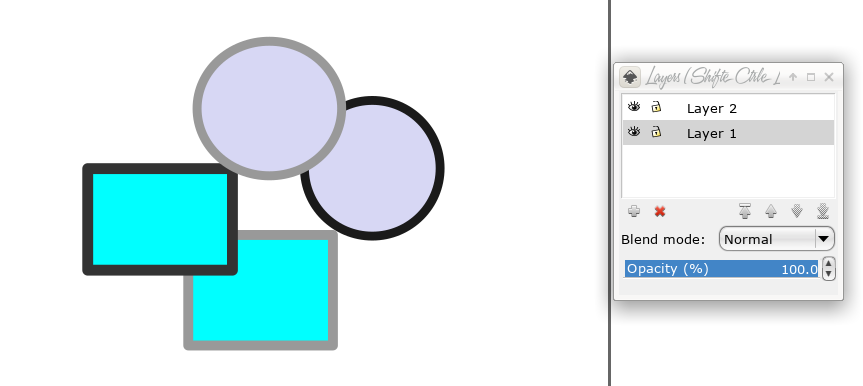 Make sure both of the layers you want to merge are unlocked. Select them all and use <CTRL>+X to cut them.  Now we have a couple of choices: we can paste <CTRL>+V our objects to an existing layer, or create a new one. I chose to paste them all on layer 1. I will then delete layer 2 since it has nothing on it. Tracing A Photo This one might not be used so much, but it looked fun, so I left it in the list. We'll use Trace Bitmap to trace a photo. Import your photo and make sure it's selected. I used a photo of our favorite editor and his lovely wife. 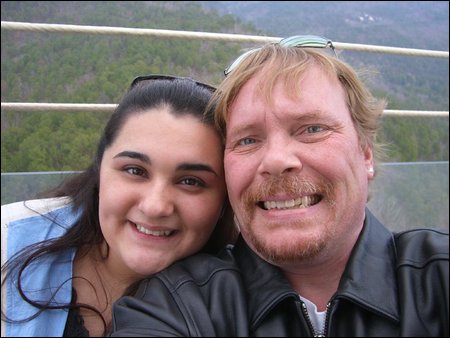 Now, choose Path > Trace Bitmap and you'll get a menu. Brightness cutoff 0.450 is default, so I left it there, then clicked OK. You might play with the settings if it's too dark or too light. I'm sure that it depends on the photo. 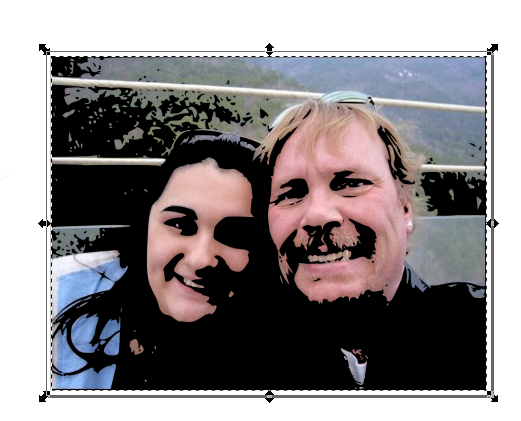 The generated vector drawing will be lying on top of the original photo, but you can grab it and move it. Here, I have moved it to the right of the original photo. 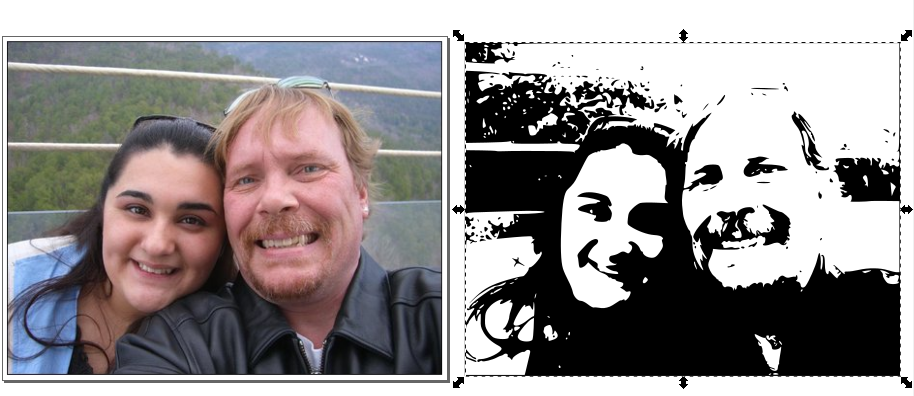 Of course, now that it's a vector drawing, you can do all sorts of different things to it if you wish, even changing the color. 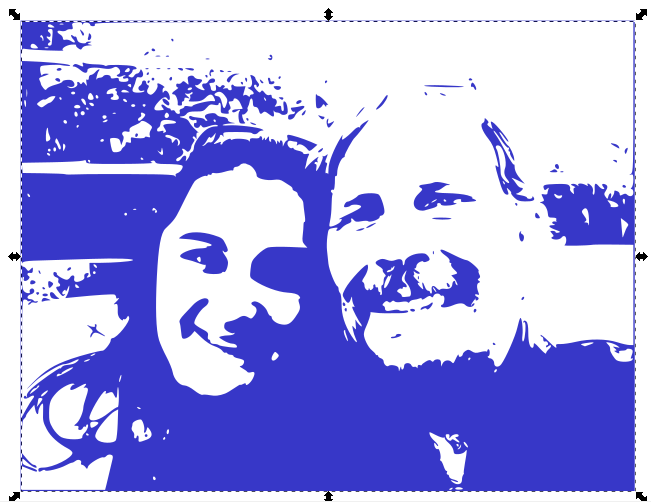
|