| Previous
Page |
PCLinuxOS
Magazine |
PCLinuxOS |
Article List |
Disclaimer |
Next Page |
GIMP Tutorial: More About Masks |
|
by Meemaw I was talking to some of the guys in PCLOS-Talk the other day, and they were talking about GIMP, and how they were wanting to understand masks. They wanted to learn more about how they worked, and told me that one of my future tutorials needed to cover that. In my research, I discovered that I had already done a tutorial about masks in the August, 2013 issue, but that's been a while, so I will revisit the subject here. As I said in the first article, a mask is a layer you can add to your project to affect certain parts of it. However, instead of being another layer, the mask is attached to a layer and affects the pixels on that layer. It's used to block or show the pixels on the layer it is part of, so your project is changed in some way. According to the online book, Grokking the GIMP, layer masks are special layers that are only 8 bits deep and that represent the alpha channel of an image layer. Now I'm not quite sure I understand it when stated that way, but it is a special layer that can be manipulated to change the image. To add a layer mask, open the image you want to use. In the layers dialog, right click on the layer where you want the mask. A menu will open , and click on Apply Layer Mask. You'll get the window shown:  In my first article, I reviewed a couple of methods of using the layer mask to affect a photo. The first was a black layer mask, which made the layer invisible, showing the desaturated layer below. Then we painted with white to show specific areas of color in the same layer as the mask. In one of the projects, I changed the mask itself to a gradient (grey to black, so the top left of the photo was partially colored and the bottom right was black & white like the desaturated copy below), then painted the flower with white to highlight it. Here is another example of the first kind, using the tulips in my yard. 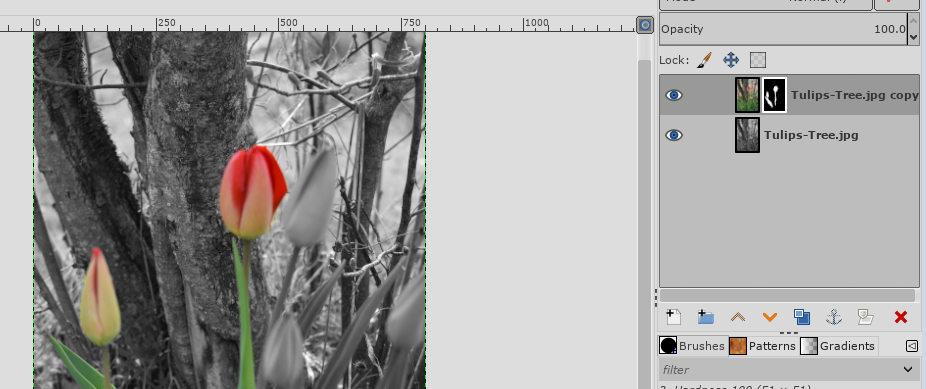 In each instance I used a black layer mask and painted it with white, essentially covering up the layer then exposing selected areas of it. A white mask does the opposite: it makes the layer visible. Painting it with black hides that part of the layer, revealing the layer below. On the following photo, I put the desaturated layer on top and used a white mask, painting it with black to expose the color photo below. 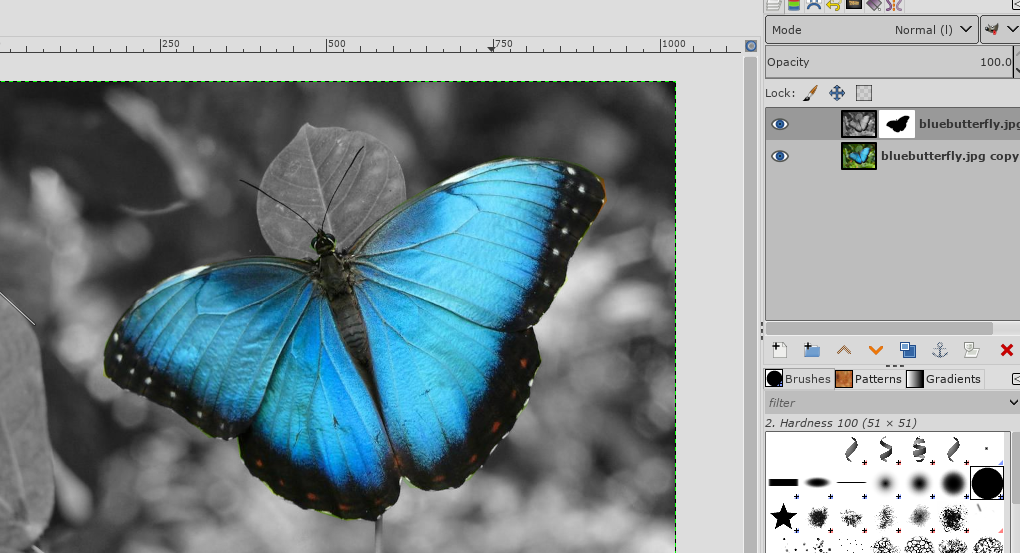 The dramatic effect above can be done with either a black or white layer mask. You just have to place the desaturated layer in a different spot. I can also use this tool to quickly erase the background from a photo that has just the picture I want to use elsewhere. We went to an auto auction a few years ago (just to look at the vehicles) and I snapped this picture: 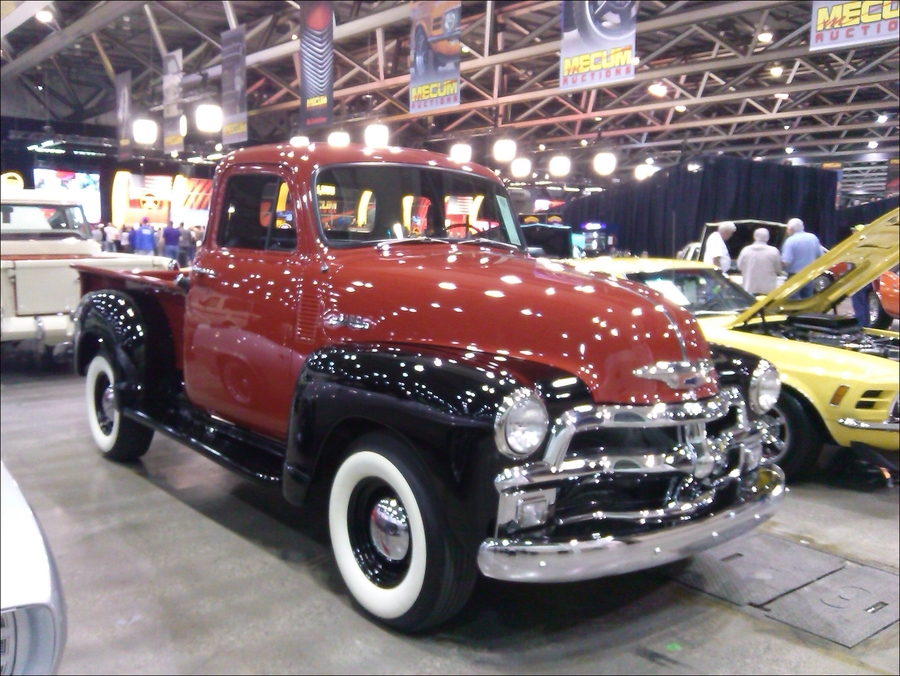 If I want to use only this truck in another project, I will want to get rid of the background. Open it in GIMP, and apply a white layer mask to this layer. Notice in the image below that I have also selected it with the Lasso tool. Go to Select > Invert to change the selection to the background. The white blob in the top left corner is what happens when I start painting with the eraser, but if I use the paintbrush with black, the background disappears (top right corner). When it is exported, only the truck shows. An extra added attraction is that if your hand slips and you run over the truck, it doesn't get erased, because it isn't in the selection. 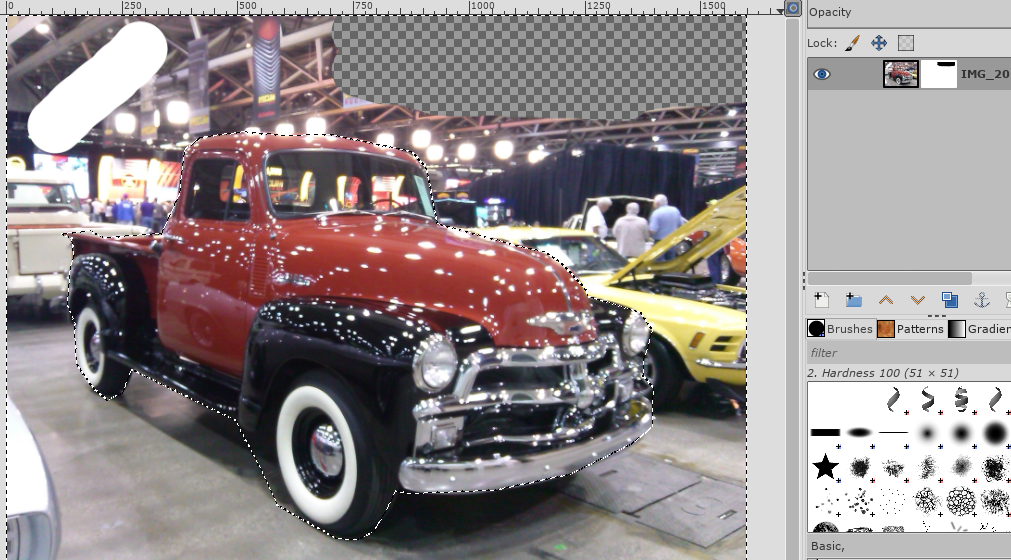 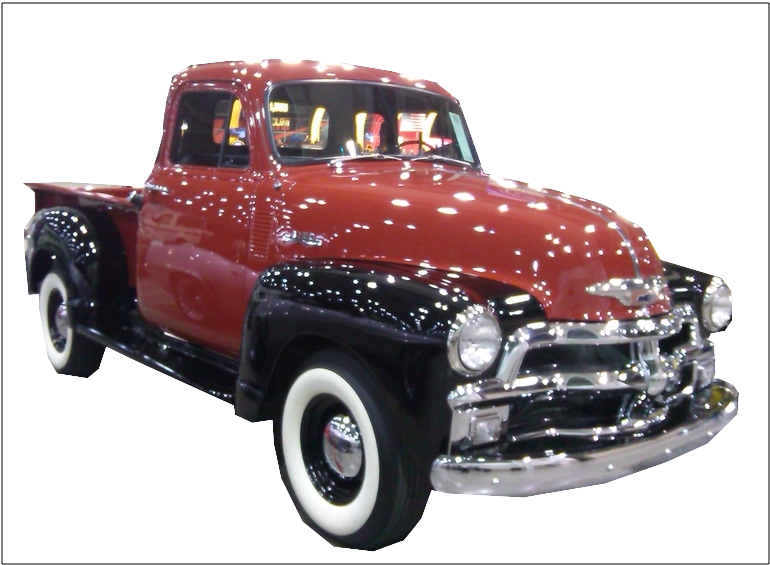 You could also use another tip: if your object can be outlined relatively easily with one of the selection tools, you can then bucket fill your selection with black instead of painting it in with the brush. I use the Lasso or Intelligent Scissors most, but you can also use the Paths tool. It is much faster and more accurate than painting! I used that on the butterfly photo, but the truck and the flower photos would be a bit more difficult (because there are more detailed edges). As you can see above, I didn't outline the truck very well. If I was going to use that in another project I would have to be much more careful. However, when I get the truck outlined correctly, I can invert the selection, then bucket fill with black. If you press Delete, the background will disappear, but replaced with a white background (I started with a jpg file, which doesn't use transparency). Then you could export it as a png. When the online book was written there were only 3 choices in the Layer Mask window. Now there are 7, and I'm still learning. The book says that the layer mask will only work if the photo has an alpha channel, and there is a choice to add one if needed. We'll revisit this again, but I need to learn more first. |