| Previous
Page |
PCLinuxOS
Magazine |
PCLinuxOS |
Article List |
Disclaimer |
Next Page |
Introduction to TeX/LaTeX (using TeXLive) |
|
by phorneker So what is TeX and LaTeX? TeX is a typesetting language intended for publication of scientific and mathematical texts developed by Donald Knuth in 1978. It was used to publish books such as The Art of Computer Programming, which you can order from Amazon. The idea behind the typesetting language is for the author to focus on the actual content of the writing, and allow the computer to do the formatting and typesetting of pages.
Documents are usually structured by chapters, pages, sections, subsections, headers, lists, tables, graphics, and other elements you would embed into a document in LibreOffice or Word Perfect. The same could be said for HTML and XML languages as their basic concepts are similar to TeX. As with any programming language, TeX commands can be combined into stylesheets and defined as macros, similar to defining procedures and functions in programming languages such as C, Pascal, Python, and Java. Leslie Lamport developed a system of such files in 1985, and released that project as LaTeX. Current TeX distributions such as TeXLive (installable from the repository, or from a TeX User Group DVD if the texlive-dummy package is installed) integrate the LaTeX system of macros into the TeX distribution. Together, the system is useful for more than just typesetting mathematical publications. (I have used it to typeset a form of my resumé.)
The TeX typesetting system has several components, two of which I already mentioned, the ,b>macro system for combining TeX commands, and the TeX command language itself. Another component of TeX is the WEB programming language, designed for literary programming (that is typesetting), originally written in Pascal (for teaching of good programming practices), then ported to C (for the CWEB derivative, sometimes called WEBC depending on the TeX distribution) to keep up with the programming trends of the day. The WEAVE and TANGLE programs are key components of WEB with WEAVE generating the TeX documentation from WEB sources, and TANGLE generating the Pascal source code from WEB sources. (In CWEB, TANGLE generates C source code instead of Pascal.) In traditional programming languages, the documentation is embedded into the source code files. In WEB, the program source code is embedded into the program's documentation. Much of the TeX sources are written in WEB, and TANGLE is used to create the source files, which are then compiled to produce the binaries that are run in PCLinuxOS. WEB, likewise, creates documentation from the same source files. Electronic typesetting would not be complete without some way of generating the fonts (or typefaces) used to prepare the documentation for printing. METAFONT is the component that handles that task.
METAFONT is used to create the actual fonts that are used to produce the DVI output files. Fonts used in the document are generated on the fly if they have not already been done. When you first use TeX, many of these fonts will need to be generated after the initial processing of the document. Once the fonts have been generated, they are stored on your system for future use. When you installed the texlive and texlive-dist packages from the repository, many of these fonts, normally generated by METAFONT, have been installed for you saving significant time when compiling TeX and LaTeX documents. DVI stands for Device Independent and is a file format used for document preparation independent of any printer, display or typesetter used to produce the final documentation. This type of code is similar to the Java pseudo machine code generated by the Java compiler, or p-code from UCSD Pascal in the sense that an interpreter is needed to execute the code, that is, the final printed product. ...which brings us to the final component of TeX, the DVI utilities (should really be called interpreters). Much of what we do in TeX will not involve any of these DVI utilities. However, applications such as Texmaker and LyX require them to function. For PCLinuxOS, the dvips utility interprets the DVI code, and produces PostScript code for output (usually spooled to CUPS or piped to ps2pdf for PDF generation). Okular, included with KDE Plasma, can be used to read DVI files directly in PCLinuxOS. As a result, the TeXLive distribution is a very large and complex system for typesetting of documents and expect installation from Synaptic to take about an hour to download on a DSL connection. Once installed, the possibilities of what you can do with TeX is as large as TeX itself. To really understand the TeX typesetting system, you will need to obtain some actual reading material.
...and if you really want to see how large this system really is, just browse the CTAN repository (at http://ctan.org/tex-archive). Important Note about CTAN: Donald Knuth's contributions to the repository are contained in a directory with his name on it (http://ctan.org/tex-archive/systems/knuth). Material contained in this part of CTAN may not be modified without Donald Knuth's permission. (As of this writing, Donald Knuth is still alive at the age of 80!) More information on the WEB and CWEB programming language can be found at http://www-cs-faculty.stanford.edu/~uno/cweb.html. Writing Documents in TeX/LaTeX When writing documents in TeX and LaTeX, we typically use an application such as Texmaker or LyX, both of which are available in the PCLinuxOS repository. These applications make it easy to produce documents written in TeX. (LyX comes with its own format for storing documents, and saved with the .lyx extension.) As TeX and LaTeX documents are plain text files, you may use any standard text editor to write TeX/LaTeX documents. When saving TeX/LaTeX documents, it is conventional to assign either the .tex extension (for TeX) or the .ltx extension (for LaTeX) to indicate that this is a TeX/LaTeX source document. I prefer to use .tex for both TeX and LaTeX for consistency as many documents I have come across that were written in TeX and LaTeX use this file extension. Let us start with an easy (Hello World) example of a TeX/LaTeX document. Open up your favorite text editor and type in the following:
% This is an example document for TeXLive. Now save the document as hello.tex and type the following: latex hello.tex ...and look what happened:
This is pdfTeX, Version 3.14159265-2.6-1.40.17 (TeX Live 2016/PCLinuxOS) -rw-rw-r-- 1 patrick patrick 8 Jun 1 08:00 hello.aux -rw-rw-r-- 1 patrick patrick 232 Jun 1 08:00 hello.dvi -rw-rw-r-- 1 patrick patrick 2006 Jun 1 08:00 hello.log -rw-rw-r-- 1 patrick patrick 108 Jun 1 08:00 hello.tex Three files were generated from this one source file. (The .log file recorded everything that happened during the compile.) We got our .dvi file and .aux file. We need all files listed here when we generate the PostScript file for printing. The .aux file contains one instruction for the next time the latex command is run on this file. The logfile, however, requires some explanation. By default, TeXLive calls pdfTeX with the latex command.
This is pdfTeX, Version 3.14159265-2.6-1.40.17 (TeX Live 2016/PCLinuxOS) The LaTeX2e packages are loaded by default instead of the LaTeX 3 packages. LaTeX2e is an older version of LaTeX, which will do for simpler documents such as this example.
LaTeX2e <2016/03/31> Class files used by TeXLive are stored here. .cls files contain TeX coded definitions for document classes. .clo files provide options that are used when processing LaTeX documents.
(/usr/share/texmf-dist/tex/latex/base/article.cls When you run tex or latex on a document file, there will not be a .aux file.
No file hello.aux. Now, the next time latex is run on this document, LaTeX will know what to do to process this file.
LaTeX Font Info: Checking defaults for OML/cmm/m/it on input line 4. This may not be important for this document, but as you write larger documents, this type of data will come into play when problems start creeping up. To produce a PDF file, we will need to issue two commands. First: dvips hello.dvi Which generates the following:
This is dvips(k) 5.996 Copyright 2016 Radical Eye Software (www.radicaleye.com) dvips used the 10 point Computer Modern font to typeset the Hello World example. As this font was already installed with the texlive-dist package, the font did not need to be generated. And second: ps2pdf hello.ps Now we have our PDF file. We could use the lpr command on either the .ps or .pdf file to print to a CUPS printer, or we could simply use a PDF viewer to view the file. As a result, our hello.tex file has expanded to six files!
...and this is just a simple "Hello World!" document. Of course, the typical TeX/LaTeX document is much more complicated than this, but this gives you an idea of what electronic typesetting has been like. To print this example, simply type: lpr -P <name of printer> hello.ps or lpr -P <name of printer> hello.pdf ...where <name of printer> is the name of the printer queue used to configure the printer in CUPS. Basic Structure of a TeX/LaTeX Document Let us look again at the "Hello World" document.
% This is an example document for TeXLive. This is the simplest form of a document written in LaTeX. Look at the first two lines. Any line that begins with the % character is ignored by TeX. These are comment lines and are for the benefit of anyone working with the document so he/she will know what is being done with the document in terms of what is being typeset, the content itself, or anything that may need doing in the future. Just as in any programming language, anyone reading comments will understand what the code is supposed to do. The \documentclass{class}[options] line tells LaTeX what type of document is being produced here. In the example, we are producing an article. Valid types for class in TeXLive are: article, book, letter, ltnews, ltxdoc, ltxguide, report, and slides. You can supply options to these class types such as the font size and paper type. For example, \documentclass{article}[12pt,letter] tells LaTeX that this document is an article that is to be printed on letter paper using 12 point fonts (with the default being Computer Modern, a font similar to Times Roman). The ltnews class allows for the 35 basic PostScript fonts to be available when used with the lw35fonts and/or the type1fonts options. Otherwise, LaTeX will allow METAFONT to create the necessary fonts for typesetting the document. No matter what type of document you are typesetting, the \documentclass{} statement must be included for the document to be typeset, preferably at the beginning of the content. The \begin{} and \end{} statements that appear in the example tell us that TeX and LaTeX documents are structured and organized into pages, chapters, sections, subsections, and the like. All documents ,b>must contain a \begin{document} and a \end{document} statement to tell LaTeX that this is the actual content of the document. Once this has been established, we can then incorporate a hierarchy of the document itself. Hence, all TeX and LaTeX documents must start with:
\documentclass{class}[options] What we have so far is the basic skeletal structure of a TeX/LaTeX document. Everything placed after the \documentclass{} statement and before the \begin{document} statement is the preamble. The preamble is used to set any options needed to typeset the document. This includes any TeX/LaTeX extensions and packages (locally installed from Synaptic or installed from a CTAN archive). Everything placed between \begin{document} and \end{document} statements is what gets typeset. This includes titles, authors, title pages, page breaks, graphics, and other elements found in the TeX/LaTeX system (of which there are many). This was only an introduction to the TeX/LaTeX typesetting system. I have presented the framework in which TeX and LaTeX documents are started. As we can see, this is a very complicated system for typesetting structured documents, and intended for typesetting of mathematical and scientific documents. However, TeX and LaTeX can be used for most any kind of document (but not all) that you can do on products such as LibreOffice, AbiWord or WordPerfect. Unlike those products, TeX and LaTeX allows you to focus on your content instead of on the formatting of the documents. For the next article, I plan to use Texmaker to build a document that would normally be created with LibreOffice. Texmaker: An Easier Way to Make TeX/LaTeX Documents Just as there are integrated development enviroments such as Code:Blocks, Eclipse, Lazarus, and KDevelop for applications and system programming, there are integrated development environments for TeX and LaTeX. Texmaker is one such application (downloadable from Synpatic) that makes document preparation easy. Other IDE packages available in the repository are Texworks, Texstudio, LyX, and Kile, as well as TeXmacs, which was at one time in of the repository, but now no longer is. The source package for TeXmacs, however, still remains available for building and installing on your PCLinuxOS installation.
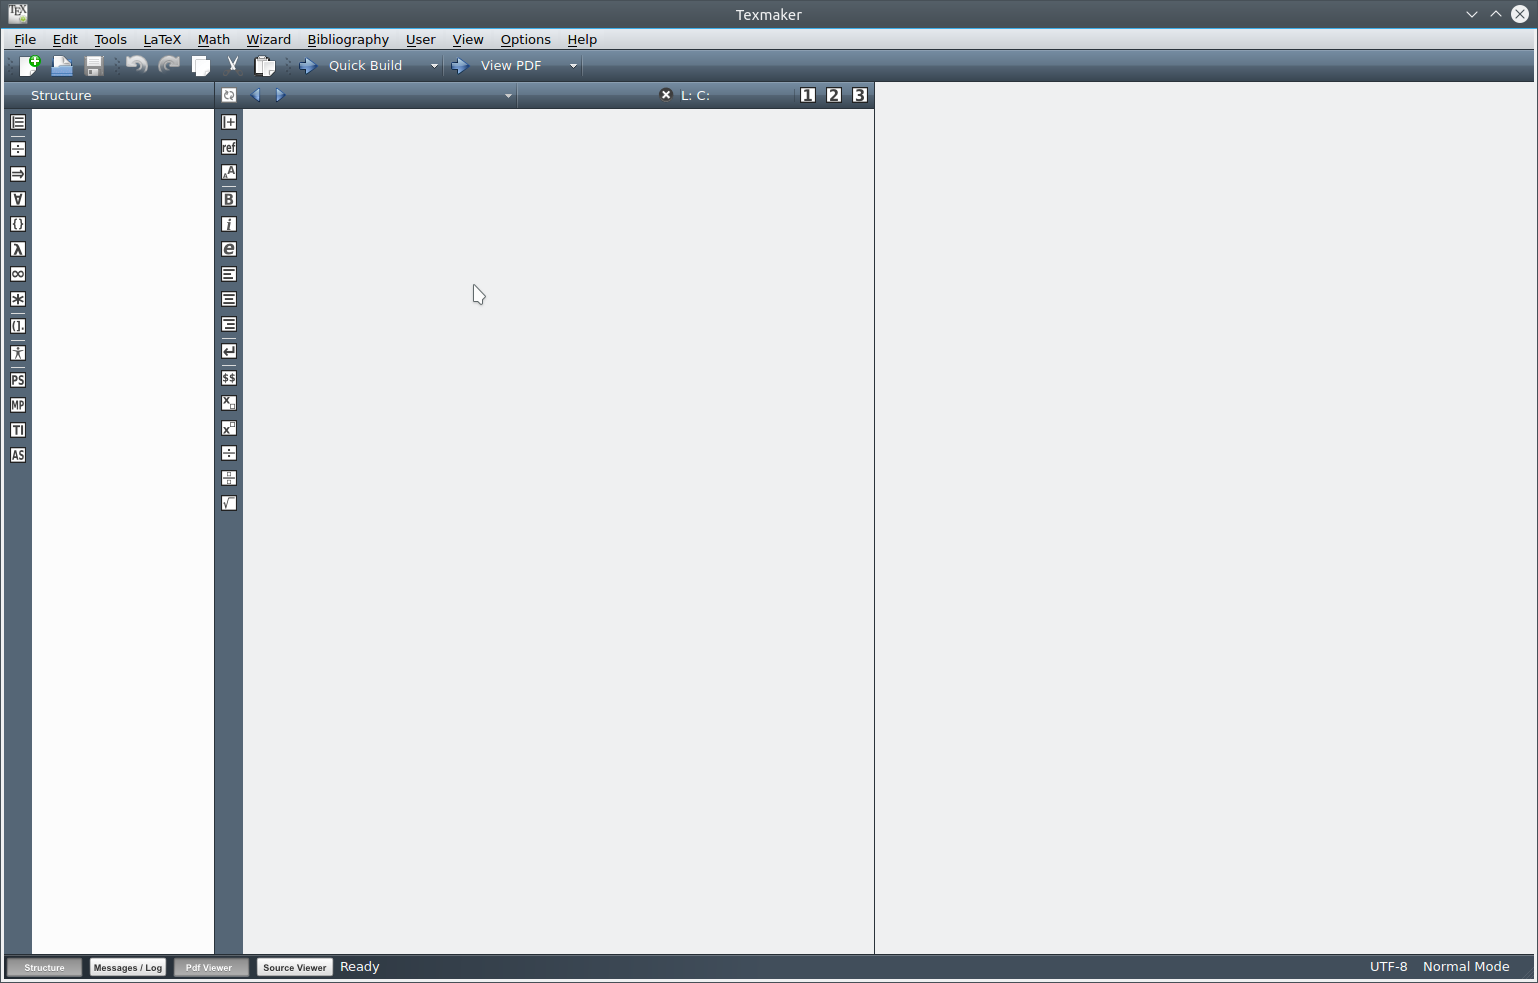 Texmaker is launched from the Office menu, and here is what you get when you launch Texmaker for the first time. There are three panels. The first panel is a multi-use panel. There is a toolbar on the left side of the panel. Normally, this panel displays the structure of your TeX/LaTeX document. The top icon in the toolbar on the upper left side of this panel is used to display the document structure. The other buttons in the toolbar are used to select special characters for insertion into your document. Each button opens a palette of special characters in the panel. The second panel is where you edit TeX/LaTeX documents. The toolbar on the left hand side of this panel activates functions, not unlike the formatting toolbar found in LibreOffice. Some of these buttons activate popup menus. You can load multiple TeX/LaTeX documents into this editor, and switch between them with the toolbar at the top of this panel (as opposed to the top panel of the entire application window. The third panel is a preview of your finished "typeset" document. To see anything in this window, you need to "Quick Build" the document and then select "View PDF" using the aptly labelled buttons located on the main toolbar. These buttons apply to the document currently being edited. 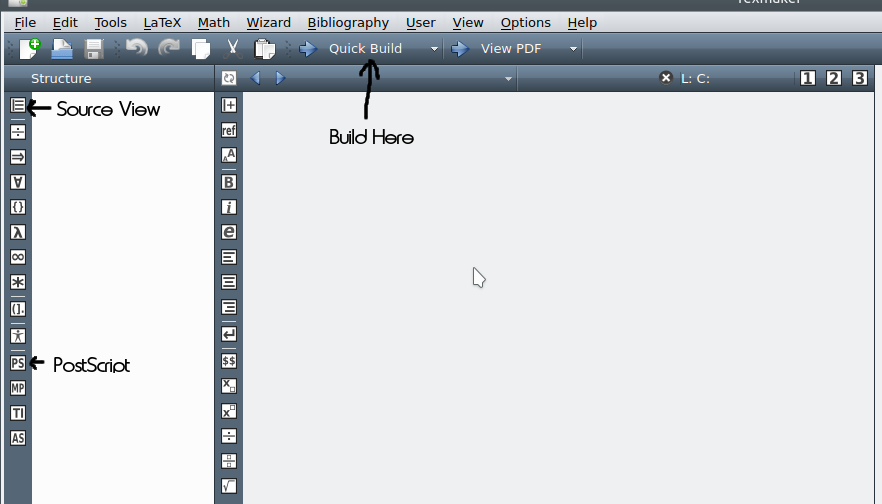 On the main toolbar, we have some familiar icons in their familiar locations, namely the ,b>New Document, Load and Save. Next, there are arrows where we can switch between documents. The next three buttons are for copying, cutting and pasting text from the clipboard, as with any word processing application. The arrow buttons next to that are for the compiling (building) of the TeX/LaTeX document, and for viewing the result in the right panel. Ordinarily, we select File → New to create a new document. We can do that, but we get a blank document, the same as what we see when we launch Texmaker. To get a document we can really work with, we must use the Wizard menu. 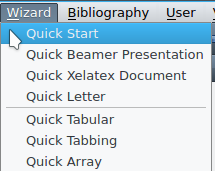 Quick Start is what most of us would normally select to begin a new document. If you wish to write a letter, however, you would select Quick Letter. 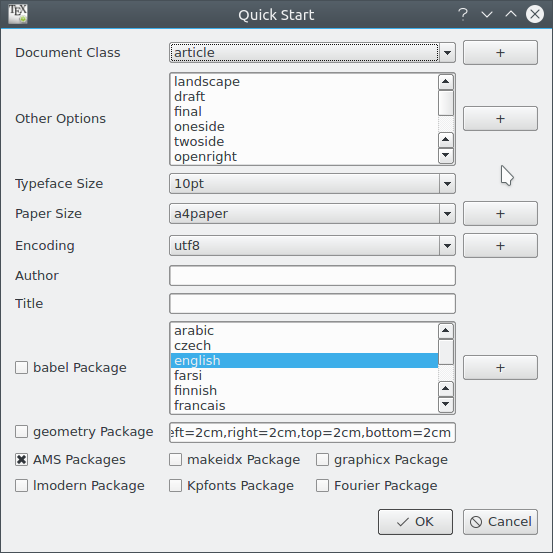 As we can see, there are enough options available to be able to typeset most any kind document you wish. The buttons labelled with a plus sign allow you to add features such as classes, paper sizes, character encoding and languages, provided you have the support files for such options installed in your TeXLive installation. Texmaker loads the support files from /usr/share/texmf-dist/tex/latex/base/. As shown, we would create a article, with portrait orientation on the page, using a 10 point Computer Modern font, on A4 size paper (about 8 x 10.5 inches). We have the ability to change any of these parameters using this dialog box. Most of us will want to select letterpaper for paper size. If we select the Geometry Package checkbox, we can change the margins of the overall document. In this examples, we get 2 centimeter margins on the printed page. The parameters here can be changed as well. By default, the class packages from the American Mathematical Society are selected by default. Selecting the graphix package allows graphics to be embedded into TeX/LaTeX documents. Other than that, all you need to do is fill in the author and title fields. Let us close this dialog and create a new example document. (Click on OK to do this.) 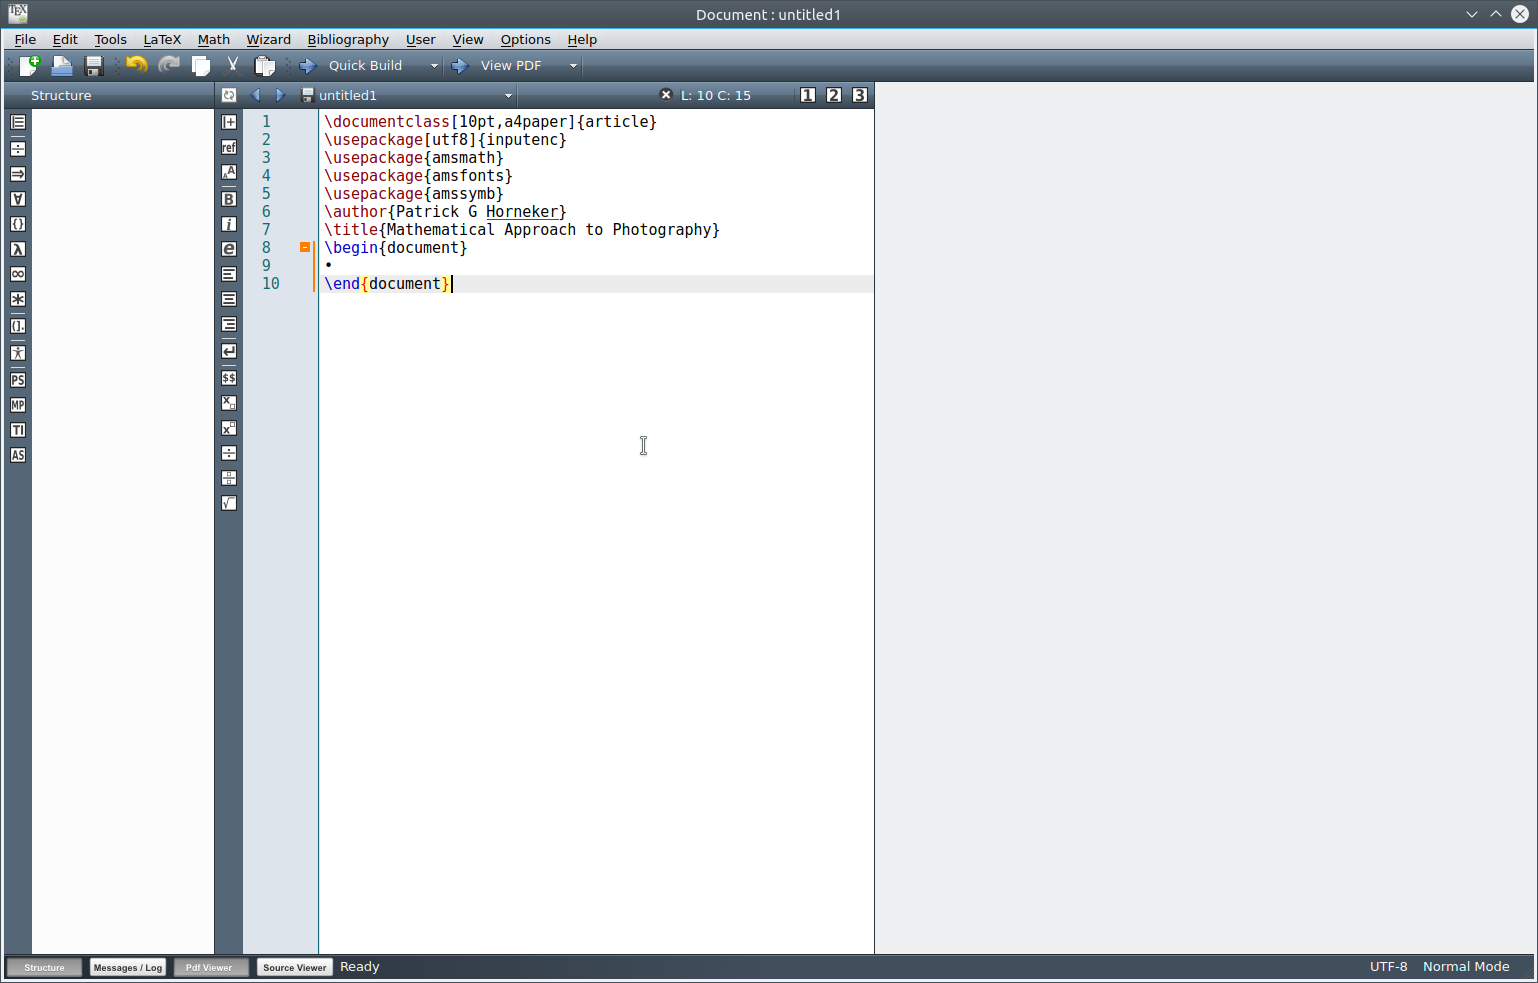 Look what happened. Our new example document has a preamble.
\documentclass[10pt,a4paper]{article} We can make changes to this here the same as with any other text editor. For example, we can change the \documentclass[]{} statement. We can replace a4paper with letterpaper for output of the document to 8.5 x 11 inch paper. We now have:
\documentclass[10pt,letterpaper]{article} Packages in TeX/LaTeX are archive files (with the .ins extension) containing fonts, classes, stylesheets, and other elements usually installed from a CTAN repository. Many of such packages have already been installed when the texlive-dist package was installed from Synaptic. The tlmgr command is used to manage packages installed in TeXLive. The \usepackage{} command is to TeX/LaTeX what #include is to C and C++. \usepackage{} adds commands and functionality to TeX that allow the document to correctly compile and achieve the desired result. For this example, the contents of the inputenc package are loaded, and with the [utf8] option, only support for UTF-8 encoded text is included and used by TeX. If a package is used without options, the entire package and all of its functionality is incorporated into TeX for use with the document being compiled. For the Quick Start dialog, the amsmath, amsfonts, and amssymb packages are used by TeX/LaTeX. These packages were created by the American Mathematical Society. AMS is a major contributor to TeXLive and other TeX distributions. More information about the AMS and its use of TeX can be found at http://www.ams.org/publications/authors/authors. The \author{} and \title{} statements define the author and title of the document. As these statements are part of the preamble, they only define the author and title, not type set it. All of these statements make up the preamble of the document. The preamble of a TeX/LaTeX document defines variables and sets up the environment to be used when typesetting.
Now, we have the framework necessary to create our new document. You would want to change the title and author to whatever you want. For this example, I will change the title to "My First LaTeX Document". So now, we have:
\documentclass[10pt,letterpaper]{article} If we tried to Quick Build this, we will end up with a document with a dot located two inches from the left margin and two inches from the top margin. What gets typeset here is everything between \begin{document} and \end{document}. 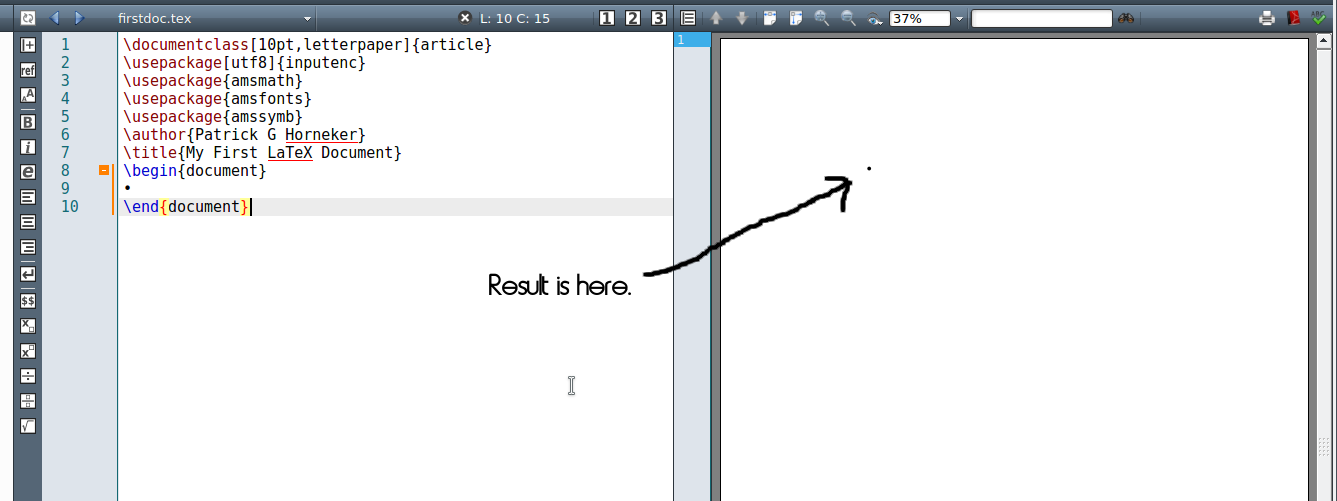 By default, TeX documents are typeset with two inch margins on all sizes. The geometry package allows you to define your page margins. The margins were defined like this in order to accommodate for binding of TeX documents into books. Donald Knuth's The Art of Computer Programming was published this way. Obviously, we want more than just a dot we can barely see. We need to place the cursor between the \begin{document} and \end{document} statements. We could type some sample text to replace that dot. When typeset, the text will show up in the right panel in a 10 point Computer Modern font. But typesetting is much more than that, and documents would be rather boring if we only used plain text. Unlike word processing, TeX and LaTeX have characters that have special meaning, namely: &, $, #, %, _, {, }, ^, ~, and \. If you attempt to build TeX documents with these characters in plain text, you will get error messages instead of text output, unless you preface the character with a \. For example, to typeset an ampersand, you would typeset \& to get a & on the printed output. When it comes to spacing of characters, you only need to set one space to typeset one space, and one carriage return to typeset one carriage return (which happens to also mark the end of a typeset paragraph). If you attempt to typeset multiple spaces, only one space will actually be typeset. TeX and LaTeX will automatically break lines where appropriate so you never have to worry about how a line of text will fit on a physical page when the line exceeds the length of the page. 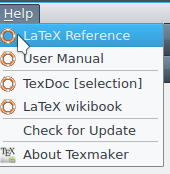 Texmaker comes with some useful documentation. The Help menu has links for four useful documents, each of which opens up in a separate window. The LaTeX Reference is a comprehensive guide to LaTeX commands, how they are used, and all available options that can be supplied to the commands. The User Manual is just what we would expect of any user manual. It goes into detail on how Texmaker is used and configured. TexDoc is a search engine for the TeX documentation. And finally, LaTeX wikibook opens up the LaTeX section of Wikibook (in Firefox or whatever browser is the default for your PCLinuxOS installation). Some Basic LaTeX Commands Before we start typing our next document, there are some basic commands we need to know. TeX documents are structured into parts, chapters, sections, subsections, and subsubsections. As explained earlier, there are characters that have special meanings in TeX. There are commands that allow you to enter such characters in your document. There are LaTeX commands that perform basic text formatting such as bold, italic, and underline. Let us go back to our TeX/LaTeX document and its basic structure. All documents begin with this line: \documentclass[options]{class} Where options and class are specified. The class is required for the command to be valid. For this example, we used the article class. Options are modifiers that tell TeX what to use. For our example, we used 10pt,letterpaper. This tells TeX to typeset this document in 10 point Computer Modern on letter size paper. Next, we have a preamble, which is used to setup the typesetting environment for the document.
\usepackage[utf8]{inputenc} ...and finally the document itself. \begin{document} We enter the actual content and formatting commands here. \end{document} The first thing we need to do is to get the title to appear in the document. In our example, we need to get rid of the dot that is in the document. Simple highlight the dot and delete it. The cursor should now be where we need it to be to begin the document. Commands in LaTeX typically begin with a forward slash, and tell TeX that the forward slash is the beginning of a command, or is to typeset one of the special characters (including another forward slash) in the document.
The \maketitle command is used to create the title of the document at the beginning of the document. You could type the statement in, or select \maketitle from the LaTeX menu to insert the \maketitle command. Now, let us save this file, then compile this document with the Quick Build command. (The right arrow button next to "Quick Build" does the job.) Look what just happened. 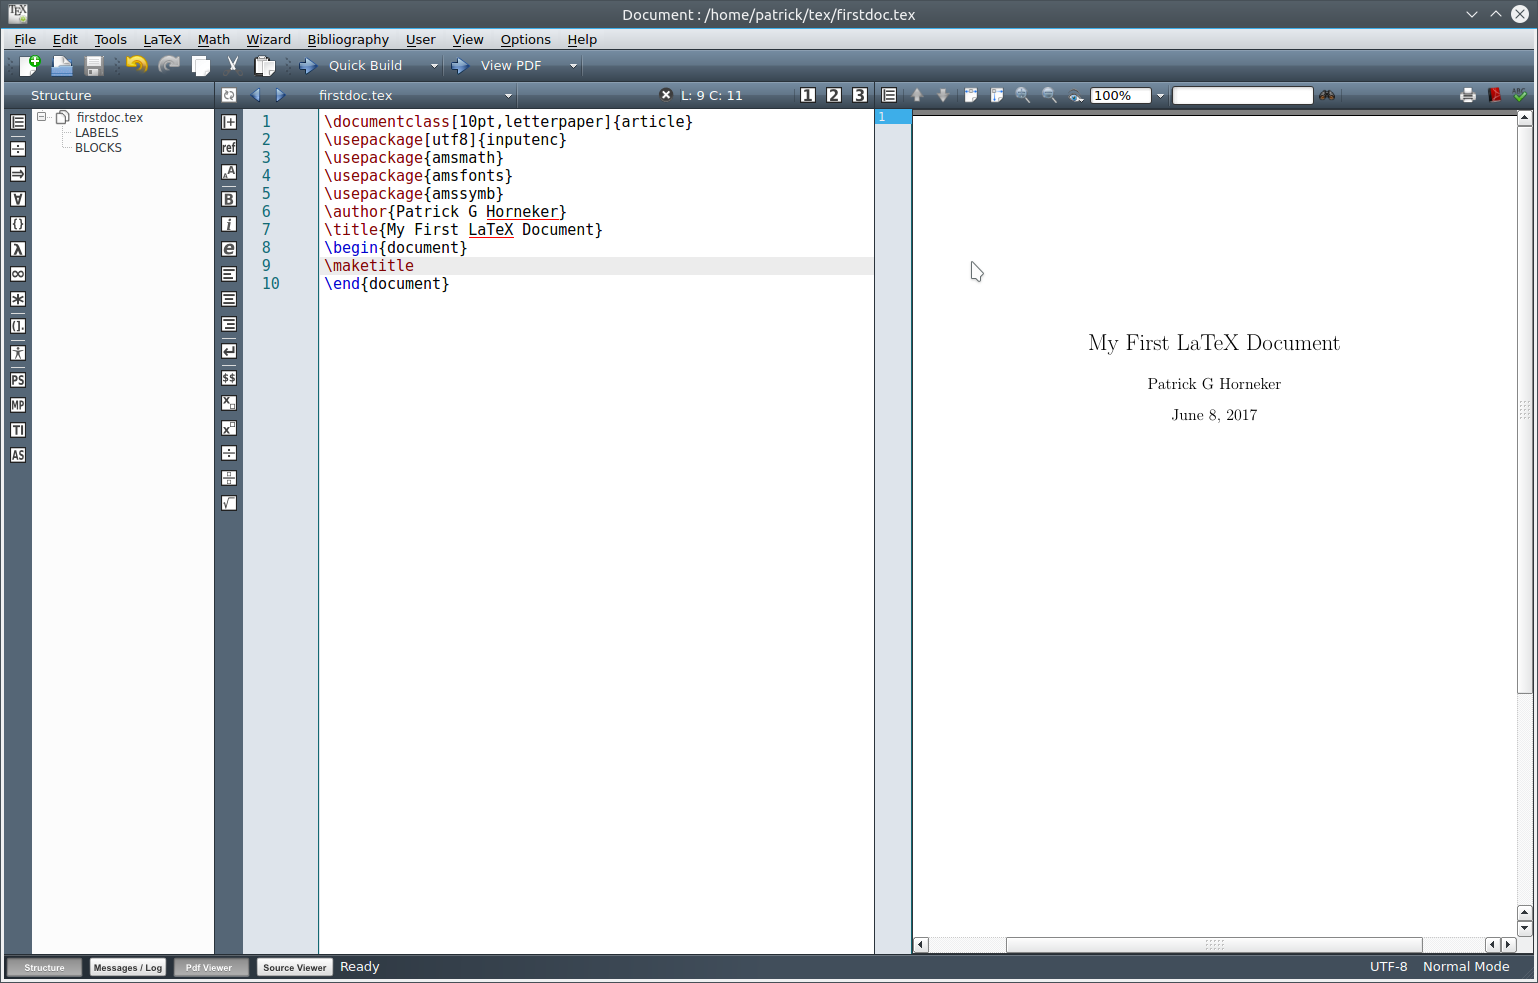 The preview panel automatically updated to reflect the state of the document we are editing. Here we have the title of the document and author, both of which were defined in the preamble. The date shown is the date this document was last built with TeX. Typically, the \maketitle command is placed at the beginning of the document, just underneath the \begin{document} command. In fact, this is the only place where the \maketitle command should be in any TeX document. In a article class document, we have sections, subsections and subsubsections. Pages and chapters only make sense for documents of the book class. The \section{} command is used to label sections in your TeX/LaTeX document. These are automatically numbered when the document is compiled in TeX. The only requirement here is the actual title to be typed within the {}. If you do not want sections to be numbered, use the \section*{} command instead of \section{}. For our example, we could type in: \section{This is the First Section} Followed by \section{This is the Second Section} So our document reads as follows (without the preamble for readability):
\begin{document} The indentation is not required here and is included for readability of the source document. Texmaker gives you a bit of help here in the form of tooltips. As you type commands in, Texmaker gives you hints in the form of a popup menu. Selecting anything from the popup menu here will complete the command, making it easier to create your document. Also, if you indent, Texmaker will automatically sense that and will indent the next command you enter. After you select Section from the popup menu, the dot inside the parameter is highlighted, and you simply type in the parameter in place of the popup. Now, let us save and build the document. 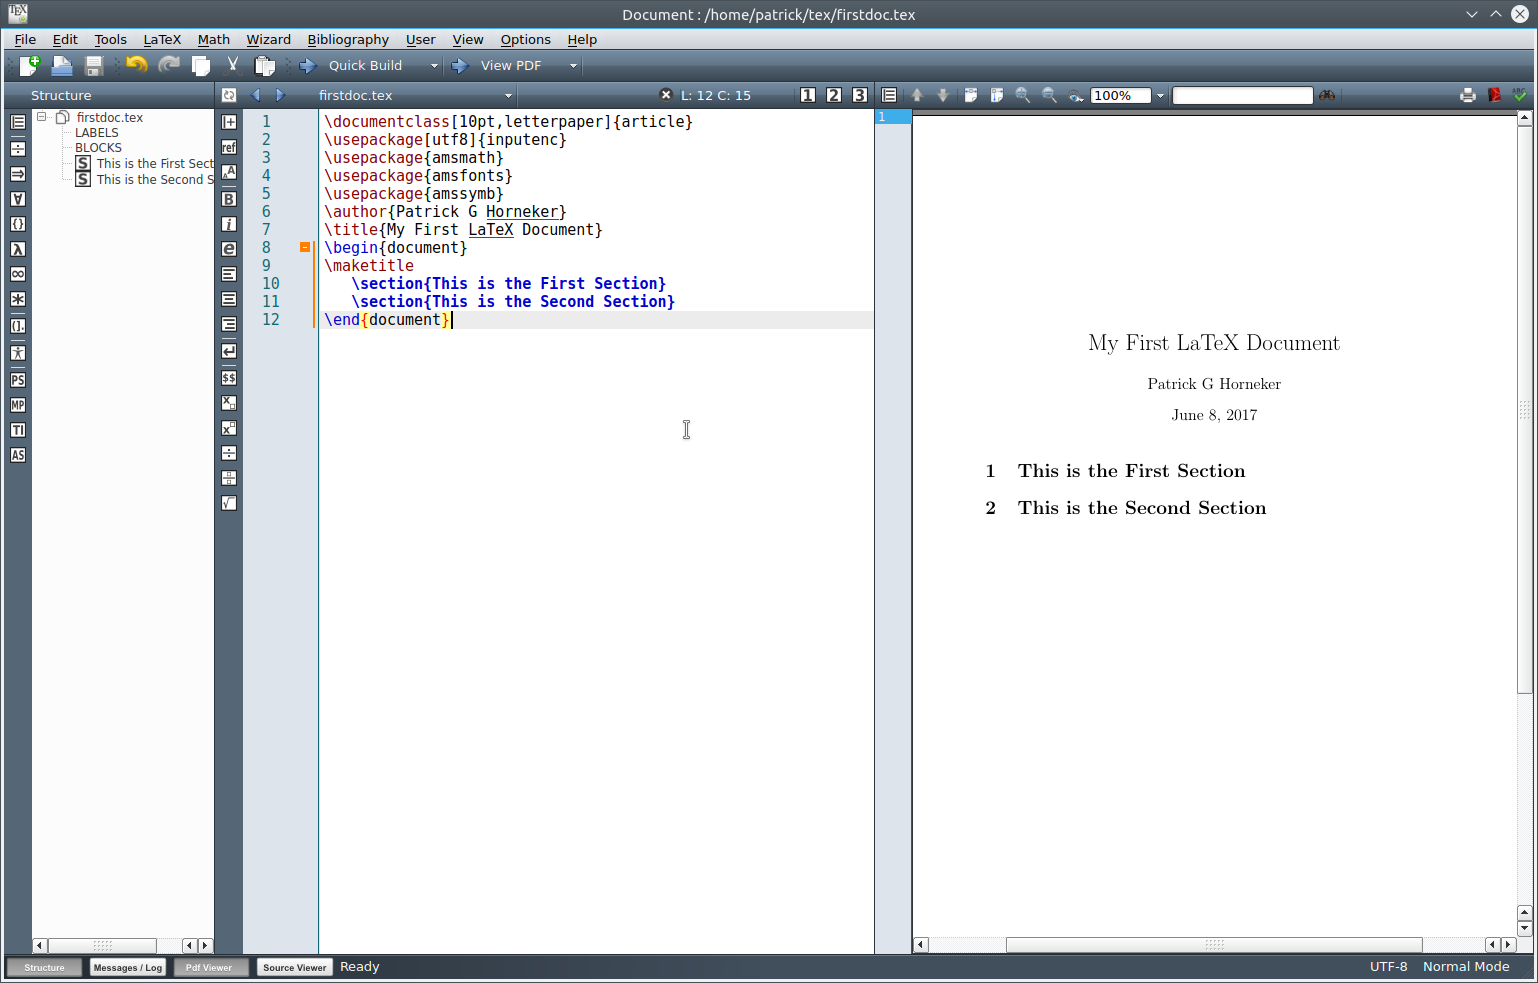 On the preview panel, we can see the immediate changes to the document. But look what else happened. The left panel of Texmaker now has two new entries in the document structure, namely the sections we have created. Texmaker shows us what the finished product will look like and how it is structured as we create the document. (This is why I prefer to use this product as opposed to Kile, which has a preview, but only when it is requested.) Had we used \section*{} instead of \section{}, the numbers of the sections would not have appeared in the document. Entering plain text here will simply typeset the text from the left margin to the right margin. This will happen no matter what sections, and subsections are defined. The result may not be what you want the document to look like. When typing paragraphs in LaTeX, it is a good practice to always begin with the \paragraph{} command. This allows you to organize each paragraph, and ensures the paragraph will fit into the structure of the document making the writing look as intended. The \subparagraph{} command functions similar to the \paragraph{} command, only the text is indented a bit more than ordinary paragraphs. Let us insert a \paragraph{} and a \subparagraph{} command in our document and see what happens.
\begin{document} 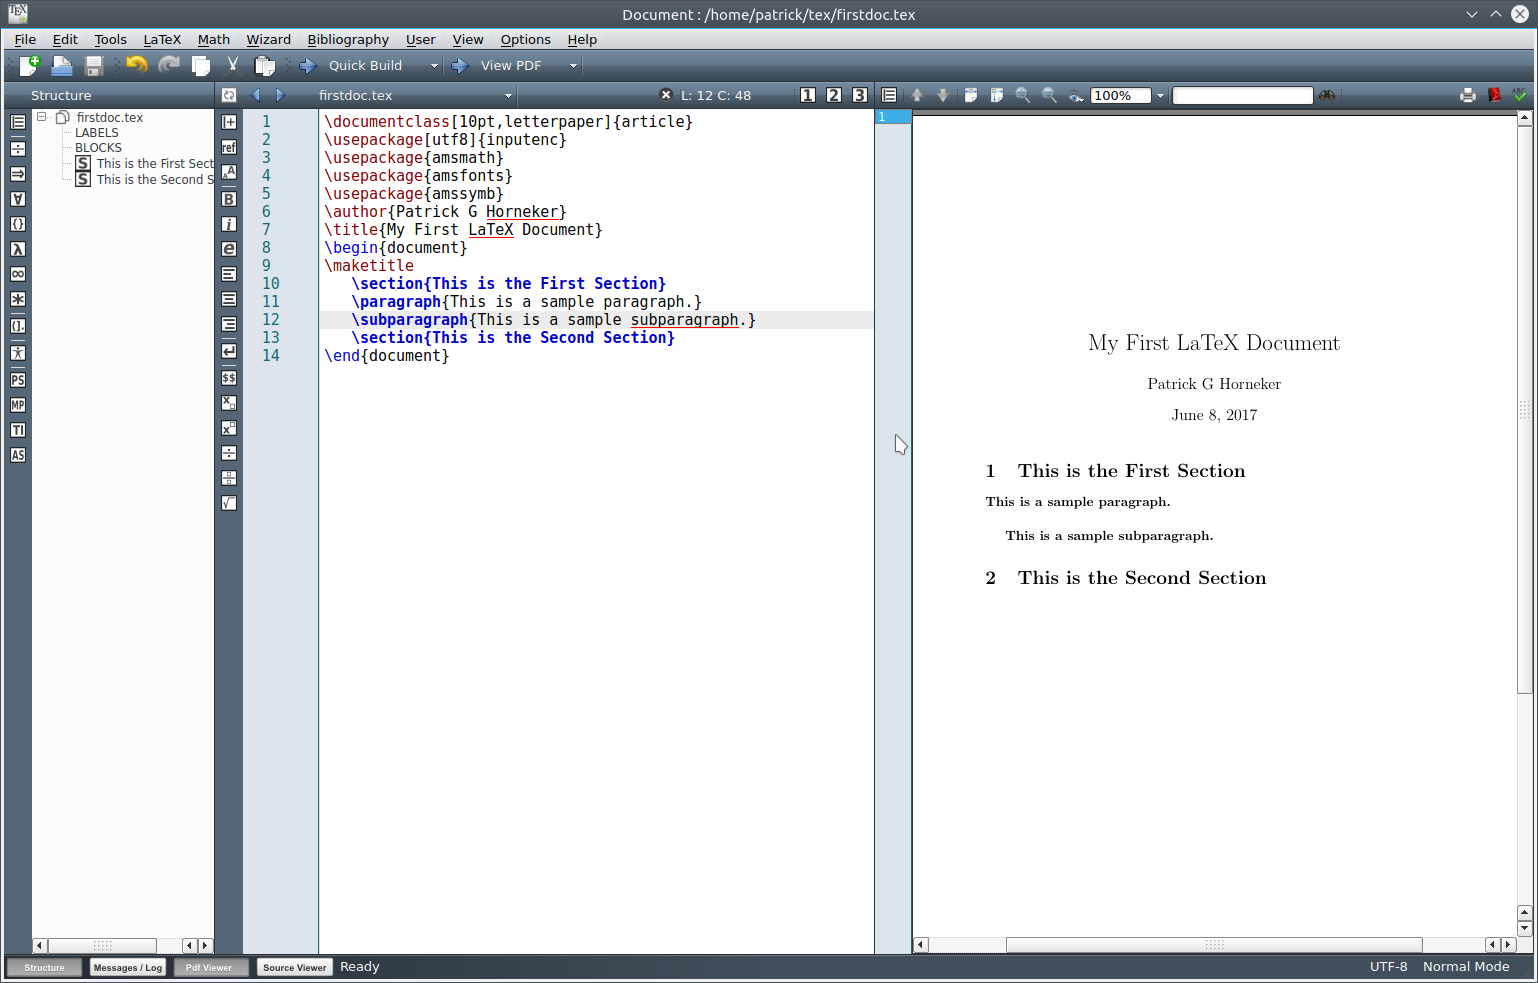 The difference between \paragraph{} and \subparagraph{} can be seen in the preview. Note the spacing and indentation between the elements in the document. TeX determines the layout of the document, so all you have to do is concentrate on the actual content. If we were to print this out with File → Print selected from the menu (or simply type Control-P), what appears in the preview will print on your printer. Selecting the LaTeX menu allows you to select commands you can insert into your document. The \maketitle command is one such command found in this menu. The commands we have discussed can be inserted by selecting the command from the LaTeX → Sectioning menu. Now, let us take out the \paragraph{} and \subparagraph{} commands leaving only the plain text. Then rebuild the document. 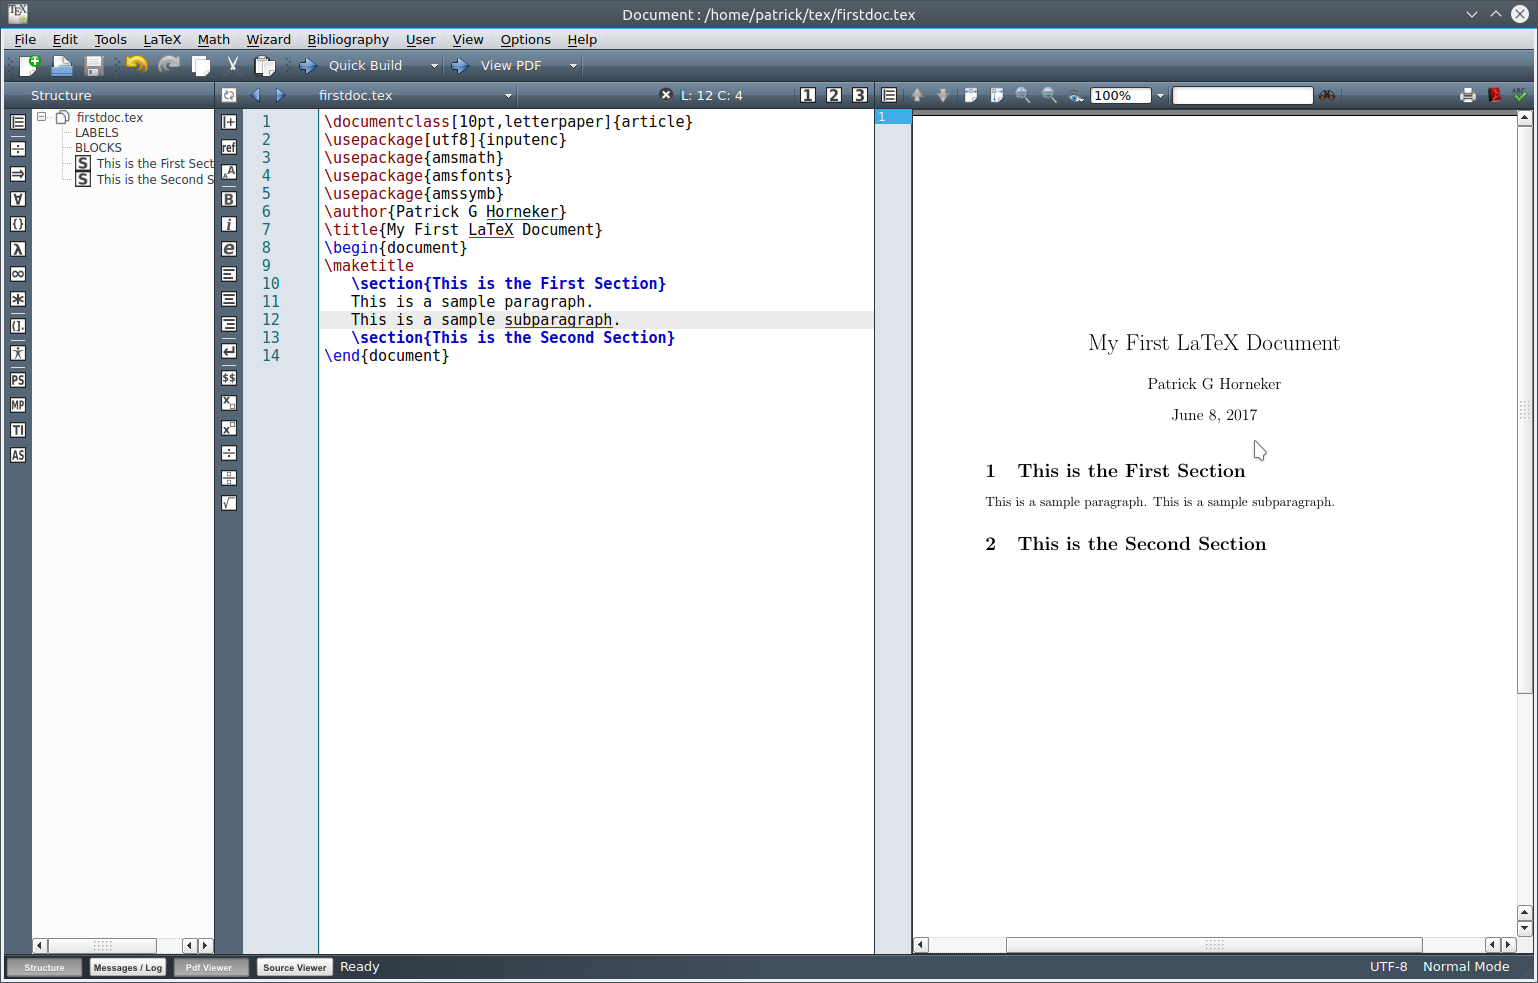 As we can see, the plain text blocks are simply typeset in linear fashion and there is no structure to speak of. This is why sectioning is so important in TeX. Suppose we want to show something as it is, or wanted to insert a quote from another writing. We would create an environment and place that block of text into the environment. Environments are to TeX what a function or procedure is to a computer program. TeX processes text in that environment according to the styles and formatting commands contained in that environment instead of the normal formatting TeX uses. 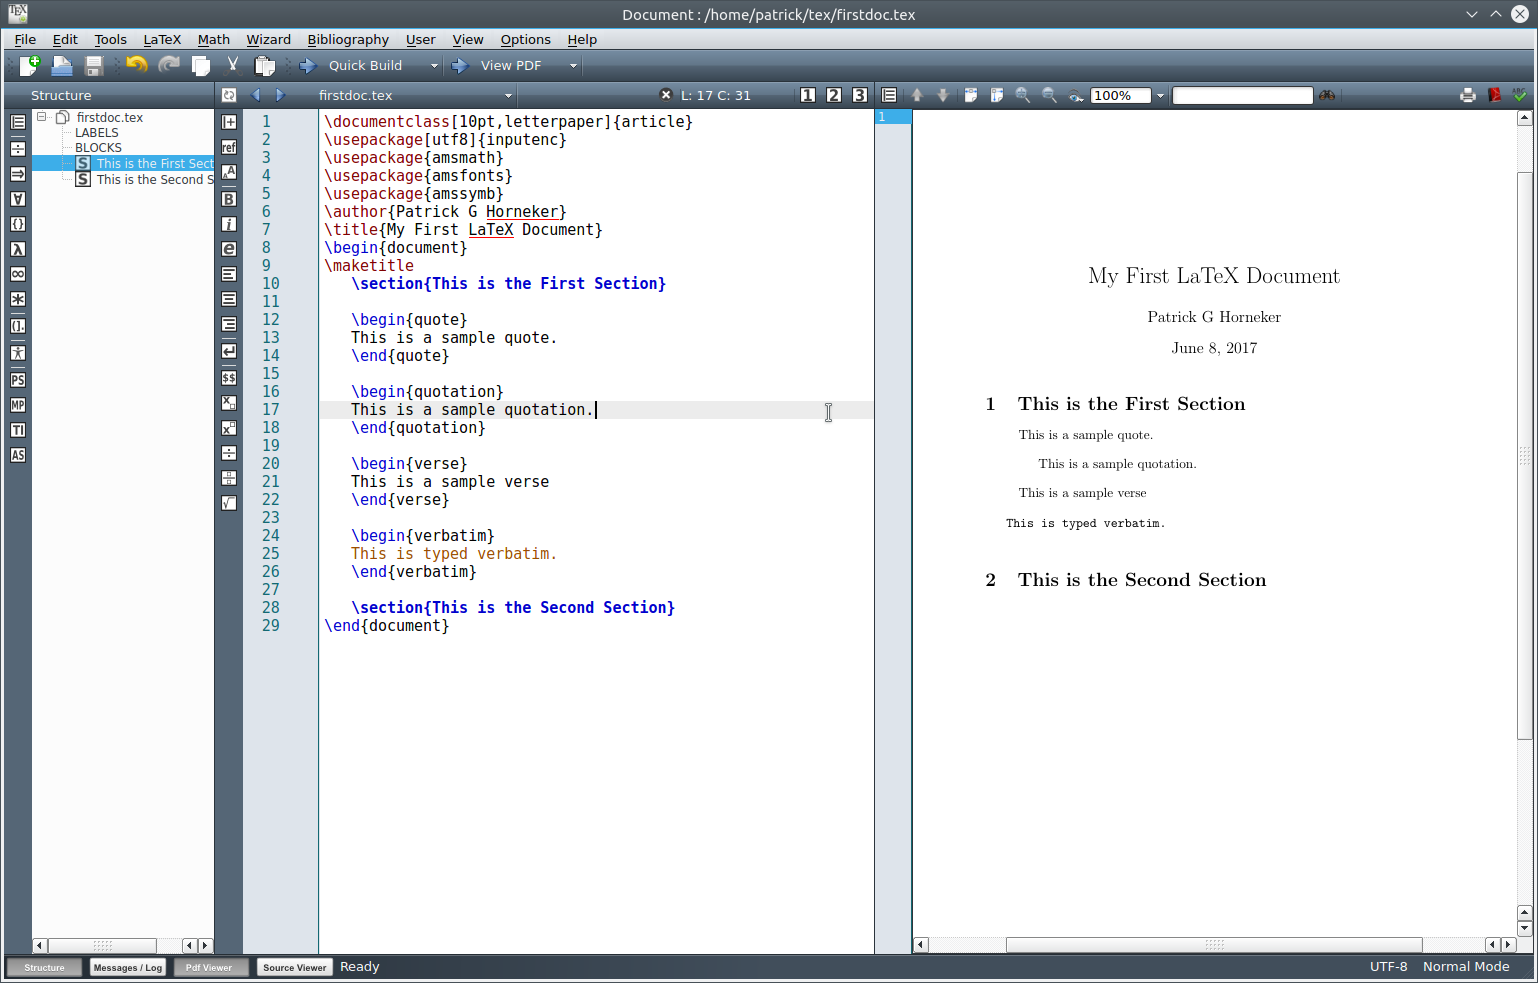 Environments begin with a \begin{} statement and end with a \end{} statement. The entire document is an environment itself as indicated by the \begin{document} and \end{document} statements. I have included samples from four types of environments selectable from the LaTeX → Environments menu. You can also left flush, right flush, justify and center text in environments as well. As we can see TeX environments are quite flexible. Note that the verbatim environment highlights the text in the editor in red to show what is being typeset verbatim. Also, the verbatim text in the preview is in Courier rather than Computer Modern font. So far, we have seen the basics of how TeX documents are formed and formatted. Typesetting Symbols TeX and LaTeX have commands to typeset common symbols, characters that have special meaning in TeX, accents, arrows, greek letters and mathematical symbols. Below is a list of commonly used symbols and the commands required to typeset them.  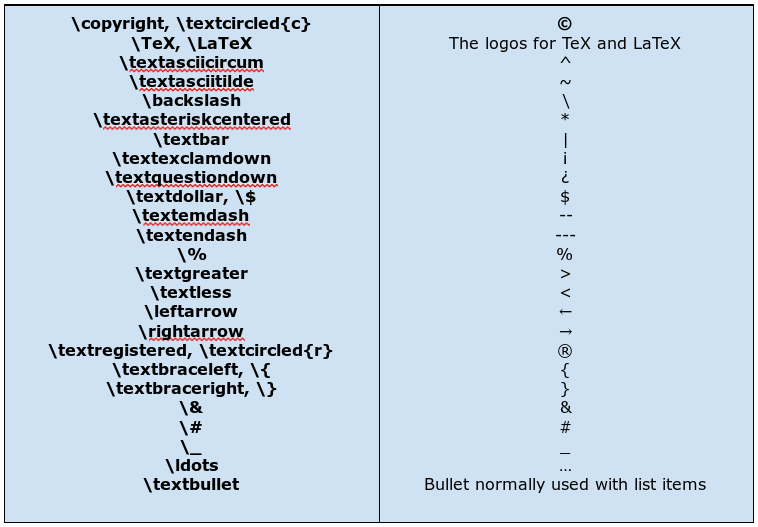 One would think that typesetting \\ would give you a \. Instead, \\ will break up the current line at the point where the \\ has been placed, and a new line will begin directly underneath the current line. If the \\ happens at the bottom of the current page, the text will continue at the beginning of the first line on the next page. To keep this from happening, a \\* is substituted for the \\. The \pagebreak command forces a new page to begin where this command is placed. \today will insert the current day the document was compiled, and will change every time the document is recompiled. ~ by itself prints a space, and will not allow a line break for the rest of the line of text being processed.
\textbf{} typesets the text contained in {} in boldface. TeX provides three basic fonts that work with any version of TeX, namely Roman, Sans Serif, and Typewriter. By default, the Roman font is used. This is the Computer Modern font that comes with every TeX distribution. \textrm{} typesets text in {} with Computer Modern explicitly. The Sans Serif depends on the distribution. For TeXLive, the font generated is similar to Cantarell or Gill Sans, which should be familiar to most of us as many companies use this font in their graphics (be it advertising or in store graphics). \textsf{} typesets text in {} with Sans Serif explicitly. \texttt{} typesets text in {} with Typewriter (Courier) explicitly. The font here is very similar to the font found in typewriters of years past, mainly with the IBM Selectric and Wheelwriter series.
This should be enough to get you started on typesetting (simple) documents. There is much more to cover for the TeX language. For samples of what can be done, feel free to look at two documents I created: Better yet, search Google for Donald Knuth's The Art of Programming and The TeX Book (this is rather extensive reading) for more information. Also search Google for TeX command reference to get helpful documents on the TeX typesetting language. |