| Previous
Page |
PCLinuxOS
Magazine |
PCLinuxOS |
Article List |
Disclaimer |
Next Page |
Inkscape Tutorial: Five Handy Inkscape Tricks |
|
By Meemaw I view loads of tutorials to choose some I think you will find useful. In my reading, I have also found several tricks that could make things easier. Let's look at a few. Tools: Use <CTRL> + the mouse wheel to zoom in and out easily. The toolbar also gives you three choices (below): Zoom to fit Selection in window, Zoom to fit Drawing in window and Zoom to fit Page in window. No, the drawing and the page aren't always the same thing. The page is whatever is contained on your designated page size. Your drawing includes your page and anything that happens to lie outside your page boundary. 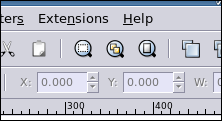 Need some storage while you organize your project? Use the area outside the page boundary. Many of my "from scratch" drawings contain pieces of items I have put together to make one object. If I am putting a hat on Tux, I usually make the hat separately. The birthday Tux on the cover of the August issue had an ice cream cone and a sign with balloons - both made separately, or imported, then combined with the Tux I used. I store stuff outside the page boundaries and get them as I need them. This is the reason I choose "Page" when I export a creation. Exporting the drawing would include all those little items. Also, when you are ready to export your image, the Export window gives you 4 choices: page, selected item, drawing and custom. By the way, "selected item" means you can export individual parts of your drawing. If I created an image of bleachers with a crowd of Tuxes on them (April 2011 cover), I could export only that part of my creation if I wanted to use it again somewhere else (July 2014 cover). I just need to make sure it's all selected. "Custom" means that you define an area to export, whether it be a part of your page, or an area in your drawing that's possibly not all on the page. When you choose Custom, the export window will try to guess the area you want. In the following illustration, it guessed part of the page and part of the window because of what I had selected. Locations x0 and y0 will define the lower left corner of your export area, and x1 and y1 will define the upper right corner of your export area: the exported image will then be the rectangle defined by these four numbers. 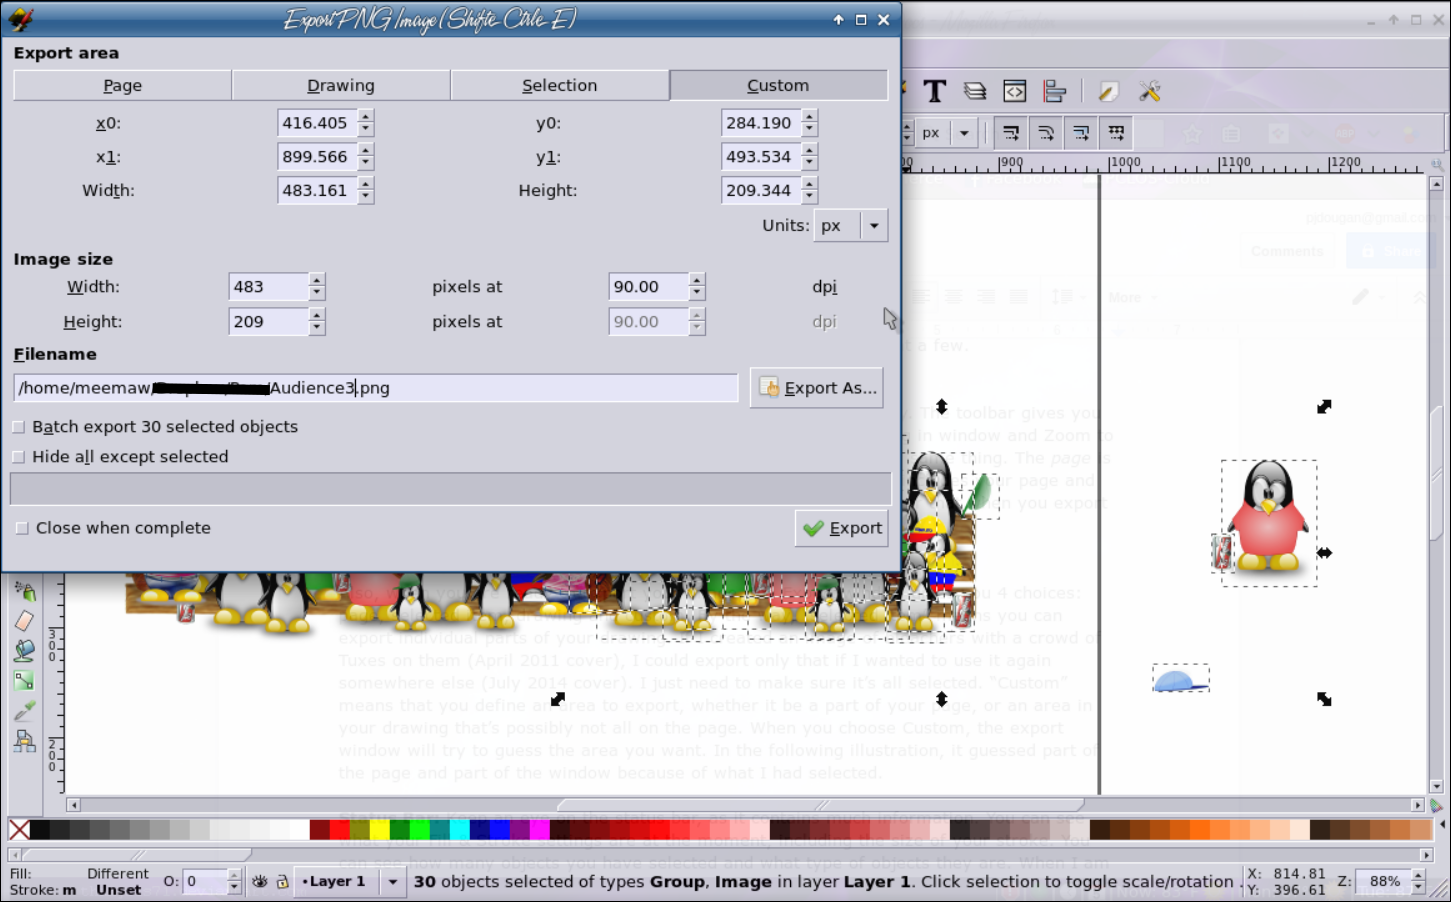 In the above image, "Page" would be only where the group of Tuxes is inside the page border that you can see. "Drawing" would be the page and everything to the side of the page boundary. See the two exports below to see the difference: 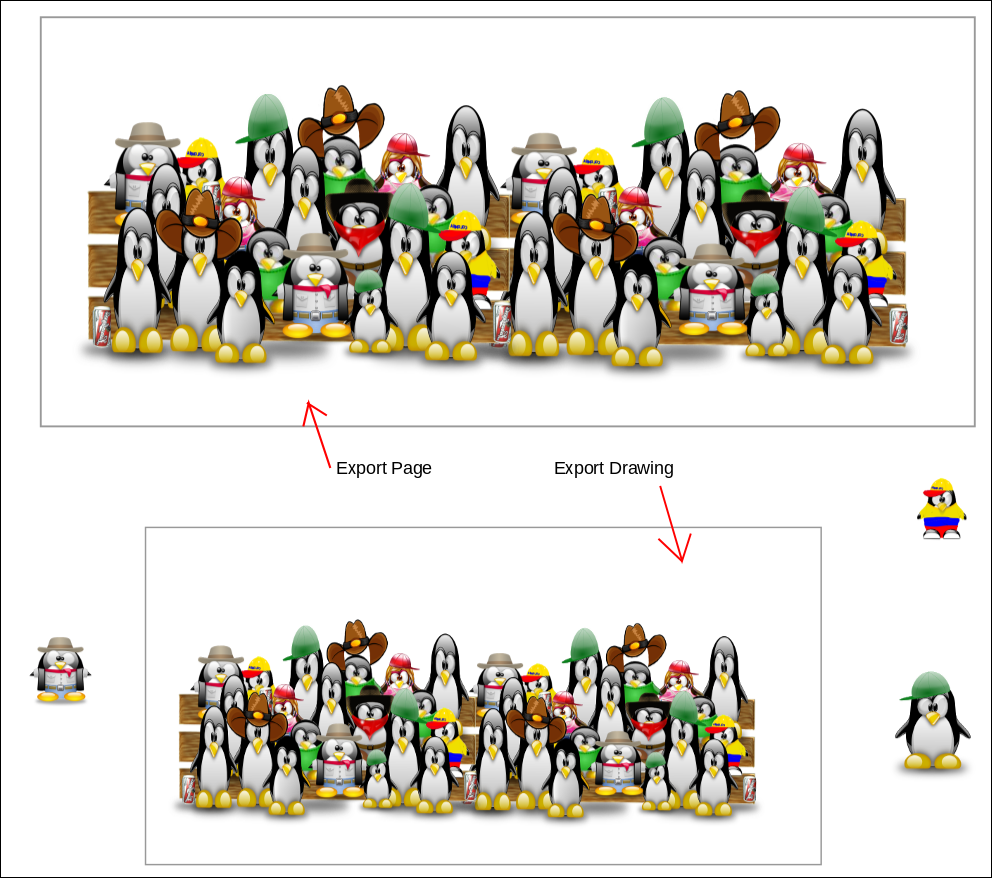 The gray rectangles are the page boundary. Notice that exporting the drawing brought in a few of the items from the side of the page. Status Bar: Keep an eye on the status bar, as it contains much information. You can see what your Fill & Stroke settings are at the moment, including the size of your stroke. You can see how many objects you have selected and what type of objects they are. When I am doing the word find puzzle's solution, I open the puzzle in Inkscape and add a layer named "Answers". I know I'm finished marking the answers when I have one more object than words to find (since the puzzle counts as one object). Notice below that I have one ball cap selected, but the status bar shows that I have five objects selected, since I created the cap using five different objects. The X and Y in the lower right tells me where my cursor is, and the percent is how big a zoom I have on this object/drawing. On the left side you see the fill & stroke colors (but since I have five objects, it can't show each, so it says Unset), tells me which layer I am on, and lets me hide or make the layer visible and lock or unlock the layer from the status bar. 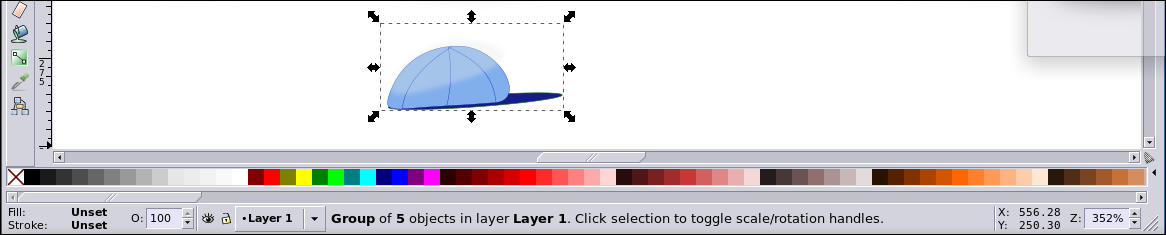 Nodes: If you select multiple nodes using the area select tool, you can hold down <ALT> while dragging one and the others will move proportionally. Also, select many nodes and click one, and you can rotate or resize those within the selection. To do this, make sure you have the "Show transformation handles for selected nodes" tool button active (third from the right in the nodes toolbar) 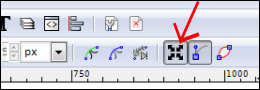 In the illustration, the chosen nodes are blue, and also outlined by the smaller dotted line rectangle. You can see that I have lengthened the arrow and the nodes have moved as well. 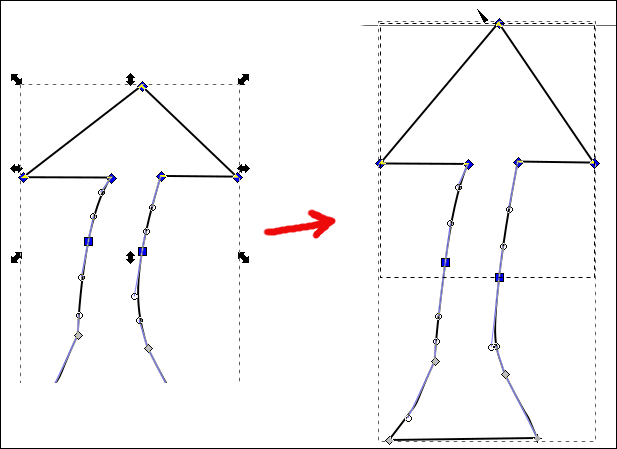 Clicking on one of the nodes changes the arrows to the rotate handles, and you can rotate your nodes as well. 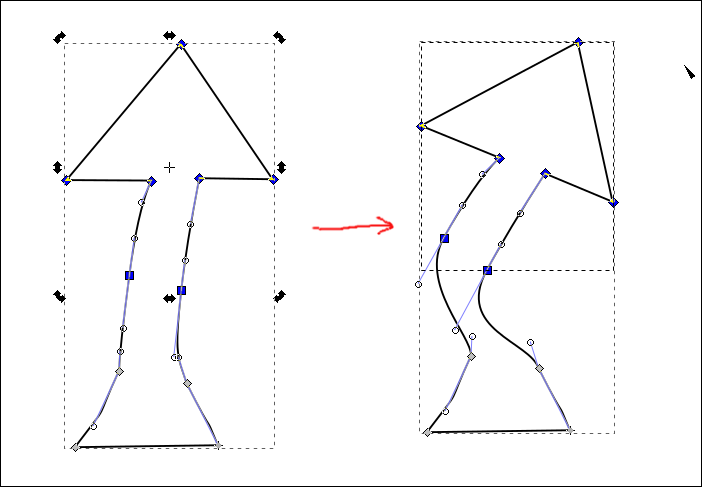 Filters: We all use some filters to achieve special effects in our projects. Many of these filters have previews. Make use of the previews to save some time. It's much easier to look at the preview and make adjustments than it is to apply your filter, close your filters window, and then have to go back in to adjust. In the example below, I can change the settings on the drop shadow and see the results immediately and not have to close the settings window each time I change something. Bear in mind that not all filters have settings you can alter. Your object is changed when you choose the filter and you have no choice. However, on the filter windows with settings, the live preview is a good choice. 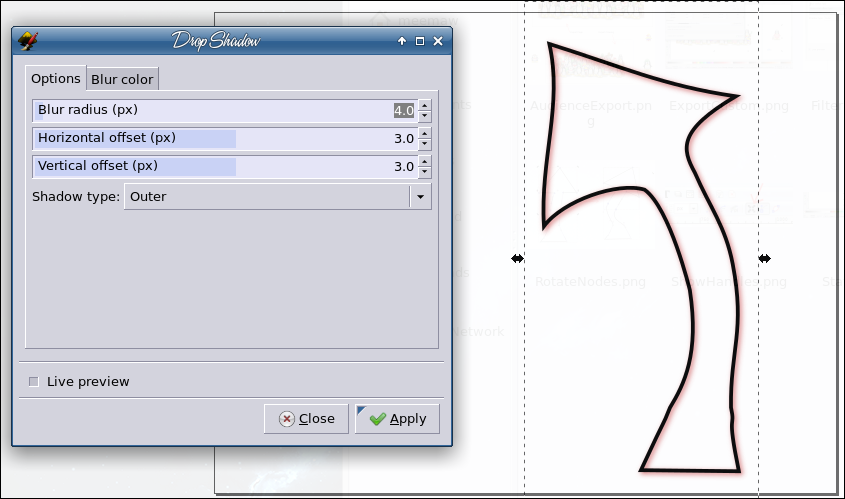 I'm sure you have some handy tips that you use in Inkscape! If you have something that I haven't mentioned, please PM me in the forum and tell about me it, so I can share, OR, share it in the Tips & Tricks section of the forum. For me, Inkscape is great fun and frustrating at the same time. I hope yours is more of the fun, and less of the frustrating. |