banner
Previous Page
PCLinuxOS Magazine
PCLinuxOS
Article List
Disclaimer
Next Page

Tip Top Tips: Update Your BIOS The Easy Way


Editor's Note: Tip Top Tips is a new monthly column in The PCLinuxOS Magazine. Each month, we will feature -- and possibly even expand upon – one tip from the PCLinuxOS forum. The magazine will not accept independent tip submissions specifically intended for inclusion in the Tip Top Tips column. Rather, if you have a tip, share it in the PCLinuxOS forum's "Tips & Tricks" section. Your tip just may be selected for publication in The PCLinuxOS Magazine.

This month's tip comes from PCLinuxOS forum member chilly.

I needed to update my BIOS to enable my motherboard to accept a faster CPU. After five hours of trying to update using freedos, Win98 boot image and other various ways, I gave up and asked for some help from Not_yet_16. He suggested 'flashrom.'

First of all make sure you are up to date. Then, install flashrom from Synaptic.

Check if your hardware is supported by flashrom from this link: https://www.flashrom.org/Supported_hardware

If your hardware is supported, you can now download and unpack your new BIOS into a folder. I named the folder 'updatebios.'
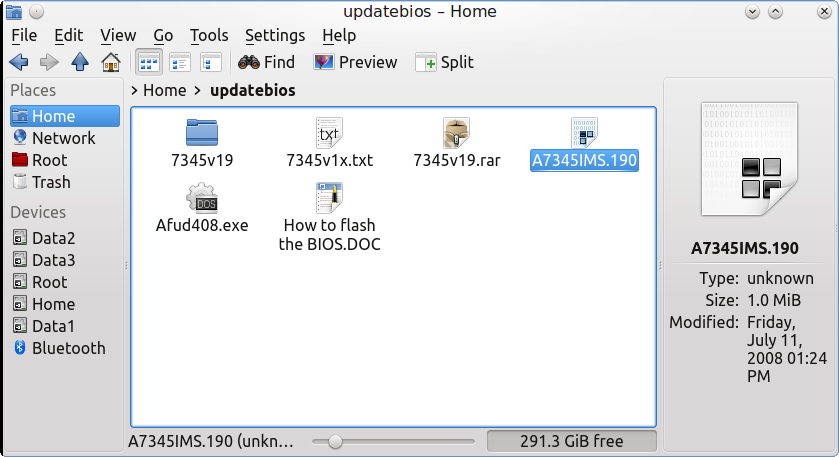


While inside the folder in Dolphin, go to 'Tools: Open terminal' and su to root. Run this command to familiarize yourself with the way flashrom works:

flashrom -h

[root@localhost updatebios]# flashrom -h flashrom v0.9.8-r1888 on Linux 4.4.4-pclos1 (x86_64) flashrom is free software, get the source code at http://www.flashrom.org

Please note that the command line interface for flashrom has changed between 0.9.5 and 0.9.6 and will change again before flashrom 1.0.

Usage: flashrom [-h|-R|-L|-p [:] [-c ]
[-E|(-r|-w|-v) ] [-l  [-i ]...] [-n] [-f]]
[-V[V[V]]] [-o ]

 -h | --help                        print this help text
 -R | --version                     print version (release)
 -r | --read                  read flash and save to 
 -w | --write                 write  to flash
 -v | --verify                verify flash against 
 -E | --erase                       erase flash memory
 -V | --verbose                     more verbose output
 -c | --chip              probe only for specified flash chip
 -f | --force                       force specific operations (see man page)
 -n | --noverify                    don't auto-verify
 -l | --layout          read ROM layout from 
 -i | --image                 only flash image  from flash layout
 -o | --output             log output to 
 -L | --list-supported              print supported devices
 -p | --programmer [:] specify the programmer device. One of
    internal, dummy, nic3com, nicrealtek, gfxnvidia, drkaiser, satasii,atavia,
    it8212, ft2232_spi, serprog, buspirate_spi, dediprog, rayer_spi, pony_spi,
    nicintel, nicintel_spi, nicintel_eeprom, ogp_spi, satamv, linux_spi,
    usbblaster_spi, pickit2_spi.

You can specify one of -h, -R, -L, -E, -r, -w, -v or no operation. If no operation is specified, flashrom will only probe for flash chips. [root@localhost updatebios]#

Check if flashrom works with your board using this command:

flashrom -p internal

You should see something like this:

[root@localhost updatebios]# flashrom -p internal
flashrom v0.9.8-r1888 on Linux 4.4.4-pclos1 (x86_64)
flashrom is free software, get the source code at http://www.flashrom.org

Calibrating delay loop... OK.
Found chipset "Intel ICH9R".
Enabling flash write... OK.
Found Macronix flash chip "MX25L8005/MX25L8006E/MX25L8008E/MX25V8005" (1024 kB, SPI) mapped at physical address 0x00000000fff00000.
No operations were specified.
[root@localhost updatebios]#

We now need to save the old BIOS file, just in case you get an error writing the new one. The command I used was this:

flashrom -p internal -r oldbios.170

[root@localhost updatebios]# flashrom -p internal -r oldbios.170
flashrom v0.9.8-r1888 on Linux 4.4.4-pclos1 (x86_64)
flashrom is free software, get the source code at http://www.flashrom.org

Calibrating delay loop... OK.
Found chipset "Intel ICH9R".
Enabling flash write... OK.
Found Macronix flash chip "MX25L8005/MX25L8006E/MX25L8008E/MX25V8005" (1024 kB, SPI) mapped at physical address 0x00000000fff00000.
Reading flash... done.
[root@localhost updatebios]#

You will see the old BIOS has been saved.
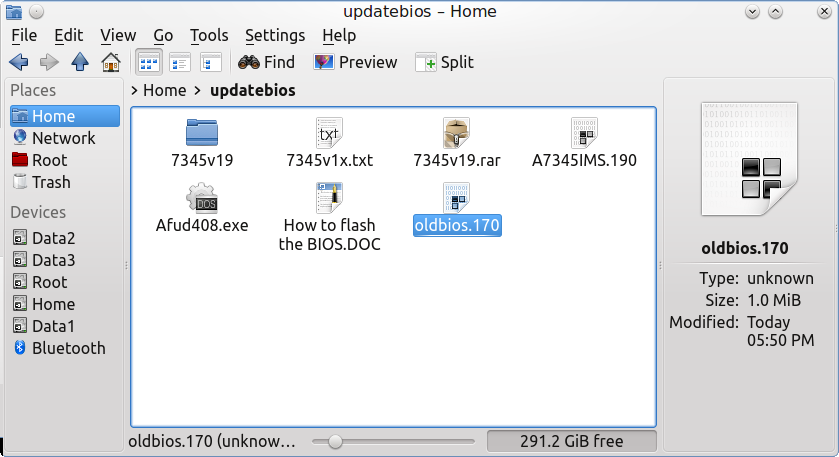


Substitute your file names in the command. For example, if your file ends with BIN, then you need to specify the command for retrieving your old BIOS as 'oldbios.BIN.'

It is now time to write the new bios. I used this command:

flashrom -p internal -w A7345IMS.190

If all goes well, you will see the write as OK and it will be verified. Reboot and set up your new BIOS.

Please make sure you download the correct BIOS file for your motherboard, taking note of the version number, because if you use a wrong file to flash your computer, there is no way back.

If your computer is the latest and greatest, you should be able to flash your BIOS by just putting the new files on a FAT32 formatted usb stick, and then write to BIOS from within the BIOS setup.


Previous Page              Top              Next Page