|
by Khadis
When designing a brochure, leaflet or flyer, we might be more inclined to use Scribus instead of Inkscape. But, some people also rely on Inkscape, as it has richer capabilities and more flexible tools, especially the ability to draw lots of items right in the application.
In this article, I'd like to imitate a simple brochure made by my friend using proprietary software for a seminar in his workplace. But here, besides re-designing it using Inkscape, I will also change the content. OK, let's go!
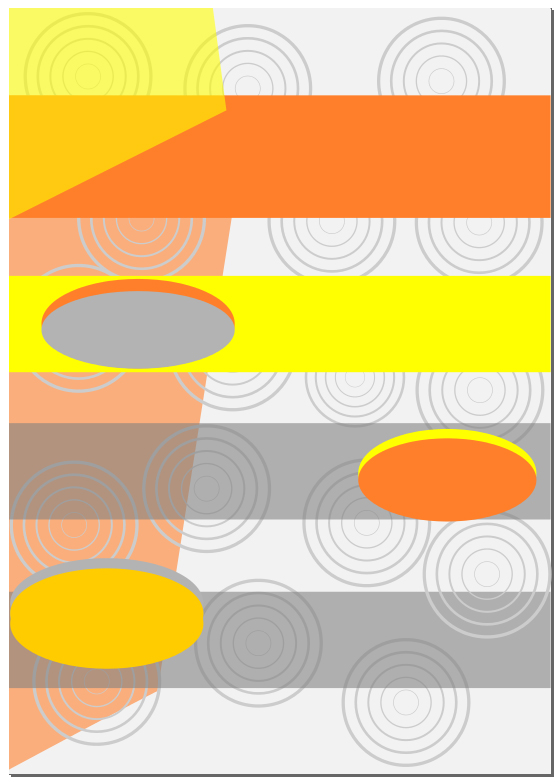
- Create an A4 sized document and draw a rectangle the same size as the document.
- Give it a 7.5% gray as the fill color and no stroke.
- Create a circle with diameter 5 cm. Give it 7.5% gray as the fill color and 20% or 30% gray as the stroke color.
- Duplicate (Ctrl + D) the circle and re-size it to 4 cm. Duplicate again and re-size again, so that the diameter is now 3 cm. Repeat duplicating the circle until you have a circle with diameter 1 cm.
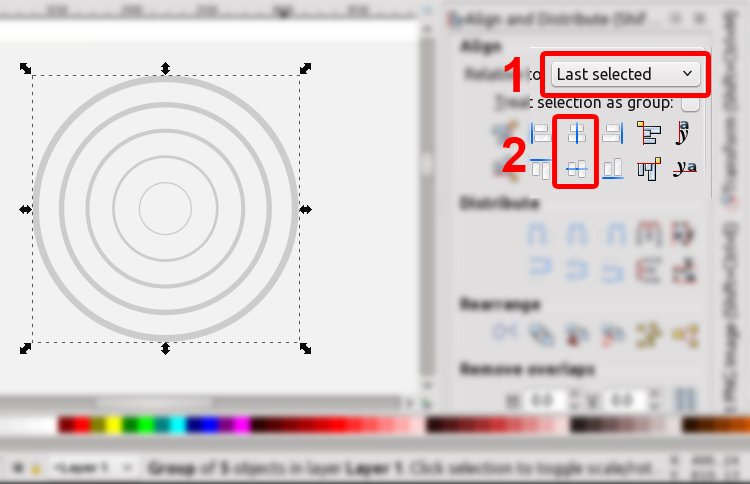
- Open up Align and Distribute (Shift + Ctrl + A) panel, select all circles, then on the Relative to option, choose Last selection. Click on Center on vertical axis and Center on horizontal axis.
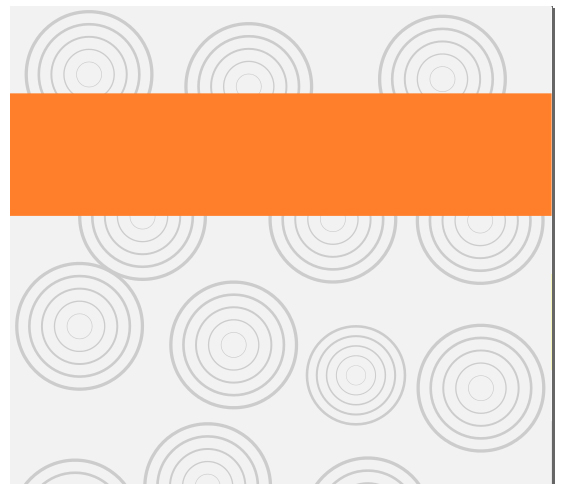
- Group these circles (Ctrl + G), then duplicate the group several times (Ctrl + D), and spread them above the main rectangle.

- Create a rectangle with the same width as the document and give it orange as the fill color without stroke. For the height, it is up to you. Put the new rectangle down a bit from the top side of the gray one.
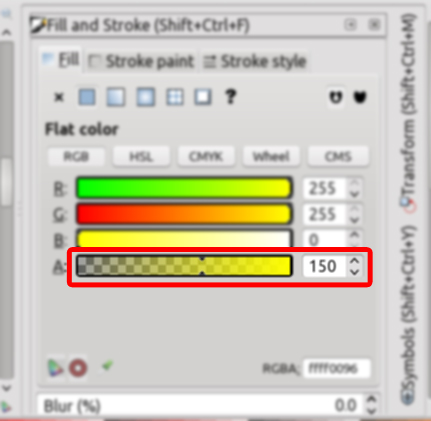
- Duplicate (Ctrl + D) the orange rectangle and fill it with yellow. Then, duplicate this new yellow rectangle and fill it with 40% gray. Open up Fill and Stroke (Shift + Ctrl + F) panel, then reduce the Alpha (A) value of this gray rectangle into 150. The orange and grey rectangles will be spaced out further down the page.
- Now, create a new yellow rectangle (about 8 x 9 cm) and reduce the Alpha (A) value to 150. Later, you can play with this Alpha value to make a proper color combination.
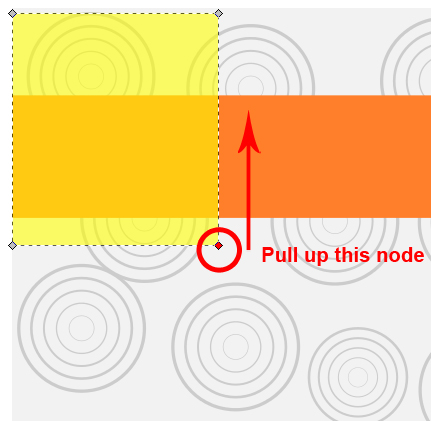
- Convert this new yellow rectangle into path through Path -- Object to Path (Shift + Ctrl + C) menu. Use your Edit Paths by Nodes (F2) tool to raise the bottom right corner node of this rectangle.
- The result might be like this:

- Put this new shape in the top left corner of the main A4-sized rectangle by opening up Align and Distribute (Shift + Ctrl + A) panel. There, set the Relative to option to Last selected.
- Click this new shape, hold your Shift button, then click the main rectangle. Choose Align left edges and Align top edges.

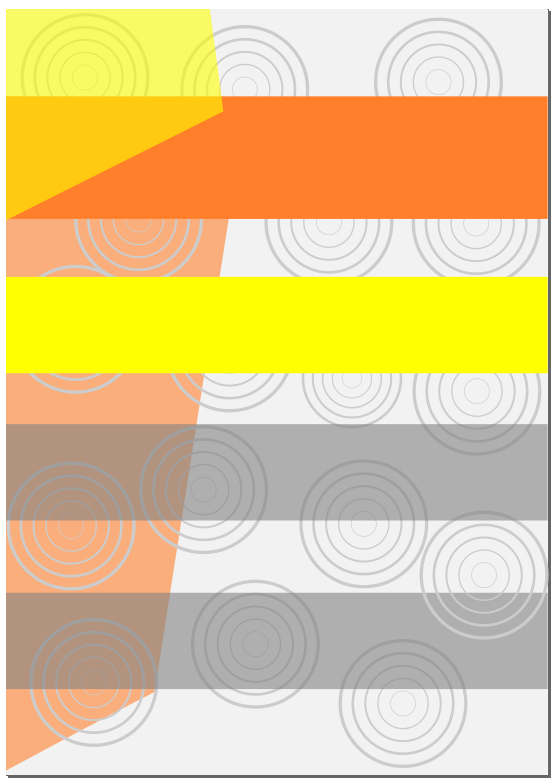
- Create new orange rectangle (about 6 x 26 cm). Again, reduce the Alpha (A) value through Fill and Stroke panel. Convert into path, and modify it using Edit by nodes (F2) tool.
- Here is the temporary look. Yours might be better :)
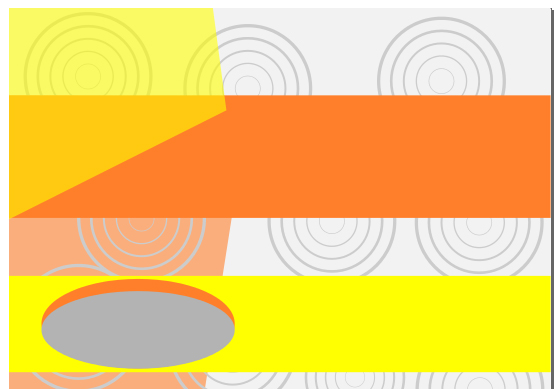
- Create an ellipse (about 7.5 x 3 cm) and fill it with orange color. Then, duplicate and give it different color. I chose gray (again).
- Put these ellipses above the long yellow rectangle like this:
- Later, you can duplicate the ellipse and make it different colors for the next part.
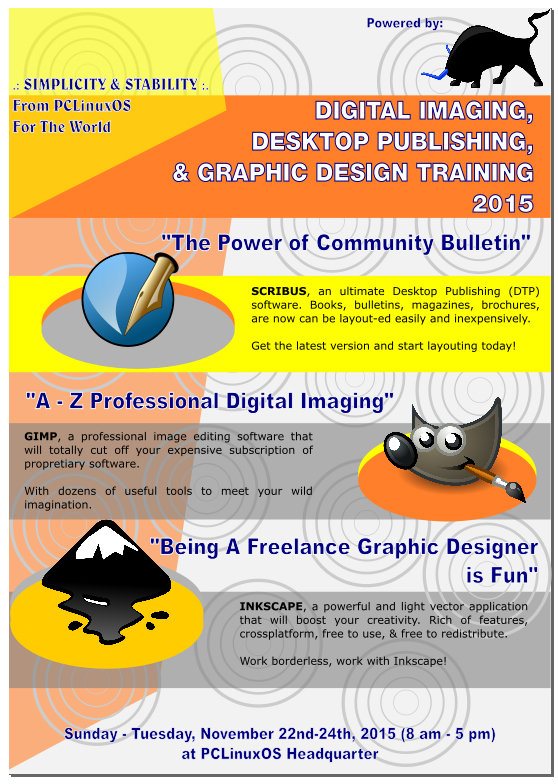
- Now, let's add some text and picture/logo. For the texts, I use some fonts: Belwe Bd BT, Helvetica Neue LT Std, and Arial. Meanwhile, for the Gimp logo, Inkscape logo, and Scribus logo, I took randomly from Google Images.
The final result:
|