|
By Khadis
Photo popping or cutout is usually done in photo editing software such as the Gimp (like what Meemaw did in the PCLinuxOS Magazine, Volume 94, November 2014 edition, entitled GIMP Tutorial: An "Out-Of-The-Frame" Effect). However, it can also be done through Inkscape. Let's try to do it!
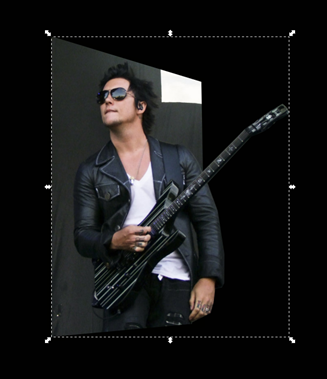
- Open up your Inkscape and import an image using Ctrl + I command or through File -- Import menu. I myself used a random picture from Google Image (I took Synyster Gate's photo).
- To be able to see the popping / cutout result, you can first make a big rectangle behind the photo (as the background) and color it. Look at the illustration below:
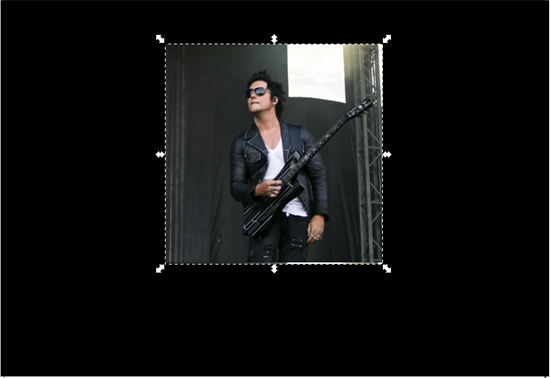
- Now let's return to the photo and convert it into a pattern using Alt + I command or through Object -- Pattern -- Objects to Pattern menu. Once you have done that, please create a rectangle with the size equal to the photo size. You can make the rectangle a little bit bigger or smaller than the photo, and it is still okay. The color will not matter since we will flood it with the pattern, so you can choose any color for now.
- Access your Fill and Stroke panel by pressing Shift + Ctrl + F on your keyboard. On this panel, open the Fill tab and choose Pattern. Your rectangle will be now filled by the new pattern (the photo you imported to the document).

- Now, let's convert this patterned rectangle into a path by pressing Shift + Ctrl + C or through Path -- Object to Path menu. After that, you can use the Edit path by nodes tool (F2) to modify this object. If it is possible, use the Zoom tool (Z) to get a better view.
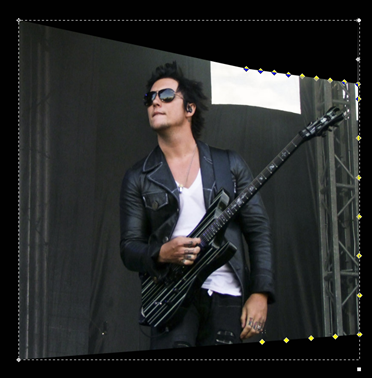
- Now grab the top right corner handle (node) and move it lower. Then grab the bottom right corner handle (node) and move it higher. It should now look like a perspective photo, as in the picture below:

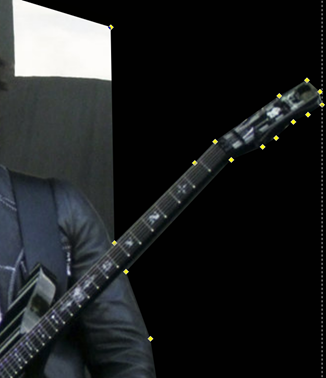
- Now, still using the Edit path by nodes tool (F2), put some new nodes. For this sample, I put some new nodes in these places (look at the yellow nodes):
- Now, let's "trace" the picture by moving the nodes one by one. Use the Synyster's body as the "path". You can add or reduce the number of the nodes by simply double clicking on the picture to add more nodes or click in a node and press Delete to reduce the node.
- Before we really move the nodes one by one, let's make a Bezier curve (Shift + F6) first to "extend" the picture so it will be easier to be edited. Draw a Bezier curve like this (look at the white Bezier. The shape might be different from mine):
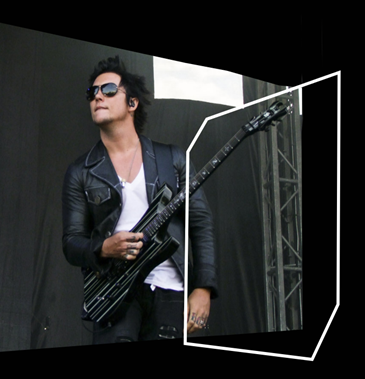
- Do a Union by selecting the Bezier, then press Shift button, click on the photo, then press Ctrl + +.
- Now, let's go back to the photo. Move the nodes one by one, by following the Synyster's body and his guitar shape. Still, you can add or delete more nodes if you need to do so. Use Zoom tool (Z) to zoom any parts you need to see in detail. The final result might be like this (the better your imagination, the better the result will be):
- Zoom out the photo, and here is my result:
- For the final touch, let's create a frame for the photo. Grab your Rectangle tool (F4) and draw a rectangle above the photo. The size can be bigger than the photo, and the color is up to you. I chose yellow.
- Call the Fill and Stroke panel (Shift + Ctrl + F) to appear. On the Fill tab, reduce the color opacity so the rectangle is now semi-transparent. Convert it into path by pressing Shift + Ctrl + C or through Path -- Object to Path menu.
- Activate your Edit path by nodes tool (F2). Adjust the shape of your semi-transparent rectangle to form a perspective shape that following the shape of the photo. Always use Zoom tool (Z) whenever you need a better view.
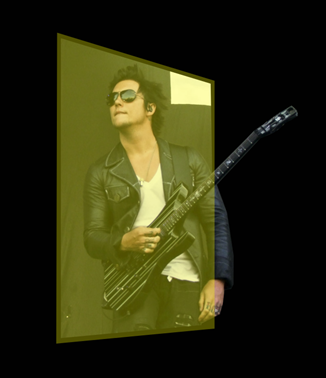
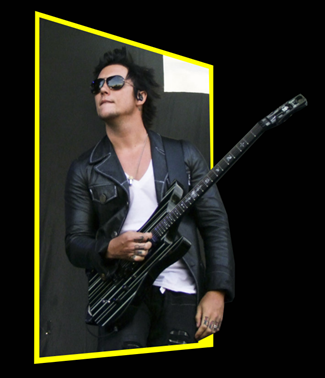
- After you are satisfied with your result, send the yellow perspective rectangle to the back of the photo by pressing Page Down button on your keyboard. Once the yellow rectangle settled behind the photo, return its opacity to 100%. The final result could look like this:
|