| Previous
Page |
PCLinuxOS
Magazine |
PCLinuxOS |
Article List |
Disclaimer |
Next Page |
Inkscape Tutorial: Creating A City Map |
|
by Khadis As we know, it's now getting easier to create a design in Inkscape. Moreover, Inkscape is now equipped with a symbol library, which will make our designing process much easier and faster. This time, I want to show you how to use items in the symbol library to create a city map. As usual, please open up your Inkscape and set the paper size as you want. I use landscape A4 and use cm (centimeter) as the unit. Please look at Document Properties (Shift + Ctrl + D) to ensure that the paper size meets your need. Using the Rectangle Tools (F4), draw a rectangle of your preferred size and fill it with 60% gray color. Before we continue, it will be better if you have already had a concept of your city map. Assuming that that you already have the concept, you are totally ready to continue drawing the map. 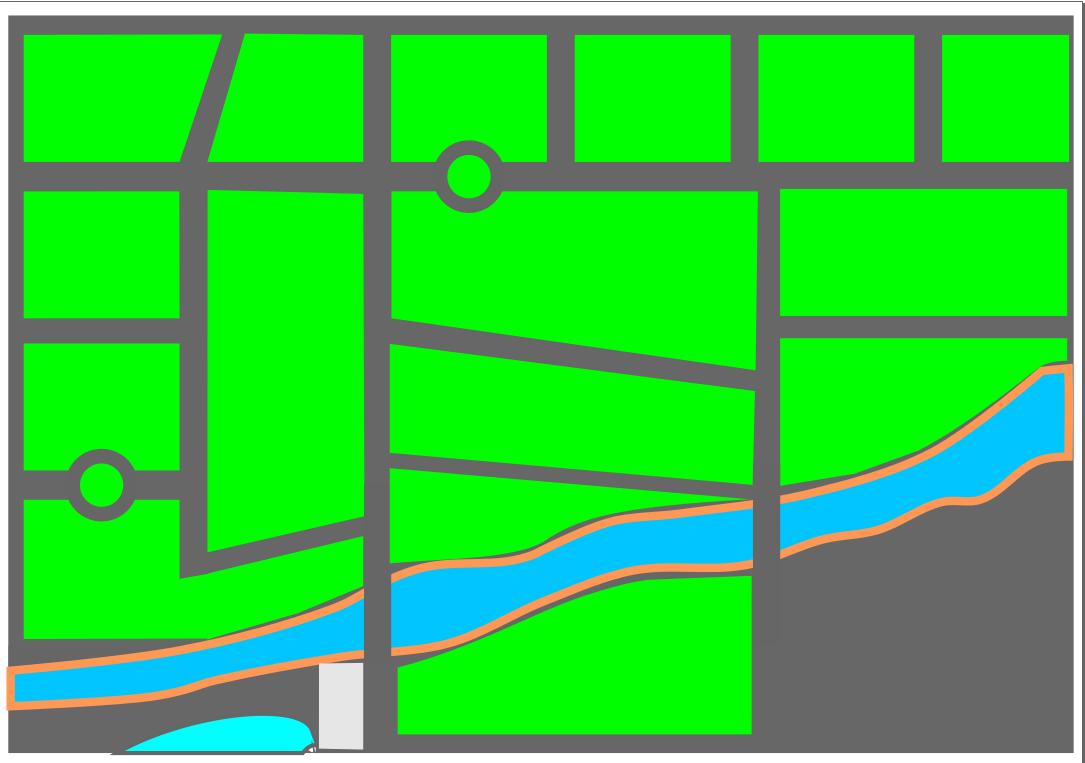 Pict. 1: Concept Drawing a city map is quite easy. We only need several modified rectangles (which I gave a light green color) and some circles with different sizes as the ground, buildings, lake, etc. I also put some shapes and built-in symbols taken from symbol library. I started by drawing a rectangle and modified it a bit using Path -- Object to Path (Shift+Ctrl+C) menu. You can duplicate (Ctrl+D) the rectangle as much as you want and modify them using Edit Path by Nodes (F2) tool. You might want to modify some of the rectangles into trapezoid or other "irregular" shapes, and it's OK to do so. Next, zoom to one of rectangles and create a small circle above it. Convert it into path by using Path -- Object to Path (Shift+Ctrl+C) and grab your Edit Path by Nodes (F2) tool. Add one or two more nodes, then click and drag them to create tree-like shape. Give it a dark green color, and duplicate it (Ctrl+D). Put the new (duplicated) shape randomly and you may change some of them to a different color, too. Do the same step to create the "lake" shape. 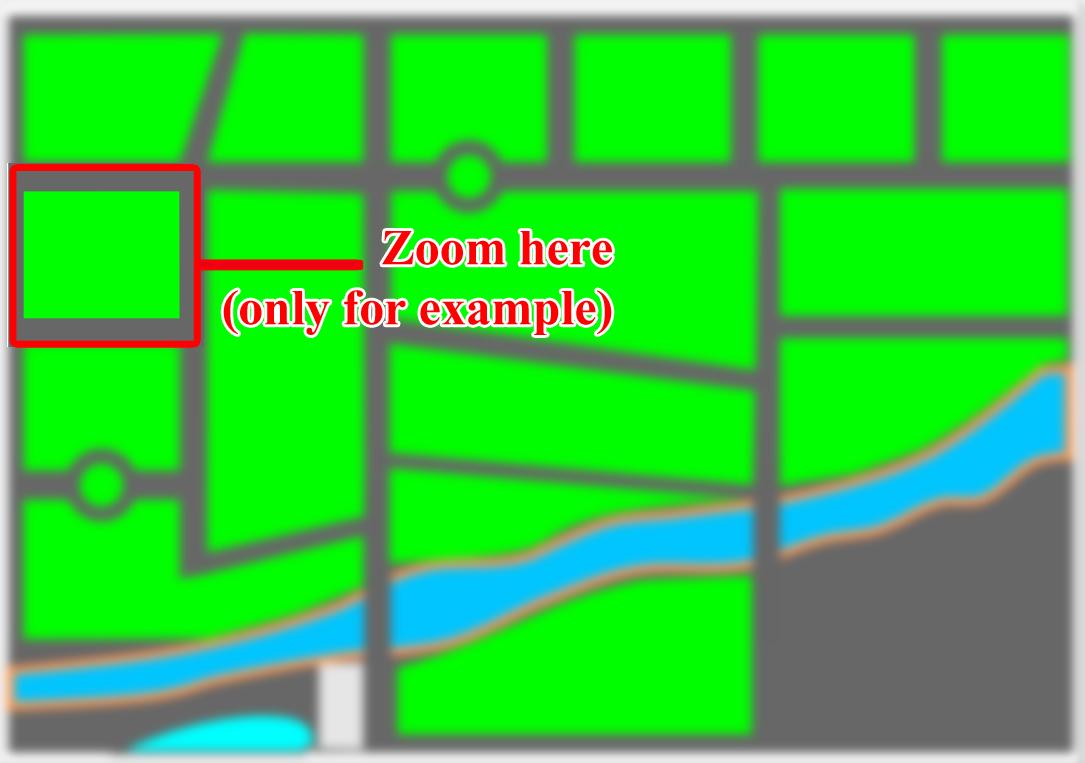 Pict. 2: Zoom to one of rectangles 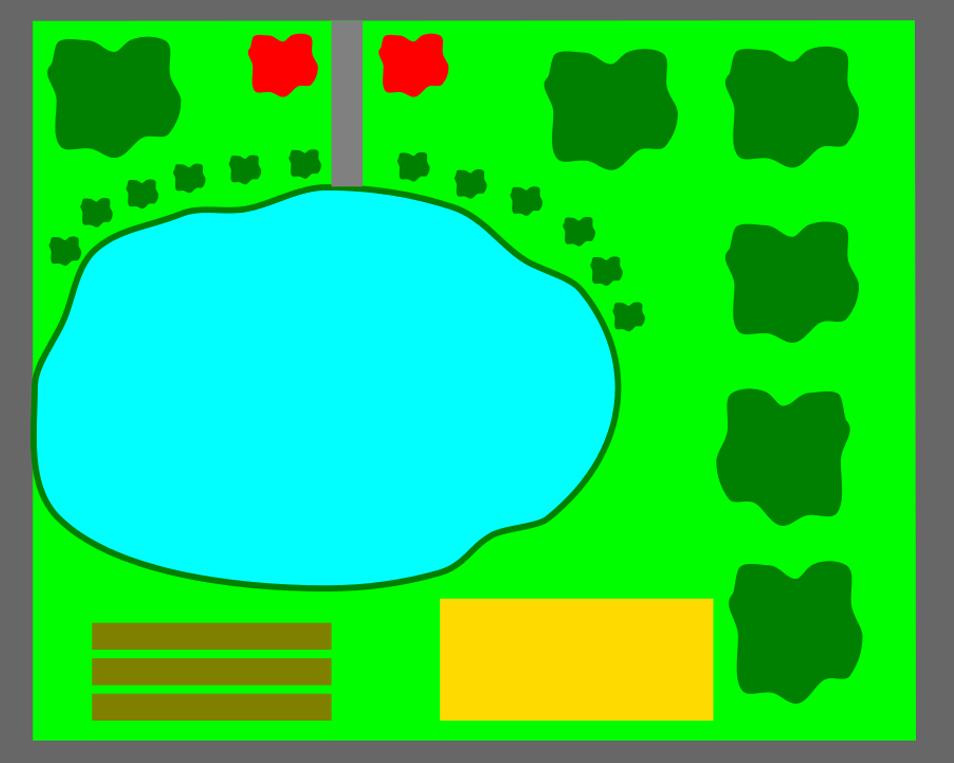 Pict. 3: Draw circles, convert to path, and make small adjustments For the other rectangles (or other land shapes), you can do the same steps. Assuming that you have filled all the town parts with "pool," "lake," and "trees," let's access the symbol library by pressing the (Shift+Ctrl+Y) button. There, you will see some categories. Just point your mouse to the United States National Park Service Map Symbols category on the available drop-down menu. Search the symbol(s) that you want to put into the map by clicking and dragging the symbol out of the box. Put somewhere on the map and adjust the size and the color. 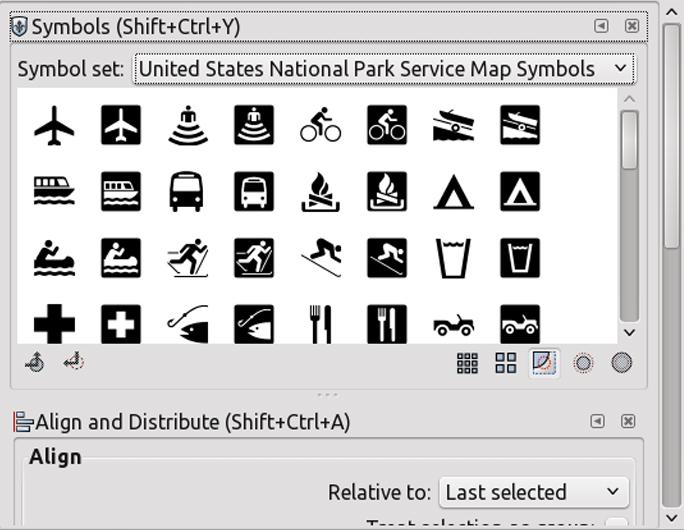 Pict. 4: Symbol Library You might want to put the symbol inside of a shape. So, create a shape, insert the symbol, and adjust the alignment using various options in Align and Distribute (Shift+Ctrl+A) box. Now, let's finish the road part. Zoom to the road part, then draw a white rectangle (no border) as the road separator. The size might be small enough, depends on the map size you want to create. 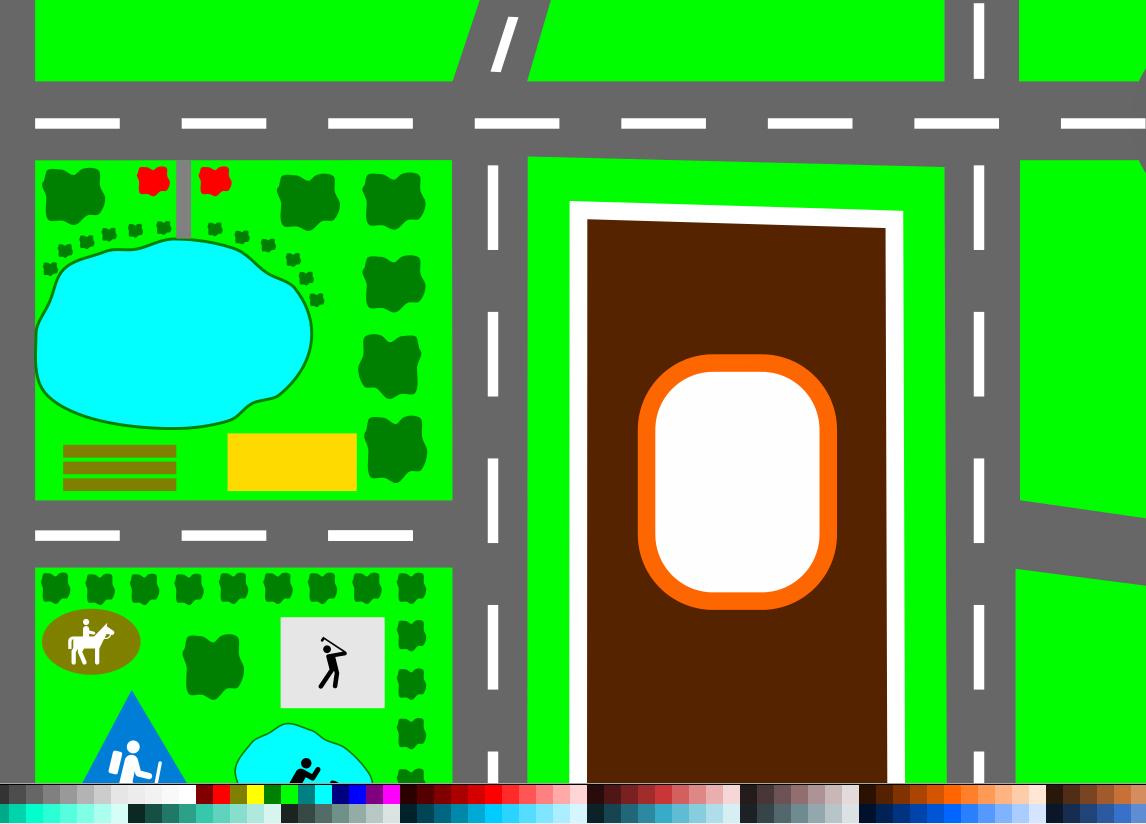 Pict. 5: Road separator lines Put this new rectangle accordingly. Open Transform (Shift+Ctrl+M) panel, then open the Move tab. There, you can see the movement direction--horizontal and vertical--and also the unit. I prefer to use centimeter. Set the movement distance according to your need, whether it's horizontally or vertically. Example: Horizontal: 1.500 cm, vertical: 0.000 cm. It will move the object 1.500 cm horizontally from its original location. You can set the value into -1.500 cm to move the object in the reverse direction. Positive horizontal value will move the object to right horizontally, and the negative value will move the object to the left. And so does the vertical value. The positive value will move the object up, and the negative value will move the object down. 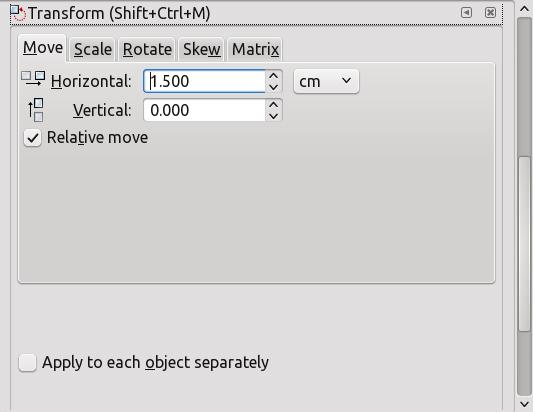 Pict. 6: Transform panel After you decide the movement direction and its distance, click on the new rectangle of road separator. Press Ctrl+D to duplicate it, and click Apply on the Transform panel. Repeat the steps until you reach the end of the road. You can also put a river. I used the Draw Freehand Lines (F6) tool to create the river. Just click and drag this tool, click on the last point to start new line until you reach the first starting point to make this new object as a closed-curve that can be filled with color and stroke. By using Edit Path by Nodes (F2) tool, you can modify the river shape. You can add or delete the nodes and also change the curve model (smooth, symmetric, corner, etc.) Fill the river with cyan as the fill color and light orange as the stroke or any other color combination that you think will be better. What about the road that crossing the river? It's easy: just place a rectangle above the river with the same width and color as the road. Look at the picture below. At the first, I put a rectangle with the same width but in a different color. Then I changed the color so that it has the same color as the road.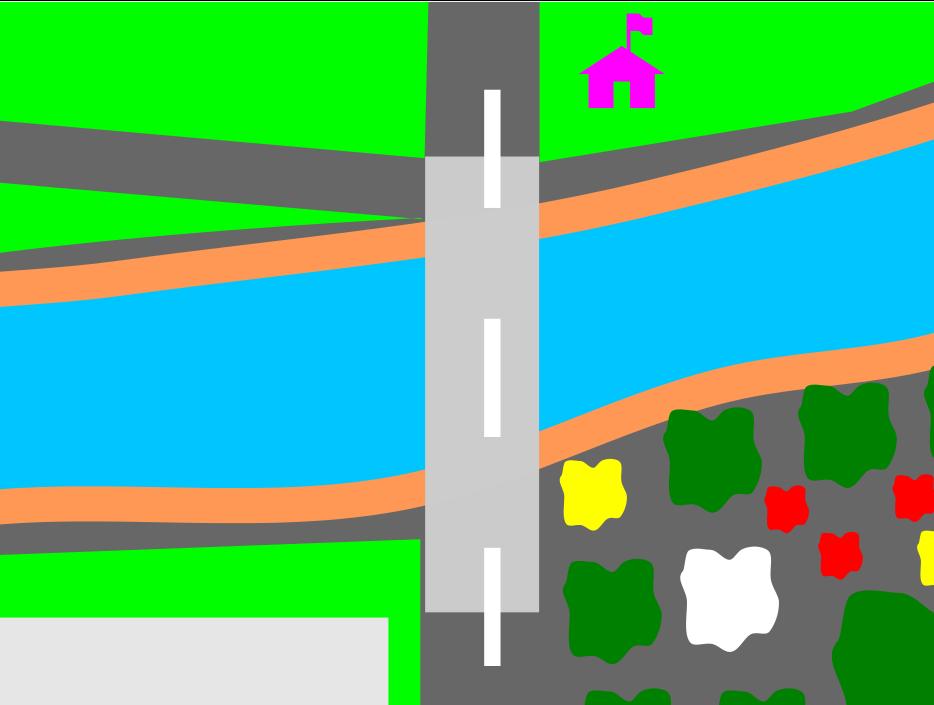 Pict. 7a: Road above the river at the first time (before change the color) 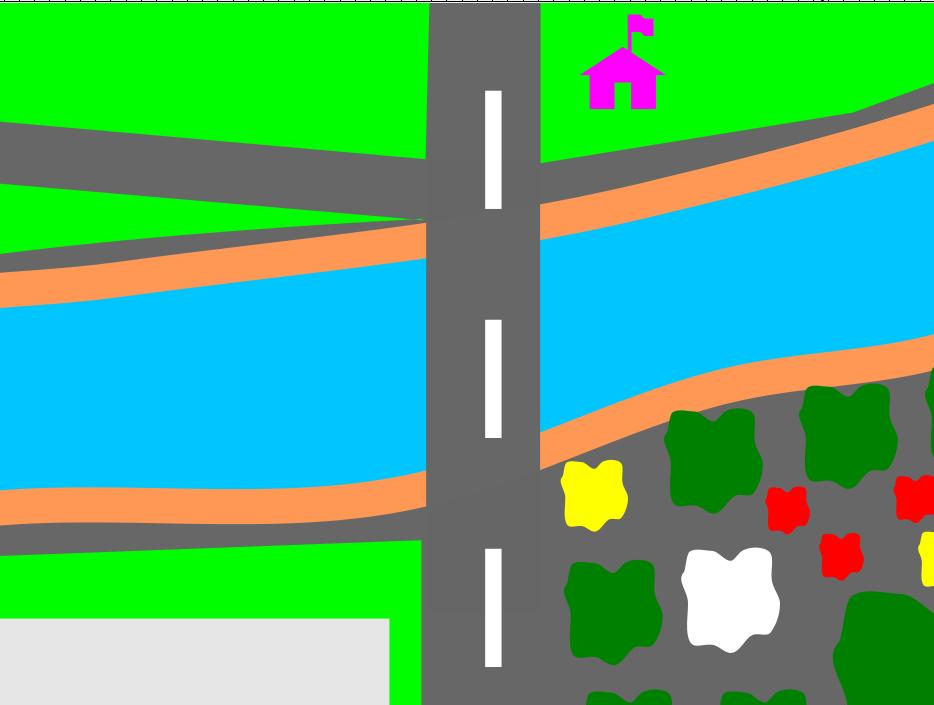 Pict. 7b: Road above the river at the first time (after change the color) You can add text if you think that it's necessary. Because it's impossible for me to show all the steps to create the whole map, I will assume that you have already understood how to make the objects to be put on other town parts. Just remember, I only use rectangles, circles, triangles, and Bezier lines. The rest (including the layout), later, will be totally depend on your imagination. Here is the example of my small work: 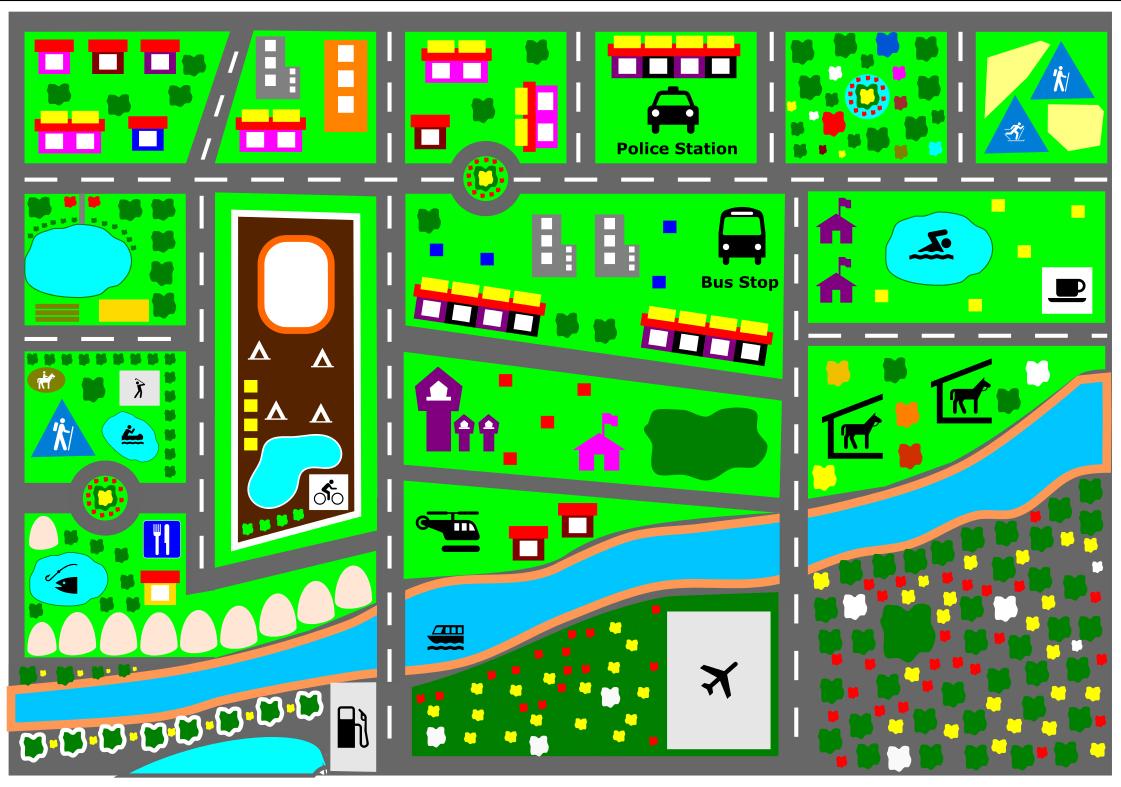 Pict. 8: Final work |