| Previous
Page |
PCLinuxOS
Magazine |
PCLinuxOS |
Article List |
Disclaimer |
Next Page |
Inkscape Tutorial: More Toolsl |
|
by Meemaw I had already thought that we needed to cover more of the tools in this wonderful program, but suddenly, here is an update which has even more tools! The toolbar on the left has one more item now, and some of the tools we already have contain more features. Now we have even more to explore. The newest version of Inkscape is version 0.91 and is available in Synaptic. Some of the tools have been enhanced with extra features. Let's explore. Improved Import Many of us import images to work with in Inkscape. The old Import window asked only whether we wanted to Link or Embed the imported image. Now the window is bigger and asks more questions: 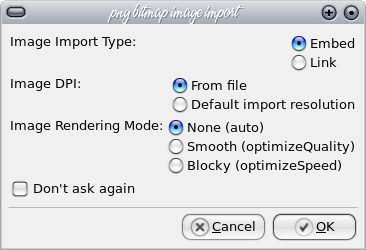 We are still asked whether we want to Link or Embed the image, but now we are also asked about the DPI (resolution) and Rendering Mode. It will use the resolution in the object you are importing, or the default resolution from your preferences (under Bitmaps). Also, you can choose how something is imported by changing the Rendering Mode to optimize quality or speed. So far, I have kept the defaults shown above. Ruler Tool
The new left side toolbar has an additional item: the ruler. Here you can see a comparison of the toolbar before (left) and after (right) the update. Measuring is easy. Place your cursor on one end of the item you are measuring and drag to the other end, holding down the mouse button until you are finished reading the measurement. I experimented a bit, and holding the left button down plus doing a right-click will keep the measurement display there temporarily. You will get a drop-down and can left-click once to close it, and your measurement will stay until you left-click away from it. This is handy if you need to measure diagonally, since the top and left rulers don't do that. It will also give you an angle measurement. Notice at the top of the drawing you can change the size of the displayed text and also the unit of measure. 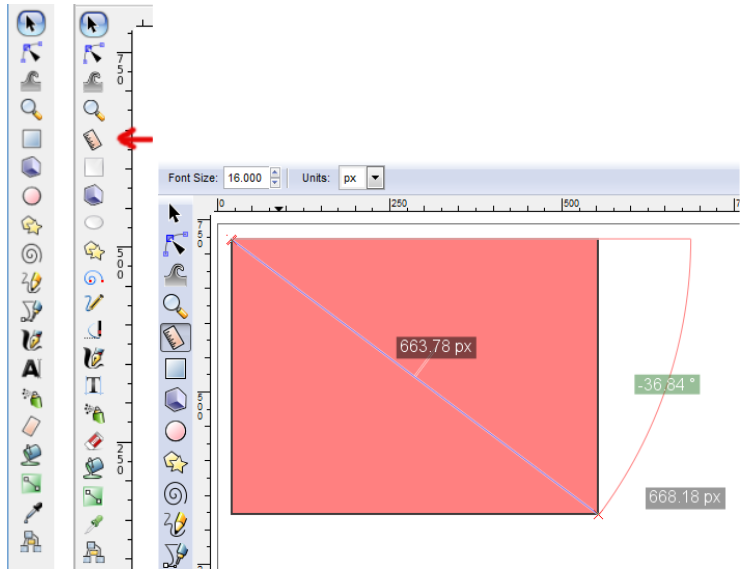 When I was thinking about what to cover in this article (since Inkscape has so much), I was already going to cover the Tweak tool. It hasn't had any additions this time, but it already has several features that make it fun to use. When you click on the Tweak tool, the upper bar looks like this (below), and each item does something different. 
We used the Tweak tool a couple of months ago to do our feathered background. However, the bar above has more than just the two modes we used. Some are self-explanatory, but going from left to right, the modes are as follows (items in parentheses occur if you hold down the 
Move objects in any direction - if you move the area under the tool to the right, your objects will all move that direction 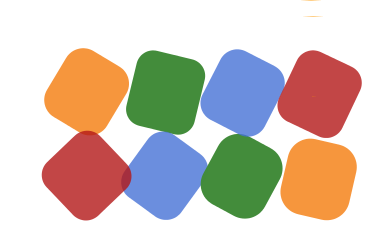
Duplicate objects (or delete objects) - This is an alternative for the Duplicate command <CTRL> + D. Holding the Shift key down will delete some of the selected objects. Caution! If your Force setting is higher, you can create bunches of duplicates pretty fast. I left my Force setting higher while I was using this tool, and ended up with 358 duplicates in about two seconds! Blur objects more (less) Looking at the Tweak tool bar, the first two settings are Width and Force. They are fairly self-explanatory, with Width being how big an area you want to affect, and Force being how much of an effect you want to make. As an example, if you want to use the third tool (move objects in random directions), your Width should be big enough to cover the majority of the objects you want to move. Your Force needs to be set depending on how much you want to move your objects, using a small setting for minimal movement and a larger setting for more movement. Also, remember that the Tweak tool will only affect objects that have first been selected with the Select tool. As you move your cursor over your object(s), the tweak tool will carry out the desired operation, but you will have to practice with this tool a bit to get your desired result. Remember, you can always undo it if you don't like the result. Gradients The gradient tool works the same way, but here is where a new feature has been added. When you create an object, and click on the gradient button in the properties window, you now get an open window which will list the gradients you have used in your drawing (plus how many times it has been used). This is nice because you can choose a particular gradient you have already created and won't have to create it again. 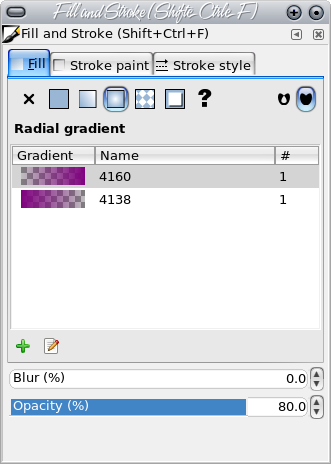 Align & Distribute Plus? Another new feature is in the Align and Distribute tool. We have always used the first two tools, Align and Distribute, but I don't remember the Rearrange tool. With it, you can do a few more things to make your work easier. Actually, the rearrange tool has items that the old Align and Distribute tool window had elsewhere. You can see the difference between them shown below with the newer one on the right: 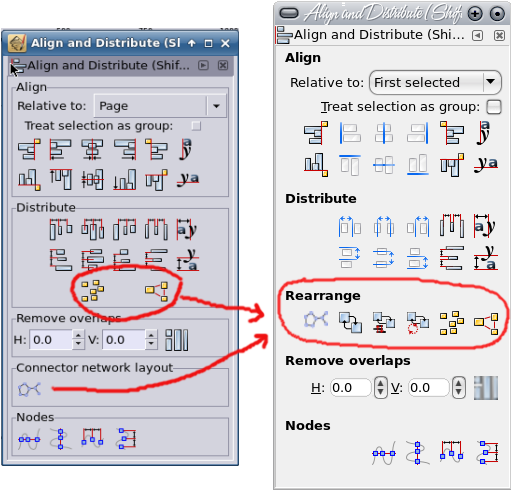 As you can see, there are three additions to the window and they are grouped under the section "Rearrange". From left to right, the buttons are: Nicely arrange selected connector network: This will "auto-arrange" the items you have connected. I started with the array on the left with connectors running from bottom left to bottom right (Orange, blue, gray, red, blue, purple, blue, purple, gray). When I selected the group and push this button, they changed to the arrangement on the right. This is not to say you will like the way that Inkscape arranges them, but it will be different. Remember, Undo is still <CTRL> + Z.  Exchange positions of selected objects - selection order: This is a neat tool you can use while arranging things the way you want them in your drawing. A few months ago, I was doing an image with text and realized that two of the text boxes had been placed wrong. With this tool, I could have selected them both and clicked this button, which would have interchanged the two text boxes without any effort on my part. As you see here, I exchanged the gray and orange boxes.  Exchange positions of selected objects - stacking order: This will exchange the positions of your objects while retaining the order in which they are "stacked". Whatever object is at the bottom will remain there. 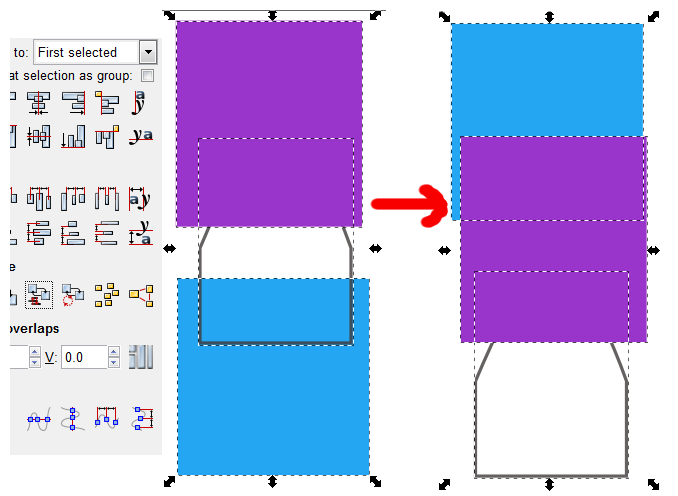 Exchange positions of selected objects - clockwise rotate: If you choose more than two objects and click this button, the objects will be moved in a clockwise direction. In the series below, I chose all eight objects, and you can see how the colors move around. 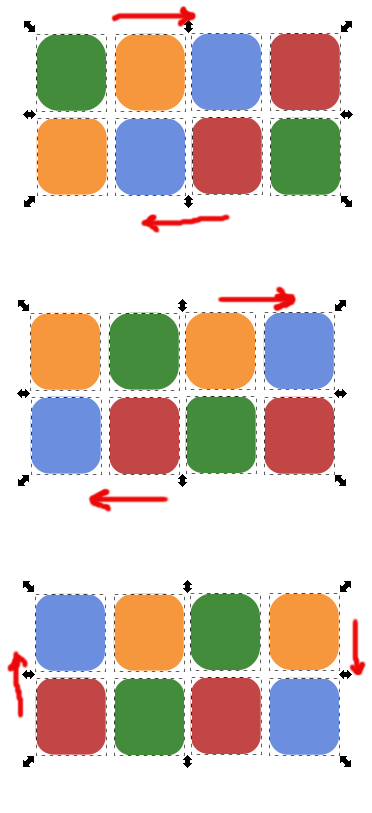 Randomize centers in both directions: This will move your objects so the centers are at random distances. The result may not be what you want, but you can undo it and try again, or not use it at all. 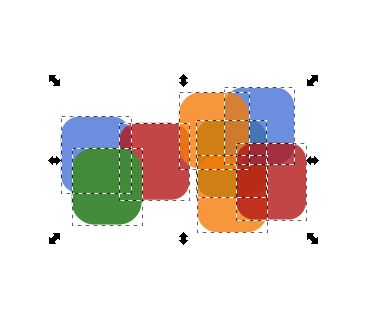 Unclump objects: try to equalize edge-to-edge distances: This will try to move your objects apart a bit, but possibly still overlapping. With the ability to exchange and rearrange things, your design should be easier to manage. Edit Menu Addition There is another new tool from the edit menu, and it will be really useful if you need to change something in multiple objects. Let's do color first. Select an item of the color you want to change, then choose Edit > Select Same > Fill Color. Each item of the same color as the one you chose will be selected. Now you can change the color of all of them at once. (I changed all the green squares to purple.) The menu item Select Same also has four other options: Fill and Stroke, Stroke Color, Stroke Style and Object Type. This should make your work easier. 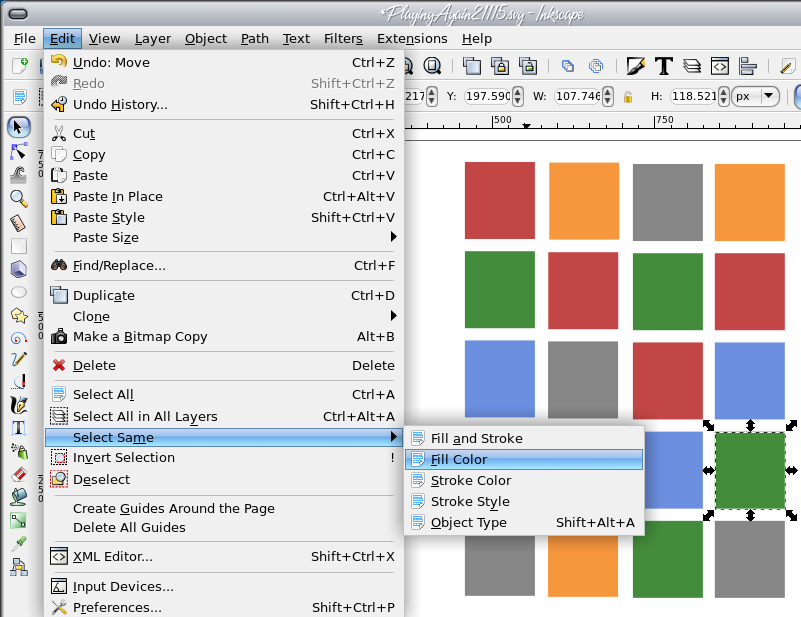 While we didn't actually complete a project, I hope you have a better understanding of the new tools present in Inkscape and how they will make your artwork easier to do. I always look forward to seeing any of your projects, and I hope you have enjoyed creating them. |