| Previous
Page |
PCLinuxOS
Magazine |
PCLinuxOS |
Article List |
Disclaimer |
Next Page |
Inkscape Tutorial: Creating A Feathered Background |
|
by Meemaw Many of the wallpapers and Impress backgrounds I have seen seem to have a kind of "whispy" or feathered background. Solid colors are nice, and so are gradients, but this tutorial I found gives us another option. We will use Spiro and Clones in Inkscape, along with a few other skills we have learned along the way. In this one, I went into Document Properties and unchecked the page frame and shadow checkboxes at the bottom so I have lots of room to work without seeing the page outline in the background. First, click on the pen tool. In the tool config at the top of your window (shown below), click on the Spiro tool, then draw a curved path with 5 points.  All segments should be curves. As soon as you finish the curve, it will change to a spiro curve. 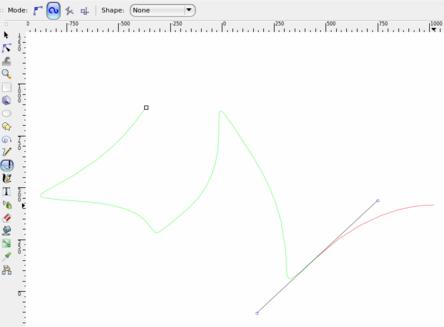 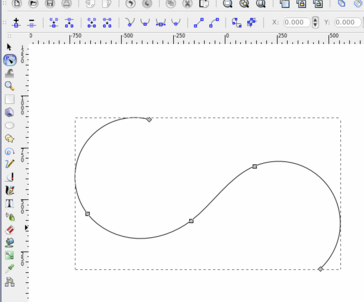 Click on Path > Path Effects to open that window. You will see that the Spiro spline is already present in that window as it is a default in Inkscape now. 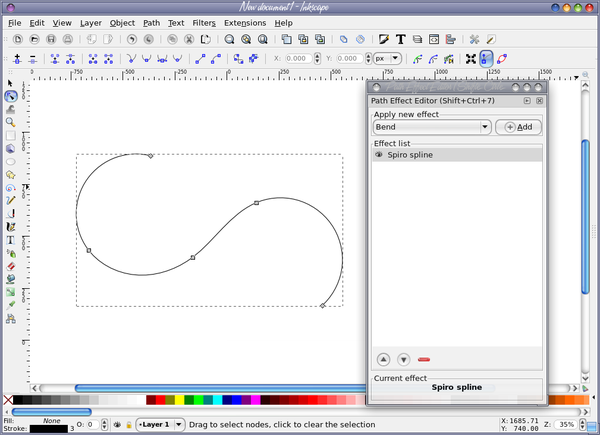 Next, we will add a triangle "brush" to our spiro curve using the Path Effect Pattern on Path. Using the pen tool, draw a triangle. While it is selected, copy it to the clipboard using Edit > Copy (or <CTRL> + C). With the Path Effects dialog open, choose Pattern on Path from the dropdown, then press the Add button In the Path Effects dialog, click the clipboard icon to paste the triangle we copied there. The triangle is the pattern ("brush") we are putting on our path (the spiro). Your spiro should now look something like this. 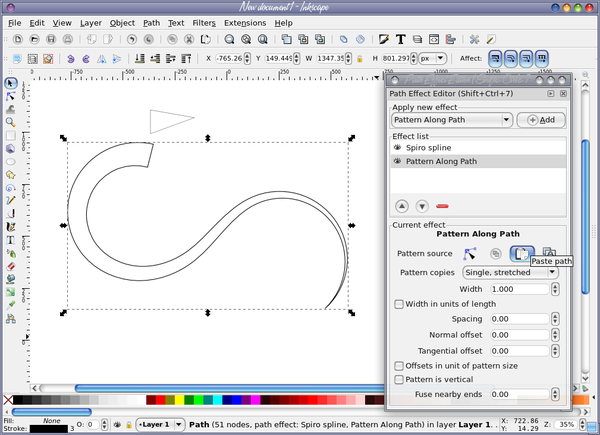 Now, we will unset the fill and the stroke of the tapered curve that we are going to use. Right click on the "None" label next to fill in the bottom left corner, and choose "Unset Fill" from the menu that appears. Right click on the black box next to stroke in the bottom right corner, and choose "Unset Stroke" from the menu that appears. 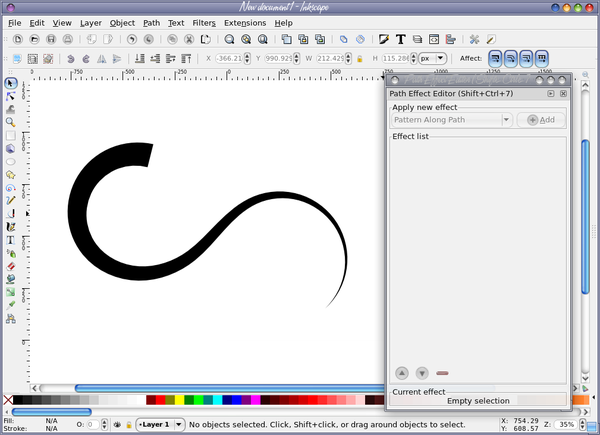 Next, we need to clone our path, move the clone away from the original, change the color to something other than black, and duplicate it several times. Select the path with the select tool, then make ONE clone of it, using Edit > Clone > Create Clone or ALT + D. Separate your clone from the original curve so you have room to work. 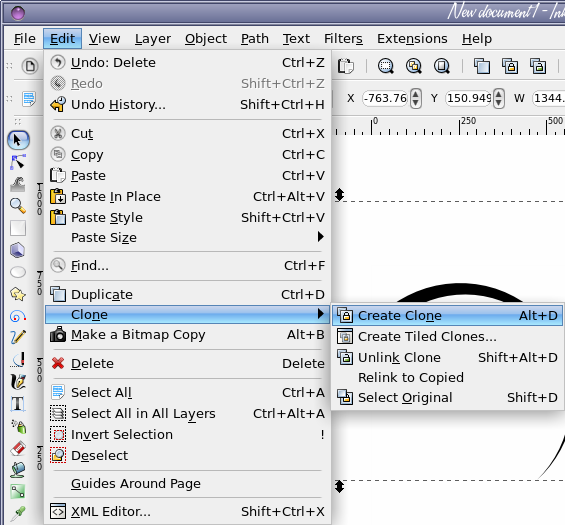 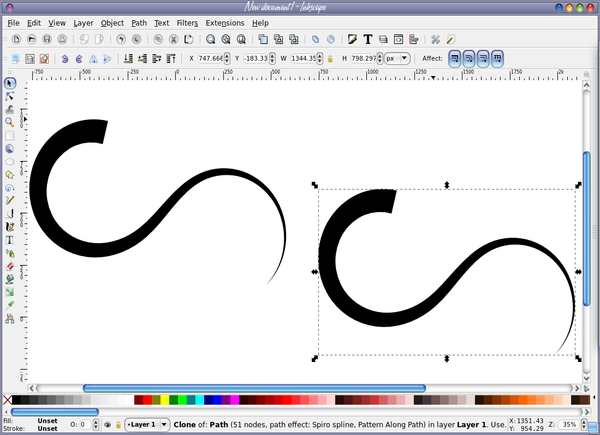
The curve selected is the clone, and I’m going to separate them more. Change the color of the clone either with the palette at the bottom or the Fill/Stroke dialog. Only the clone should change color. If both objects change, you are probably changing the color of the original and you should grab the other curve and work on it instead. Shown below, the clone is the only one that changed color. 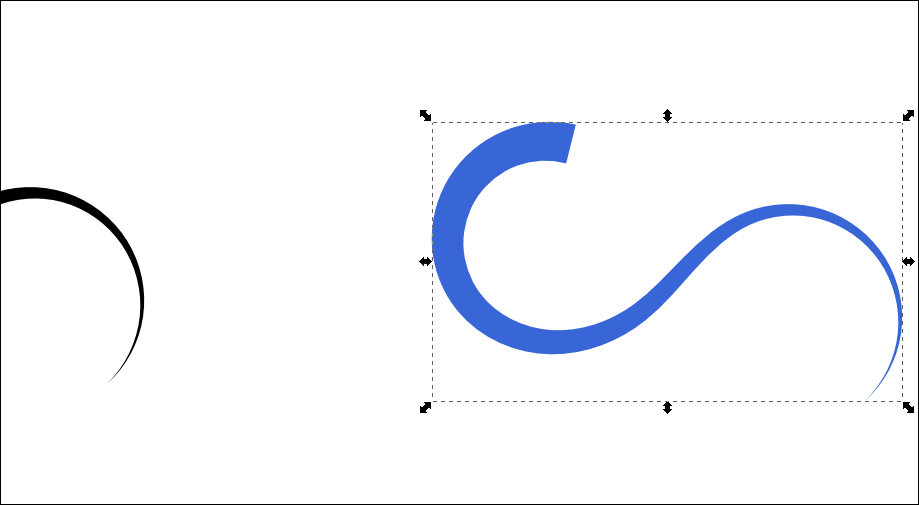 Duplicate the colored clone 30 or so times using Edit > Duplicate or CTRL + D. Now, we are going to use the tweak tool to jitter the position of our 30 clones, as well as jitter some the saturation and lightness values of the clones. Using the select tool, click and drag around the clones to select all 30. If you aren’t sure, look in the status bar at the bottom of your window, which should say something like "30 Objects selected...." Click on the tweak tool in the toolbox, then look at the configurations across the top of your page. The Tweak tool has three modes for moving objects but you want Move Objects in Random Directions. Now click and drag the tweak tool over the clones and watch them move. If they don’t look like they are moving much, you may need to play with the Width and Force values of the tweak tool. I used 25 for Width and 20 for Force. The selection outline of the objects will disappear when using the tweak tool, so you won’t see all the dotted lines around everything. Your end result should look something like this:  With the 30 clones still selected, open the Fill / Stroke Dialog, and lower the opacity of the clones. The tutorial used 30%, so I did too.  With all clones still selected, go back to the Tweak tool, and this time set the mode to Jitter Colors. Make sure the only 2 values checked/toggled are Saturation and Lightness. On my desktop the channels show as toggle buttons in the toolbar, since my screen is wider. In a smaller window they will be hidden in a dropdown. Click and drag over the clones and watch their colors change slightly. If they change too much, consider tweaking the Force value. 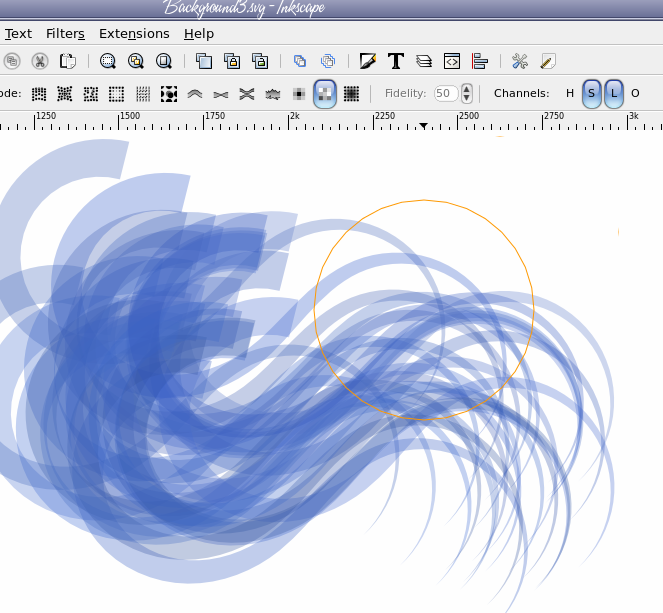 If we want to, we can play with the original that all our clones are based on, as well as our triangle "Brush". Select the black original, and change to the node tool. The familiar node editing handles should appear. Move the nodes of your spiro to make a better curve. Notice that your creation will update with the changes to the black original path. Play around with it until you get something that you want. 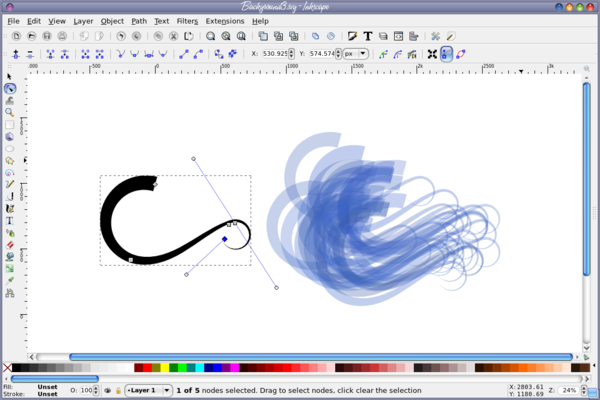 You can also change the "Brush" we used to create the curve design. Click on the Show Pattern Source button in the Path Effects dialog, and somewhere on the Inkscape canvas, your triangle should appear (you may need to zoom out to see where it appears. if it is far from your drawing, select all 3 nodes and move it closer.) 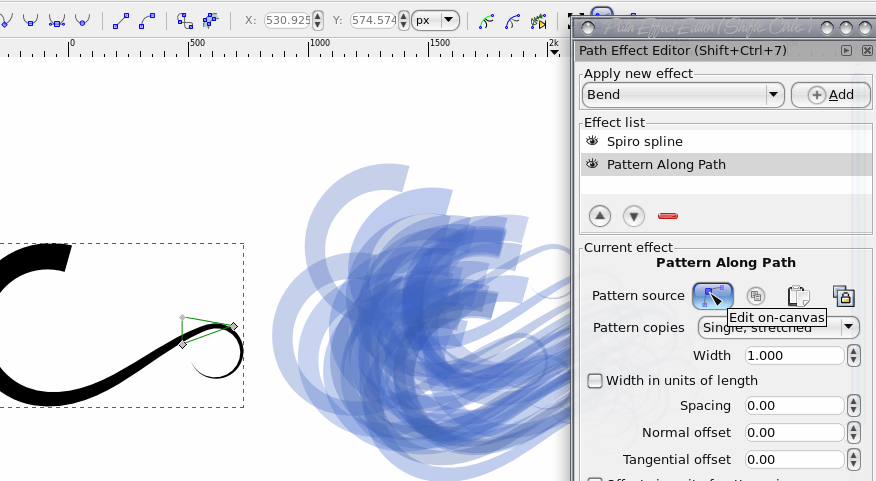 Can you see my triangle? Now, using the node tool, edit the triangle shape, adding and moving nodes. Your changes should update as you go on the black original path, and also the blue clones. Cool, huh? 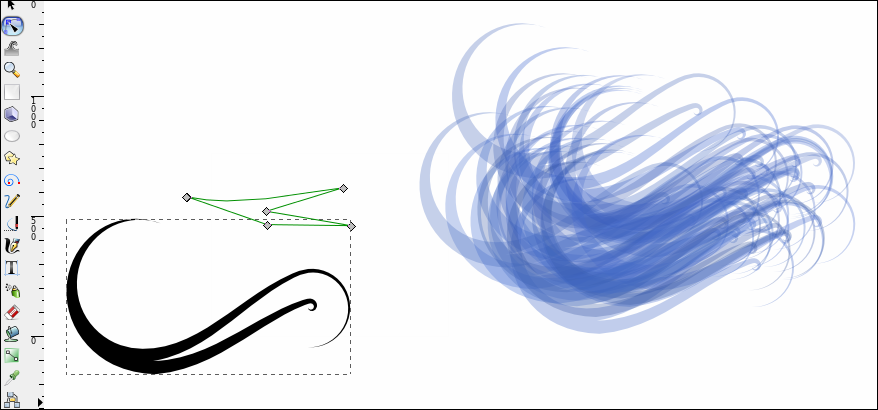 Let’s do a bit more. Group your clones together, then duplicate the group 2 or 3 times, rotate each one a bit, and change the opacity of each group. When I got close to what I wanted, I found that I wanted it a bit more blue with less white, so I duplicated the whole grouping once more. Now, you can finish this one of two ways. You can draw a rectangle over the area, and use a clipping path to create a rectangular background, or you can go back to Document Properties, make your page visible by checking the page border checkbox, place your finished texture over it and export the PAGE as a bitmap.  After I finished the background, I then used it to create a background for a LibreOffice Impress presentation.  The great thing about this project is that you can always go back and change the curve, or the brush (or both) and the color and have another feathered background to use for whatever you want. |