| Previous
Page |
PCLinuxOS
Magazine |
PCLinuxOS |
Article List |
Disclaimer |
Next Page |
Inkscape Tutorial: Tracing A Logo |
|
by Khadis On some occasions, I often help people to create or to re-create a logo they have. Mostly, they come with a bitmap logo (a scanned draft of logo) or come with low-resolution bitmap image. They often need a new logo that can be used or manipulated for later use. In brief, they need a vector format of a logo, which can be easily made using Inkscape. The tutorial below will show you how to trace random simple logo I picked from my logo collection. Step One: To trace a logo, we need the Bezier Tool (Shift + F6). Then, after this tool is in your hand, now draw a continuous line starting from point "A" to point "B". 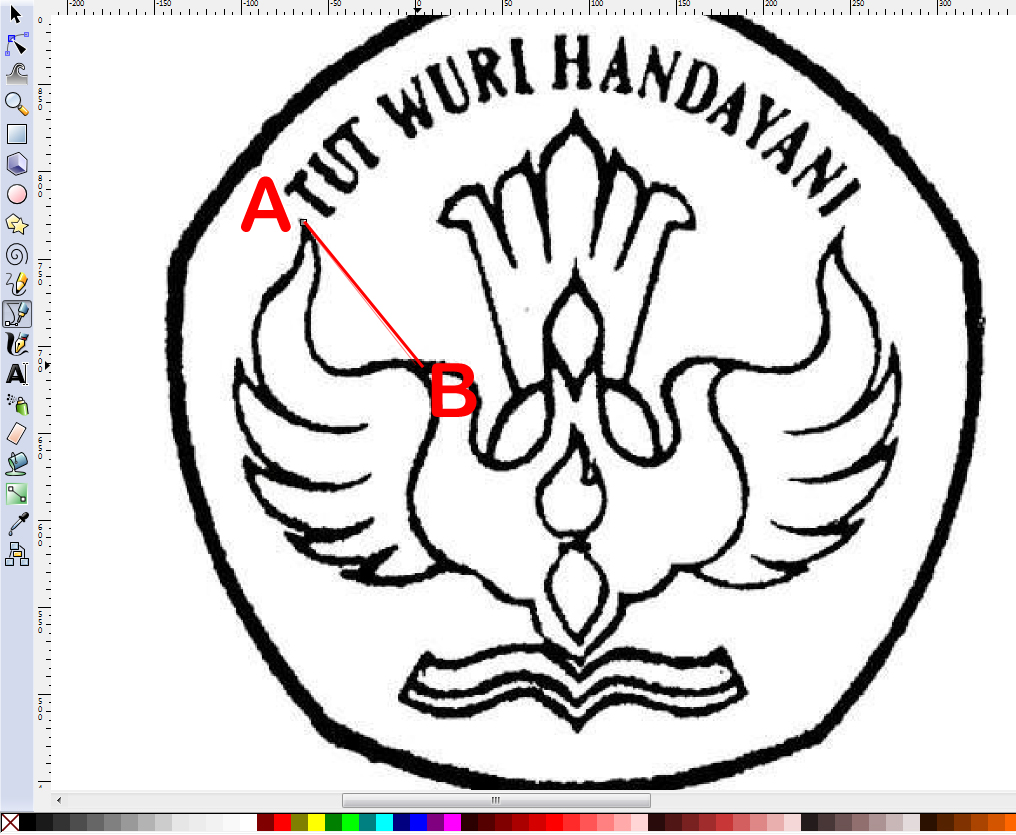 Step Two: If your default line is hard to see, you can zoom the screen to get better view. You can also raise the stroke width and change the stroke color. For now, I changed the stroke width into 2 px and red as the color. We can always turn its color back into its original one, of course. Step Three: Keep drawing the line by clicking on each corner until you get as pictured below (in the end, click on the starting point to close the curve/path): 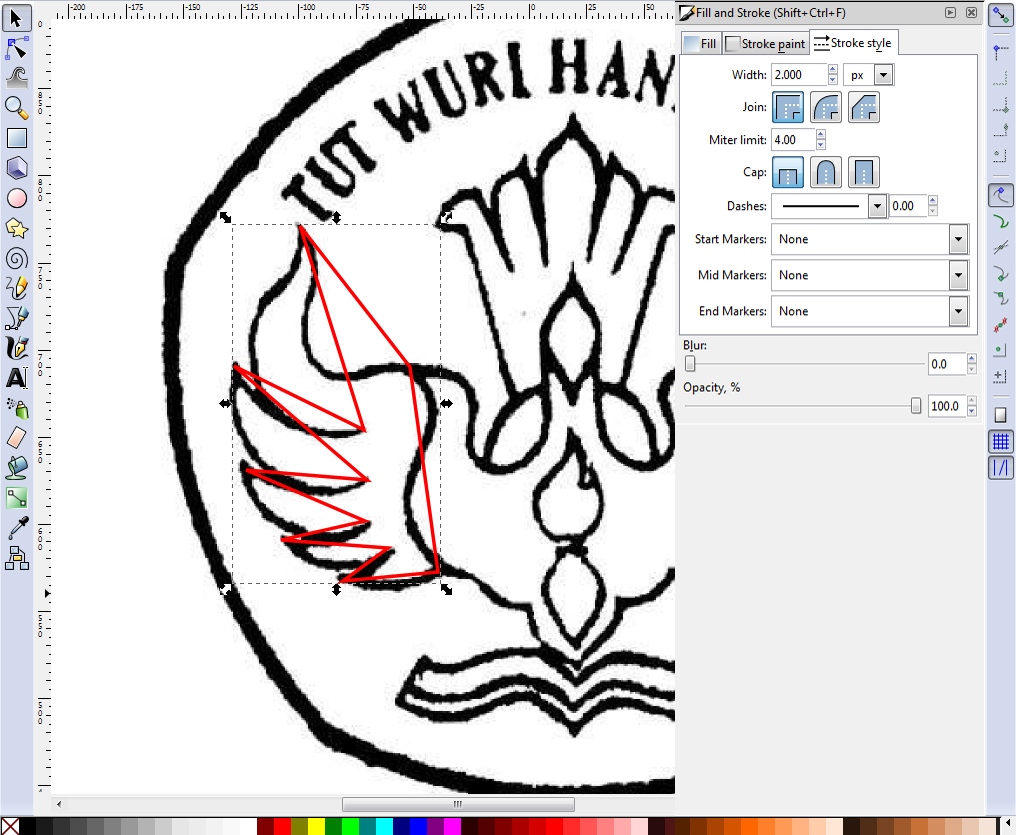 Step Four: Using "Edit path by nodes" tool (F2), you can manipulate the path into desired shape (e.g. bend the straight line into a curved one). 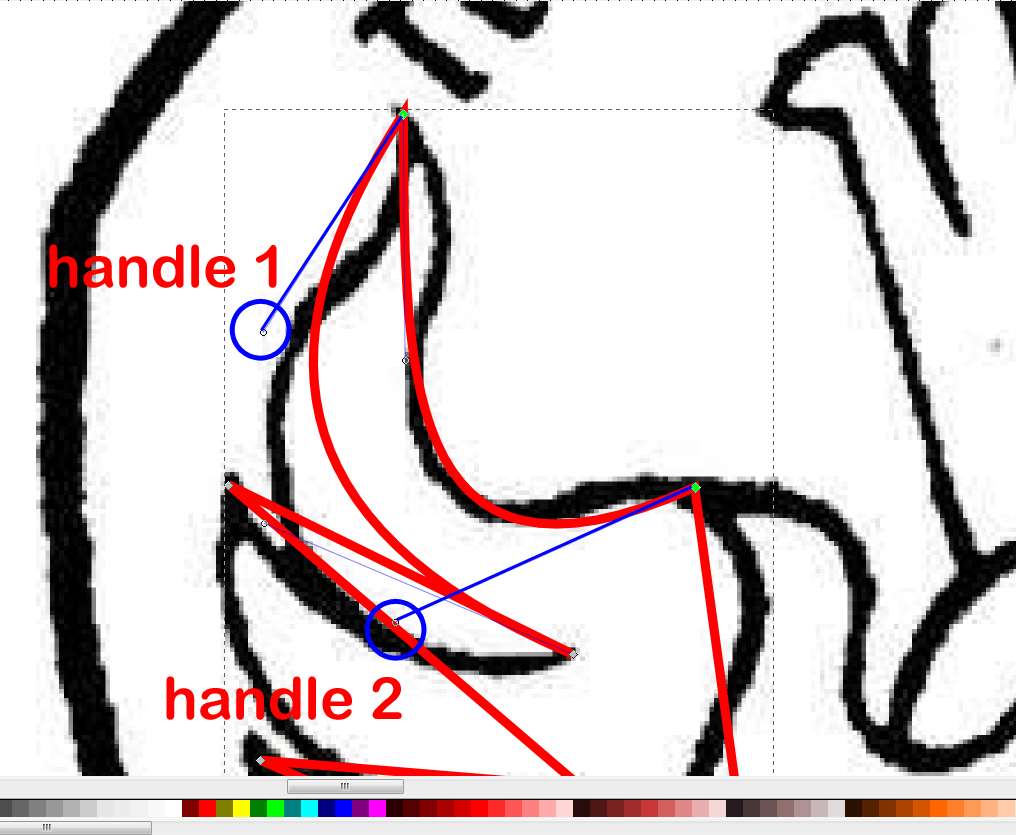 Step Five: Using this tool, pull the middle part of the line. You will also get two handles which can be lifted up and down to bend the line. If you find the nodes you have are not enough, you can always add the nodes by double clicking your mouse on the path. Step Six: After all parts have been bent, you can continue to another part. For the logo I traced here, I have a pair of symmetric wings, so I do not need to trace the remaining wing part, but later I can copy and flip it instead. In the picture below, I traced the middle part of my logo using 3 px-stroked blue curve so you can spot the difference. 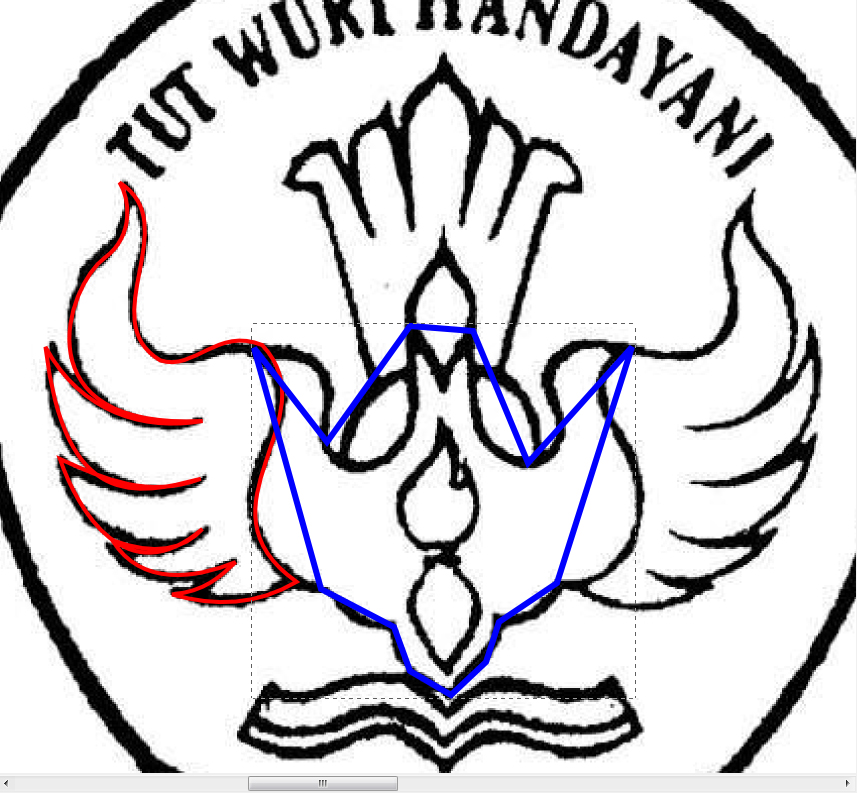 Step Seven: Using "Edit path by nodes" tool (F2), you can bend the line following the original path (logo). The final touch will be like this: 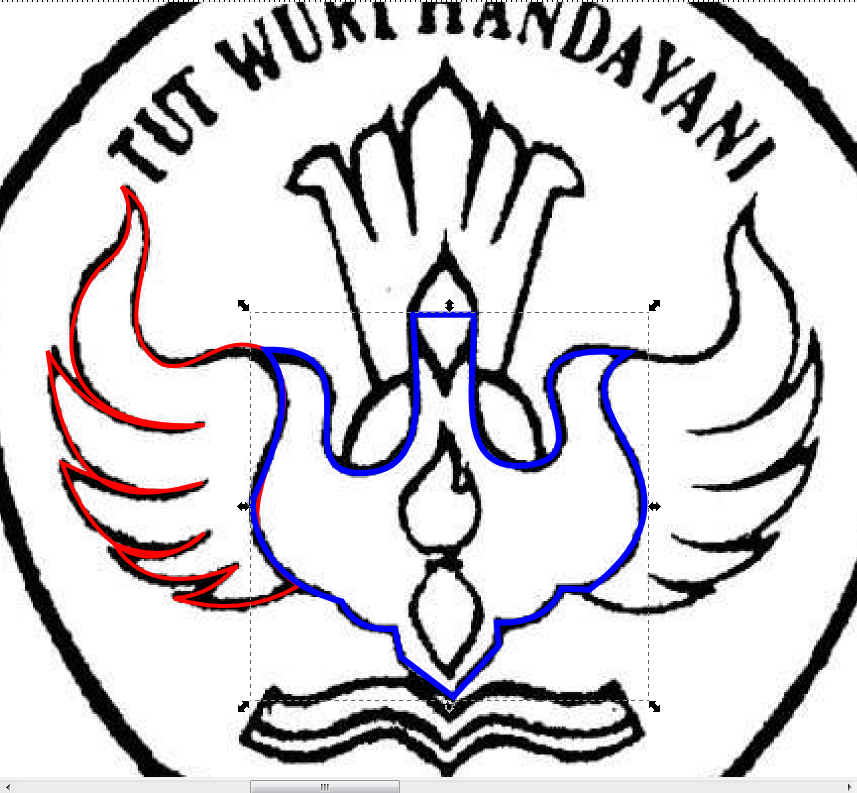 Step Eight: Do the same steps for other parts. Now, let's insert text, as in the original logo. Using the Text tool (F8), type the text. I use Times New Roman 32 pt. Your font size may be different from mine because of the size of the overall picture. Step Nine: Next, let's create a path as we will put the text on a path. For the path, I use an ellipse. To ensure that the text will flow on the path correctly, I drew an ellipse right under the original text to measure the required size. Look at the 4 px-stroked green ellipse below:  Step Ten: After you get the right size of your path (your ellipse), now put the text on it. Select your text and your ellipse, then go to the Text > Put on path menu. Your text will be placed on the ellipse. You might need to make some minor adjustments so that the text position fits your needs. After your text is positioned to your satisfaction, you can remove the ellipse. Step Eleven: Finally, it's time to put a pentagon shape as the background. Please group all the objects first. After that, create a black-stroked pentagon (no fill color) using Stars and Polygon Tool (*). Adjust the size as you need and set the rounded into 0.100.  Step Twelve: You can then adjust the shape of this pentagon by converting it into path (Path – Object to path menu or press Shift + Ctrl + C) and re-shape it using "Edit path by nodes" tool (F2). Step Thirteen: Now, align the grouped objects with the pentagon. Make them centered horizontally and vertically. 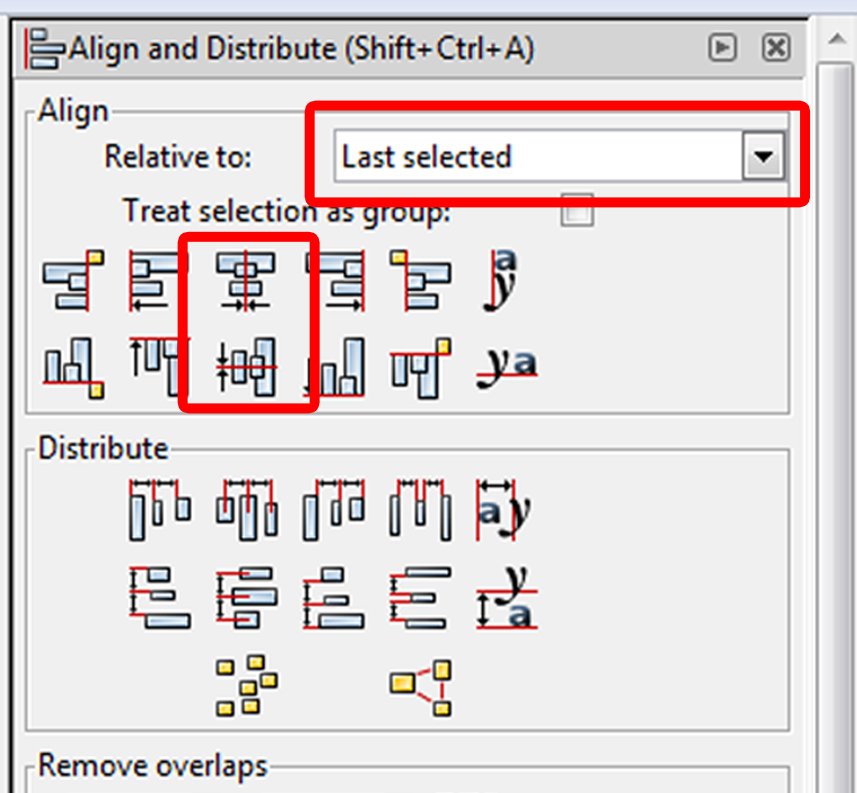 That's all. Now, you can trace any logo you want only by using Bezier curves. |