| Previous
Page |
PCLinuxOS
Magazine |
PCLinuxOS |
Article List |
Disclaimer |
Next Page |
LibreOffice Macros |
|
by zerocool OK, I admit it! I was an Excel wizard. Actually, that was my single greatest stumbling block preventing me from switching to Linux. I knew without dropping the Excel magic book of tricks I'd be spell-bound to Bill Gates. Luckily, after I found PCLinuxOS, I was highly motivated to write a new book of tricks chock full of open source magic. Granted, it wasn't easy. I had toiled long and hard for years in an effort to make Excel do my bidding. It had become second nature. It took time, effort and determination, but I can now call myself a LibreOffice Calc wizard! Just like Excel, Calc supports a full programming interface, macros, and form control elements. Macros can be coded in LibreOffice basic, python, beanshell, or javascript. The form control elements range from standard push buttons, check boxes, radio buttons, text box, combo box, list box... A complete writeup on the use of all the languages and controls would surely be beyond the scope of this article. Rather, I will be discussing the use of LibreOffice basic to automate basic spreadsheet function via a few standard form elements. It's my hope that this might make your transition to Linux just a bit easier. So with that in mind, let's get started. It goes without saying we can't start coding if we don't have LibreOffice office suite installed. PCLinuxOS utilizes the LibreOffice Manager application for accomplishing that task for us. So if it's not already installed, (in most cases it should be, but if not) open the Synaptic package manager and install LibreOffice Manager. Then run it and follow the screen prompts to install LibreOffice office suite. If you're having trouble getting it installed, please refer to the forums and ask one of our many helpful forum members for assistance. Then, open a new calc document. The first basic functions we'll look at are reading the contents of a cell into a variable, performing some operation on that variable, and then writing the new value to a new cell. We'll then automate the process by attaching this little useless macro to a push button. Sounds fun right? Believe me, it really is. So let's start by populating some cells. In A1 type "PC", in A2 type "Linux", and in A3 type "OS". Then open the macro programming interface by clicking Tools > Macros > Organize Macros > LibreOffice Basic. This will open the Basic Macros dialog. 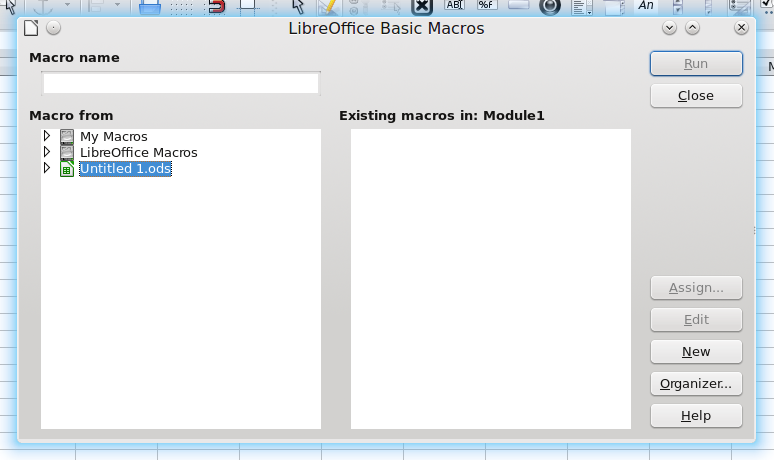 Click on the little arrow next to "Untitled 1" (the spreadsheet name) in the left hand pane, 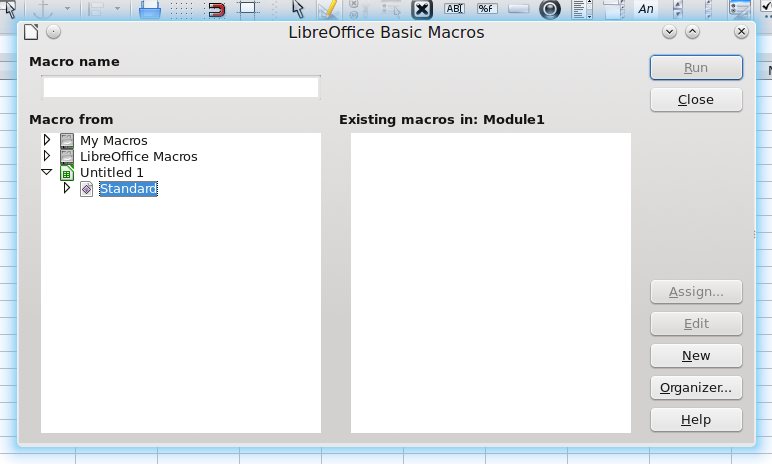 then select "standard" and click the "New" button. 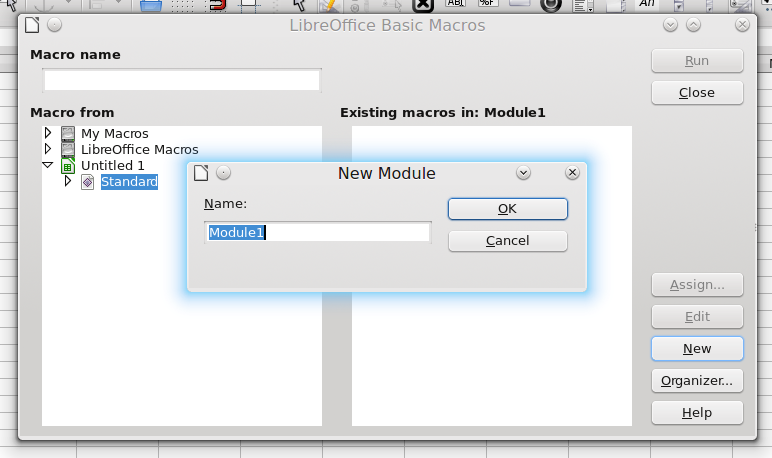 Then click OK to open a new macro module called "Module1." 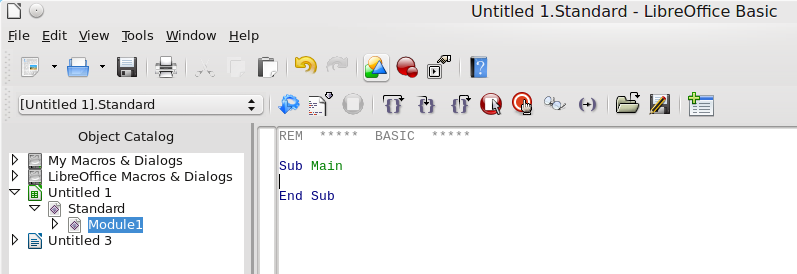
Referring to the image above, in the left hand pane we have created a module called "Module1". Modules can contain several macros and we could rename "Module1" to anything we like. In the right hand pane is our macro currently called "Main." Again, we could rename it to anything we like but we'll leave both as is for these purposes. As you can see, we have "Sub Main" and "End Sub" and any code we write goes in between these two statements. 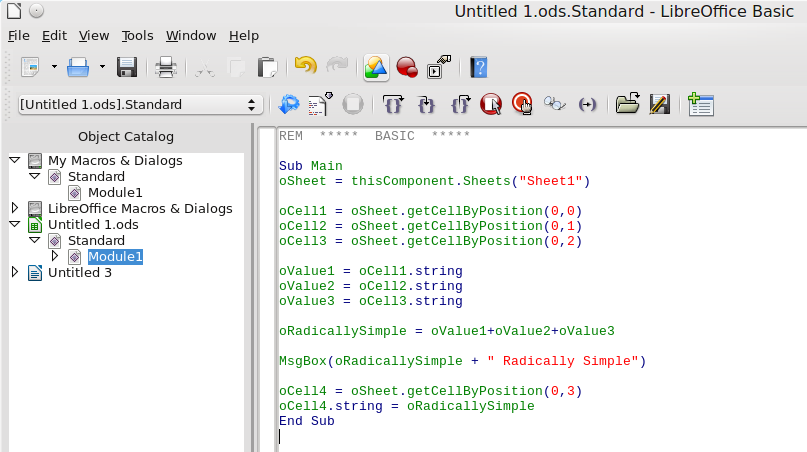
Now we'll go over each statement and what it does. The first statement: With the getCellByPosition values in column, row order. This is great. Right? We now have pointers to the three cells which contain the data we want to manipulate. Now all we have to do is use those pointers to get the actual data contained in the cells and that's what the next three statements do.
oValue1 = oCell1.string
These statements simply say:
Next, we combine these three separate values into a single variable called oRadicallySimple: 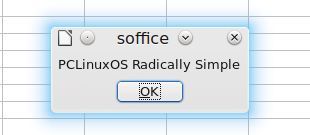
and lastly, we write the contents of the variable oRadicallySimple to cell A4 like such: 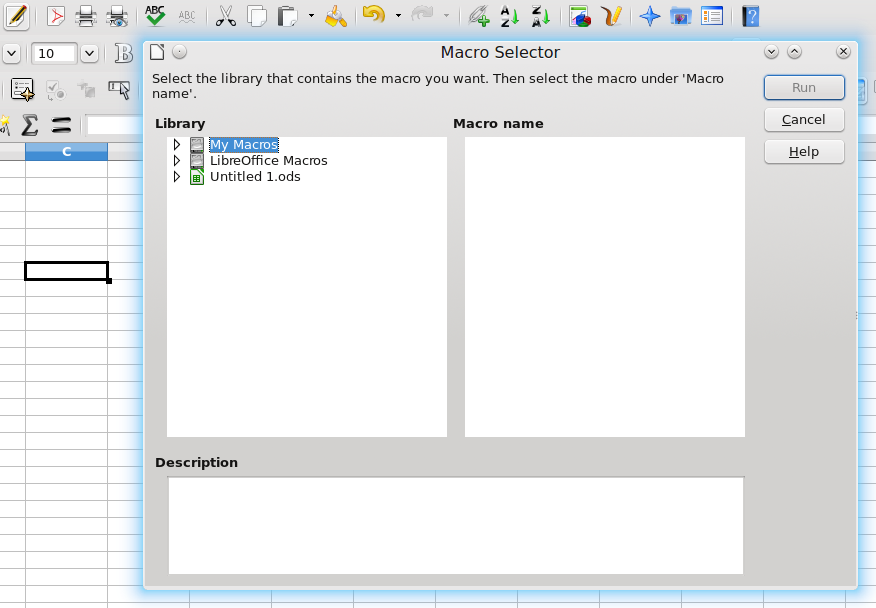 Now, double click "Untitled.ods", double click "Standard", and click on Module1. 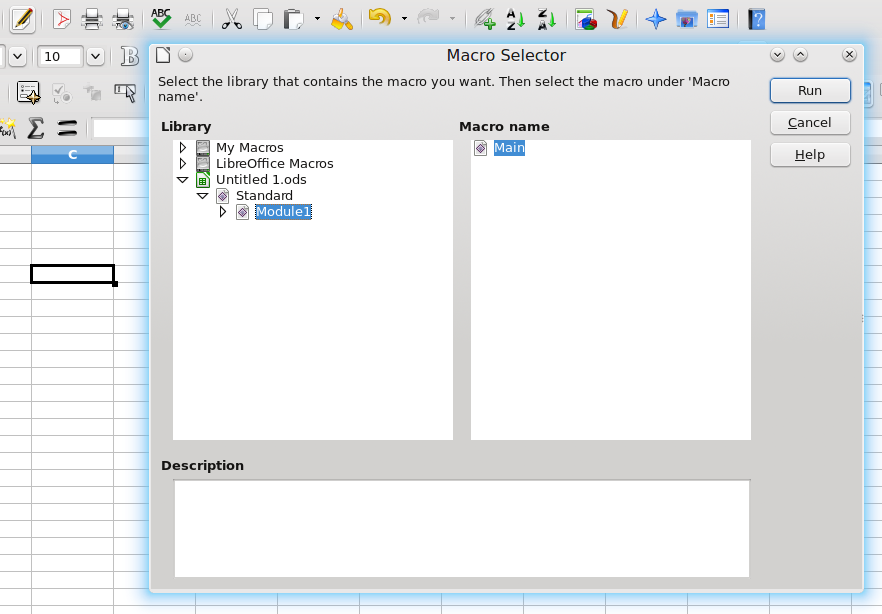 "Main" should be highlighted and click the "Run" button. TADA!!! Cool huh? But really rather tedious after about the tenth time! So let's fix that, too. Let's connect our macro to a push button. First, make sure the form controls toolbar is turned on. Click View > Tool Bars, and make sure "Form Controls" is checked. Then click on the "Push Button" control. Then click and drag somewhere on your sheet wherever you want your button. 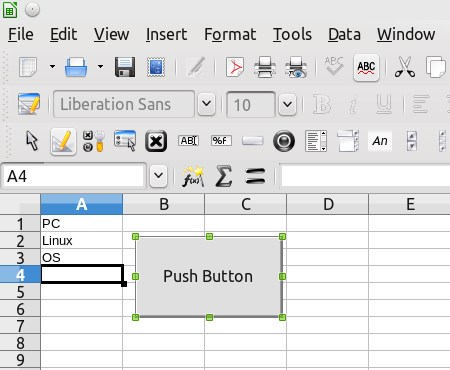 Now, right click on your new button and select Control. If your right click is not working, toggle the Design Mode icon from the form controls toolbar, and then try right clicking again. 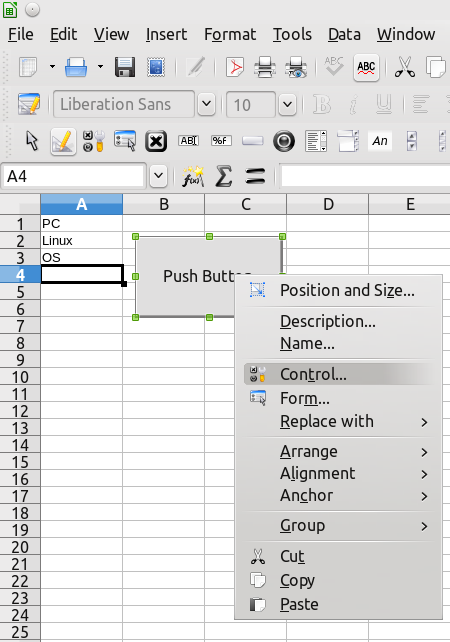 This will bring up the buttons control dialog box. 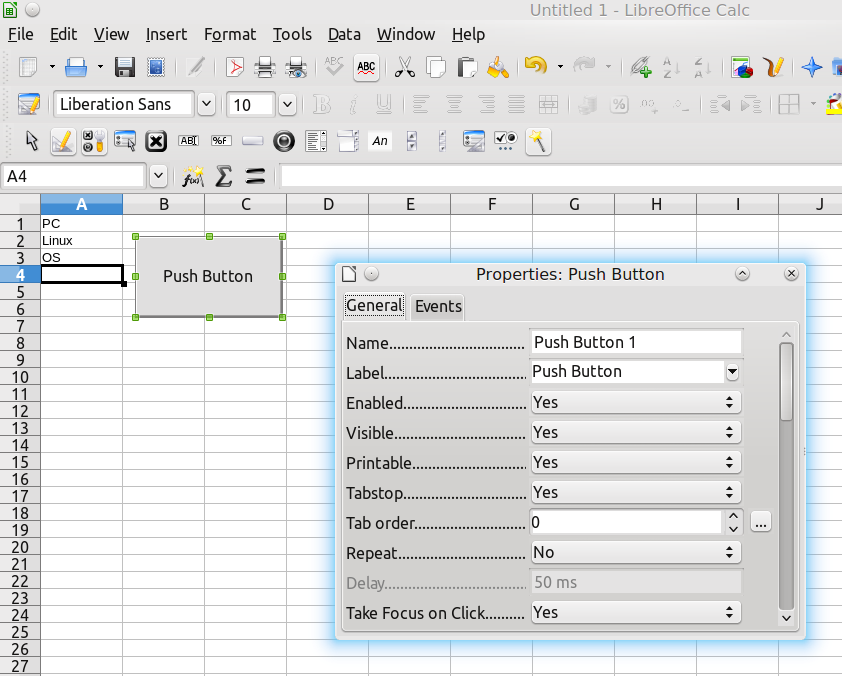 Now, click on the "Events" tab and scroll down to the "Mouse button released" setting. 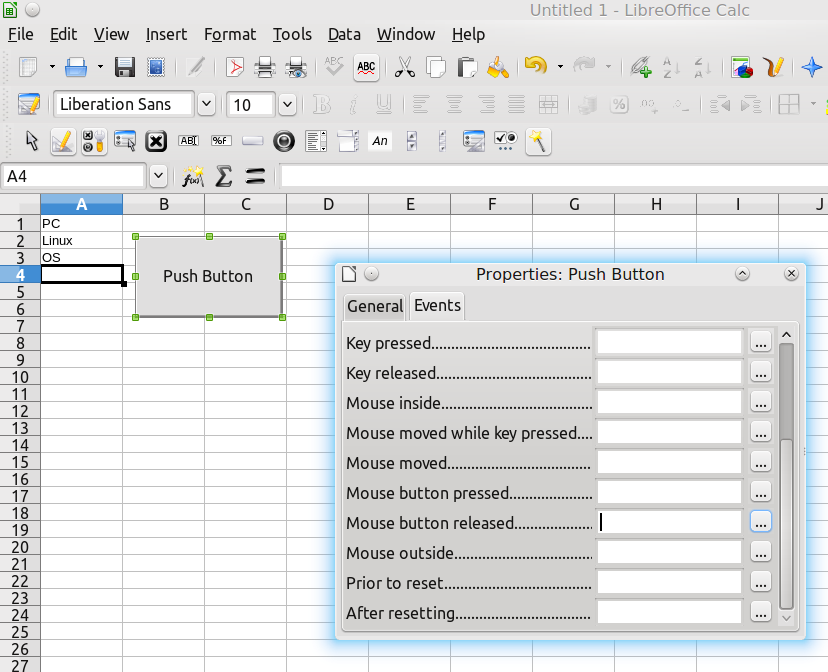 Now click the little button with the 3 dots at the end of that line.  Now click on the "Macro..." button. 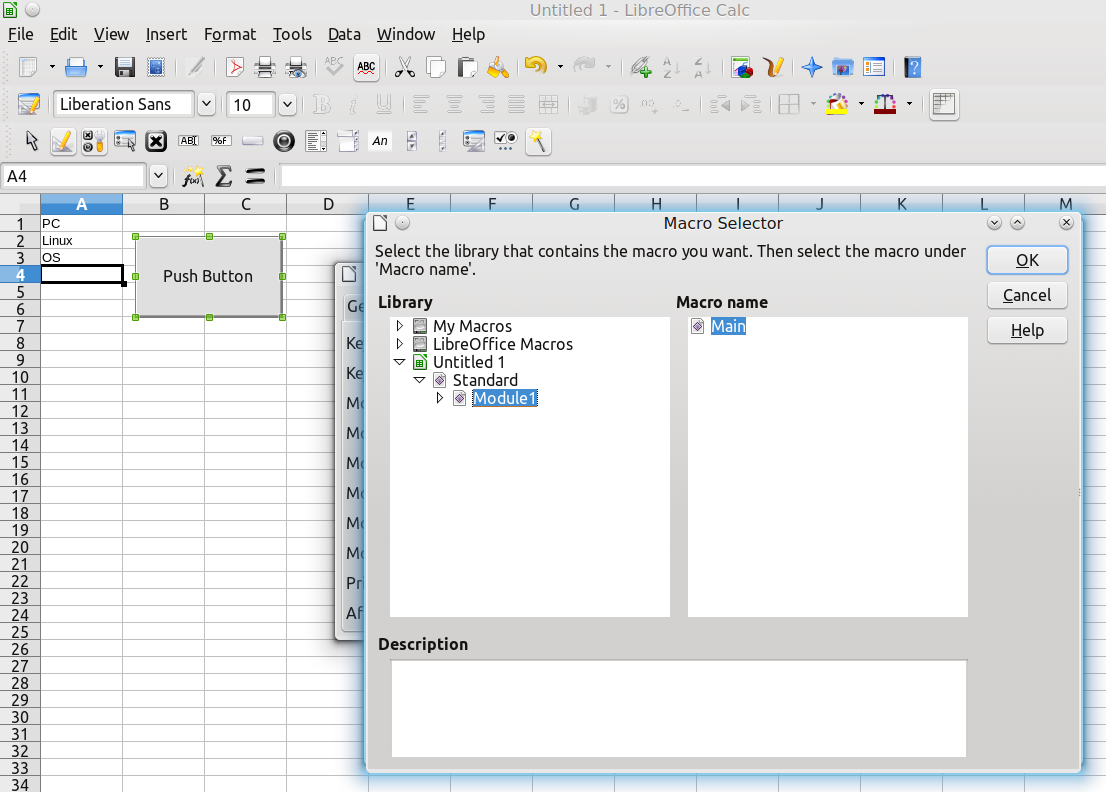 From here, it's just like it was to run it. Double click "Untitled.ods", double click "Standard", and click on Module1, and when "Main" is highlighted click "OK". 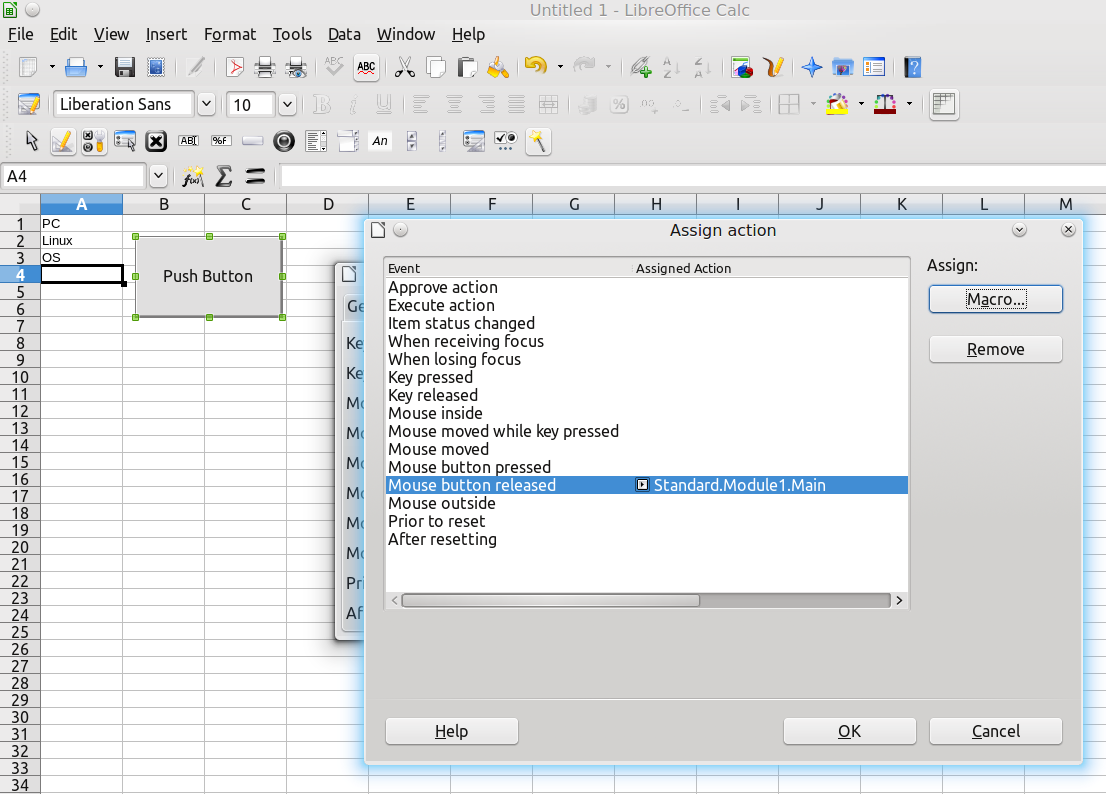 Click OK again. 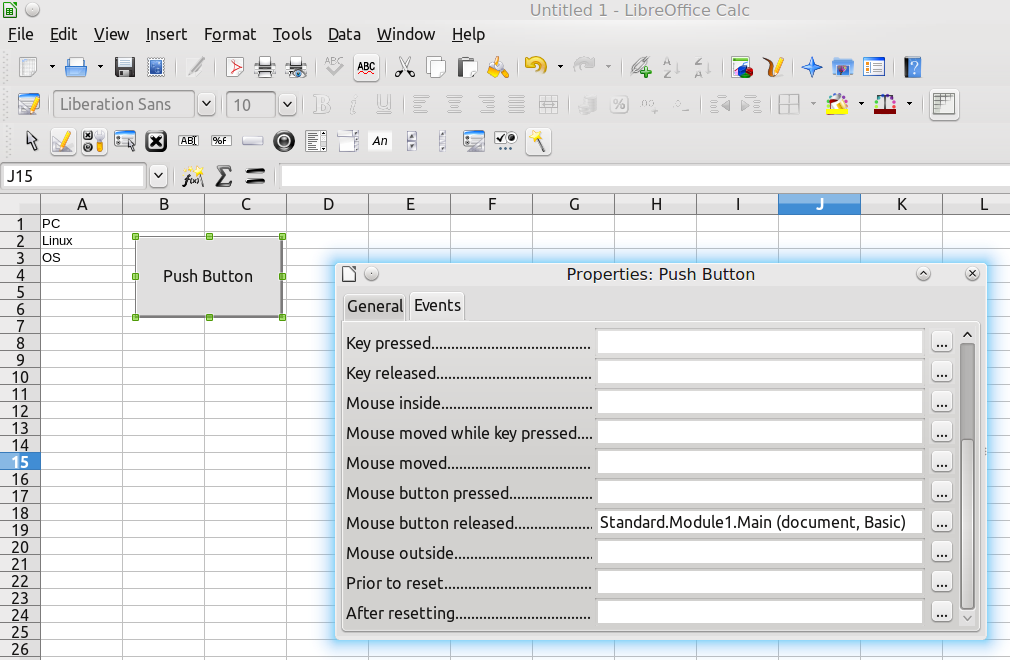 Close this dialog and toggle the "Design Mode" icon on the forms control tool bar. If you did everything correctly, you should now be able to run your macro by clicking the button.  Exciting right? You have just taken your first step into a much larger world! Don't be afraid to experiment and there are many great sources for expanding your knowledge of LibreOffice Basic. The possibilities are limited only by your imagination. I hope you all enjoyed it and maybe we'll do some more sometime soon. Till then, keep on coding. |