| Previous
Page |
PCLinuxOS
Magazine |
PCLinuxOS |
Article List |
Disclaimer |
Next Page |
GIMP Tutorial: Fixing A Photo
|
|
by Meemaw Not all the photos we have are in perfect condition, especially older photos of parents or grandparents. My cousin and I have shared many photos of family members, and many of those photos are not in the greatest shape. Many are torn or cracked. If you can scan and save these photos to your computer, Gimp can help you do a good job of fixing them. I have this photo that is cracked and too dark in places; 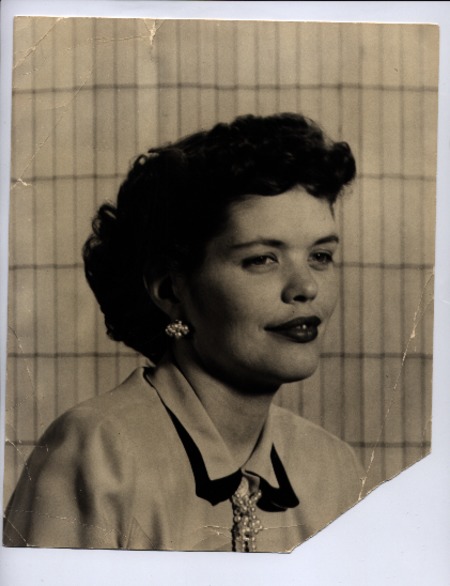 I would like to fix the cracks and even out the color. Find a photo you would like to fix and we'll get to it. Opening it in Gimp, the first thing you should do is choose File > Save a copy. Name it whatever you wish and allow it to be saved with the .xcf file extension. This way you will still have your original photo just in case something happens to your work. Fixing the cracks will be done with the Clone tool, which looks like a date stamper to me.  Click on the Clone tool, choose a place in your photo you want to fix and, holding down the <CTRL> key, click on a spot nearby that is the same color and texture you want to use to fix the crack. If necessary, zoom into your drawing to see your work more clearly. Also, depending on what you need to clone, adjust the size of your brush. I'm working on the background, which has darker lines every so often, so I made my brush 5.5 px wide. The circle with the + inside is the indication that my clone area has been selected. 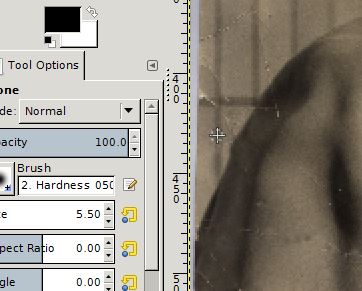 You will want to use small strokes and go slowly. Also, you will want to change your clone sample as many times as necessary to match the area you are fixing. I have to change several times because the background is a light color with darker lines, and different areas of the photo are different shades of those colors. While I am at it, I've decided to try to reconstruct the bottom right corner of the photo, which has torn off. For the background, I have chosen to copy an area of the existing background and place it into the missing corner. I used the crop tool and outlined an area, clicking <CTRL> + C (Copy) and then <CTRL> + V (Paste), and then moving each pasted piece into position down the right side of the photo. 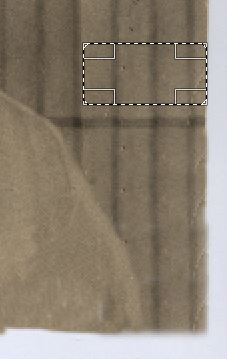 The tear on the corner also cut off part of her arm, so, using the clone tool again, I very slowly put the same colors as her blouse into the photo, changing my clone selection where it needed to be lighter or darker. I can always go back and put in more detail, but I'm happy with it at the moment. Any time you are happy with the work you have done up to that point, you should save your work. Remember, if you clone in a color and it looks wrong, you can always use <CTRL> + Z (Undo) 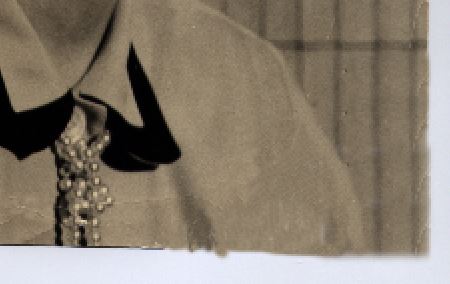 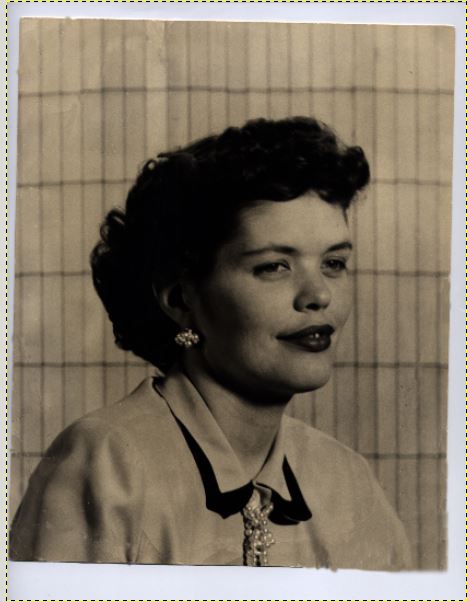 Once you get everything cloned to your satisfaction and save your photo, you can lighten the color a little by choosing Color > Brightness - Contrast. The Color menu has several color tools, but we can start here. 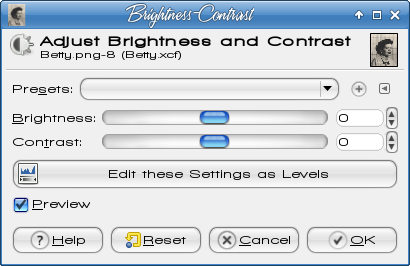 You can slide the sliders in the center, or click on the up & down arrows at the right. I choose the arrows because the sliders are not as easy for me to control and I always go too far. The good thing about the arrows is that you can go up or down one number at a time, and stop when you think you have it right. I ended up setting the brightness up to around 72 and the contrast up to about 22, but your photo may need different settings. When you get what you think you want, click OK. 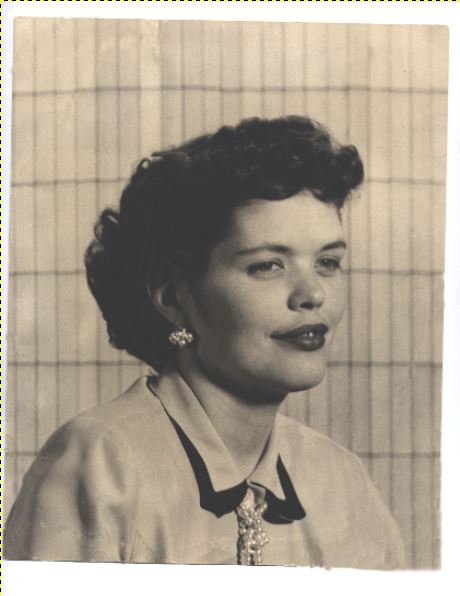 This doesn't look right yet. One trick you can use is to Undo your editing using <CTRL> + Z and then Redo it using <CTRL> + Y. Toggling back & forth will give you an opportunity to see the original in comparison to your work, and decide what you need to do next. I don't think it's quite sharp enough, so I'm going to set the contrast up a bit. 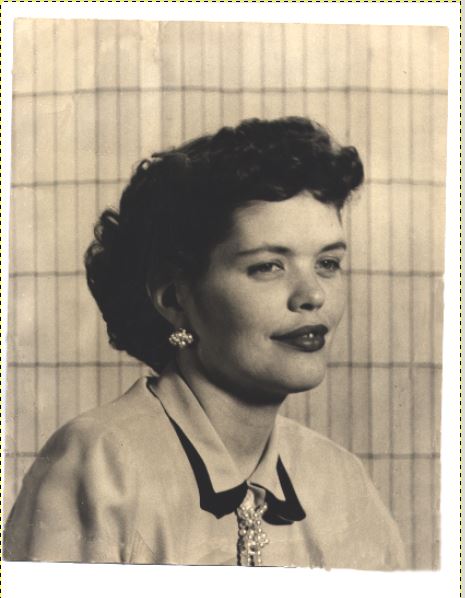 I like this one, so I saved it. Feel free to keep adjusting your photo until it looks right to you, then save it.
The next thing I'm going to do is rotate my photo. It looks like it was placed in the scanner crooked. Click on the Rotation tool, 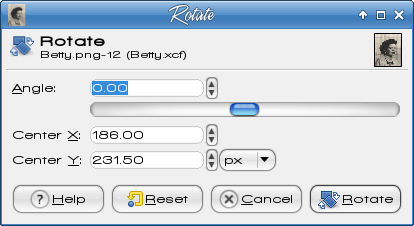 Last, I'm going to crop the ragged edges out of it. Using the Rectangle Select tool, draw a rectangle around the photo and the choose Image > Crop to Selection. When you have it rotated and cropped to your liking, save your work. You can always keep the .xcf file to work on it further, but you can also Export your photo to an image file (png, jpg or whatever you want). Remember, if you click "Save", your photo is saved as a Gimp .xcf file. If you want to save it as anything else, you should click "Export...", then choose the format you want.  One other item is the color of the photo. This photo has a sepia tone to it. Some of the tone may be intentional by the original photographer and some may simply be yellowing because of age. You may wish to reduce the sepia tone using Colors > Hue-Saturation. This will change it to more of a black & white photo. Here is the photo with the saturation adjusted by -50. 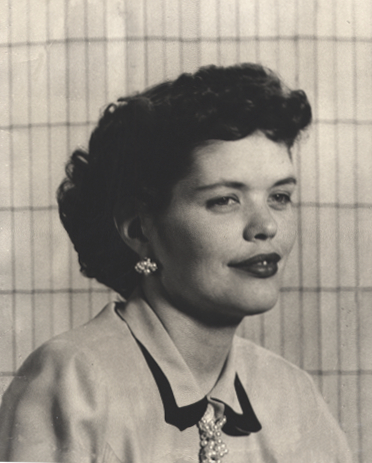 As always, it is your creation, so you can change it as much or as little as you want. When it looks good to you, and you think it's finished, then you should save it and/or export it. We've seen that just a few tools in Gimp's toolbox will help us "restore" a photo, or at least repair one. I'm sure that your photo album will look wonderful very soon. |
 then click in the center of the photo.
You will get a Rotate window, and a grid will appear over your photo. Using the arrow keys will help you rotate your photo until it's correct (mine only needed a few degrees). When you are finished, click OK. You can always open it again if you decide that you need to change it.
then click in the center of the photo.
You will get a Rotate window, and a grid will appear over your photo. Using the arrow keys will help you rotate your photo until it's correct (mine only needed a few degrees). When you are finished, click OK. You can always open it again if you decide that you need to change it.