
| Previous
Page |
PCLinuxOS
Magazine |
PCLinuxOS |
Article List |
Disclaimer |
Next Page |
Inkscape: Tree Silhouette In Sunset, Part 2
|
|
by Meemaw Last month we made our tree into a silhouette. We started this project in GIMP, but now we are going to use Inkscape to finish it. 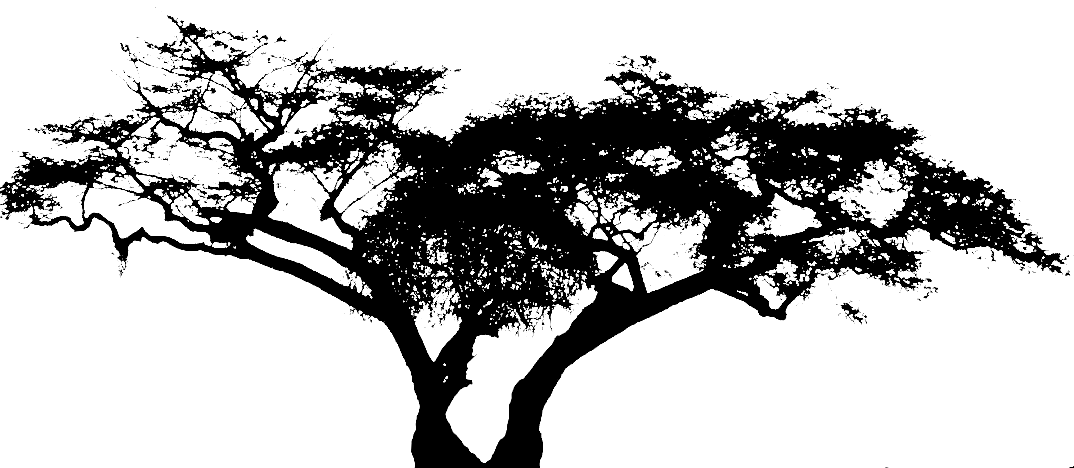 Load your tree into Inkscape. You will always get a window asking if you want to Link or embed the image. With this project it doesn't matter. We are going to do a bitmap trace of the tree. We can use the original image file if we wish, but I also want to experiment. A bitmap trace will enable us to manipulate our drawing easier and do more things with it while keeping the file size smaller. Click on Path > Trace Bitmap. The window that opens will have several items from which to choose. 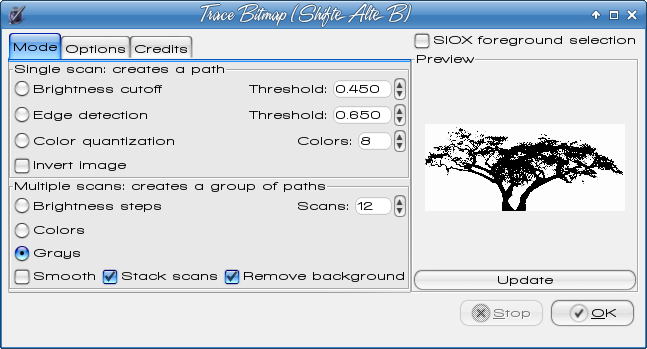 You want to make sure that "Grays" is checked, along with the "Remove Background" checkbox. You can set the number of scans, which will show up as layers in different shades of gray, from 5 to 15. I used 12. Click OK. Inkscape is going to trace over the original drawing we loaded. Depending on your computer hardware, this might take a bit. Just as duplicating an object puts the duplicate on top of the original, Trace bitmap does the same. Click away from your object, and then select it again. Look at the status bar at the bottom. If it says "Group of xx objects" (xx is however many scans you selected), move that to the side. You'll see your tree still there where it was. Click on that one and delete it. Choose your group you moved a minute ago, and click Object > Ungroup or just click on the Ungroup button in the upper toolbar. Now move your scans apart so you can see them all.  Using your cursor and drawing a box around them to select them all, change the fill on all of them to black. You might see some that ended up with more detail. Pick the one that looks the best to you. I saw a couple that seemed to have more detail, so I chose one of them. You can move the rest off to the side or delete them. If you just move them off to the side, you can try this tutorial later with another tree. Place your tree on your drawing where you think it should be located. If you are happy with your work, save your project as a .svg file. 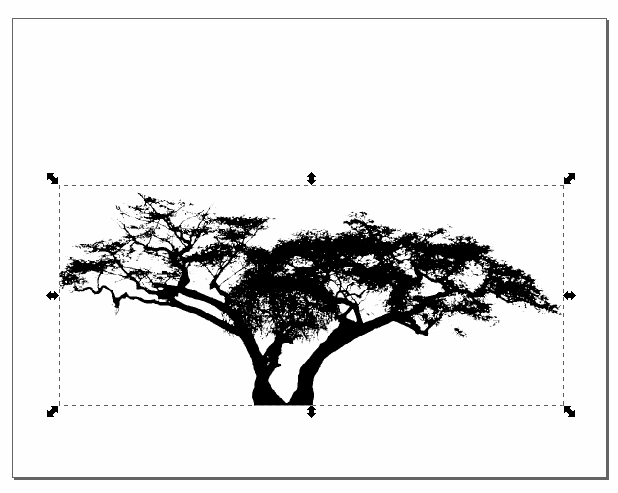 Let's add the ground under the tree. Using the Bezier Curve and Straight Lines (Pen) tool, draw the ground however you want it to look. Make sure you click many times and make it the general shape of that you want. With this tool, you should draw a closed curve, even if you have to follow the edges of the page, because you are going to want to fill it with black to match your tree. Don't worry if it doesn't look the way you want it right away - we can remedy that as well. I made my stroke red, so you can see it. 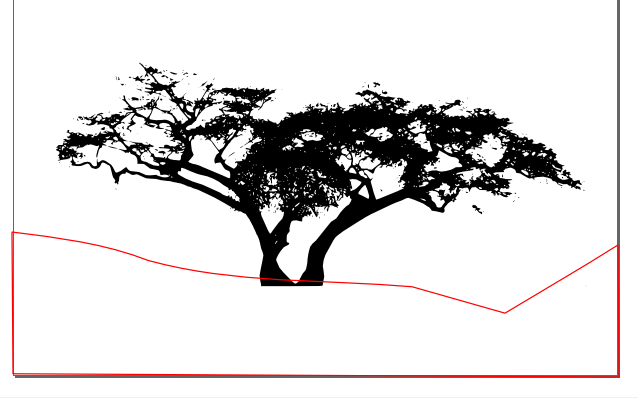 Now we will smooth out our curve. You can click Path > Simplify, or use the keystroke for Simplify <CTRL> + L, which is much easier. Use this keystroke until your land curve looks relatively smooth. 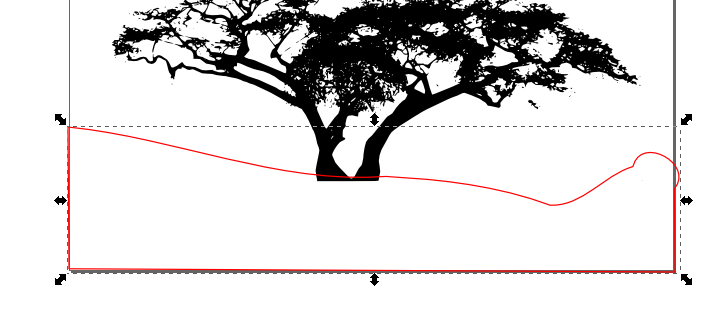 Then click on the Node Editing Tool and finish editing the land. You can pull the nodes or the curves in between until you have it as you want. You can go back and forth between the node tool and the selection tool to see what needs work. Make sure you also square off the corners at the sides and bottom. Add a fill (and I changed my stroke to black as well). When you are satisfied, save your work. 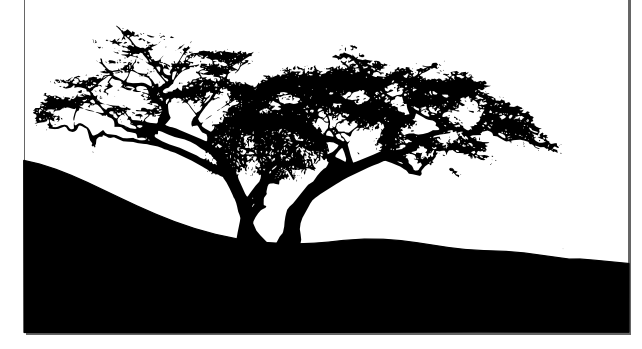
Now we have our tree and ground silhouettes mostly finished. Let's work on our sunset. The first thing you want to do is create a rectangle the same size as your page. Using the Rectangle / Square Tool, draw a rectangle. It will be filled with whatever color you used for fill last, and will cover your tree and ground, because all new objects are created on top of everything else. Edit your rectangle's dimensions so that it is the same size as your page, the using the Levels icons above your workspace, 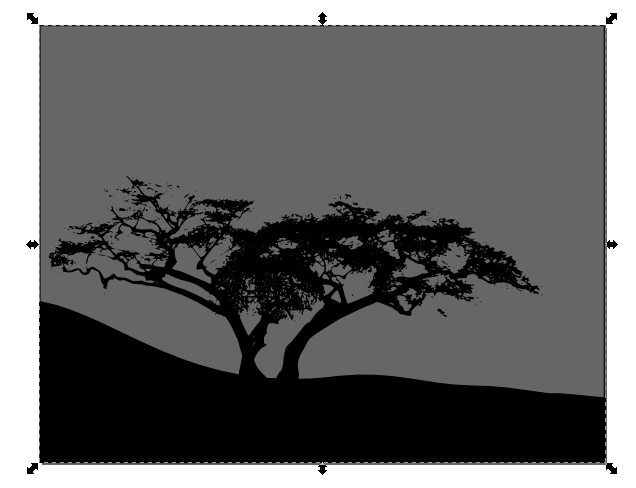
If you don't have the Fill and Stroke window open yet, you need it open to set the colors and edit the sunset gradient. Remember the icon in the top row of tools that looks like part of a square with a paintbrush across it. With the Fill tab selected, click on the Radial Gradient button. (It's the square at the top that has the round highlight in the center.) When you click on it, your fill will change to a round area in the center of your drawing. In the left side toolbar, pick the Gradient tool near the bottom. Now you will see an L-shaped line in your drawing with circles and diamonds on it. this will allow us to edit this gradient until it looks the way we want. The first thing you want to do is reverse the gradient that's there and add some color. Click on the square in the center and change it to a yellow or gold that reminds you of a sunset. The click on one of the circles at the edge and choose a dark blue or gray. Also, since sunset is usually down on the horizon, you want to move your gradient down lower and lengthen the gradient handles to widen the gradient. You can see what I have now: 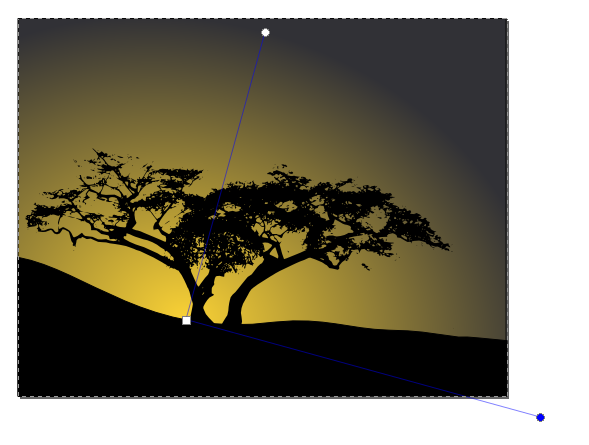 While you might think this looks pretty good as it is, we need to add a little more color. Most sunsets have several colors. Double-click on one of the blue gradient lines, and a small diamond should appear in each of the lines. Every time you double-click, another diamond will appear. Each added diamond allows us to add another gradient color. Be careful, though, to double-click over the line in the sky, because double-clicking over your tree or land will create a gradient on one of them. You can create as many as you wish, but I have done only three for now. You can also click on a diamond and move it up or down the gradient line to space them closer together or farther apart. If your center gradient is a brighter yellow or orange, you want to add a darker colors as you get farther away from the sunset. Click on the diamond that is closest to the sunset and add a darker yellow or orange. 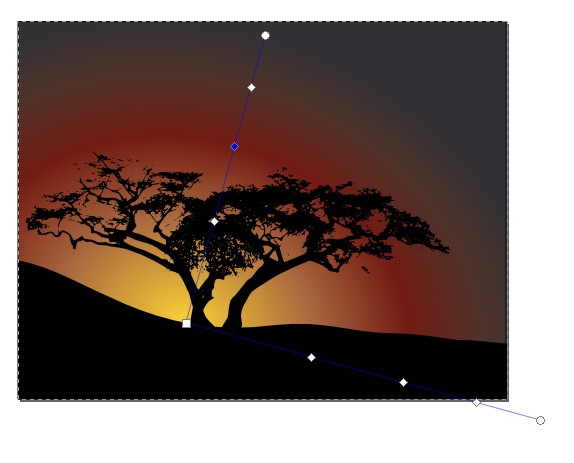 While I have been adding gradients, I have also moved my gradient around and extended the bottom gradient out so the sunset looks more elliptical than circular. You can also put a gradient right up close to the square in the center and put in a brighter yellow, in case you want your sun to still be up a bit. When you are satisfied, save your work. 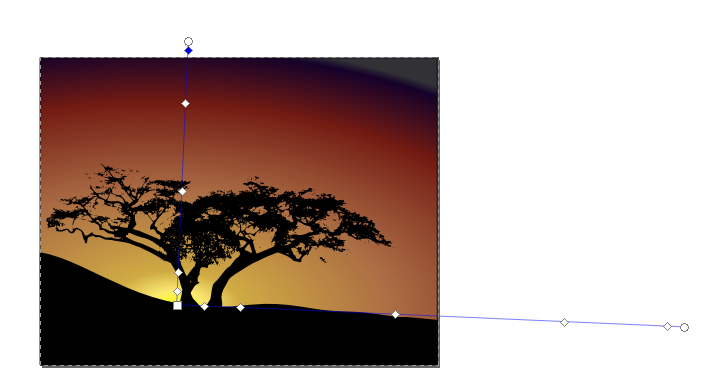 Remember, you can make it as bright or dark as you like - it's your project. So far, mine looks like this: 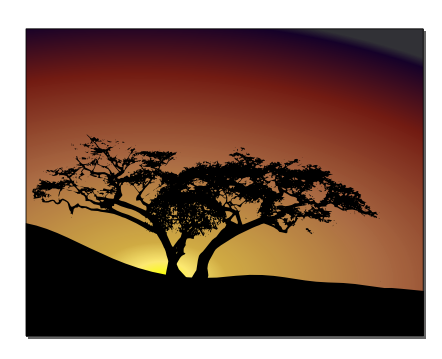 However, I decided that if the sun hadn't completely set yet, the sky would be a lot brighter. So I removed one of the diamonds and spread the colors out a bit. By the way, the way to remove one of the diamonds is to click on the gradient icon in the Fill & Stroke window, click on Edit Gradient, find the one you want to remove in the drop-down list, and choose Delete Stop. Now my project looks like this: 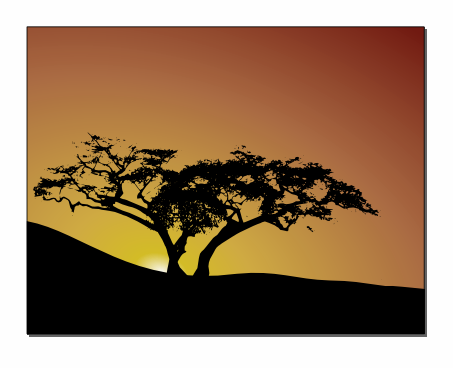 We could stop here, but we could also do a couple more things to make our picture look more realistic. The first thing is to put a little gradient on the ground to make a little highlight. Select your ground and choose Linear Gradient from the icons. The program will default and show a side-to-side gradient. We are going to edit that. Click on the gradient tool at left, then move your gradient handles so the lighter color is at the top of your ground and the darker color is at the bottom of your picture. Move the handles until you get what you want. Mine looks like this: 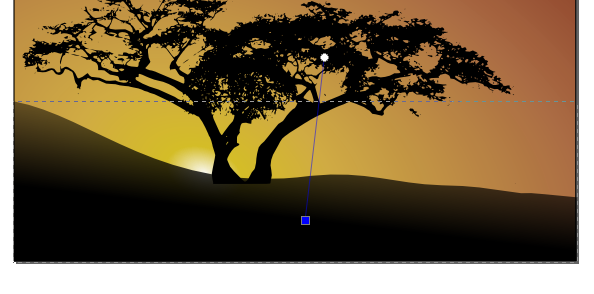 If the sun is going down the tree will cast a shadow, so the last thing I'm going to do is add a shadow. Start by selecting your tree and making a duplicate of it (<CTRL> + D or Edit > Duplicate). Remember, the program puts the duplicate directly on top of the original. Grab it and move it off to the side. To make the shadow, you need to do a vertical flip on the photo, then stretch it and/or rotate it so it looks the way you think a shadow might look at that time of day. With the sun so low in the sky, your shadow will be rather long, and in the opposite direction from the sunset. 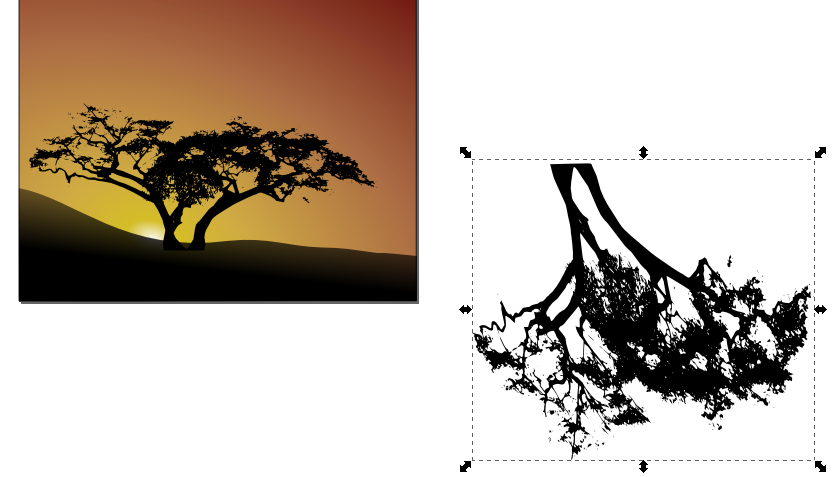 When you get it stretched as you like, place it at the bottom of your original tree, making sure they line up. You may have to zoom in on the tree truck and work on the stretch and rotate a bit. 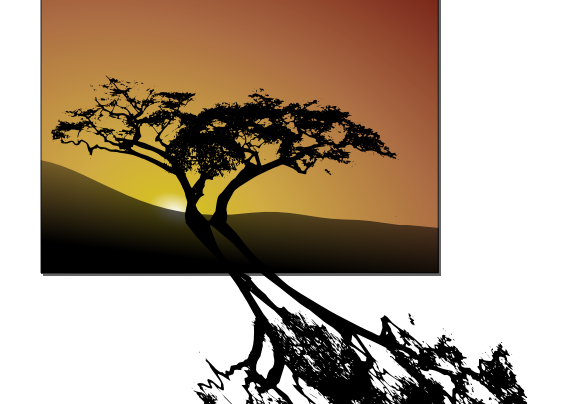 Before I do anything else, I'm going to blur the shadow a bit, choosing a blur of 2 or 3 from the Stroke & Fill window. As you see, the shadow extends far out of the picture. I want to get rid of all the excess tree. Choosing the Square & Rectangle tool we drew the background box with, draw a rectangle over the part of the tree you want to keep. Changing to the Selection arrow, select the tree, then holding the shift key down, select the rectangle you just drew. 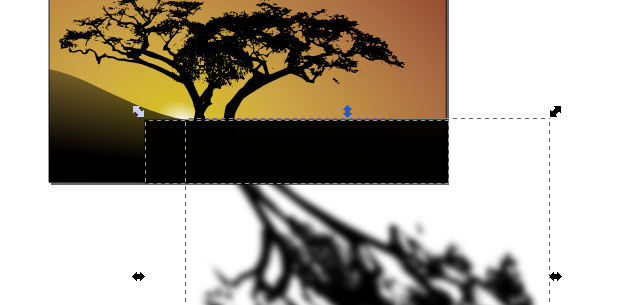 Now, click on Object > Clip > Set and you should have only that part of the shadow that's in your drawing, and the rest should be invisible. Now my drawing looks like this: 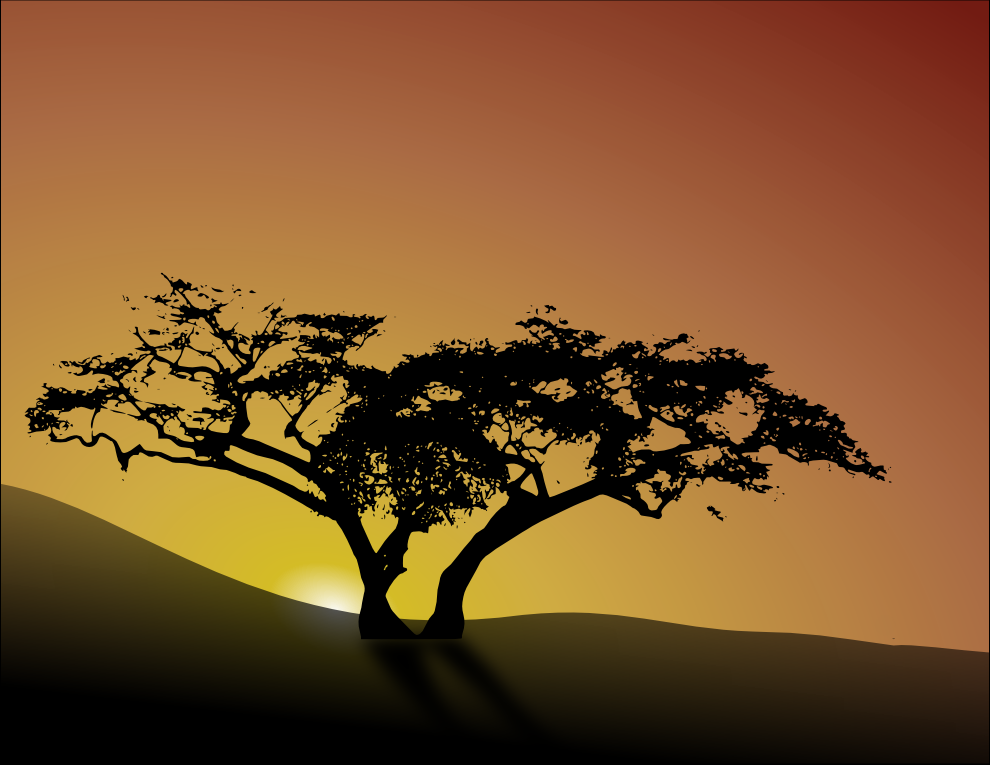 Summary Wow! We've learned quite a few things this time! We have a great tree with the sunset behind it, and we've learned a little bit about bitmap trace and vector drawings. If you made your drawing with the sun farther down, and darker sky at the top, you can also go back in and create a few stars, like we did a couple of months ago for a holiday tree, and scatter them in the darkest part of your sky. When you are satisfied with your work and have saved it, you should also export the drawing to png or jpg. One great thing about a vector file (svg) is that you can go in and change almost anything in the drawing even after you have saved it. That way you can have different versions of the same design, as long as you don't delete your svg file. Want your gradient brighter or your sunset in a different spot? Change it. Want the land different or the tree smaller? You can change it. Even after you've exported a bitmap of your finished drawing, you can go back and change the svg file again to try something different. Remember, it's your project, and it's finished when you decide it's finished. |
 send that rectangle to the bottom of your drawing. You might want to fill it with something besides black so you can see what you're doing. We're going to change it soon anyway.
 Clicking on it will open the window. If your screen is large enough, you can move your project to the left and put the Fill and Stroke window on the right and see everything you need.