| Previous
Page |
PCLinuxOS
Magazine |
PCLinuxOS |
Article List |
Disclaimer |
Next Page |
Gimp Tutorial: Create Your Own Alien World
|
|
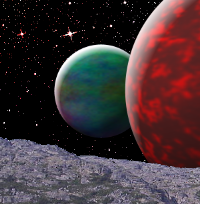
by Meemaw I was sent a cool tutorial the other day. It's got several useful manipulation methods in it and I'm going to share it. When you are finished, you'll have something similar to this: 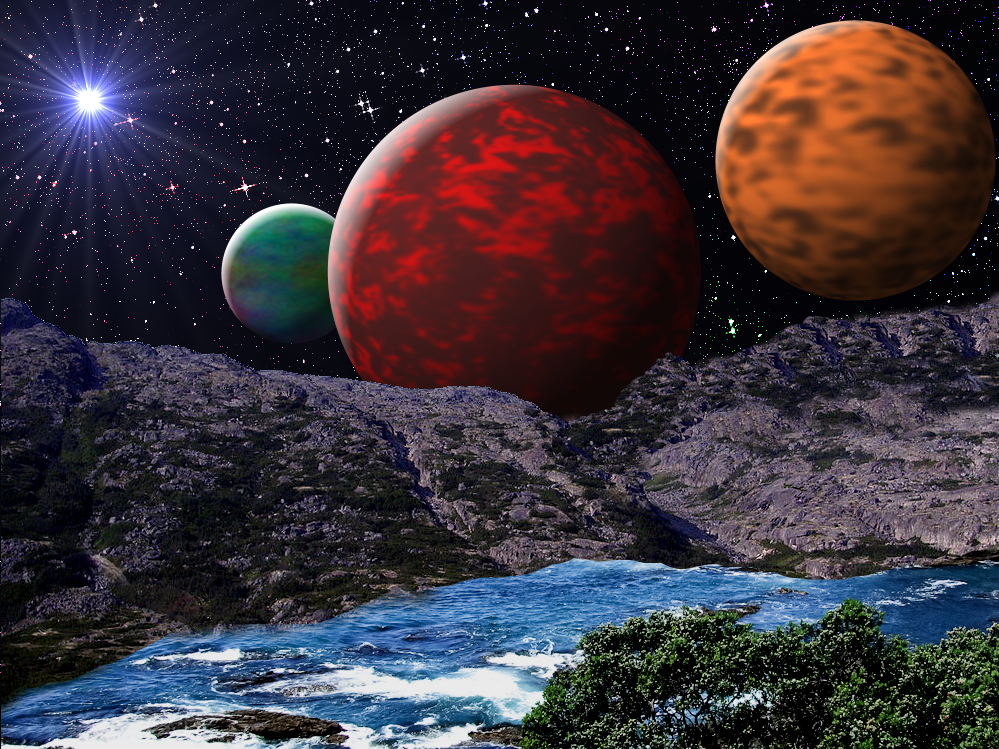 This a three part process: editing the land, creating the starry sky and then the planets. The first thing I did was find a couple of photographs: one of mountains and one of the seashore. Opening Gimp, you need to click File > Open as Layers.... and navigate to the folder where you saved your photographs. Choose them by clicking the first and then pressing the <CTRL> key while you click on the other. (Remember, multiple select uses <CTRL> or <Shift> depending on how many you are selecting.) I moved one layer so you could see them both, but you don't have to do that. 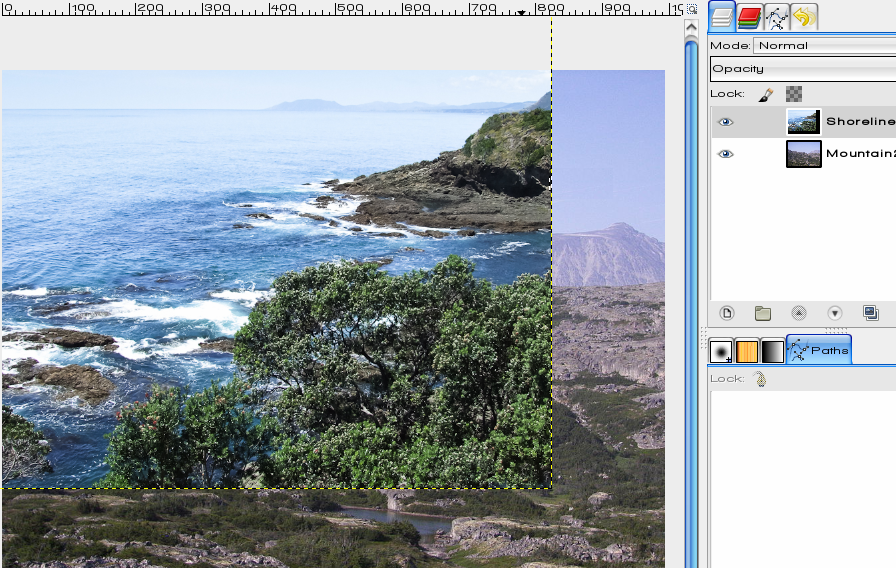 I'm first going to add an alpha channel to each layer so we can make part of each transparent. Right-click on each layer and choose "Add Alpha Channel". Now I will put the mountain layer on top and "turn off" the water layer by clicking the eye to the left of it in the layers tab. I just want to use the mountains, so I'm going to choose the select by color tool and click on the sky. 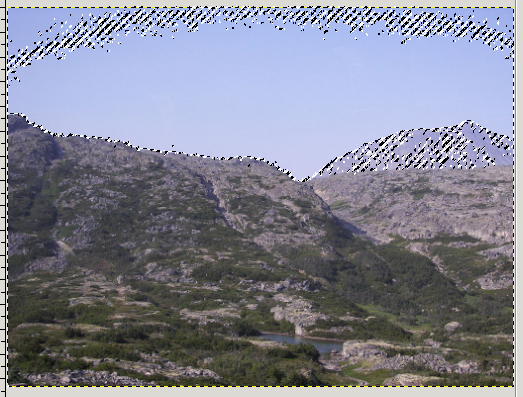 See all the dots inside the sky? I don't want that. Sometimes the selection doesn't include all the area you would like it to. A way to remedy that is to set the threshold up a bit and click again. (Threshold is in the Select by Color tool options at bottom left.) Keep doing that until your sky is outlined and all the other dots, if there are any, are outside it.  Now choose your eraser, using a hard brush, and erase the sky. Be careful next to any similar colored mountain you want to use. In mine, the mountain in the background is too hazy for me, so if I erase part of it, I'm not going to worry, because I'm going to clone another mountain into that spot. 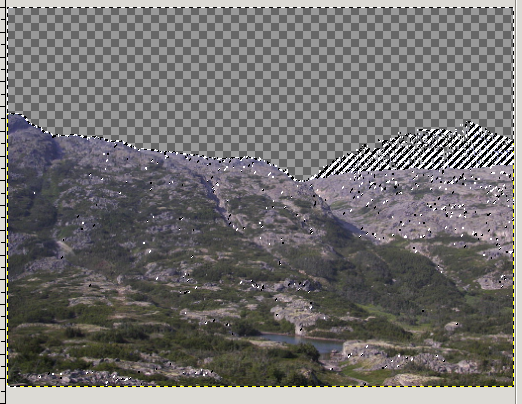 Click Select > None to remove your selection. That turns off all the moving dotted lines. With the clone tool, we'll use the same technique we used for taking the road sign out of a photo, except this time we will pick a piece of the existing mountain (using a soft brush), hold <CTRL>, and brush across it. Then go to the place you want a mountain and paint there. If it doesn't turn out the way you want it the first time you can always undo part of it (<CTRL> + Z) and try again. Save your work if you are satisfied (Remember, saving as a Gimp xcf file deletes your undo history, so only save it when you are happy with what you have done.) 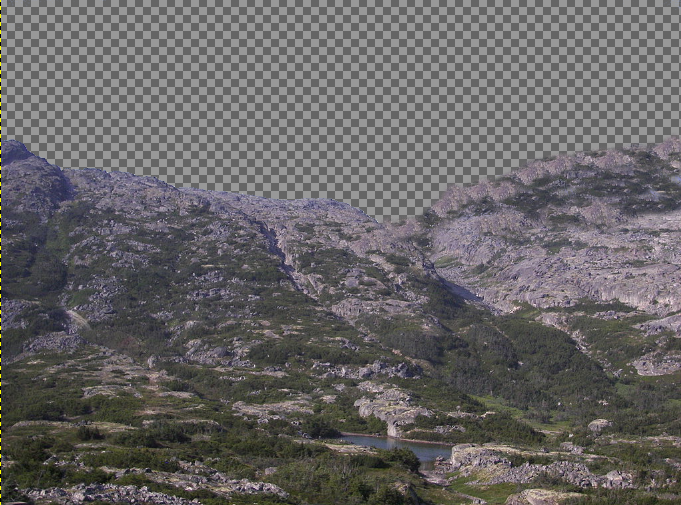 Now we can make the water layer visible again by clicking the eye icon on that layer. Move it to the top, too. What I want to do is stack these layers so it looks like there is a cove or lake with hills around it, so we're going to erase the sky and part of the water. To be able to see what we are doing in relation to the bottom, mountain layer, set the Opacity on this layer to about 50%. Using a hard brush, start erasing the top layer until you like the way it looks. When you get part of your water erased and want to see what you are doing, you can set the opacity back up and finish your erasing. You can also move your layers around on the page to get the effect you want as well. I moved the water layer down to show more mountains. 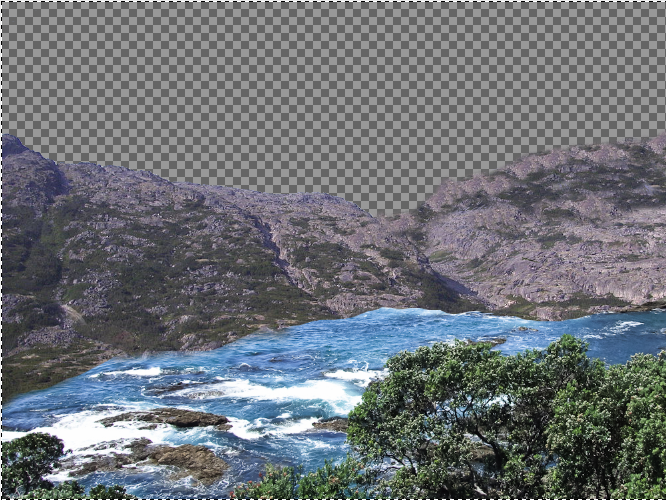 If you are happy with your work up to now, right-click on the top layer and choose Merge Down, then save your work. Let's do the sky now. First, make the mountain/water layer invisible for now. Then, in the Layers dialog, click on Create New Layer. Choose Fill with Foreground Color (since we haven't changed anything, your foreground color should be black). On this layer, click Filters > Noise > HSV Noise. In the configuration box that pops up, move the Value slider all the way to the right, then click OK. 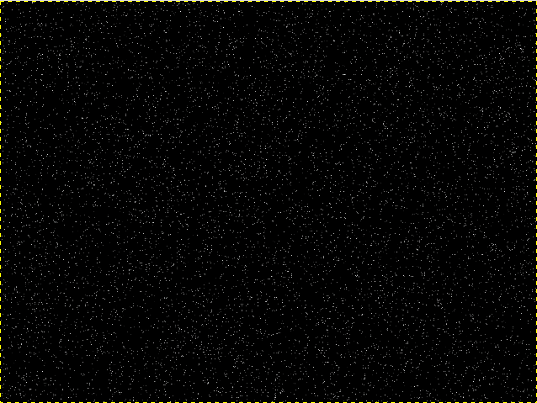 We want a little variety, so click on Filters > Light & Shadow > Sparkle. Leave the settings as they are and click OK. 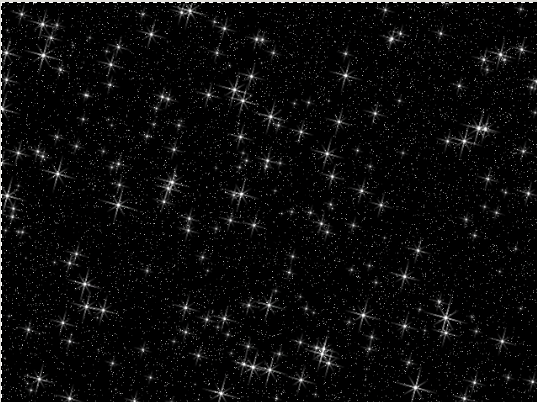 However, this is a little too sparkly for my taste, so Create a New Layer (black). In the new layer, choose Filters > Render > Clouds > Difference Clouds. Then, in the Layer dialog, change the mode of this layer from Normal to Burn. 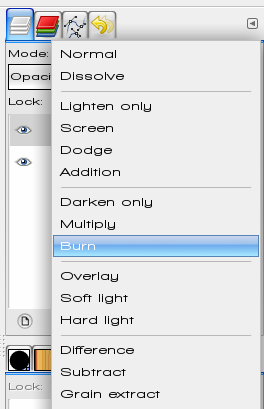 Now your stars look more varied. Merge these three layers. We want to add a little color to the stars, so create a new black layer. Click Filters > Render > Clouds > Plasma. Then change your layer mode to Dodge. 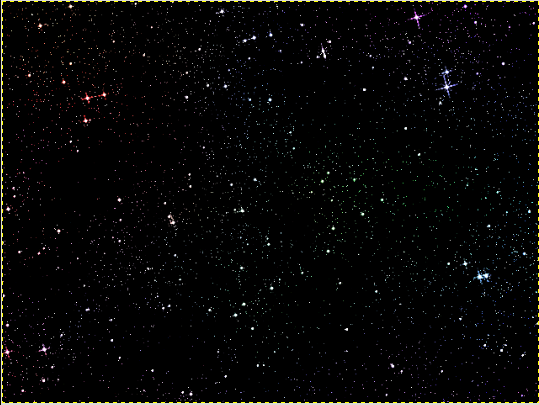 You should study your layer a bit before you proceed. The top is going to be visible, but not the bottom. You can flip your layer using the Flip tool if you wish. Make sure it is set on Vertical before you click on your layer to flip it. Right click and Anchor layer if needed. Now you can "turn on" your land layer and bring it to the front. 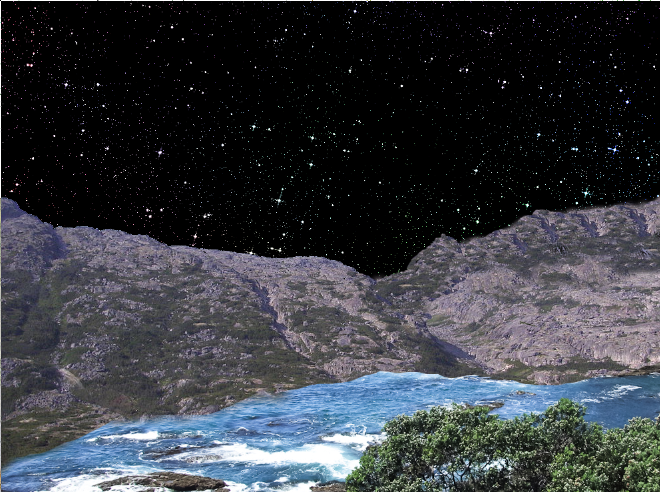 An alien world wouldn't be complete without some nearby planets! Create a new layer, but make it square, and a little more than half the height of your project on each side. My drawing is about 750 pixels, so I'm going to make this new layer a 400 pixel square. Pick a red color and bucket fill it. 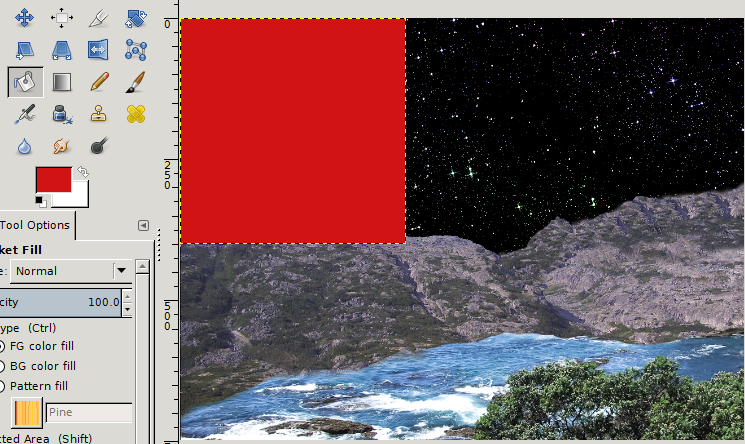 Now choose the paintbrush. Change it to another brush style, like acrylic (I chose acrylic02). Choose a brown color, increase the size of your brush to 150 or 200 and paint inside your layer. Don't cover all the red, though. 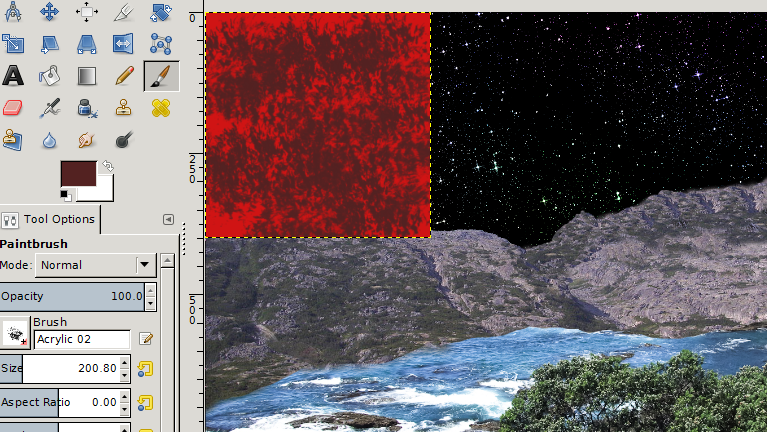 Now we are going to make it into a sphere. Click on Filters > Map > Map Object. We'll change some of these settings:
Main Window: Uncheck Show wireframe and check Show preview live.
Using the Move tool, you can move it anywhere you want it, and move the layer down under the land layer so it looks farther away. Before we finish with this layer, we want to add some light to one side of it to give our picture the feeling of a light source. With your planet layer selected, right-click in the layer tab and choose Alpha to Selection. This chooses only the planet. Select the Blend tool, then choose as your gradient FG to Transparent with the foreground white and the transparent on the left. Also, choose a radial gradient, because we want the white around the edge of the planet, and change the offset to 85. Starting from just below and to the right of the center of your planet, hold and drag your mouse pointer up and left to just outside the planet. 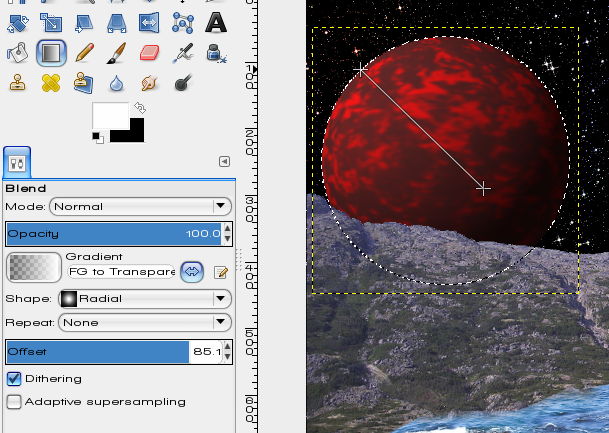 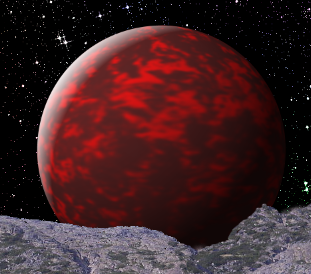 Cool, huh? Click Select > None to unselect everything. Now I'm going to make another planet a little smaller than the first. I made my new layer 300 x 300, filled it with an orange, then using a brown, clicked over it with a different brush (I used one called Galaxy). Since you have already made a sphere, all you need to do is choose Filters > Repeat Map Object. All the settings are already there, so just click OK. Alpha to Selection, as before, then choose your blend tool and add your light. 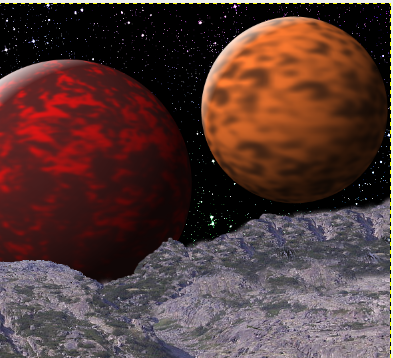 Let's make one more planet, smaller than either of the other two (150 x 150 in a new layer). Instead of painting it, Click on Filters > Render >Clouds > Plasma. Now, click on Filters, but go to Recently Used, and choose Map Object. then Alpha to Selection again, and choose your blend tool and add your light.
Let's make it a little more alien. Choose your land layer, click on Colors > Brightness & Contrast, and set the color down and the contrast up to change the colors a bit. When you are satisfied with your work, save. If you are sure you are finished you can merge all your layers by choosing Image > Flatten Image. As a final feature in our project, let's put one supernova in our picture. Click Filters > Light & Shadow > Supernova. 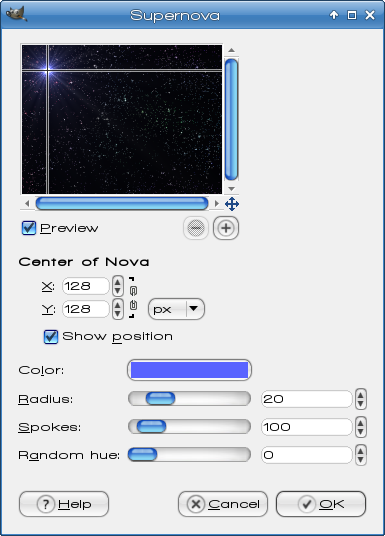 The crosshairs show where it will be on your picture, and you can make it as bright and as big or small as you want by changing the color, radius and number of spokes. I left the defaults. If you don't want to mess with the photographs, you can just make the sky and the planets, which is fun, too. Experiment with different settings & colors and see what you get! 
|