| Previous
Page |
PCLinuxOS
Magazine |
PCLinuxOS |
Article List |
Disclaimer |
Next Page |
Xfce Power User Tips, Tricks & Tweaks: Multimedia Files
|
|
by Paul Arnote (parnote) If you want to clear a room or kill a party, start talking about working with multimedia files. Many folks will head for the exits. Multimedia files are often viewed as being temperamental and hard to work with. However, it doesn't have to be this way. Sure, they are big, and they eat up a lot of CPU cycles when you work with them. There's nothing we can do about that, but we can streamline the process. In the previous Xfce Power User Tips, Tricks & Tweaks articles, we talked about streamlining the way Xfce users could work with graphic files (March 2013) and an easier, more reliable way to work with archive files (April 2013). Guess what. If you're an Xfce user, we can also streamline the way(s) you work with multimedia files, doing tasks such as previewing multimedia files, playing multimedia files, and even converting multimedia files. If you haven't already done so, you will need to make sure that both Zenity and Yad are installed from the PCLinuxOS repository. Most of the items that follow use one or both of the dialog creation libraries. Some additional programs you may want to install include ffmpeg, pacpl, mplayer, sox, aplay, mediainfo and mencoder. All of the additional applications are command line tools for working with multimedia files. Playing a sound when Xfce starts Most of us Linux users are Windows refugees. Exceptionally few of us cut our computer baby teeth on Linux. Most of us came to Linux after suffering through the inadequacies of one Windows version or another. One thing that some Linux users miss is some kind of sound playing when our desktop loads. While some may view such a thing as trivial and even sophomoric, the playing of the sound indicates, for many, that the desktop is loaded and ready for business. Under Xfce, there's no clear-cut way to play a sound when your desktop loads. That feature simply does not exist. Fortunately, there's a relatively simple way to restore the startup sound that signifies that your desktop has loaded and is ready for use. The first thing to do is to install either aplay or sox command line utilities from Synaptic. I usually have both installed, allowing me to switch back and forth between the two. Of the two, aplay is a little more restrictive, since it will only work with *.wav, *.voc, *.raw or *.au files. Sox, however, will work with just about any sound file you might have on your system, including *.flac, *.mp3 and *.ogg files. There may be other command line programs that also allow you to control the playback of audio files, but to be perfectly honest, I've found these two to perfectly fulfill my needs and I haven't looked any further. Now that you have either aplay or sox installed, it's time to set up your startup sound. Open the Xfce Settings Manager, then find and launch the Session and Startup manager. Select the Application Autostart tab, then select the Add button near the bottom left of the window. 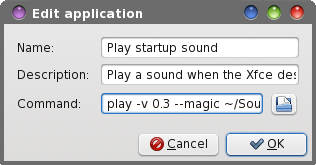 Fill in the "Name" and "Description" fields in the dialog box. For the "Command" field, I recommend first trying out the "bare" command at a command line prompt in a terminal session, to insure that you have everything correct. Here, I use the play command (from sox) to play the sound file specified at the end of the command, at a volume of 30% (-v 0.3), and to use "magic" file-type detection (the information stored in the header of the sound file) to determine how to play the sound file. Using the "magic" file-type detection makes the play command much more universal, rather than specifying a separate command and Thunar Custom Action for each individual sound file type (e.g., -t mp3 would tell the play command to read the file as a *.mp3 file). Thus, my entire command is as follows: play -v 0.3 --magic ~/Sounds/Borealis/Startup1_3.wav Be sure to provide a full path to the sound file you are wanting to use as your startup sound. Also, be careful with the volume switch. If you want to play your sound file back at 50 percent volume, enter 0.50. If you enter 50, the play command will instead play your sound file back at a volume that's 50x louder than normal. If you want to play your sound file back at full volume, use 1.0 as your volume level. Once you are sure that you have the command correct and as you like it, copy the command from your terminal session and paste it into the Command field of the dialog box. Select the OK button. Now, the next time you log out and back into your Xfce desktop -- or the next time you start your computer -- your startup sound will be played. Playing a sound when shutting down Just as users have grown accustomed to a sound playing to signify that their computer is nearly ready for them to work with, users have also grown accustomed to hearing a sound play when they exit, logout or shutdown their computer. Unlike the startup sound, which is relatively easy to configure and use, setting up a logout sound is a bit more challenging. Also, despite Xfce having a setting to "Enable Event Sounds" (Xfce Settings Manager > Appearance > Settings), I've not yet been able to find a place within the Xfce settings to otherwise enable or define "event" sounds. The lack of such an ability makes defining certain events more difficult, but not impossible. I've tried -- unsuccessfully -- executing the necessary commands as a "one-liner" panel launcher. However, I did find that I could execute the commands from a bash script, and it works perfectly! First, copy/enter the following text into your favorite text editor: !# /bin/bash # sound-shutdown.sh # Paul Arnote # Play our sound when we logout # The '&' is important # Without the '&', the logout command isn't # executed until the sound has finished playing # causing a delay. play -v 0.40 ~/Sounds/Borealis/Exit1_2.wav & # Bring up the logout choice window xfce4-session-logout I named the bash file sound-shutdown.sh. Be sure to either place bash file somewhere in your path, or (if you don't place it somewhere in your path) provide the full path and filename to your bash file. Be sure to make the file executable (right click on the file, go to the permissions tab, and check the "Allow this file to run as a program" check box). 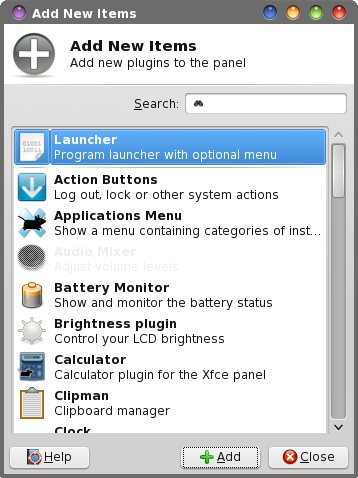 Next, remove the Xfce Panel Plugin named "Action Buttons." You won't need them any longer, with this alternative in place. In its place, create a new launcher on the panel. Select the green "+" button to select the application to run with your new launcher. Pick anything. What we are looking for isn't in the list, so we'll be changing it anyway. In the image below, I've selected the "About Xfce" application. 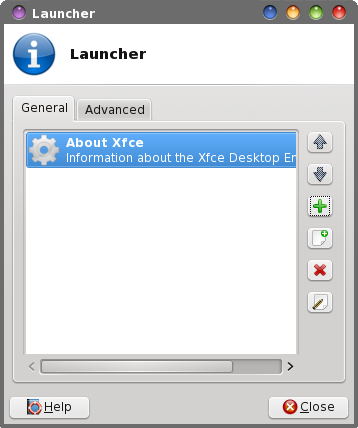 Now highlight the launcher application, then select the bottom button on the right side (the one with the pencil on it) to edit our launcher. I've named my new launcher "Xfce Logout," which is what you enter on the first line of the launcher dialog box. On the second line, type a description for your launcher. This is the text that is displayed when you hover your mouse over your new launcher. I simply entered "Logout of the Xfce desktop." 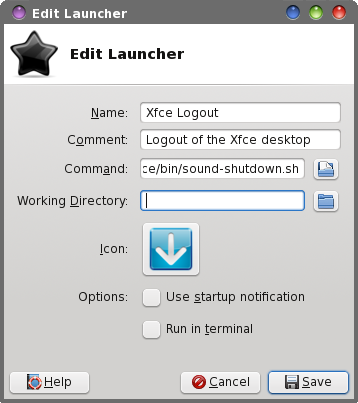 On the third line, enter the name of your bash file that you saved (in my case, it's sound-shutdown.sh). Remember, if the bash file is located somewhere within your path, only the filename is necessary. Otherwise, you will need to specify the full path and filename to your bash file. Next, select an icon for your new "Log Out" launcher. Because of what we're asking it to do, I chose a "logout" icon to represent my new launcher. 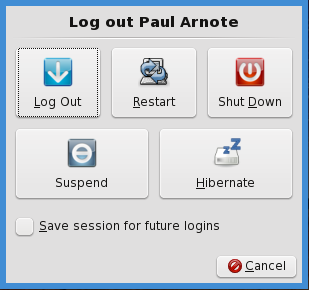 Now, when you select your new launcher, your chosen sound file will play and the logout chooser dialog box will be shown, giving you a choice of logging out, restarting or shutting down your computer. As an added bonus, instead of having three, four or more buttons on your panel (one for each option you choose with the Action Buttons), you now have just one button, saving precious space on your panel. Should you ever wish to change the sound that is played when you log out of your Xfce desktop, simply change the sound file that the play command points to in the sound-shutdown.sh bash file. Play a sound file If you have a collection of sound effect files hanging around on your system, it can sometimes get tiring to open each one in a sound player program just find the one you are looking for. Or, sometimes you have a collection of your favorite music files that you want to listen to as you work. We can handle either situation very easily, with this Thunar Custom Action. From Thunar, select the Edit > Configure Custom Actions... menu item. From the dialog box that appears, select the first button (Add a new custom action) in the column of buttons on the right side of the window. 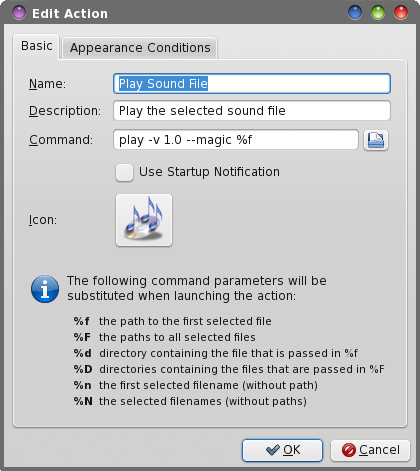 On the first line of the new dialog box that opens, type "Play Sound File" as the name of our new Thunar Custom Action. On the second line, enter a description. I entered "Play the selected sound file." On the third line, enter the following: play -v 1.0 --magic %f This will invoke the "play" command (installed as a part of the sox package) at a volume (-v) of 1.0. In play and sox speak, this is 100% ... if you want it played at half volume (50%), enter 0.50. Similarly, if you want the sound to be played at only 30% volume, enter 0.30 instead of 1.0 for the volume. The --magic flag tells the play command to use the information in the file header to figure out what codec to use for the playback of the file. The %f represents the single sound file you selected. Finally, select an icon to display next to your new custom action (click on the button that says "No Icon" on it). Next, on the "Appearance Conditions" tab of the dialog box, select the checkbox next to "Audio files" and make sure no other check boxes are marked. For file pattern, simply leave it as * (the default). Select the OK button at the bottom of the dialog box. You will be returned to the first dialog box. Select the "Close" button. Now, using Thunar, go to a directory on your computer where you have some sound files saved, right click on it, and select "Play Sound File" from the right-click context menu. This should work perfectly on every sound file that has a proper header (yes, there are headerless sound files out there) that your system recognizes as a sound/audio file (dependent on what audio codecs you have installed). Your system should already be set up (minimally) to know how to handle MP3, OGG and WAV files. As an added bonus, MP3 playlists (*.m3u files) and general playlists (*.pls) files will also be played with this Thunar Custom Action. So what happens if you click on a sound file without a proper header? The command simply will not play it. But you can easily "fix" the sound file by giving it a proper header. Open the sound file in Audacity, and then export (File > Export) the sound, re-saving it as the exact same file name. Audacity will apply a proper header to the sound file when you re-save it. Granted, when played this way, you have no extra control over the playback of the file (or files, in the event that you selected a playlist file). You can't adjust the volume after you start playing (other than adjusting your speaker volume). You can't pause the file playback. You can't jump ahead or back in a playlist. You can't fast forward or rewind through a song. But, there is a way to stop a song (or playlist) from continued playback. In a terminal, simply type pkill play at a command prompt. You should have instant silence, just in case your playlist of Led Zepplin or Deep Purple was rocking the house when the telephone rang. Of course, there's nothing preventing you from also just turning down the volume on your speakers -- or muting your sound card -- when you answer the telephone. If you want to have a little more fun with this, try adding "reverse" to your play command. Your command (in the second Thunar Custom Action dialog box) should now look like this: play -v 1.0 --magic %f reverse Now, whatever sound file you select to play, it will be played backwards. Although probably not very useful, it is amusing to play with (especially if you are wanting to revisit the "Paul is dead" Beatles conspiracy). Similarly, if you want to play with some of the other special effects available with the play command, keep in mind that the gain in, gain out, decay, delay and speed settings are all based on the premise that 100% = 1.0, 50% = 0.50, 30% = 0.30, etc (just like the volume setting). You can see an entire listing of all of the effects by typing play --help at a command prompt. To see the help for each individual effect, type play --help-effect "name-of-effect" (without the quotes). Thus, the echo command can be employed like this: play -v 1.0 --magic %f echo 1.0 1.0 1.0 1.0 0.75 0.75 Another effect you may want to try is the "reverb" effect. You can easily kill/waste a couple of hours just playing with the effects. Loosen up and have a little fun playing with the play command. After all, it just reads your sound files, so any errors you make in the execution of this command aren't going to permanently damage your sound files. If you are unsure about how to format a command, try it from a command prompt first, replacing the %f used by Thunar with a full path and filename to the sound file you want to use. Preview a sound or video file If you're anything like me, it's not uncommon to draw a blank regarding what file is what when you're browsing through your collection of music and sound files stored on your computer. Plus, if you've ever downloaded videos from video sites like YouTube, the filenames are sometimes quite cryptic and provide literally NO clue to the video contents. Thanks to this Thunar Custom Action, you can easily preview just about any sound or video file that your PCLinuxOS installation is configured to handle. Because you can only watch one video at a time or listen to one sound file at a time, this Thunar Custom Action is setup to work on only one file at a time, too. 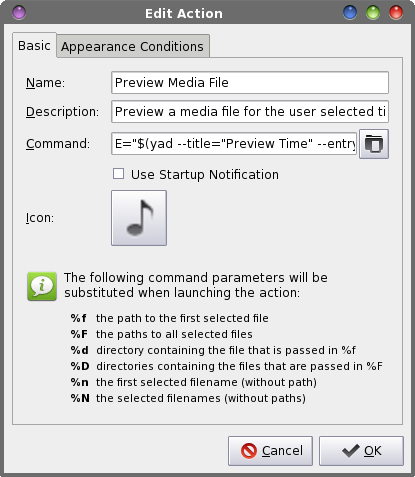 Create a new Thunar Custom Action (Thunar > Edit > Configure custom actions...). On the first and second lines, enter the name and description for your new custom action. I entered "Preview Media File" and "Preview a media file for the user selected title" for these fields. Now, enter the following on the third line as your command: E="$(yad --title="Preview Time" --entry --entry-label= "Please enter the preview time (sec):" --entry-text="30") "; mplayer %n -vo x11 -really-quiet -endpos $E Pick an icon for your new Thunar Custom Action. Under the "Appearance Conditions" tab, leave the "File Pattern" entry set to the default value of "*" and place a checkmark in front of both Audio files and Video files. 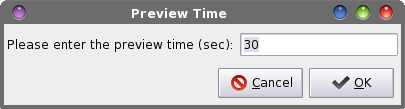 This command uses yad to display a dialog box that allows you to specify how long you want the preview to last. The default time is 30 seconds, but you can enter whatever value you want. Thus, if you want the preview to last for three minutes, you would enter 180 seconds. Then, mplayer is called to play the file (%n), and the video output is directed to output any video using the x11 video driver (optional ... ignored when playing audio files ... done so that you can capture the video in screenshots, if you like.). The error and warning messages from mplayer are set to bare minimum (-really-quiet) and the end position (-endpos $E) is set to end playback after the number of seconds input in the yad dialog box. Mplayer usually does an outstanding job of picking the proper codec to use for playback based on the file extension of the multimedia file being played back. Thus, there is no real need to tell mplayer how to playback a file. 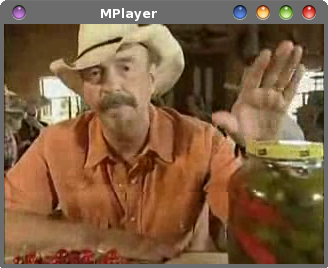 Above is the playback of a country music video (Jalepenos by The Bellamy Brothers ... look it up) I downloaded from YouTube. As you can see, this Thunar Custom Action does an excellent job of playing back your video files. Since it's impossible for me to "show" audio playback, you'll have to take my word that audio playback is equally as impressive -- or even better yet, you can try it for yourself. Simply right click on a multimedia file, then select "Preview Media File" from Thunar's right-click context menu. Enter the length of time you want the preview to play for, then sit back and enjoy! Converting sound files Remembering the commands to convert from one audio file format to another is often difficult. Thanks to Thunar Custom Actions, we can define a two-click shortcut to convert from WAV to MP3, MP3 to WAV, OGG to WAV and WAV to OGG. Actually, we have four different custom actions -- one for each conversion. Each custom action is dependent on having ffmpeg installed from the repos. Ffmpeg is the command line utility that converts between various multimedia formats.
To convert from WAV to MP3: ffmpeg -i %f -acodec libmp3lame -ab 128k `basename %f .wav`.mp3 | yad --progress --title="File Conversion" --progress-text="Please wait ... File(s) being processed." --percentage=40 --auto-close --auto-kill
To convert from MP3 to WAV: ffmpeg -i %f `basename %f .mp3`.wav | yad --progress --title="File Conversion" --progress-text="Please wait ... File(s) being processed." --percentage=40 --auto-close --auto-kill
To convert from WAV to OGG: ffmpeg -i %f -acodec libvorbis -aq 60 `basename %f .wav`.ogg | yad --progress --title="File Conversion" --progress-text="Please wait ... File(s) being processed." --percentage=40 --auto-close --auto-kill
First line: Convert WAV to OGG
To convert from OGG to WAV: ffmpeg -i %f `basename %f .ogg`.wav | yad --progress --title="File Conversion" --progress-text="Please wait ... File(s) being processed." --percentage=40 --auto-close --auto-kill Besides ffmpeg, you will need to insure that you have the libmp3lame and libvorbis sound libraries installed. Chances are high that they are already installed on your computer. The `basename %f .ext`.ext line strips the old extension off before attaching the new extension. Use extra care -- those are backticks, NOT single apostrophes. (Hint: the backtick is on the key (on the U.S. keyboard) next to the number "1" key, in the row of number keys at the top of the keyboard). 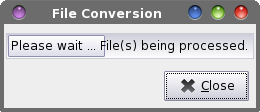 The commands also display a yad progress bar dialog box, to let you know that the file conversion is being carried out. Depending on the speed and number of cores of your computer's processor, the file conversions can take a little time (up to a minute or so). The progress bar dialog box lets you know that "something" is still being done. Because we're calling the progress bar dialog box from the Thunar Custom Action command line itself, the percentage is set to a static 40 percent. I've had very limited success at getting the progress bar to pulsate, unless it is called from a bash script. You can set the static percentage of the progress bar dialog box to whatever value you choose. I chose 40 percent because it gives the appearance of actually being active -- at least to my eyes. Also, because we have not created a loop to process multiple files (easy enough to do, if you create and call a bash script), this custom action can only be used on single files, converting one at a time. The command can easily be expanded to convert other audio and video files. You can find good examples of the uses of ffmpeg here and here, providing you additional Thunar Custom Actions. Just use the examples I gave here as templates. Converting Sound Files, Part 2 A quick search in Synaptic nets us another real diamond for converting sound files from one format to another. Below is the description: Perl Audio Converter is a tool for converting multiple audio types from one format to another. Perl Audio Converter is a tool for converting multiple audio types from one format to another. It supports: AAC, AC3, AIFF, APE, AU, AVR, BONK, CDR, FLA, FLAC, LA, LPAC, M4A, MP2, MP3, MP4, MPC, MPP, OFR, OFS, OGG, PAC, RA, RAM, RAW, SHN, SMP, SND, SPX, TTA, VOC, WAV, WMA, and WV. It can also convert audio from the following video extensions: RM, RV, ASF, DivX, MPG, MKV, MPEG, AVI, MOV, OGM, QT, VCD, SVCD, M4V, NSV, NUV, PSP, SMK, VOB, FLV, and WMV. A CD ripping function with CDDB support, batch conversion, tag preservation for most supported formats, independent tag reading/writing, and extensions for Konqueror, Dolphin and Amarok are also provided. When you read that description, the last part of the last paragraph might make you think that pacpl is a KDE-centric application. Nope. It's just that the extensions included in the package are centered around KDE applications. Pacpl is a command line utility. You can run it from a command line prompt in a terminal session. In our case, we're going to adapt it for use as a Thunar Custom Action.  Create a new Thunar Custom Action (Thunar > Edit > Configure custom action...). Fill in the name and description fields. I used "Convert Audio Files" for the name, and "Convert between different audio formats" for the description. On the third line, we need to insert the command to be executed for our new Thunar Custom Action. This is where the real magic occurs. Here is the command (below): D="$(yad --title="Directory Name" --entry --entry-label= "Please enter the directory name")"; if [ ! -d $D ]; then mkdir $D; fi; F="$(zenity --list --column="Select One" --title="Audio Converter" --height=300 --width=250 --text="Select the format to convert to" aac ac3 aiff ape au avr bonk cdr fla flac la lpac m4a mp2 mp3 mp4 mpc mpp ofr ofs ogg pac ra ram raw shn smp snd spx tta voc wav wma wv)"; pacpl --outdir $D --normalize -t $F %N | yad --progress --title="File Conversion" --progress-text= "Please wait ... File(s) being processed." --pulsate --auto-close --auto-kill Yes, it's a long one. While I am unable to find the reference again, I seem to remember that the length of the command for a Thunar Custom Action cannot exceed 4 KB. Even with a command this long, we're still a LONG ways away from that length limit. 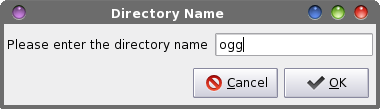 Here's a rundown of what's going on in the command. First, it gives you a chance to enter a specific directory for your converted files, via a yad dialog box. You type in the directory name, and if the directory doesn't already exist, it is created. If you don't want to save your converted files to a special directory, simply enter ./ as the directory to use. 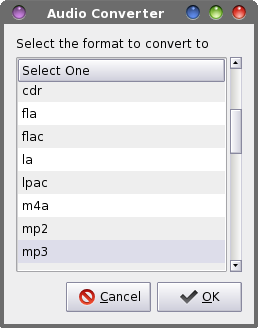 Second, a zenity dialog box is displayed, allowing you to select which audio format you want to use to convert your audio files into. All of the audio formats supported by pacpl are included in the list dialog box. Selecting OK in this dialog box causes pacpl to run. Pacpl will output the converted file into the specified directory ($D), normalize the output file, convert the audio file(s) to the specified audio format ($F), and work on multiple files (%N). Thus, you can select several files at once -- even files of different audio formats -- and convert them ALL to one common audio format. 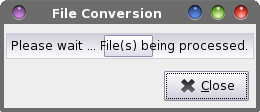 While the conversion is taking place, a pulsating yad progress bar dialog box is displayed. This way, you know that the conversion process is still working. Depending on the speed and number of cores of your computer's processor, this conversion process can take some time. Remember that audio files tend to be rather large, and it might take some time to work through multiple files. Now, when you select multiple files, then select Convert Audio Files from Thunar's right-click context menu, your selected files will be converted into one common audio file format. As an added bonus, pacpl can extract the audio from many different video formats. Convert video files Another task you might want to perform on your collection of video files (from whatever source) is to convert them all into one common format. Of course, as you add to your collection, you may also want to convert the new additions to your video library to the same common format. For the sake of clarity, by format, I mean videos that all use the same video and audio codecs, and the same video and audio sample bitrates. This Thunar Custom Action will enable you to do just that. To get started, copy or type in the following bash script into your favorite text editor.
!# /bin/bash

ConvertTo=$(zenity --list --column="Select One" --title="Video
Converter" --height=300 --width=250 --text="Select the format
to convert to" avi 3gp flv mov mp4 asf wmv mpg mov)
   if [ $? == 1 ]; then
      exit
   fi
Video=$(zenity --entry --entry-text="1000" --title="Video
Converter" --text="Enter video bitrate (Kb/sec)")
   if [ $? == 1 ]; then
      exit
   fi
Audio=$(zenity --entry --entry-text="128" --title="Video
Converter" --text="Enter audio bitrate (Kb/sec)")
   if [ $? == 1 ]; then
      exit
   fi

tail -f ~/Scripts/convert-video.sh | zenity --progress --pulsate
 --auto-close --auto-kill --title="Converting" --text="Converting
 video to $ConvertTo ... Please wait." &
name=$(echo $1 | cut -f1 -d.)

ffmpeg -i "$1" -ab "$Audio"K -vb "$Video"K "$name.$ConvertTo"

killall -KILL tail

zenity --info --title="Video Converter" --text="Conversion to
$ConvertTo finished.\n\nPlease check file to insure\nno errors
on conversion."

exit 0
The script allows you to choose a video format to convert your selected video file(s) into, and then input the video bitrate, then input the audio bitrate for the converted video. The script then uses the tail command to track if the script (itself) is still running and displays a pulsating zenity progress bar dialog box. The "old" file extension is stripped off of the filename, and ffmpeg is run to convert the video, assigning it a new file extension. It then "kills" the execution of the tail command, and displays a zenity dialog box to let you know that the file conversion is complete. 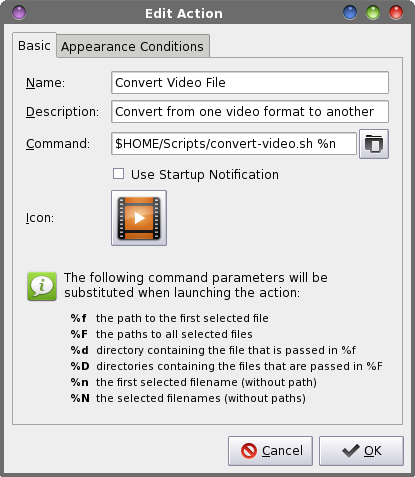 Create your new Thunar Custom Action. Provide a name and description for it. I entered "Convert Video File" for the name, and "Convert from one video format to another" for the description. Next, enter the following into the "Command" field: $HOME/Scripts/convert-video.sh Since I store all of my custom bash scripts in my /home directory in a subdirectory called /Scripts, I've pointed the command to that location. Either save the bash script to a location that is listed in your PATH statement (type echo $PATH at a command line prompt in a terminal session), or provide the full path and filename in the command field of the Edit Action dialog box. Select an icon for your new custom action. I chose one that relates to videos, naturally. Under the "Appearance Conditions" tab, leave the "File pattern" set to "*" and make sure ONLY "Video files" is checked. Below is what you will see on your screen when you use this Thunar Custom Action. 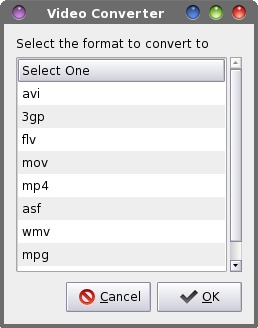 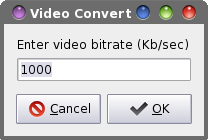 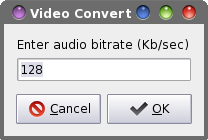 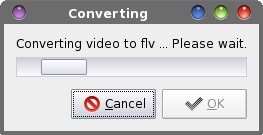 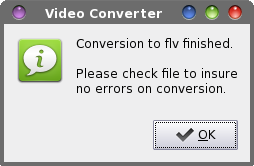 Now, converting from one video file format to another is a very simple task using Xfce and Thunar. Create a playlist In today's digital world, many of us have a rather large collection of music files stored on our computer. With that many files, there's no way to sit down and listen to them all at one time. What's best is to create custom playlists that list the music you want to listen to. This next Thunar Custom Action does exactly that. First, copy or type in the following bash file. Be sure to save it either somewhere in your path, or be prepared to provide the full path and filename of the file when you call the file from your Thunar Custom Action. I called mine (creatively enough) make-playlist.sh. #!/bin/bash # Create a playlist from a group of selected songs List=$(zenity --entry --title="Make Playlist: Enter a Name" - -text="The m3u extension will be added for you automatically.") ret="$?" if [ "$ret" = "252" ]; then exit elif [ "$ret" = "3" ]; then exit elif [ "$List" = "" ]; then List="playlist" fi n=1 echo "#EXTM3U" >>./"$List".m3u for i in "$@"; do echo "$i" >>./"$List".m3u done exit 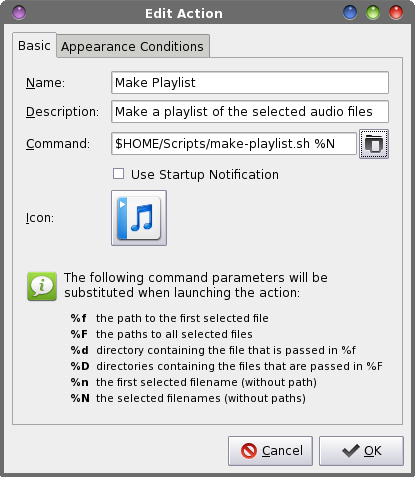 Next, create a new Thunar Custom Action (if you've gotten this far, I don't need to tell you how to do that any longer). Enter a name and description for your new custom action. I entered "Make Playlist" for the name, and "Make a playlist of the selected audio files" as the description. Enter the name of the bash script in the "Command" field. I entered it as $HOME/Scripts/make-playlist.sh %N, since I keep all of my custom scripts in that particular directory. Next, choose an icon for your new custom action. I chose a generic audio file icon to use. 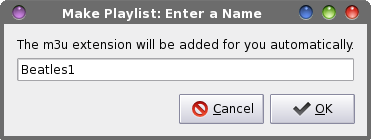 The script will display a zenity dialog box that asks you to provide a name for the new playlist. Enter only the name, since the *.m3u file extension will be automatically added for you. If you fail to enter a name, the filename will default to playlist.m3u. Next, the name of each file is appended to the playlist file, and the file created.
Here are the first 10 entries in a playlist I created from my digital files that I ripped from my CD of the Beatles One album: Now, whenever you select multiple music files, then select "Make Playlist" from Thunar's right click context menu, you can create custom playlists for those music selections that can be played with virtually any MP3 player on your desktop, or via the "Play Sound File" Thunar Custom Action that we previously created. View info about media files Sometimes, you run across a multimedia file (audio or video) that is ... shall we say ... problematic. Looking inside the file can sometimes give us clues as to why the file is giving us problems. The next Thunar Custom Action does exactly that. For this custom action, you will need to install mediainfo from the PCLinuxOS repository. Mediainfo is a command line utility that is specifically written to extract all the data flags that are stored inside a multimedia file.  Create your new Thunar Custom Action. Enter a name and a description for it. I entered "Media Info" as the name, and "View information about the selected audio or video files" as the description. In the "Command" field, enter the following: mediainfo %N | zenity --text-info --title="Media Info" --width=400 --height=250 This will run mediainfo on the selected files, and display the information in a zenity dialog box on your screen. Select an icon for your new custom action. Under the "Appearance Conditions" tab, leave the "File pattern" selection at the default "*" setting, and make sure both "Audio files" and "Video files" are checked.Now, whenever you select "Media Info" from Thunar's right click context menu, you will see something similar to the following displayed on your computer screen. 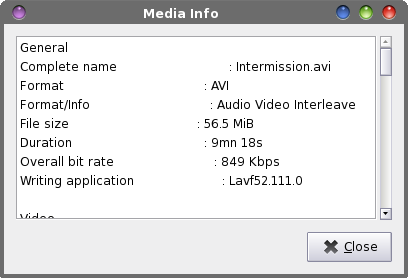 All of the available information for all of the selected media files is displayed in the window, one file after another. Summary As you can see, there are many things you can do in Xfce to make it easier to work with multimedia files. Basically, if you can play it on your computer in a media playback program, you can also play it from a Thunar Custom Action. There are more custom actions you can define, and the needs of each person is going to differ, depending on what tasks they are trying or wanting to perform. The possibilities are limited only by your imagination and your command line prowess. |