Windows Migration: Download, Verify,
and Create A LiveCD or USB
by Antonis Komis (agmg)
Introduction
So, you’ve decided to take a step away from Windows and explore the world of Linux, and more specifically, PCLinuxOS. You couldn’t find a better distribution to do that with. PCLinuxOS is a rolling Linux release, well-known for its quality and stability supported by one of the friendliest (if not the friendliest) forums around. Whether you are a novice, intermediate or advanced Windows user, one thing is sure: you are facing something that you have never seen before. A new environment, a new philosophy, a new way of doing things, a new way of life. Not everyone takes to the change in the same way, but don’t worry: we have prepared a series of articles that will help you find your way around. In this specific article, you will find how to get PCLinuxOS and prepare an installation medium (CD, DVD or USB), to try it (yes, you can do that) and, if you like it, install it on your hard disk.
If you want to know more about PCLinuxOS or need further help, you can visit the PCLinuxOS Knowledge Base (http://www.pclinuxoshelp.com), or become a member of the PCLinuxOS forum (http://www.pclinuxos.com/forum), where you will always find people willing to help you with every problem or question you may have.
Enough with the introductory stuff. Let’s begin our journey.
Choosing the right version for you
The main difference between the various PCLinuxOS editions is the Desktop Environment (or DE) they use and the applications that are installed by default. Simply put, the DE is the Graphical User Interface of your system, and it typically consists of windows, icons, panels, toolbars, wallpapers and desktop widgets. It’s like the Desktop you are using in Windows. It gives you the ability to interact with your computer using concepts which are similar to those used in the physical world, such as buttons and windows. Most Desktop Environments include a set of integrated applications and utilities to give you a more complete graphical experience. Unlike Windows, there are many Desktop Environments that you can choose from, depending on your personal needs and tastes and/or your computer capabilities. We will talk about Desktop Environments with more detail in a separate article, but here is a quick reference for your convenience:
KDE Edition: This is the standard edition of PCLinuxOS. It is based on the KDE platform (www.kde.org), which consists of the desktop environment (Plasma Desktop – with different versions for desktops, netbooks or tablets) and a suite of applications based on that platform that integrate to the desktop environment and can literally cover every user's needs.
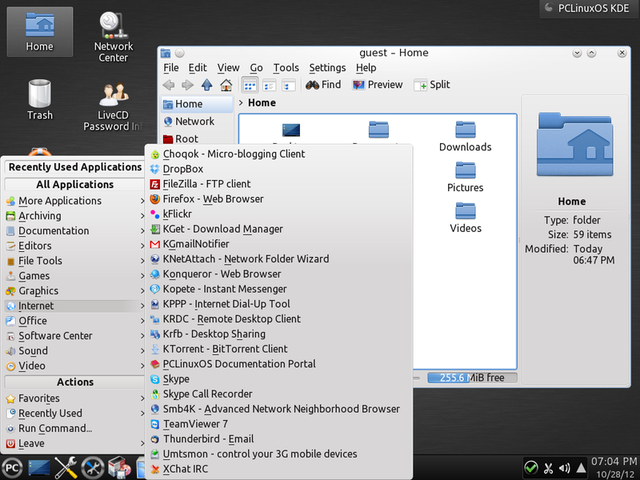
The default KDE desktop environment.
LXDE Edition: This is a community release using LXDE (www.lxde.org). The "Lightweight X11 Desktop Environment (LXDE)" is an extremely fast-performing and energy-saving desktop environment. It is the perfect choice for computers with low hardware specifications, such as older computers or netbooks, but it also runs lightning-fast on more modern ones.
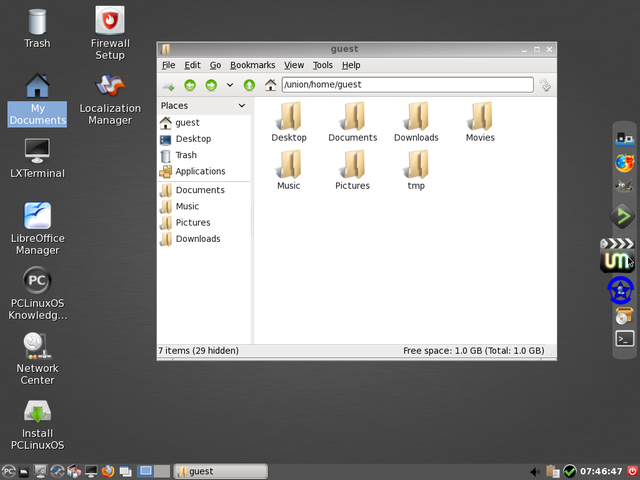
The default LXDE desktop environment.
Xfce Edition: This is also a community release based on Xfce (xfce.org). It aims to be fast and low on system resources, while still being visually appealing and user friendly.
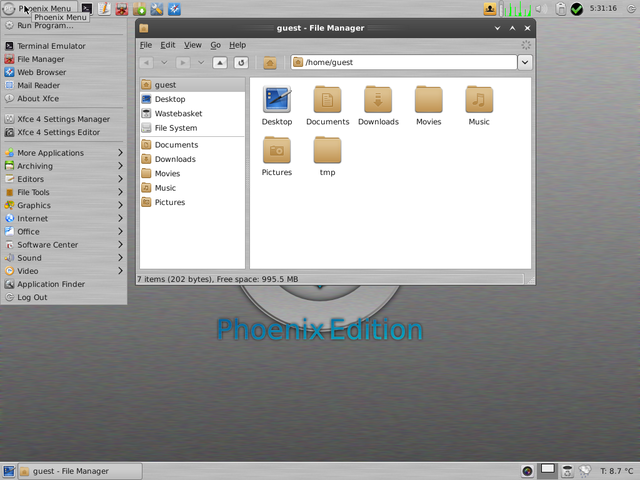
The default Xfce desktop environment.
Full Monty Edition: Another community release which is based on the standard KDE edition of PCLinuxOS but sports a special desktop layout and many drivers and applications pre-installed. Full Monty applies a new concept: an activity-focused virtual desktop layout, which is designed to address a typical user’s needs/tasks and make working on the computer straightforward and fun. You can find more info on Full Monty here.
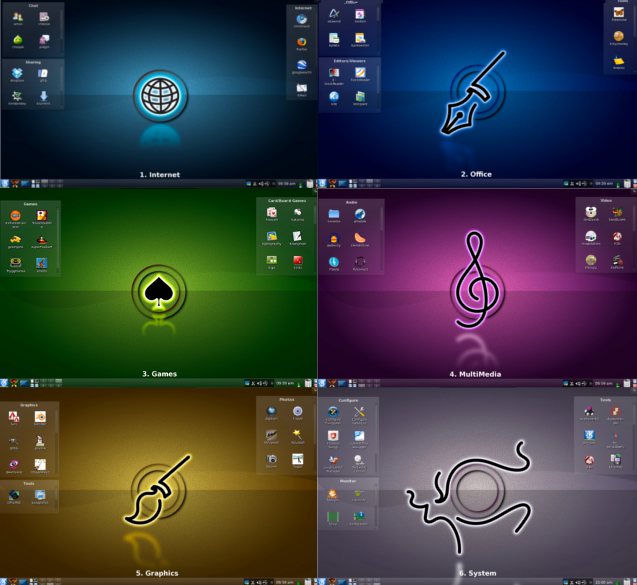
The Full Monty with activity-oriented desktops.
There are also mini editions of PCLinuxOS (with the name “MiniMe”) that are not recommended for new Linux users. These are editions that contain only the core system and some basic applications so a power user can customize them the way he/she prefers.
Ways to get PCLinuxOS
There are two ways to get PCLinuxOS:
1. Download from the Internet.
2. Order a CD/DVD/USB.
We’ll only cover the first option in-depth, here. Ordering a CD/DVD/USB is usually preferred by users that have a slow or no Internet connection at all, or who want to have PCLinuxOS on a professionally created medium. This option costs a small amount of money and is slower, as it takes some time to get the medium shipped to you. If you are interested in this method, you can visit www.osdisc.com for more information.
The main source for downloading the latest PCLinuxOS releases is our official website: www.pclinuxos.com
You just select “Get PCLinuxOS” and you will be provided with two options.
- The first option is to select the version of PCLinuxOS you prefer.
- The second option is to select whether you want to download via the Web (using either the FTP or HTTP protocol) or by using a BitTorrent client.
Downloading from the web (via FTP/HTTP)
If you choose to download from the web, you can use the main PCLinuxOS server, or choose from a list of alternative mirrors for better speed.
There are two files for each version of PCLinuxOS: the ISO file and the md5sum file. You will need both. The ISO file will be used to create the medium from which you will try or install PCLinuxOS. The md5sum file will be used to check the integrity of the ISO file you have downloaded to avoid creating a defective medium. You don’t have to download it, you only need its contents, which can be copied directly from the website.
Downloading using the BitTorrent protocol
BitTorrent provides a fast way of downloading large files by sharing bandwidth. You will need a BitTorrent client to download a torrent file. If you are new to BitTorrent, here's a very nice beginner's guide.
Advantages
* You don't have to check your download after downloading.
* BitTorrent can continue from a broken download (i.e., resume where it left off).
* Allows slower or intermittent downloads (such as users on dial-up) to do it over many days, or even weeks.
* You help take away the cost of providing download mirrors.
Disadvantages
* You have to configure your firewall to work properly.
* Download speeds are sometimes slower than downloading from the mirrors.
Verify your download
When you have finished downloading from the web, you should take an extra step to verify the file you have downloaded before creating a CD, DVD or USB. By doing this, you will ensure that the medium you will create is not defective, and that it will not lead to a corrupted installation of PCLinuxOS.
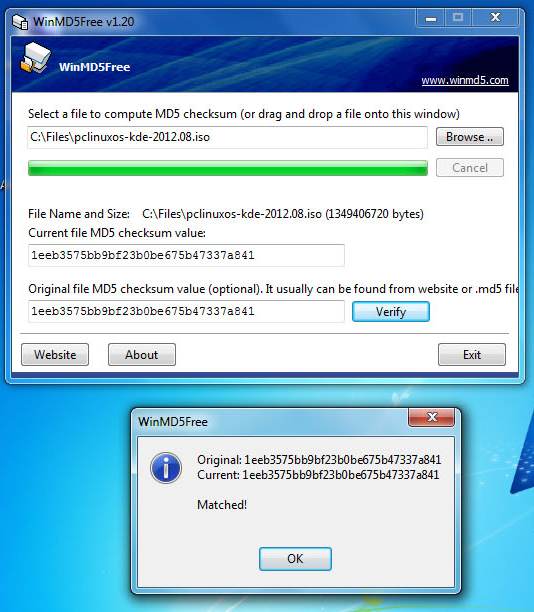
A very nice and free Windows utility for checking md5 hashes with an easy to use interface is WinMD5. You can download it from its official website: http://www.winmd5.com
You just select the ISO file you need to verify. The program scans it and displays the current Md5 checksum value. Then, you need the contents of the md5sum file corresponding to the version you downloaded. Just click on its link and you will go to a new page containing something similar to this:
1eeb3575bb9bf23b0be675b47337a841 pclinuxos-kde-2012.08.iso
Copy the first part of this line and paste it inside the program (as the original file MD5 checksum value) and click “Verify”. If everything is fine, you should get a message that the values matched. You are good to go!
Create the installation medium
Now that you have verified the downloaded ISO, you can proceed with creating the medium from which you will try or install PCLinuxOS.
You can use an optical medium (CD or DVD – depending on the edition of PCLinuxOS) or a USB flash drive.
Burning the ISO to a CD or DVD
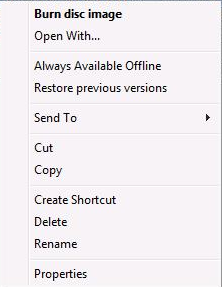
If you are using Windows 7, then you don’t need any additional program to burn the ISO file to a disk, because Windows 7 natively supports this function. You just right-click on the file and select “Burn disc image” from the menu.
If you are using a Windows version older than Windows 7 (or you don’t like the built-in function), you can find many free programs that can be used for this purpose.
The most well known is ISO Recorder, which can be downloaded here:
http://alexfeinman.com/isorecorder.htm
Another well known program is ImgBurn.
Of course, you may already be using your own disk burning software (commercial or free), so you will decide what is best for you. Regardless of the program you are going to use, you should remember some simple tips:
* Always use quality, brand name disks.
* Always use the lowest possible writing speed.
* Always verify the disk you have created.
Creating a bootable USB
The best way – and probably the easiest way – to create a bootable USB under Windows is to use UNetbootin.
You will find it at its official website: http://unetbootin.sourceforge.net/
In this page you will also find a very helpful visual guide on how to use UNetbootin.
There are also two other nice utilities for creating a bootable USB available on www.pendrivelinux.com
The first one is called Universal USB Installer, and has similar function as UNetbootin mentioned earlier.
The second one is called YUMI and has a unique function: it can create a bootable USB containing more than one Linux distribution. You can use this utility to create a multiboot USB that has all the flavors of PCLinuxOS, boot from it, try them all, and decide which one is best for you.
Using a USB instead of CD or DVD has many advantages:
* A USB drive is usually faster than a CD or a DVD.
* They can be erased and used again (i.e. to try another flavor of PCLinuxOS).
* You can have many different Linux distributions in one single USB drive.
NOTE: You have to make sure that you computer is able to boot from a USB before selecting this method. Most modern desktops and laptops offer this function, but if your computer is older, you should consult your manufacturer’s manual (if it is a branded desktop or a laptop) or your motherboard’s manual (if it is a custom built computer) to see if booting from USB is supported.
How to boot your computer from a CD/DVD/USB.
To make your computer boot from removable media (CD/DVD/USB), you have to change the boot order from your BIOS. BIOS (Basic Input Output System) is software stored in a small chip inside your motherboard. BIOS instructs the computer on how to perform a number of basic functions such as booting and keyboard control, and is also used to identify and configure the hardware in a computer, such as the hard drive(s), CPU, memory, etc.
When you turn on your computer, you see a screen similar to the one below during POST (abbreviated as POST, the Power On Self Test is the initial set of diagnostic tests performed by the computer when powered on):
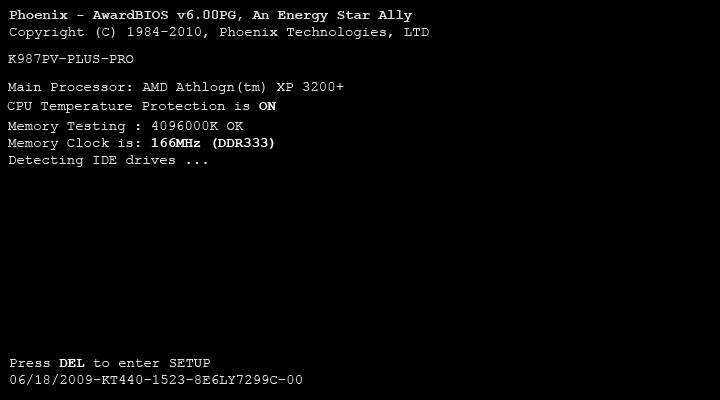
If you hit the DEL key, you will enter the BIOS setup utility (this key may be different, depending on your BIOS manufacturer).
You need to change the boot order and set the CD/DVD or USB first, so the computer will boot from it. Since every BIOS setup utility is different, the specifics on where the boot options may be located is different but you should look for items with names like Boot Options, Boot Order, Boot etc. Depending on the BIOS, you may have to look in sections such as Advanced BIOS Options or Other Options. Additionally, some computers (mostly laptops) have a special key (usually F12) which you can press just after POST to change the boot sequence without changing settings in the BIOS setup utility. This is what it should look like:
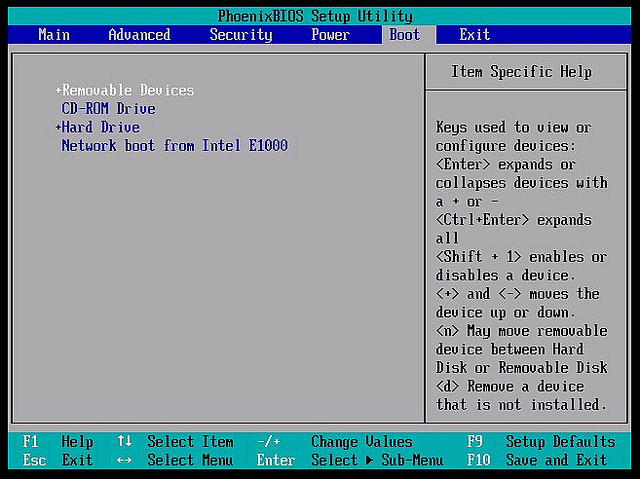
You
select the correct device, save your settings and reboot your
computer. When the computer reboots it will boot from the device
you have selected.