Linux Financial Apps: GnuCash
by Meemaw
The fourth installment of our series is GnuCash http://www.gnucash.org/, which is available for Linux, Mac and Windows. The User Guide is at http://www.gnucash.org/docs.phtml. GnuCash is in the PCLinuxOS Repository.
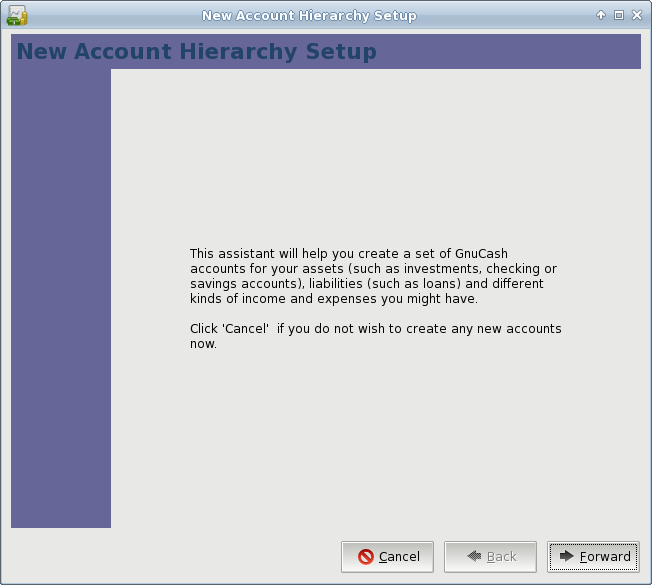
Starting the program for the first time, the following window appears:

If for some reason you already have a set of accounts saved, you can click Cancel and open them from the main window. Instead, we will create a new set of accounts, so click OK. You will be presented with a series of windows that will help you create your set of accounts.
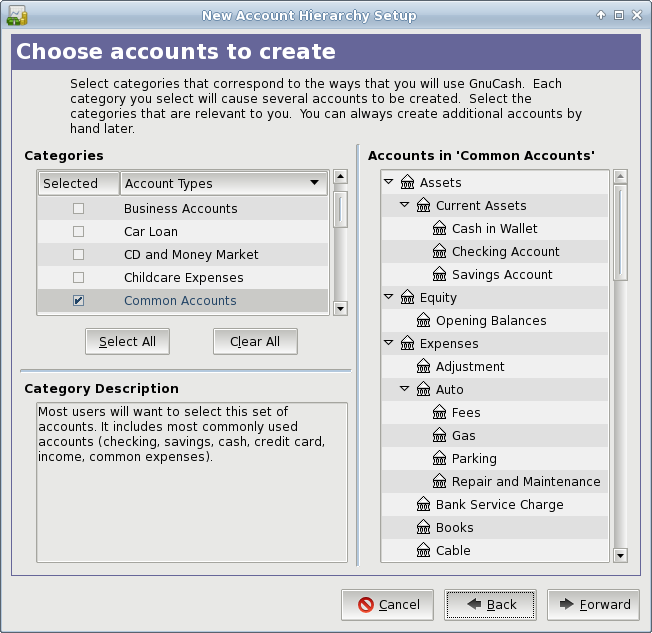
GnuCash has several ‘pre-made’ sets of categories, or account types, as shown in the left side of the window below. You may add as many as you wish. I have added the “Common Accounts” set. If you find that you need a category you don’t have, it can be added by hand, and any of the existing categories can be edited to your preference.
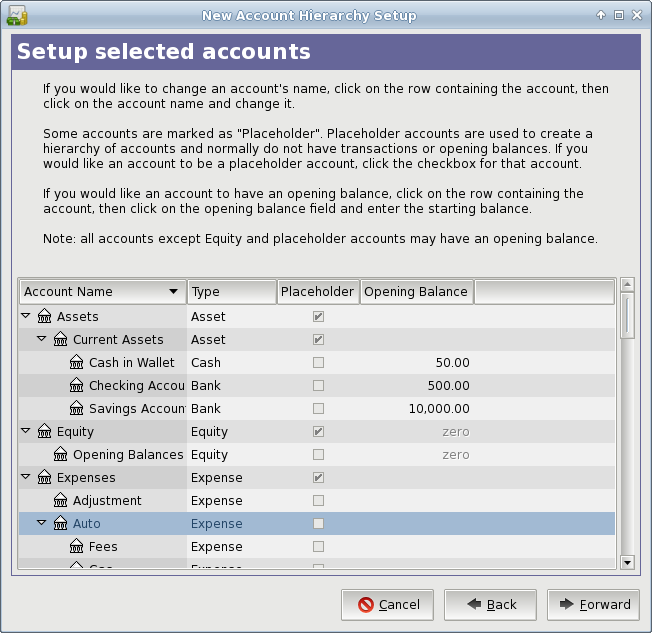
While you have your category list open, you can edit any of them. Click on each Asset account (at least the Checking and Savings) and enter an Opening Balance.
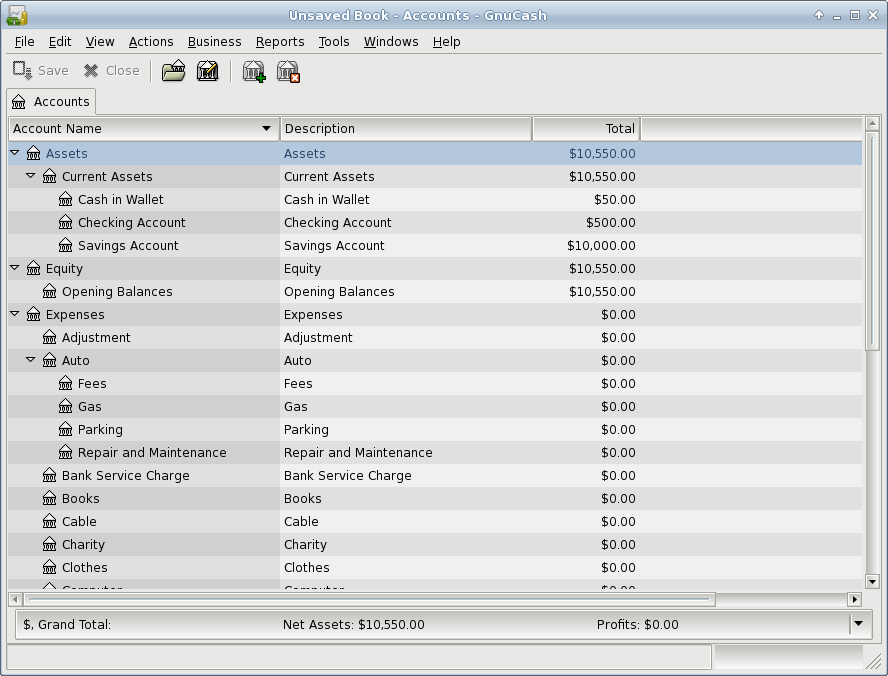
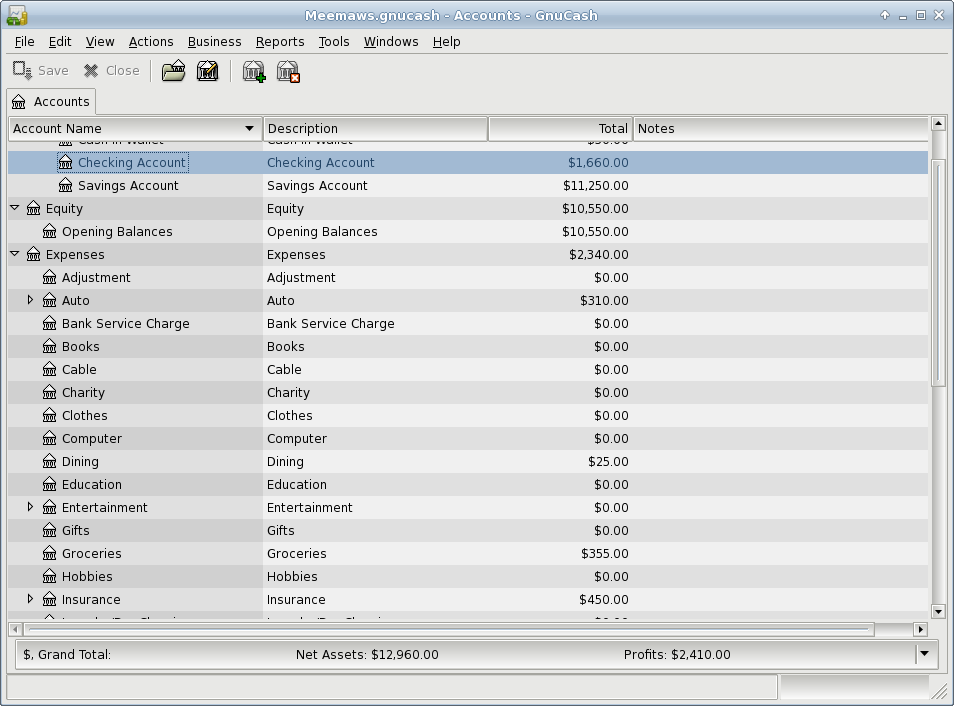
When you finish, you will have a window like the one below. Equity is Assets minus Expenses. Since there have been no expenses entered yet, Equity is the total of the asset accounts.
If you remember, iFreeBudget’s left side tree looks pretty much the same. GnuCash also uses double-entry bookkeeping, which means that everything is an account, even the categories. It also means that each transaction is entered twice, once as a debit from an account, and once as a credit to another account. When you enter a transaction into your checkbook, the transaction’s corresponding entry to a category is made automatically. After you add your transactions, you will find that the categories also have balance amounts in them as well.
Double-click on the Checking Account to open it. We will enter our transactions here. From the View menu, you can set your register to be single- or double-line display, and choose a basic ledger, auto-split ledger, or a transaction journal. The ledgers aren’t that much different, but the transaction journal shows both entries for each transaction (double-entry bookkeeping), and unless you are used to it, it may confuse you a bit. I chose the basic ledger.
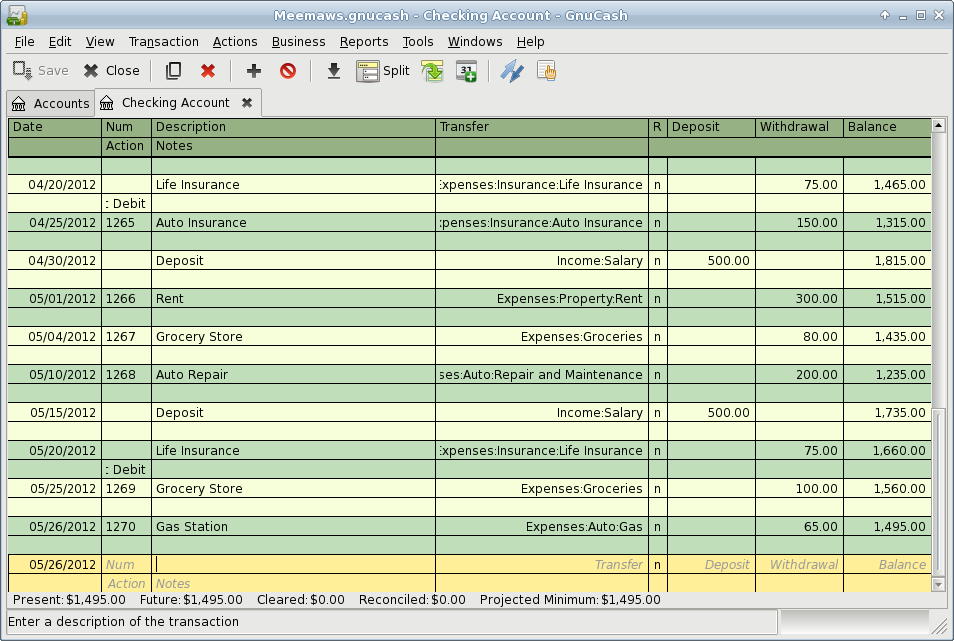
The two lines colored yellow at the bottom of the display are for entering your transaction. All you really have to enter is the date, check number, payee, category and amount. In the double-line display, you have a line in which to add notes about a payment. (Prom dress for daughter?) GnuCash memorizes your transactions and payees, so if you start to enter a payee you already have, it will be filled in for you. All you will then have to do is tab over to the amount and change it if it’s different. Notice also that each account you open is a tab at the top, so if you want, you may have your checking and savings accounts open at the same time and just alternate between tabs.
When you save and close the accounts, you will see your main screen again. Notice that the Expenses categories now have amounts in them.
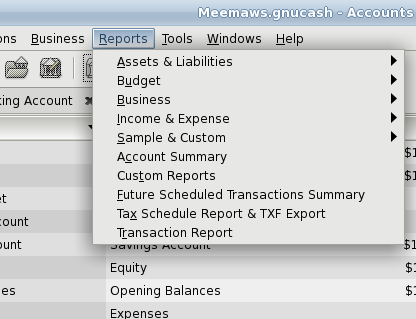
The Reports menu has many reports that can be viewed, and you can customize your own report if you wish.
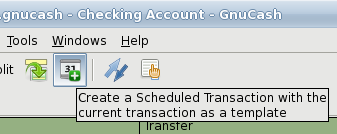
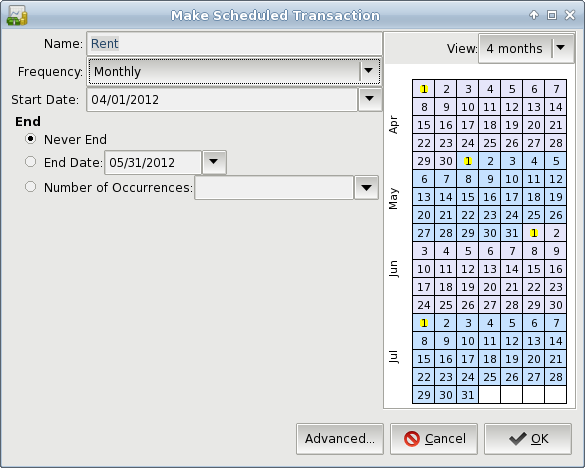
GnuCash does Scheduled transactions two different ways. The first way is from the check register. If the transaction you have been adding is supposed to happen on a regular basis, you can go to the toolbar and click on the button that looks like a calendar with a plus sign.
Scheduled transactions can also be created from clicking on the Actions menu.
You will see several items in the Tools menu. You can set up Online Banking from here. I don’t do online banking from any financial program, but it looks pretty straightforward, as long as you have all the required information.
The Price & Security Editors are for your investment accounts.
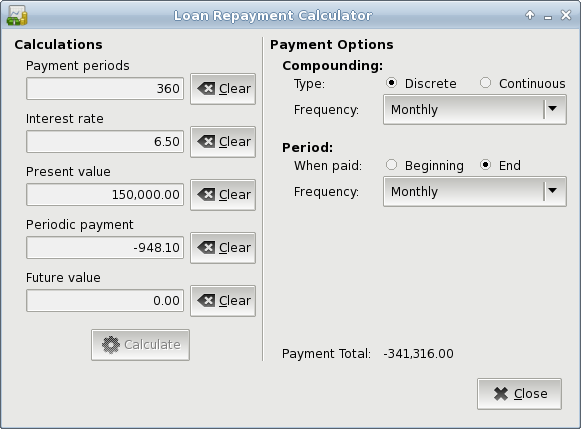
The Loan Repayment Calculator is quick & handy to figure out your payment if you are borrowing money. Just clear all the options, then enter your loan amount, interest rate, future value and number of payments. Click “Calculate” and the payment amount will be calculated. In the example below, I set the amount I want to borrow as the Present Value, and zero as the Future Value (because I want the loan to be paid off). I put in the interest rate and number of payments, leaving the Periodic payment blank. Clicking “Calculate”, we see that the monthly payment is now filled in.
The Close Book item is for an account you are closing.
You can pull up a General Ledger for your accounts as well.
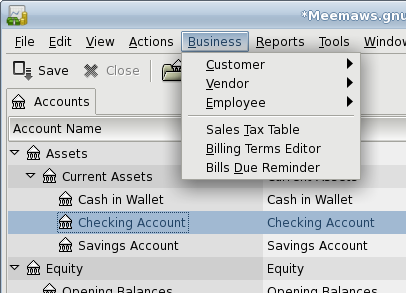
Notice that you have a menu item called Business. If you want to manage your business accounts, you can use GnuCash. You can use the business categories rather than the standard set, and the program includes menu items to create Vendors, Customers, Employees, Payment Vouchers, Jobs and Invoices. In addition, the accounts you use include Accounts Receivable and Accounts Payable. If you have a business, this may be a good program to manage it.
I have found GnuCash to be a good program that works well. The only problem I see is that it saves two files in addition to the data file every time it saves. Again, this is my personal opinion. However, if you set the program to auto-save every ten minutes and you work with it for an hour, you will have a file list in your save location that looks something like this:
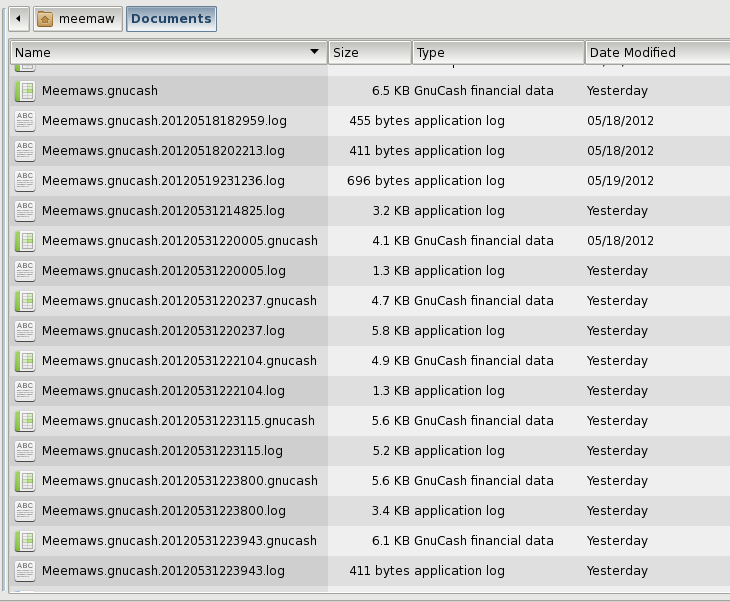
My main file is the first in the list, but you will see several sets of files that include a log and an application file. If you open the program every day, this can fill up your /home folder pretty fast. The Preferences can be set to solve some of that, as you see here:
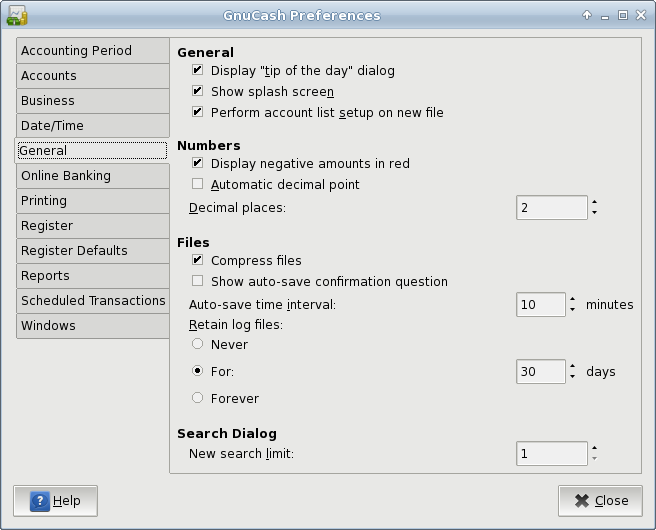
You can set to save every 30 minutes or hour, and only save the log files for 5 days or less. Set it however it works best for you.
Next month we will look at KMyMoney.