Use LibreOffice Writer, AbiWord To Fill Out Forms
by Paul Arnote (parnote)
Lordy, lordy. I love that I subscribe to Windows tips and news email lists. Often times, it’s like that quote from Forrest Gump: “Momma always said life is like a box of chocolates. You never know what you’re gonna get.”
What’s that? You’re surprised that the editor of a Linux magazine would subscribe to and read such things? Don’t be, because it’s resulted in quite a few articles of how to do things in Linux. If nothing else, those Windows articles get the gears turning. I always read those articles with the thought of “how is this of interest to Linux users?” Plus, it’s helpful to stay informed on what the Evil Empire and Darth Ballmer are up to.
Such was the case once again on May 23, 2012, when I received the Windows Desktop newsletter from TechRepublic. Featured in there was a tip on how to use Microsoft Word to fill out forms. I got to thinking, “I can do that in LibreOffice.”
To prove that I could, I downloaded the 2011 Form 1040-EZ tax form from the IRS web site. Sure enough, you can do it in LibreOffice and AbiWord. Not only can you do it in either of those two applications, but you can do it much easier. Take that Microsoft Word!
What follows is an explanation on how to do it. We’ll start with the Microsoft Word method, which can easily be replicated in LibreOffice. It’s a bit involved, but it’s easier than it sounds. You just got to know which hoops to jump through. Then, I’ll show you the much simpler ways, in both LibreOffice Writer and AbiWord.
Step One: Obtain & Convert The Form
This step is common between all three methods I’ll show you, so I’ve separated this step to stand alone. Obtaining the IRS Form 1040-EZ to use as an example was easy enough. I simply went to their website and downloaded the latest version available, snagging the PDF of the form for 2011.
Next, open the PDF file in Gimp. Yes, Gimp will open PDF files, in case you didn’t know. Just right click on a PDF file and select “Open With...” then Gimp. You will get this window:
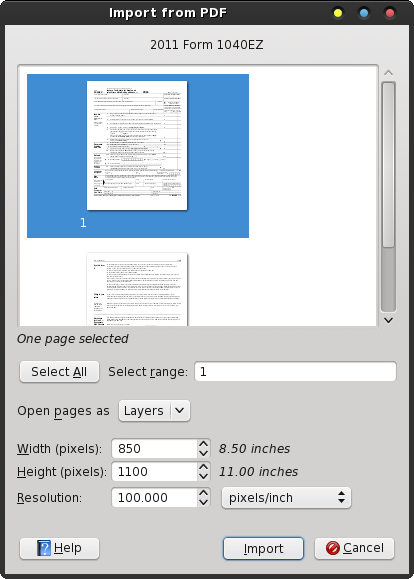
Click on the page you want to import. In the example above, it’s only the first page of the single page tax form. The second page contains only the instructions for filling out the form. Click the “Import” button in the bottom right corner of the window.
Once the form opens in Gimp, save it as a PNG file. You could save it as a JPG file, but I chose the PNG format because of its lossless compression and better results.
The Microsoft Word Way, In LibreOffice Writer
Using the same method as described for Microsoft Word, we can achieve the same result from LibreOffice Writer. Only the terminology is different, since Word and Writer call the same functions by different names.
Step Two: Set Your Document Background
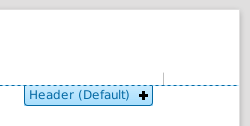
Actually, this is where the bulk of the “trick” lies. Open a new LibreOffice Writer document, move your caret cursor into the header area and click on the blue tab to enable editing of the header.
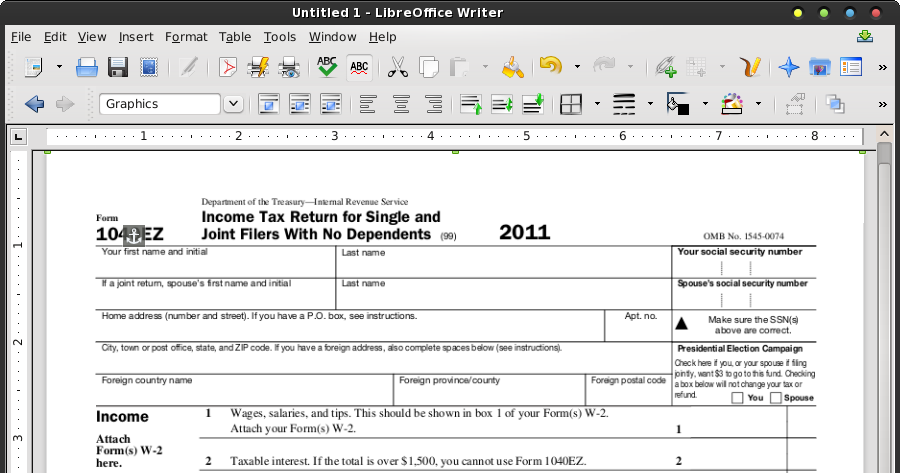
With the header now selected for editing, go to the “Insert > Picture > From File...” menu item and insert the PNG file we made in Step One. Double click on the image after you have it placed in the header.

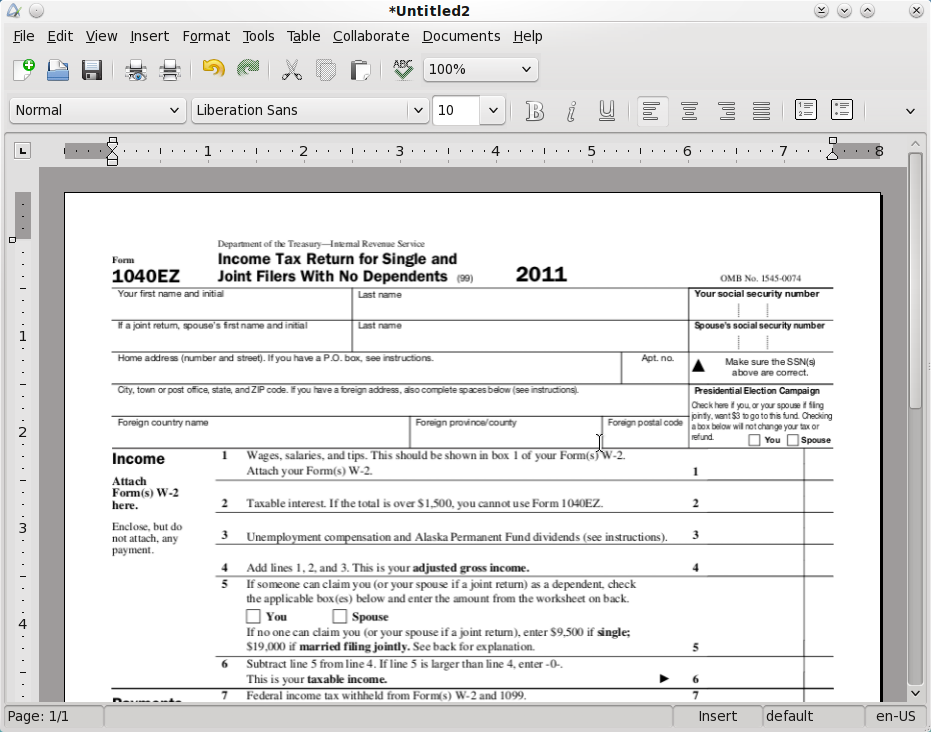
On the left side of the dialog box that appears, select “Original Size.” We don’t want the image of our form to fit neatly within the margins of our document. Being a PDF form, it was intended for users to print out, then fill out manually. Thus, our form already has “margins” included (just not OUR margins). Your LibreOffice Writer window should look something like this:
Step Three: Set Up Text Wrap
With the background image of your form still selected (as denoted by the small green resizing marks around its edge), select the “Format > Wrap > In Background” menu item. This moves your image to the background of the document, and allows you to enter text over the top of it. Using this method to send your image to the background of your document is a key step in getting this to work.
Step Four: Fill Out Your Form
To deselect the background image, click your mouse in the gray area surrounding the document display. Now, you should have your normal text entry caret cursor flashing, awaiting your input. Using tabs and spaces, move the caret to the locations where you need to enter data on the form.
Note that you may need to modify your margins to be able to “reach” all the areas of your form. You may also have to play around a bit with fonts and font sizes to get the proper line spacing for your entered text. For me, I found that 10 point Liberation Sans worked well, and gave me fairly good line spacing that matched up with the line spacing on my form.
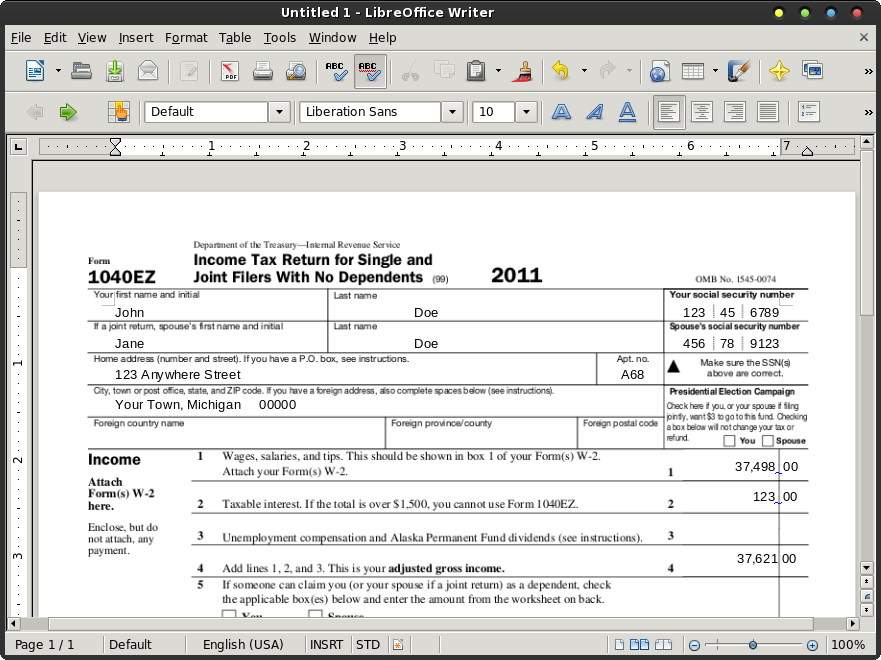
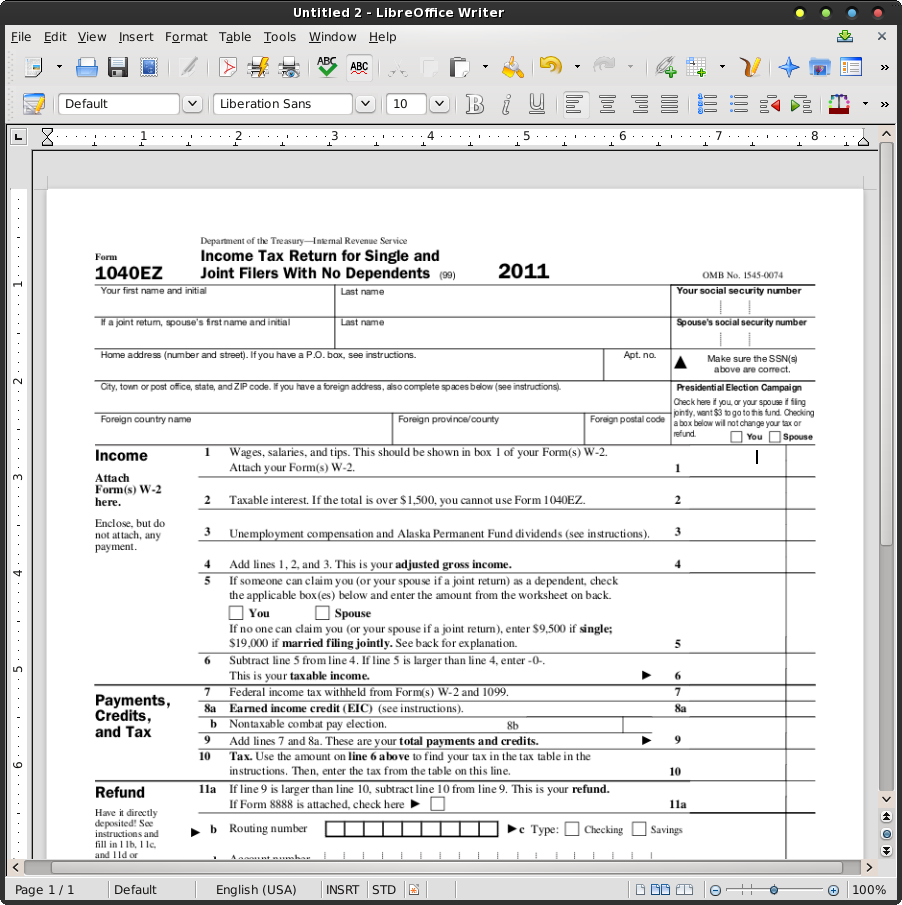
Here’s an example of the tax form filled out in LibreOffice Writer (with fake information, of course):
The Simpler LibreOffice Writer Way
Leave it to the folks who produce FOSS to find a easier way to do things. LibreOffice Writer is no exception. The instructions that follow presume that you have already completed Step One and made a PNG file of your PDF form.
Step Two: Set Your Document Background
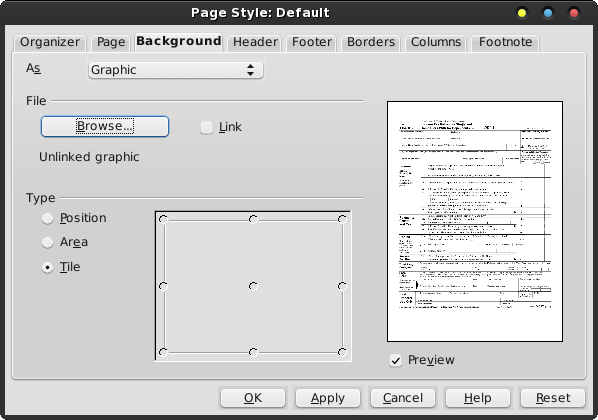
Select the “Format > Page...” menu item. Navigate to the “Background” tab. In the upper left corner of that tab is the “As” drop down. It defaults to Colors. Click it and choose “Graphic” from the drop down list. Then, click on the “Browse” button and select the PNG file you made from the PDF in Step One. Don’t close this dialog box out – yet. Click on the “Apply” button.
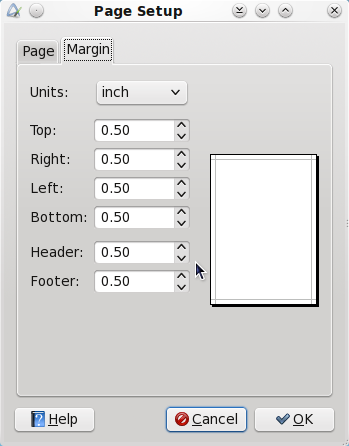
Step Three: Set Your Margins
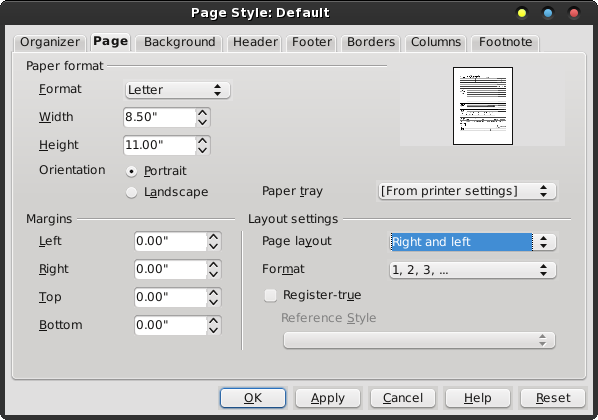
Then, select the “Page” tab, and set all of your margins to 0.00 inches (or whatever other measuring units you are using). Remember, our form graphic already has margins included, so we really don’t need to worry about margins.
Click on the “OK” button to accept your changes and close out the dialog box. You will get the following message box displayed:
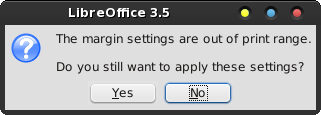
Select “Yes” to dismiss the warning box.
Step Four: Fill Out Your Form
Voila! Your blank form should now appear as the background graphic in your LibreOffice Writer document, similar to that pictured above. Just as with the previous method, you will have to mess around with the choice of font and font size to get a line spacing that matches up with that of the form. Again, 10 point Liberation Sans seems to work fine for me with this particular form. As you enter your data, it will appear over the top of your background image. Once more, use a combination of tabs and spaces to move the caret to the positions on the form where you need to enter text.
The Ultra-Easy AbiWord Method
Sometimes, it seems downright criminal that AbiWord is as often overlooked as it is. In case you’re not familiar with it, it’s a small, but powerful, cross-platform word processor. In keeping true to its FOSS origins, it does one thing, and does it well – word processing.
Using AbiWord to fill out forms is the easiest of all the methods described here.
Step Two: Set Your Document Background
Select the “Format > Page Background > Page Image” menu item, then select the PNG file you created from the PDF in Step One.
That’s it. It’s very, very easy.
Step Three: Set Your Margins
Since Form 1040-EZ already uses 0.5 inch margins, I set the margins in AbiWord to match.
Step Four: Fill Out Your Form
Voila! Just type in the information for your form. Just as with the previous methods, you will most likely have to play with the font and font size combination to achieve proper alignment with your form. Once again, I found that 10 point Liberation Sans seemed to fill the bill quite nicely. As with the previous two methods, use a combination of tabs and spaces to move the text entry caret to where you need to enter data on the form.
Summary
Without a doubt, we can do many of the same things that Microsoft Word does. In many cases, as illustrated here, we can do it much easier, thanks to the FOSS developers keeping things simple. There may be easier ways to do this in Microsoft Word, but to be honest, I wouldn’t know. I haven’t (thankfully) used Microsoft Word in years. I did go back and review the comments to the original TechRepublic article, and no one else had mentioned anything about an easier way to do it in Word, either.
It just
goes to show you that expensive commercial software is not
always better. It’s just … well … more expensive!