KompoZer: Let's Get Acquainted
by Paul Arnote (parnote)
After spending some time on the web, there are many users who may wish to create their own personal web page. There are many ways to do it.
First, you can use a web interface to create a bare bones web page. Some web interfaces at least allow you a few customization options, like different backgrounds, text sizes, layouts, etc. But they all look like “cookie cutter” pages with their similar appearance.
Second, you can create a personal blog. Most of these use a web interface to allow the blogger to update the content of their site. Most useful for espousing your opinion, blogs typically don’t allow for the downloading of additional files, unless you use cloud storage or some other off-site storage solution. Many of these also have a “cookie cutter” appearance.
Another way you can create a web site is to hand code your HTML. You can do this in a simple text editor, or in a special HTML editor that helps write the raw HTML code. There are many who subscribe to and like using this method. Many view it as a “rite of passage,” and proclaim it to be the “only way to code HTML like a man.” Without a doubt, this is the best way to create a custom web page, but it’s also the easiest to get wrong.
Fortunately, for the rest of us wimps, there are WYSIWYG (What You See Is What You Get) HTML editors – like KompoZer. Working a lot like a WYSIWYG word processor, such as LibreOffice Writer, you create your web page much as you would a term paper or typing a letter. You can position your images and text exactly where you want them, without having to learn a lot about HTML coding. Of course, it’s a lot of help to know HTML coding. The more you know, the more you can do with the generated HTML code to customize it even further.
Background
Back in February 2004, then Linspire CEO Kevin Carmony wanted to create a simple, easy to use, open source WYSIWYG HTML editor, based on the Mozilla Gecko engine. He hired Daniel Glazman, a former Netscape employee, as the lead developer to help create Nvu (pronounced “N view”).


Development on Nvu stopped in 2006, and a community fork of the Nvu source code continued on – as KompoZer. The current version in the PCLinuxOS repository is 0.8b3, released in February 2010. It is based on Gecko 1.8.1. The Gecko engine is currently at version 11, but the older version that KompoZer is based on continues to work well, even in the newer Gecko engine.
Despite the “K” in its name, KompoZer is not a KDE application, no more than the Linux kernel is. Instead, KompoZer is a Gtk+ application. Versions exist for Linux, Windows and OS-X, giving it cross platform support. It is developed by Fabien Cazenave in his free time.
Meanwhile, Daniel Glazman went on to create another WYSIWYG HTML editor from scratch, based on Gecko and XULRunner, and called BlueGriffon. While the core program is released as GNU free software, many of the functions, add-ons and the manual are available only after paying for the modules you select. If you were to buy all the modules, add-ons and the manual, you could end up paying around $100. Without the purchase of the modules, many of the features of BlueGriffon are crippled and non-functioning.
Getting Acquainted
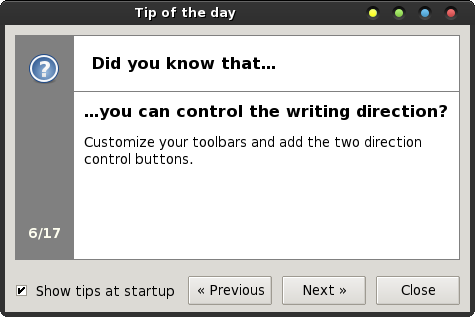
When you first launch KompoZer, you will see the KompoZer Tip Of The Day dialog box (which can be disabled, if you choose).
After that, you will find the main window displayed, as below.
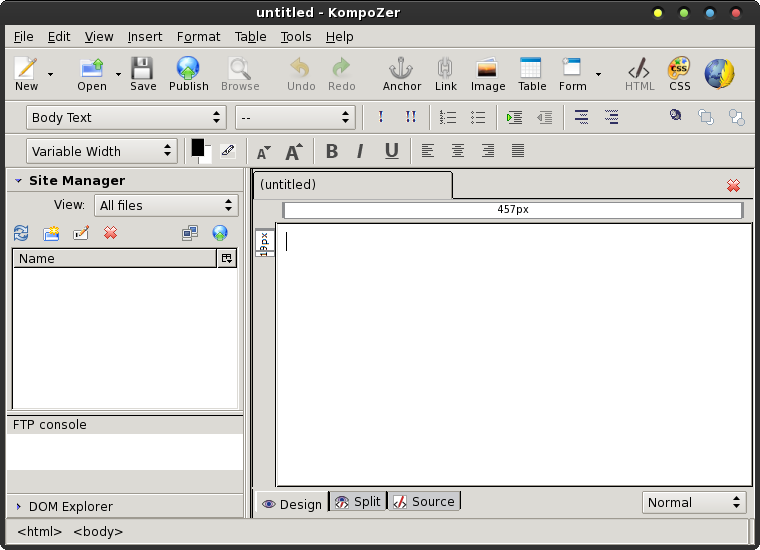
So, let’s break down the different areas of the KompoZer window. Let’s start with the toolbar.

The KompoZer toolbar gives you one-click access to many tools you will need when creating your HTML page. The first three icons on the toolbar should be self explanatory to any user. Hovering your mouse over any of the toolbar icons will get you an explanation displayed in a tooltip. We’ll discuss the functions of most of these buttons in greater detail in future articles. Right now, we’re just getting familiar with them.
Publish enables you to publish the files that make up your website. Typically, these are all stored in a directory on your hard drive that mirrors the directory and file structure on your website.
Browse allows you to open the saved version of the file currently being edited or worked on in your default web browser. Be sure to save your edits before using the “Browse” button, or your new edits won’t appear in your web browser.
Undo allows you to undo your most recent edits. Redo allows you to put your most recent edits back in, after you’ve removed them with the “Undo” action.
Anchor places an anchor tag in your HTML at the current cursor position. Let’s say you have a rather long document, and you create an index or table of contents for that document. By inserting anchor tags at the appropriate places within that document, you can link from the index or table of contents directly to that specific anchor tag, without your user having to scroll through the entire document to get there. Anchor tags are typically given a unique name, with # used as a prefix.
Link allows you to insert a HTML link into your document. That link can be to a local file, or to a resource hosted on another site. The “Link” button will bring up the “Link Properties” dialog box, where you can enter all the pertinent information for your link.
Image allows you to insert an image into your document at the current cursor position. KompoZer will display the “Image Properties” dialog box that will allow you to enter the necessary information for your image.
Table allows you to insert a table into your HTML document. Tables are a very powerful formatting tool when creating HTML pages. KompoZer will display the “Insert Table” dialog box, allowing you to define the initial structure of your table. The table will be immediately placed into your document at the current cursor position, using your definitions as a guide. If you double click your mouse cursor on the table in your document, you can further tune your table’s appearance to exactly what you want.
Form allows you to insert and set up a form in your HTML document. We’ve all dealt with forms and form elements within web pages. You use form elements to sign into the PCLinuxOS forum, when you insert your username and password to gain access there.
HTML allows you to open up your HTML code for editing in an external editor, if you have one set up.
CSS Editor allows you to edit the CSS (Cascading Style Sheet) for your HTML document, which applies a style sheet to your HTML document. The default with KompoZer is to embed the style definitions into the HTML header. It is possible to import an external *.css file to control the styles of a group of pages.
Finally, at the far right of the toolbar is the KompoZer logo. Mouse over the logo and a tooltip will appear, declaring “This is KompoZer.” Otherwise, that’s all it does.
Text Formatting Tools
The next two “toolbars” relate to your text formatting. They appear like in the image below.

Starting with the top row, let’s review the text formatting features. At the top left is the formatting style of the text. The default is for body text. The other choices are paragraph, headings one through six, address, preformatted, or create an generic division.
Working left to right, the next control allows you to apply a class to either the text being entered, or the selected text. The ! applies emphasis to the text, while the !! applies strong emphasis. Basically, applying emphasis to text is akin to making the text italic, while strong emphasis is similar to making the text bold. Selecting them both makes the text bold italic.
The next control formats the text as a numbered list, while the next one formats the text as a bulleted list. Next are the controls to indent and outdent text. The outdent control is disabled, unless you are dealing with text that has previously been indented.
The next two controls don’t make a lot of sense to me, as they are implemented in KompoZer. They are called “Definition Term” and “Definition Description.” I’m unable to find any documentation about them, and in playing around with them, I can find no rational use for them.
The last three controls on the top row of the text formatting toolbar deals with layers. With KompoZer, you can design layers into your web page. Briefly, the use of layers allows precise positioning of an element within your layout.
On the second row of text formatting controls, starting from the left, the first control allows you to select the font to use. The default is “Variable Width,” but I usually prefer to select a specific font to use for my web pages. It boils down to personal preference of how you want your page to appear. My personal preference is for a sans serif font, such as Helvetica, Arial or Liberation Sans.
The next control sets the font color and the text background color. Clicking on them allows you to bring up a color selection dialog box where you can define or select the colors of each. Right next to those controls are the two controls to allow you to make the text larger or smaller.
Next are the controls to determine whether your text is bold, italic or underlined, just as you would find in a word processing program.
The last controls determine the alignment of the text in your HTML document. You can choose left aligned, centered, right aligned, or justified. Again, these controls work pretty much as they would in a word processing program.
Site Manager
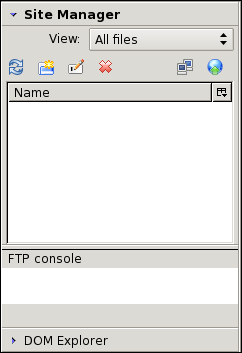
One of the neat functions of KompoZer is that it allows you to manage your web site. Typically, when you are creating or working on your site, there are a number of files that comprise the whole. You would normally store a copy of things to your hard drive, arranged as they would be on your website. With KompoZer, you can upload your all of the elements of your site or just the changed pages to your web host.
Page Layout Area
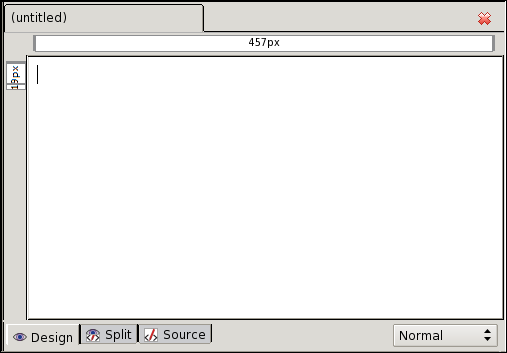
The largest element of your KompoZer window is the area where you enter and arrange the elements of your HTML page. Think of it as your canvas. Or think of it as your blank page as you might have in a word processing program. Just as you might do typing out a letter or a term paper, you enter the information for your web page exactly the same way.
At the bottom of the page layout area, you see three “tabs” on the left. The “Design” tab is the default view, and displays the information you are entering in a WYSIWYG manner. That is, how it appears on your screen is pretty close to how it will appear when a visitor to your website might see it in their browser. The “Source” tab allows you to view and edit the generated HTML code, something you might want to do when you use or add elements to your web page that aren’t supported by KompoZer. The “Split” tab allows you to have a WYSIWYG display of your page content in the top part of the window, while displaying the generated HTML code in the bottom part of the window – in a split view.
At the bottom right of the page layout section of the Kompozer window is a control that determines how your page layout window appears. The default is the “Normal” setting. You can also set it to the “Preview” setting, (although I can’t see any difference between the normal and preview settings). You can also set it to the “HTML Tags” setting, which displays the HTML tags for each element of your page in your WYSIWYG page layout window, right next to each individual element of your page. To be perfectly honest, I never alter the view. I choose, instead, to switch between the design tab and the source tab when working on my pages.
Status Bar

At the bottom of the KompoZer window is the status bar. The status bar will display the general HTML tags of the current section of your HTML page.
Summary
Now that
you’ve gotten a quick overview of some of the features of the
KompoZer window, you should be better able to find your way
around KompoZer. Don’t worry – there’s lots more
that we haven’t even touched on yet. Next time, we’ll talk about
setting up your site, and get started creating your first HTML
page.