Linux Financial Apps: HomeBank
by Meemaw
With the new year, I thought I might start using a Linux financial program to keep track of my budget, so I investigated the programs available. I found nine. Of those nine, only eight are in our repository, and one of those is a command line program. Yet another is, in my opinion, useless. So I am down to six. Over the next few months, I will review these six: HomeBank, iFreeBudget, Money Manager EX, grisbi, gnucash and kmymoney. All are in the PCLinuxOS repository.
HomeBank
The home page is http://homebank.free.fr/. It’s also available for Mac & Windows. The user manual, in English, is at http://homebank.free.fr/help/index.html.
When you start HomeBank, you will be shown an opening dialog window which says ‘Create a new Wallet’, ‘Open an Existing Wallet’ or ‘Open the Example File’. You want to create a new wallet. This is the file you will open when you work on your finances. You will have four windows, two of which are shown below:
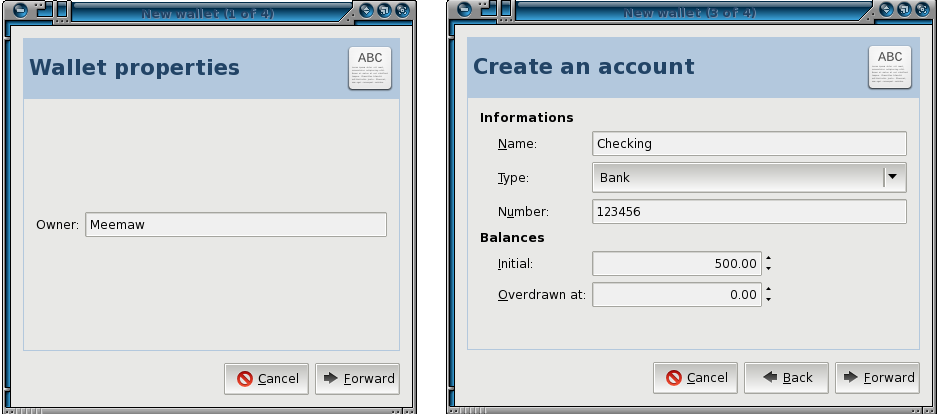
The first window asks you to name your wallet, the second one detects your preferred language in the system (not shown), the third asks you to create an account. Give your account a meaningful name, and indicate what type of account it is. The choices are bank, cash, asset, credit card and liability. Put in your account number, enter your beginning balance, and if you want a reserve amount in your account at all times, you can enter a number in the ‘Overdrawn at’ section. The last screen is a confirmation screen. If you wish, you can click the Back arrow and proofread what you entered before you click OK.
At this point you only have one account in the main screen. Your toolbar will look like this:

We have New, Open and Save as the first three icons. The next six icons correspond to the entries in the Manage menu (Accounts, Payees, Categories, Assigned Transactions, Archives and Budget). The next two are in the Transactions menu (Show and Add) and the last five are in the Reports menu (Statistics, Trend Time, Balance, Budget and Car Cost).
To add another account, like a savings or credit card, you would click on the Manage Accounts button to the right of the save button, or access it from the Manage menu. The manage accounts screen has the same things that the new account screen has, plus a few more. There are check boxes for ‘Include in the Budget’ and ‘This account was closed’, as well as a couple of Check Number boxes. In HomeBank, you can put in your starting check number here, and HomeBank will auto-enter your account number when you enter a check. You will see two of those entries for a couple who has two books of checks for the same account.
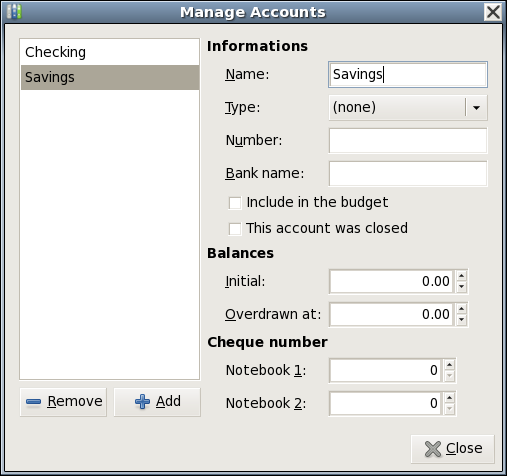
I added a savings account. You can add other accounts as you desire. Here is my main HomeBank window now:
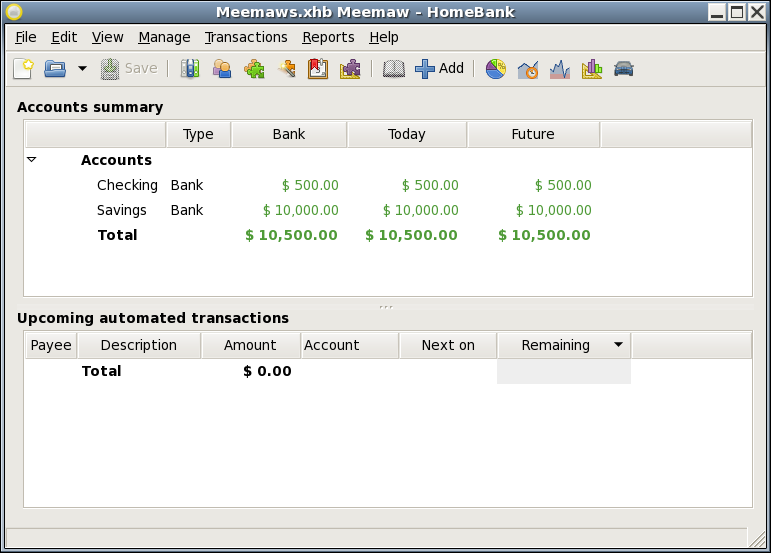
You need to go to File > Save As... and give your wallet file a name. After that, you can just click on ‘Save’ in the toolbar.
Now we have our accounts set up. Double-click the name of the account you want to view. You will get another window with that account’s ledger in it.
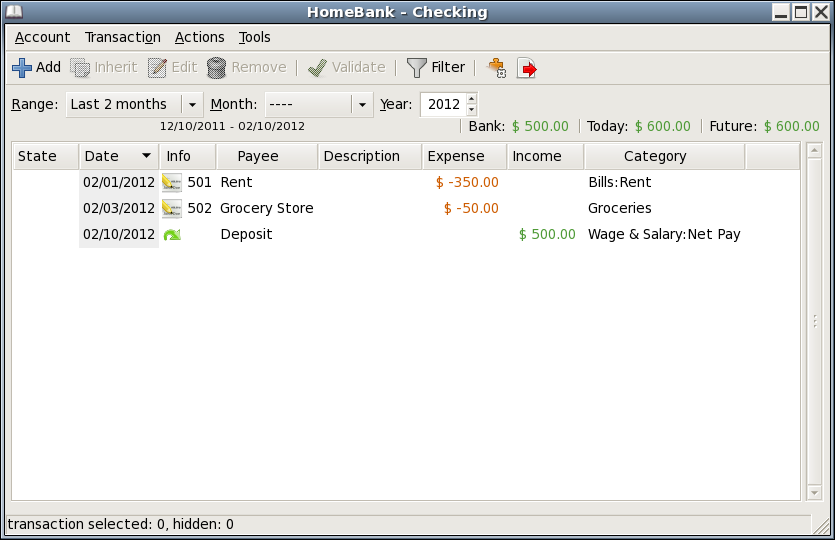
Notice that your balance is at the top of the window to the right of the word ‘Today.’
To add your transactions, simply click the Add button.
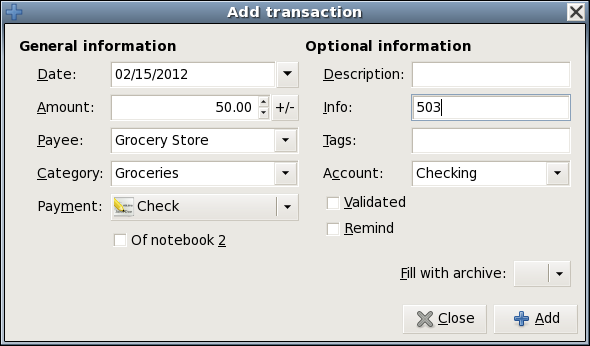
From here you can add as many transactions as you want. When you click Add in the lower right corner, your transaction is added to the register, but this window remains open. In the window, we see all the necessary information for your register. I should first point out a few things, though.
First, you can add payees as you are filling in the transaction, and they will be saved. Also, you need to designate a payment in the Amount window by clicking the +/- button or the program will add everything to your balance instead of subtracting the checks.
Next, you can keep track of the type of payment you are entering with the Payment drop down. You can choose check if you wrote a check, but there is also Credit Card, Debit Card, Transfer, Electronic Payment, Deposit and a few others. Info actually keeps track of your check numbers. Back on the register window, info will display the check number if you wrote a check, plus the type of payment made. There is a place for a description, in case you wrote a check at a store for something in particular and want a note of it in your register. The concept of tags has been added as well, to provide better search results.
The ‘Validated’ check box is checked during your bank statement reconciliation, and the ‘Remind’ check box can set a reminder for a special transaction, such as loaning money to someone.
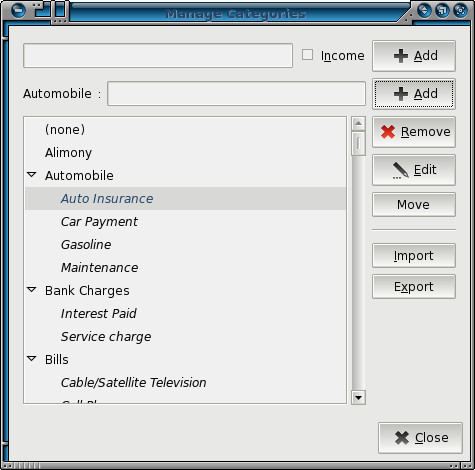
HomeBank includes many pre-entered categories, but that does not mean you can’t add some of your own using the Manage Categories window. I noticed that auto insurance is in the category Insurance, but I want it in with the cost of operating my auto. I clicked on Automobile and added Auto Insurance as a sub-category.
Once you have your transactions entered, there are a couple of extra things you can do. Many of our transactions are payments we make regularly, like rent, gas, electric, cable and phone bills. We can set those up as automatic transactions which are added to the appropriate account on a certain date every month. This works particularly well if it is an automatically withdrawn payment. For example, I have my life insurance premium electronically withdrawn from my checking account once a month. I have to remember to enter that into my check register every month. The automatic payment is an easy way to make sure it isn’t forgotten.
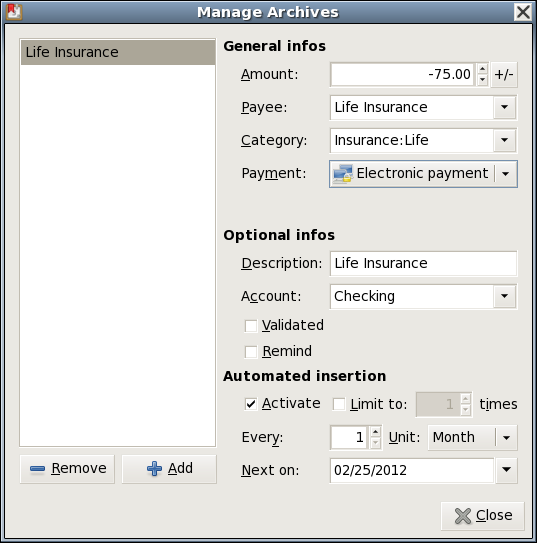
Automatic payments are configured in the ‘Archive’ dialog in the Manage menu. When the window opens, you create an archive by filling in the details of your transaction. I have filled in an automatic life insurance withdrawal below. Notice that it is almost like the transactions list in that you fill in the payee, category, type of payment and account, but at the lower right of the window you must activate the automation and designate how often it is to be done and on what date the soonest one is to occur.
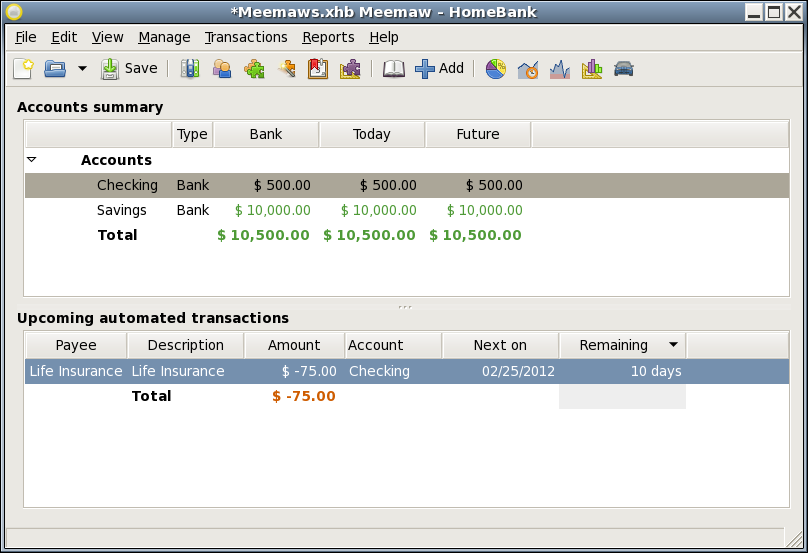
You can add as few or as many as you wish. You can also remove one when it’s no longer needed, such as when the car is paid off. When you get back to the main window, it will have the automatic payment in the lower half of the window:
There is a button for Assigned Transactions, but it seems to be one where you can assign a specific category and payee to a specific description. When you enter that description into your transaction window, it automatically fills the Payee and Category. There is also a choice in your account window (your check register), which is called Inherit Transaction. If you inherit a transaction, HomeBank creates a new one exactly like the one you chose to inherit. Then, you can change the date and amount of payment and save it as a new transaction. This can be handy for things like the weekly grocery store visit.
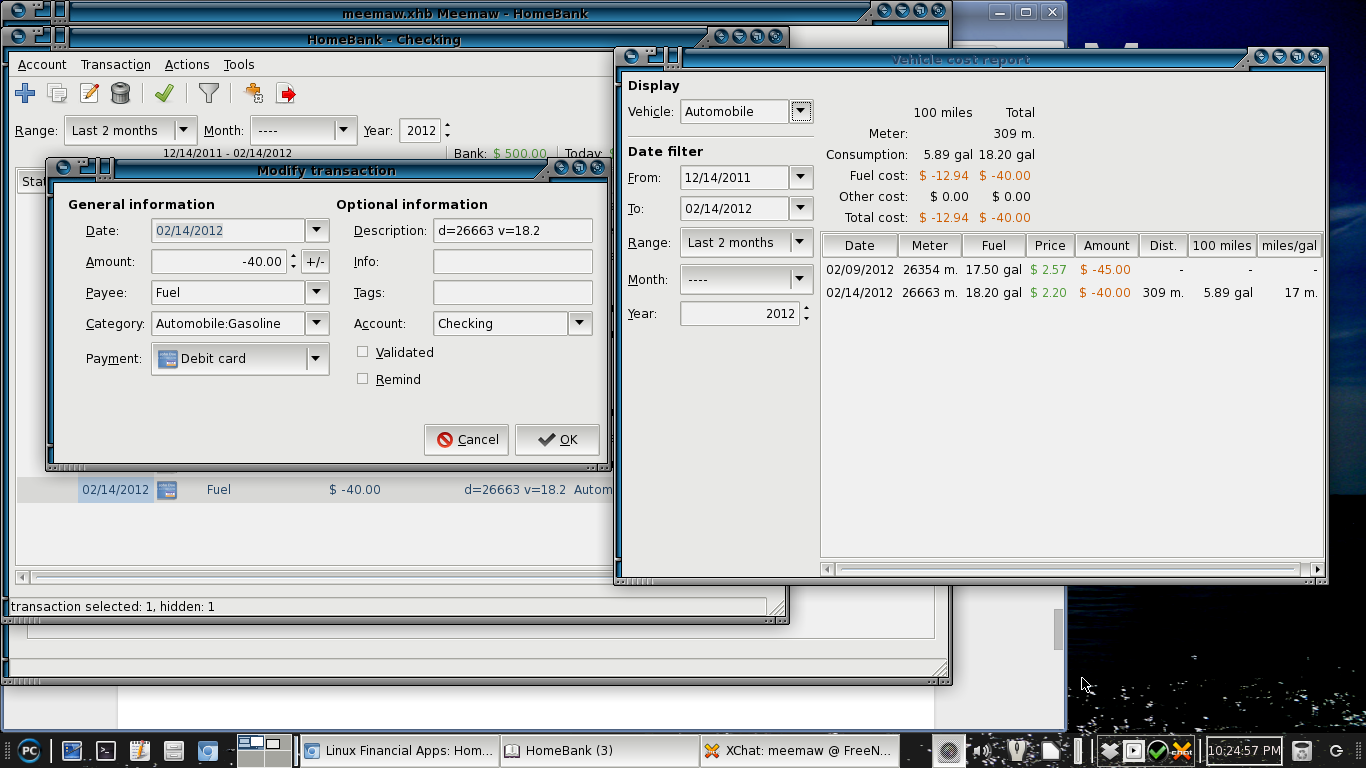
One different thing you can do is a car cost report, which includes mileage. This particular feature involves editing your auto fuel expenses. Many of us keep track of our mileage, along with the amount of fuel we put in the vehicle when we filled it. We can transfer that information into HomeBank’s transaction window in the following manner.
In the transactions window I entered a debit card transaction for fuel using the category Automobile. In the Description, I entered the vehicle’s odometer reading as d=26663 and the amount of fuel purchased as v=18.2. Since I have a starting odometer reading before this one, the program can now figure the gas mileage (MPG) as well. Adding car payments, insurance, repairs and taxes to the same category will give me an overall view of the cost of my vehicle.
If you have more than one vehicle, you should create another category named Automobile 2 or Truck or something meaningful with the same sub-categories. You can set your preferences to use Imperial units or metric units. Preferences is the only choice in the Edit menu.
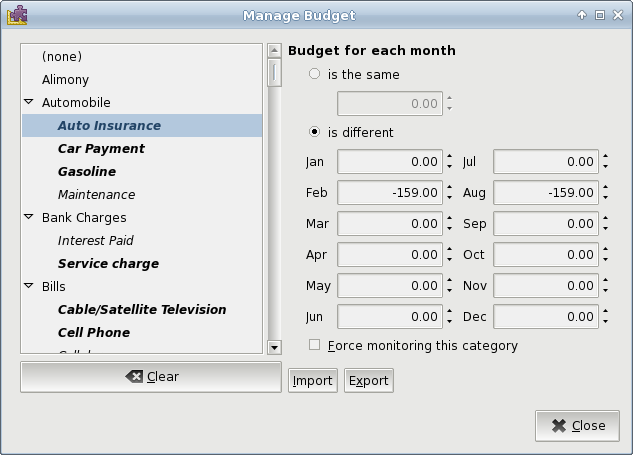
HomeBank has a budget feature as well. You have a configuration window where you can designate an estimate of your annual spending in each category. On the left is a category list and at right you see blanks to fill in with an estimate of your monthly expense. You have to designate spending for each category.
You can do it two ways. First, if you pay the same amount each month (like a cable bill or rent or car payment), you can click in the radio button that says (Budget for each month) is the same, then enter that amount in the box.
Second, for the categories that have occasional payments (my auto insurance is paid twice a year), choose the radio button before is different and fill in the months that apply. That method can also be used with categories where the payment varies, like natural gas, which we use more in the winter. The categories that have already been completed are displayed in bold text in the list on the left.
Just as it shows in the image above, your expenses must have the minus sign in front of them to mark them as expenses. You have to type it in yourself. Make sure you complete your salary category so you also have an income in your budget. When you finish, you will have a table like the one shown below.
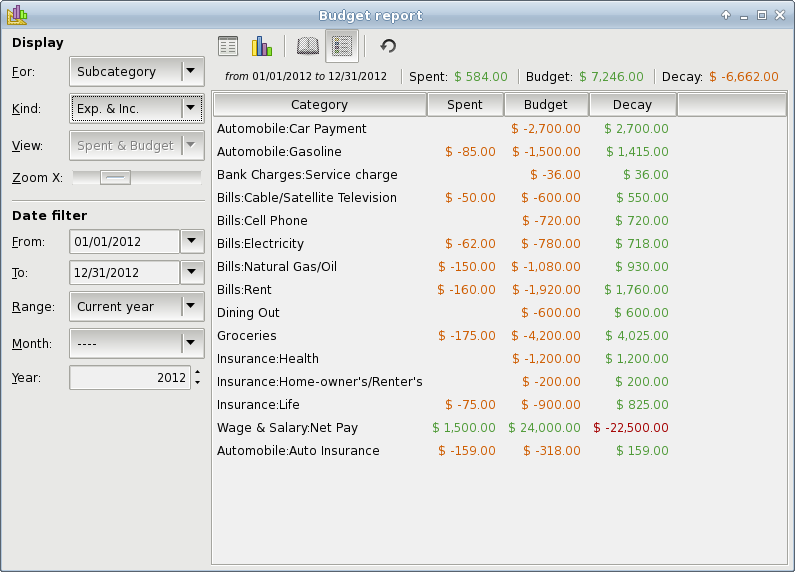
You can sort by category or sub-category, can list Income and Expenses or only Expenses or only Income and can choose a certain time frame, like the present year or the current month using the drop menus at left. Your budget can also be shown as a bar graph. The term ‘Decay’ is the difference between the budgeted amount and what has been entered in your accounts.
I think once you get used to some of the
idiosyncrasies of HomeBank, it is a very useful program. It
works very well, but some of the columns are too close together
for me. I can widen most of them, but the next time I open the
window they haven’t stayed where I’ve put them, and are jammed
together again. It doesn’t affect the program operation, but I
do find it a little bit annoying. I haven’t found anything in
the program about online banking. However, for someone who is
interested in keeping track of their budget, it’s a good program.