ClamAV Installation &
Configuration

by Darrel Johnston (djohnston)
Periodically, questions come up on the forum about configuring ClamAV after the installation. It seems that almost everyone, myself included, has encountered problems with getting ClamAV to work properly after it’s installed. The default installation issues should be addressed upstream at the developers’ end. However, the configuration issues have existed for years, and I’ll let sleeping dogs lie. I’ll show you how I addressed the problems encountered.

It was two or three years ago when I installed it for use on a remastered CD I made for the purpose of scanning Windows PCs for viruses. As a result, I had forgotten some of what I had done to get ClamAV working. So, I used the information from some helpful PCLinuxOS forum posts to help me along.
The first step is to open Synaptic package manager, install any updates needed for your system, then enter “clamav” as a search term (without the quotation marks). Several packages will be displayed. After marking the package clamav for installation, the packages clamav-db and libclamav6 will be shown as dependencies. You should mark them for installation, as well. The clamtk package is a front-end GUI for clamav and offers convenience for the user. The clamav-milter package is designed for Sendmail. The package should be selected for installation on mail servers, but is not necessary on desktop PCs. The clamd package is a daemon (system service that runs in the background) that listens for incoming connections on UNIX and TCP communication sockets and scans files or directories on demand. Although the clamd package is not a dependency of clamav, you should mark clamd for installation, as well.
After installation of the clamav, clamtk and clamd packages and all dependencies comes the fun part of configuring ClamAV to work properly. The first two tasks I did were to change the contents of /etc/clamd.conf and /etc/freshclam.conf. These files must be edited as user root. It is always a wise idea to make backups of the original files before editing, just in case. I took my cues from wolverine_tech in editing the freshclam.conf file. He says:
For some reason, the config file for freshclam has some 'necessary' lines commented out. I got it to work by removing the # before some lines. Look for those that do not have #.
1. I modified DatabaseMirror db.us.clamav.net. It had a # at the beginning and was DatabaseMirror db.XY.clamav.net instead of DatabaseMirror db.us.clamav.net. (Use the appropriate country code.)
2. I removed the # before DatabaseDirectory /var/lib/clamav.
The contents of his modified file are listed in his post in the Code: section.
Next, I took a shortcut and downloaded Leiche’s clamd.conf file from here. I then copied it to the /etc directory after making a backup of the original. For reference, here is the change to be made. Towards the top of the file are these two lines:
# Comment or remove the line below.
Example
Why the line “Example” is uncommented is beyond me. Every other line in the file is commented but that one! That line causes the rest of the file to not be parsed at all. Comment the line by adding the # symbol at the beginning of the line, or remove the line altogether. There are no other changes necessary.
At this point, freshclam, the CLI executable used to update ClamAV’s virus database will not run. As per forum user as, freshclam runs as user 'clamav'. You need to allow write permissions for user 'clamav' on the file /var/log/clam-update.log. His solution is to run the following two command lines in a terminal as user root:
echo > /var/log/clam-update.log
chown clamav:clamav /var/log/clam-update.log
Instead of opening a terminal and entering the command freshclam to update ClamAV’s database, I opted to create a desktop file for that purpose. I wanted to be able to run the desktop file from the main menu. I opened a text editor and entered the following:
[Desktop Entry]
Name=ClamAV Update
GenericName=Virus Definitions Update
Comment=Update virus database
TryExec=freshclam
Exec=freshclam
Icon=clamtk
Type=Application
Terminal=true
Categories=GTK;GNOME;Utility;X-MandrivaLinux-System-FileTools;
StartupNotify=true
X-Desktop-File-Install-Version=0.18
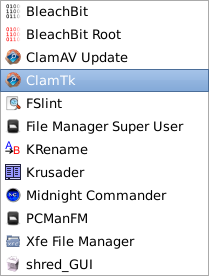
I then saved the file as clam-def-update.desktop. Then I copied the file to my ~/.local/share/applications directory. (The ~ symbol represents, and is equivalent to, /home/{yourusername} directory.) I then had two new menu entries in the File Tools section, ClamAV Update, (from the desktop file I created), and ClamTk, from the clamtk package installation.

Next, I wanted to be sure that freshclam was working, so I opened a terminal and entered the command. I received the following error:
freshclam
ERROR: Can't create temporary directory /var/lib/clamav/clamav-be560031acf6a1b994ab1fa84ba4dc16
Hint: The database directory must be writable for UID 500 or GID 500
Hmmm. I’m user ID 500, and I’m the sole member of group ID 500. At this point, I could have tinkered with the settings in the /etc/freshclam.conf. I chose a simpler route. I chose to make (only) the /var/lib/clamav directory, its files and any subdirectories readable, writeable and executable by all. As user root, I issued the CLI command:
chmod -R 777 /var/lib/clamav
Once done, the freshclam command merrily updated the virus database definitions. (NOTE: If you elect to create a desktop file for freshclam, launching the desktop file from the menu will open a terminal. The terminal may pause for a bit while reaching ClamAV’s database servers. The terminal window will close on its own once all steps have completed.)
As user margarita has pointed out, freshclam’s database can be stored in your home folder, with all updates written to the stored database file.
I use that as user:
/usr/bin/freshclam --datadir=$HOME/.clamtk/db < (all --log=$HOME/.clamtk/db/freshclam.log # clamtk-defs < one line)
/usr/bin/clamscan --database=$HOME/.clamtk/db --detect-pua -i -r $HOME < (all
--exclude-dir=$HOME/.clamtk/viruses --log=$HOME/.clamtk/history/$(date < (one +\%b-\%d-\%Y).log 2>/dev/null # clamtk-scan < line)
There are a few possible
solutions to the problem of configuring ClamAV to run
after
installation as forum user as has pointed out in this
forum thread,
So now you have 3 solutions, but no one is an upstream solution.
