Gnome 2.32: Gnome Schedule Puts Gnome On A
Schedule
by Paul Arnote (parnote)
There are times when you may want to run an application while you are away from the computer. The things you may want to do are limited only by your imagination and your needs. You may want to run a script that allows you to record your favorite TV program from your TV tuner card. You may want to sync the files on your laptop with the files on your desktop or server. Or, you may wish to sync your locally stored repository with one of the PCLinuxOS repositories, using rsync. Whatever it is that you would like to accomplish while you are away from your computer, Gnome Schedule 2.12 is your answer.
While it isn’t installed by default in Zen Mini, it’s no further away than installing it via Synaptic. Once installed, it will be listed under your More Applications > Configuration menu as “Scheduled Tasks.”
Once launched, you will see a window like the one below:
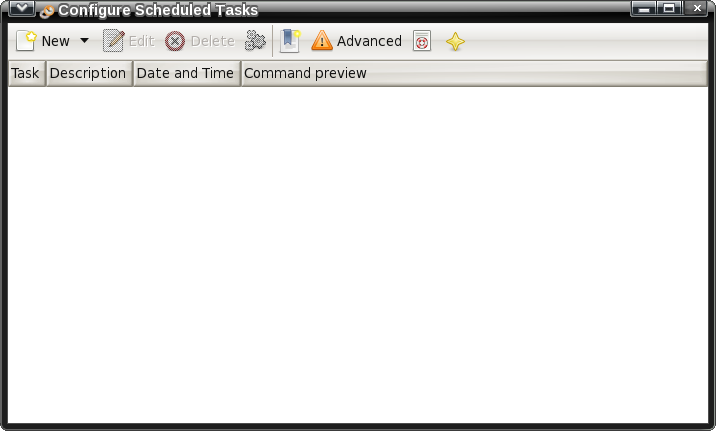
As it sits when you first launch it, it looks rather empty, devoid of any purpose. But don’t let that fool you. With very little effort, and in the right hands, Gnome Schedule is a very powerful tool. Written in Python and using pygtk, Gnome Schedule provides a visual interface for scheduling tasks to be executed by the “crontab” and “at” command line utilities, insulating you from the command line that instills so much fear into so many users. With a few exceptions, which I’ll point out as we go, Gnome Schedule follows most of the rules of crontab. You can view those rules by checking out the online crontab man page.
By selecting the “New” button on the toolbar, Gnome Schedule will display the following window:
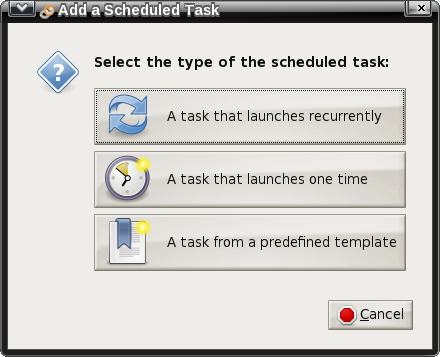
Here, you select whether you want to schedule a recurrent task (as you may wish to do when backing up your laptop’s data to your desktop every Sunday night after you’re customarily in bed and your computer isn’t routinely in use), schedule a one-time task (as you may wish to do when recording the airing of one of your favorite movies), or if you want to schedule a task from a predefined template.
For my personal use, I’ve found the one-time task option as the one that I use the most, since I currently use it to record TV programs aired on an irregular basis. However, your use, dictated by your individual needs, may differ.
Selecting the one-time task button, you will see a window like the one below:

At the top of the dialog box, you can give a title to your scheduled task. This helps keep your tasks separated and easily identified, especially when you have multiple tasks scheduled. If your task launches a GUI’d application that uses X, then check the box next to “X application.”
Next, enter the date and time you want your task to start. You can enter the date directly, or you can use the “Calendar” button to select the date. If you choose the latter, the date fields will automatically be filled in for you. When filling in the time, hours are expressed based on a 24 hour clock. Thus, 8 p.m. becomes 20 (12 + 8), 4 p.m. becomes 16 (12 + 4), and 11 p.m. become 23 (12 + 11). The minutes are simply entered directly, ranging from 0 to 59.
Below, in the “Task” area, simply enter the command that launches the application(s) you want to run at that scheduled time. Once you have everything as you like it, simply click on the “Add” button. If you change your mind – or screw things up badly – you can click on the “Cancel” button to discard your choices. Clicking on the “Add as template” button allows you to save your scheduled tasks as a template, so you can reload it again for later reuse.
However, if you choose to schedule a recurrent task, you will get a different dialog box, like the one below:
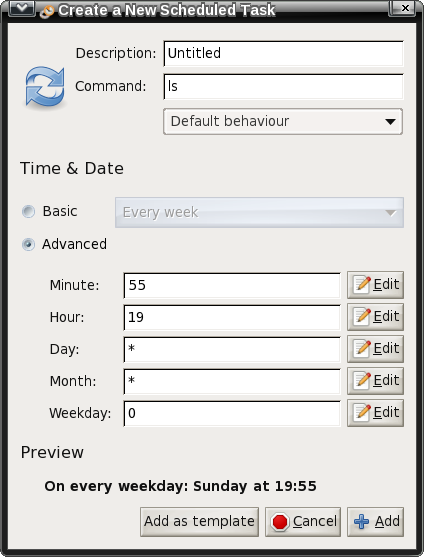
Things become a bit more complicated when scheduling recurrent tasks. Just as when you are setting up a one-time task, the first line in this dialog box allows you to provide a title for your scheduled task. The second line is where you put the command(s) that you want to be executed.
The next control is a button that brings up four choices: default behavior, suppress output, X application, or X application: suppress output. The default is the first choice, default behavior. This allows you to specify the behavior of the application you are running.
Even though grayed out in the image above, your next choice is the “Basic” control. Here, you select if you want your recurrent task to run every minute, hour, day, week, month or at every reboot. If you select anything other than running your task at every reboot, you will want to move the selection from “Basic” to “Advanced”
Under “Advanced,” you specify the minutes (0-59), hour (0-23), day (1-31), month (1-12) and weekday (0-6) you want your recurrent task to execute. The latter setting, “Weekday,” recognizes 0 as being Sunday, and 6 as being Saturday.
Alternatively, you can use the first three letters of the names of the days of the week (sun, mon, tue, etc.) and the month (jan, feb, mar, etc.) in place of the number designations. Normally, with crontab, case does not matter when using the names of the days of the weeks or the months. Thus, sun, Sun, SUn, suN, sUN and SUN all mean the same thing. But under the Gnome Schedule environment, you can only use all lower case letters. Otherwise, you will see an error message displayed under the “Preview” pane of the dialog box.
If you have everything set up properly, you will see the frequency of your recurrent scheduled task under the “Preview” pane of the dialog box. Once everything is as you like it, click on the “Add” button to add your recurrent task to the list of scheduled tasks. Selecting “Cancel” discards all of your selections. Clicking on “Add as template” adds your task as a template for later reuse.

Selecting the “Edit” button on the Gnome Schedule toolbar will display the appropriate dialog box depicted above, depending on whether the task is a one-time or recurrent task. Clicking on the “Delete” button will delete the currently selected task. To run a task now, instead of at its scheduled time, click on the “gears” icon on the toolbar. The next icon allows you to manage your saved templates.
The sixth icon allows you to select from a basic or advanced view of the tasks displayed in the task pane of the main window. Personally, I can’t see a whole lot of difference between the basic and advanced view, other than a rearrangement of the columns of information. The next to the last icon launches the help file for Gnome Schedule, if you happen to have it installed. The last icon displays the “About” dialog box for Gnome Schedule, when selected.
Summary
Because Gnome Schedule is a Python app, it doesn’t pull in a lot of Gnome dependencies. As such, Gnome Schedule is included on my Xfce installations, which is where I first “became friends” with it.
Gnome Schedule is a powerful tool that allows you to perform tasks at a time when your computer typically isn’t in use, like while you are sleeping. It also allows you to run virtually any command on a schedule. The latter is the way I use it. I have some custom scripts (meaning ones I wrote myself) that I run to record “The Walking Dead” off of my TV tuner card every week when it airs.
Gnome Schedule goes a long way in buffering the user from the often perceived complications of trying to hand-code a crontab entry yourself, on the command line. You definitely owe it to yourself to give Gnome Schedule a look and discover how it can help you automate some routine tasks that you may repeatedly perform on your system.