Alt OS - NetBSD Part 1
by
Darrel Johnston (djohnston)
Linus Torvalds said in 1993: "If 386BSD had been available when I started on Linux, Linux would probably never have happened." NetBSD took its roots from the original UCB (University of California at Berkeley) 4.3BSD. via the Net/2 release, and from 386BSD. It was the second open source BSD descendant to be formally released, after 386BSD. The NetBSD project was founded by Chris Demetriou, Theo de Raadt, Adam Glass and Charles M. Hannum. In 1994, for disputed reasons, Theo de Raadt left the project. He later founded a new project, OpenBSD, from a forked version of NetBSD 1.0 near the end of 1995. FreeBSD was formed later with a focus on the i386 PC platform.
Frustration with the quality of patches in the wild and the inability to get patches included in 386BSD led to the founding of the NetBSD project in 1993. NetBSD's original focus was quality and architecture independence. Since then, in addition to the many developments within the project, NetBSD has imported changes from other sources, including 4.4BSD Lite. The NetBSD source code repository was established on March 21, 1993, and the first official release, NetBSD 0.8, was made in April, 1993. This was derived from 386BSD 0.1 plus the version 0.2.2 unofficial patchkit, with several programs from the Net/2 release missing from 386BSD re-integrated, along with various other improvements. The first multi-platform release, NetBSD 1.0, was made in October 1994. In 1998, NetBSD 1.3 introduced the pkgsrc packages collection.
As the project's motto ("Of course it runs NetBSD") suggests, NetBSD has been ported to a large number of 32- and 64-bit architectures. These range from VAX minicomputers to Pocket PC PDAs. NetBSD supports 57 hardware platforms (across 15 different processor architectures). The kernel and userland for these platforms are all built from a central unified source-code tree managed by CVS. Currently, the NetBSD kernel requires the presence of an MMU (memory management unit) in any given target architecture.
NetBSD's portability is aided by the use of hardware abstraction layer interfaces for low-level hardware access, such as bus input/output or DMA. Using this portability layer, device drivers can be split into "machine-independent" and "machine-dependent" components. This allows a single driver to be easily used on several platforms by hiding details of exactly how the driver accesses the hardware, and also reduces the amount of work needed to port it to a new architecture.
This enables a driver for a specific PCI card to work whether that card is in a PCI slot on an IA-32, Alpha, PowerPC, SPARC, or other architecture with a PCI bus. Also, a single driver for a specific device can operate via several different buses, for example ISA, PCI, PC card, etcetera.
Download the ISO for 386 architecture from here. You can also download a torrent file from here. I’ll be using VirtualBox for the installation, with 512MB of RAM, 64MB of video RAM and an 8 GB dynamically sized hard drive. This configuration is extremely generous, as NetBSD doesn’t require anywhere near these numbers to function well.
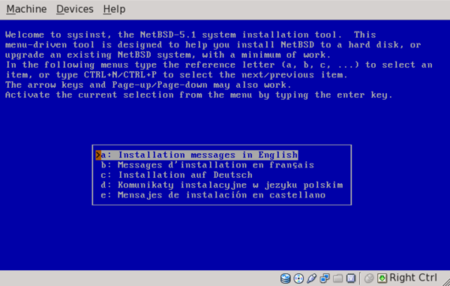
Starting with the first screen after booting from the CD, select option 1.

We can select messages in English, French, German, Polish or Spanish. I chose English.
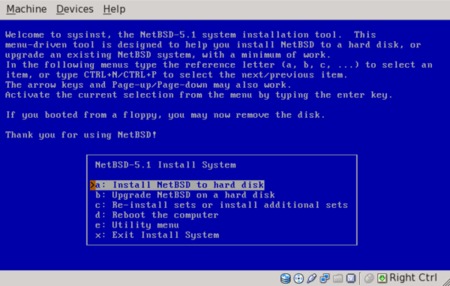
I then chose US-English for the keyboard type. Next, I chose to install NetBSD to hard drive.
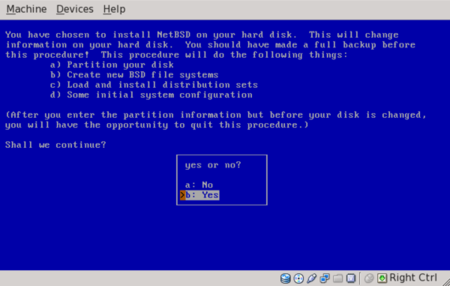
Next, we are warned to backup any data on the hard drive, and we are informed of the steps that will be taken to install NetBSD to hard drive.
The installer found only one hard drive, the VBOX HARDDISK. Next, we are offered the choices of a full installation, a minimal installation or a custom installation. I chose the custom installation, as it will offer the choices of package installation. We certainly want an X server. Shown below are the X11 packages I chose.
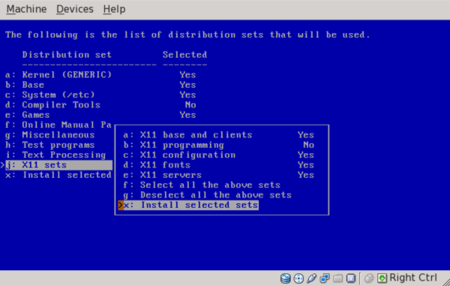
Shown here are the overall packages sets I chose to install.

Next, we are shown the disk geometry, consisting of the BIOS disk number, the number of cylinders, heads, sectors, and the disk size. We can either accept the given disk geometry, or choose to edit the disk’s parameters by hand. The values were correct, and I accepted them. In the screen shown below, we are offered the choice of editing the MBR partition table or using the entire disk. I chose to edit the MBR partition table. Using the entire disk will result in no swap partition being created.
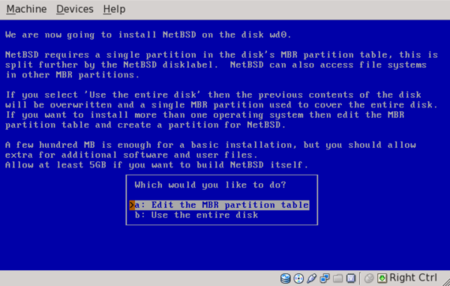
At this point, a primer on BSD disk labels would be in order. In Linux terms, there can be many disk partitions on any given hard drive. The first four can be designated as primary partitions, but any number higher than that must be designated as extended partitions. If there are extended partitions, there can only be as many as three primary partitions. The last used primary partition becomes the container for all the extended partitions. For example, if we have two primary partitions, the third primary partition becomes the container for all the extended partitions. If we have three primary partitions, the fourth primary partition becomes the container for all the extended partitions. The extended partition numbers begin with five, then count upward.
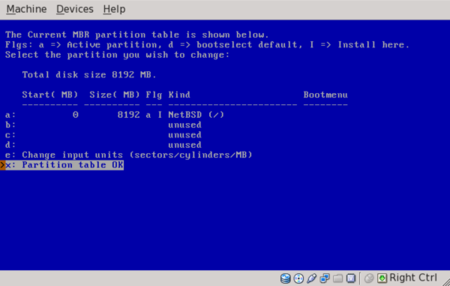
In BSD terminology, the four primary partitions are called “slices”. There can only be four slices, and no more. The slices are further subdivided into BSD partitions. This will explain why we see four pre-designated disk slots for use in the next screen. I chose to create one slice consisting of the entire hard drive which will hold all the NetBSD partitions within it.
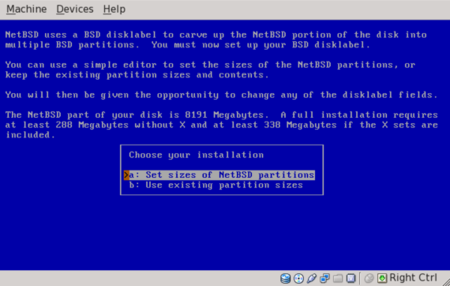
Next, we are asked whether to update the MBR to the latest version of the NetBSD bootcode. Because NetBSD will occupy the entire disk, I chose to install the bootloader. The following screen explains the BSD disklabel and gives an approximation of how little disk space will actually be required. I chose to set the sizes of the partitions.
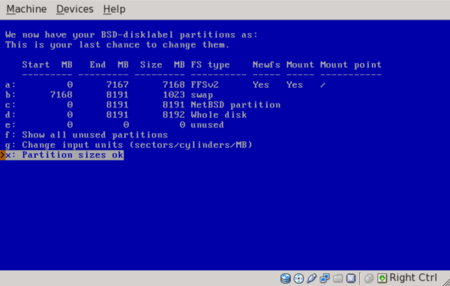
The traditional method is to use the first partition, or a, for the root, and the second one, b, for the swap area. We can then add up to twelve more partitions, each with a different mount point. I chose to keep things simple and allocated 7GB of space for the root partition and 1 GB of space for the swap partition. I chose FFSv2 (fast filesystem) as the filesystem for the root partition. You will notice that the third partition, although it is 0 MB in size, is designated as “NetBSD partition”. The third partition, c, is normally the same size as the entire slice. This allows disk utilities, such as a bad block scanner, to work on the entire slice. For that reason, the third partition is usually unused as a mount point.
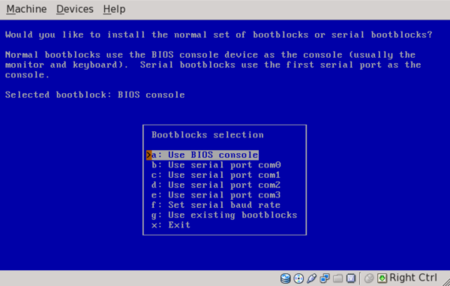
We are next asked to enter a name for the disk. I entered NetBSD. In the next screen, we are told that nothing has been written yet, and are asked whether to proceed with the installation. In the screen below, we are asked whether to install normal or serial bootblocks. Normal bootblocks use the BIOS console, usually a keyboard and monitor. Serial bootblocks use one of the first four COM ports.
We are then informed that the first portion of the procedure is complete. The system installer has created the disk partitions, has created the file systems and has checked the file systems for any errors. The next step is to install the filesets. We are offered the choice of a progress bar, no indicators or a verbose listing, which is the slowest option. I chose the default option, a progress bar. We are then asked to select a source for the filesets.
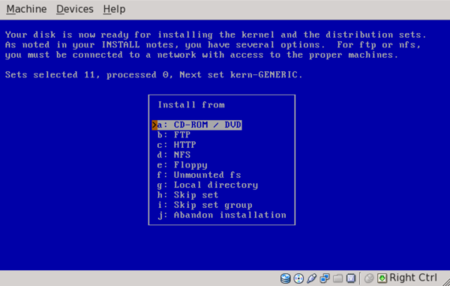
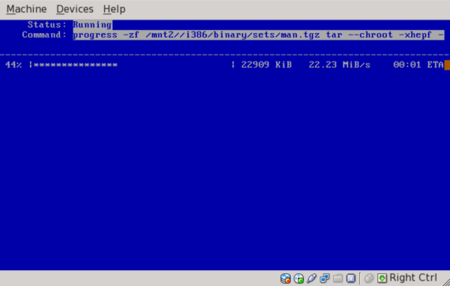
I chose the CD-ROM, then chose to continue the process in the next screen. The filesets began extracting from the CD-ROM and installing to the hard disk.
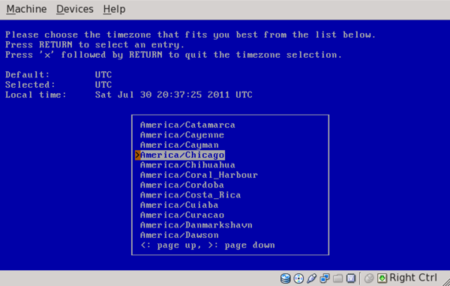
After all filesets have been installed, another screen appears, informing us that we are now able to boot from the hard disk. We are also informed that some essential things need to be configured. There is only one option, “Hit enter to continue”. The first thing to be configured is selection of the timezone.
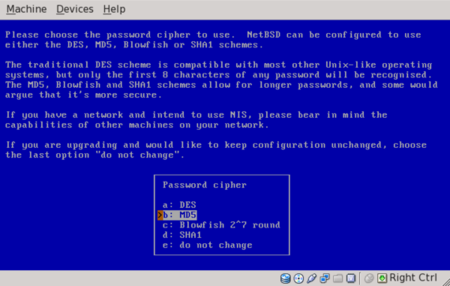
We are then asked to choose a password cipher method. The default is DES, but that method is limited to a password length of only eight characters. I chose MD5.
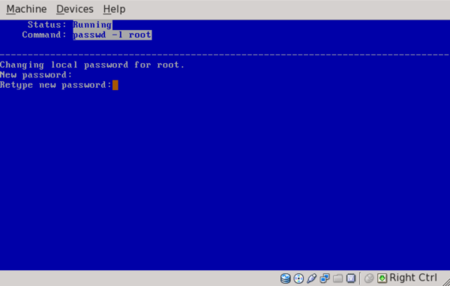
We are then asked whether to set a root password, which I chose to do.
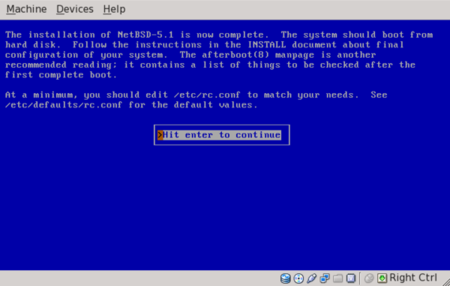
We are then asked to choose from three possible shells. I chose the default, which is /bin/sh. Installation is now complete. The screen message recommends reading the afterboot manpage and editing /etc/rc.conf.
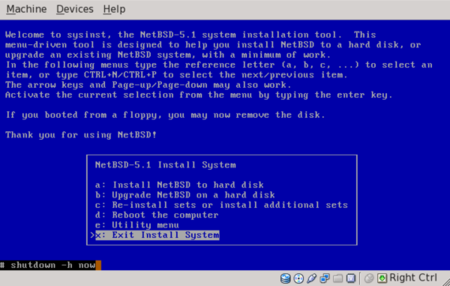
We are then offered several more installation choices, to reboot the computer, to enter a utility menu or to exit the installation. I chose to exit. At the resulting command prompt, I issued a shutdown command.
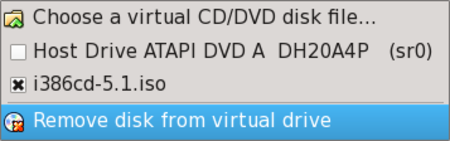
Well, the system halted, but will reboot after a key is pressed. At this point, we need to remove the CD from the virtual machine.
I have rebooted and logged in as user root. At this point, there are no other users on the system. There is a boot error message about having an empty hostname. That will need looking into.

Next month, we will look at creating a new user, configuring the system, setting up our X GUI environment and updating the system.
X marks the spot