Video Part 9 - DVDStyler Intro
by longtom
I have been in the position, like some of you as well, to download some wonderful videos and snippets of moving pictures from sites which allow you to do so, like YouTube and others. I download because my connection speed is low and once a video is downloaded I can watch it as one and without much stuttering which would come from flash being used in a browser in connection with my somewhat ancient computer.
However, for me to watch a video properly, I need to hang or lie in front of a TV and play it in my DVD player at the best quality possible.
In order to do so, I needed a program which does that and which is easy to use and reliable as far as the output is concerned. I, by far, haven't tested all I came across but now am using DVD Styler, which does for me what I want, until I find something better.
So what is DVD Styler? The website describes it as follows:
DVDStyler is a cross-platform free DVD authoring application for the creation of professional-looking DVDs. It allows not only burning of video files on DVD that can be played practically on any standalone DVD player, but also creation of individually designed DVD menus. It is Open Source Software and is completely free.
It is free software distributed under the GNU General Public License (GPL). That does all the tricks for me.
As I go along, I would like to share with you my experiences with this program, and enable you to witness what I can do with it. I certainly do not know all the ins and outs (not even close), but whatever I do know will be documented here in the form of some How To’s. How many, I am not able to say at present. I write as I go along.
To begin with, I would like to write a flv file downloaded from YouTube to a DVD, using DVD Styler at its easiest. The name of the video is “Confessions of a Train Spotter,” and it stars Michael Palin. Here it goes.
Once you have downloaded and installed DVD-Styler from the PCLinuxOS repo of your choice, you will find it in your menu with the video applications. When run for the first time, you are offered a vast collection of languages in which this program can run.
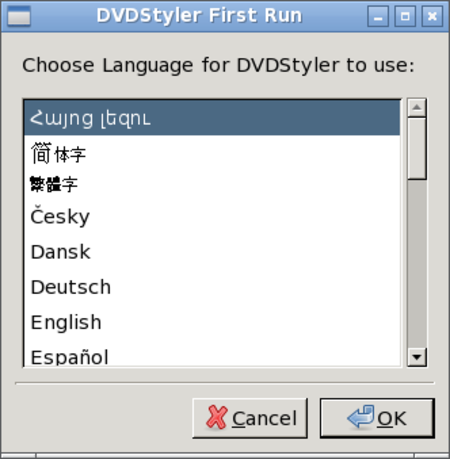
We, unsurprisingly, will be choosing “English” .
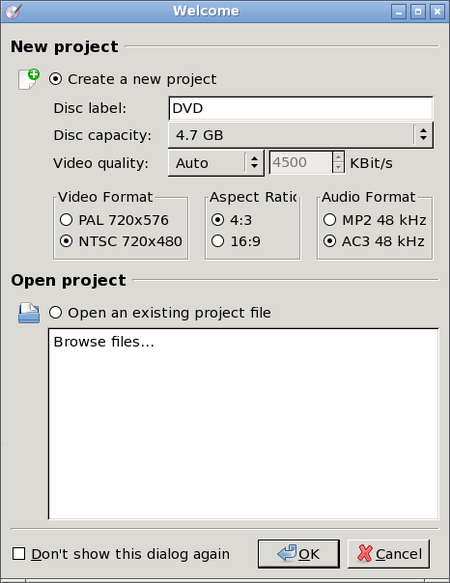
The next screen looks like this:
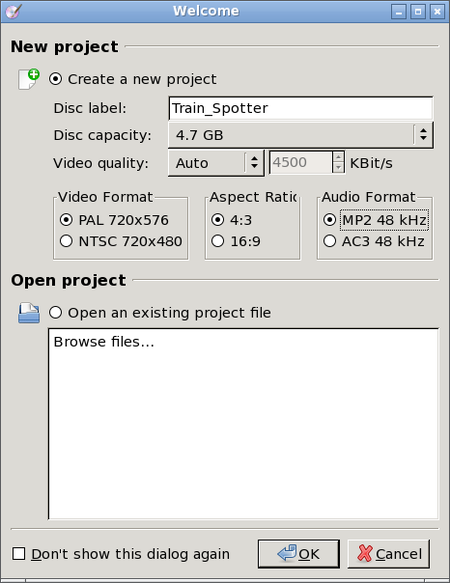
I would like to change a couple of things. My Disc Label will be changed to “Train_Spotter,” the Video format used where I live is PAL, and the audio setting which has always worked for me is MP2. Once done, my welcome screen looks like this:
You can change your settings to your liking and needs.
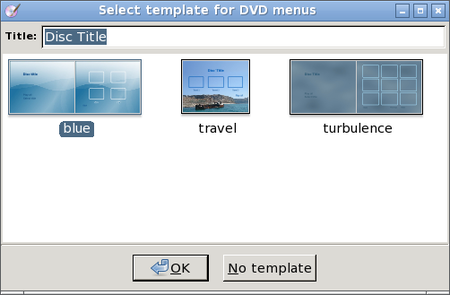
The next window that pops up will ask you to select one of DVD-Stylers templates, or to choose none. We will choose “No Template” .
The next window looks like this – and here we are at our workspace where the action unfolds.
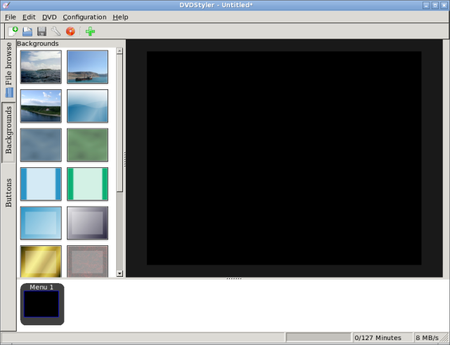
I will explain most of it as we sail along. But first things first: We choose “Configuration” at the top, and then choose “Settings”. We will see this screen:
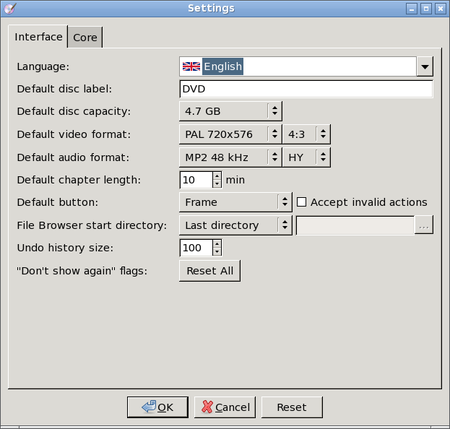
Here we can set all our preferences the way we like them. Once selected, they will become the default, so you don't need to change your standard settings every time. For the sake of this introductory ride, I will not go into any further detail on the settings.
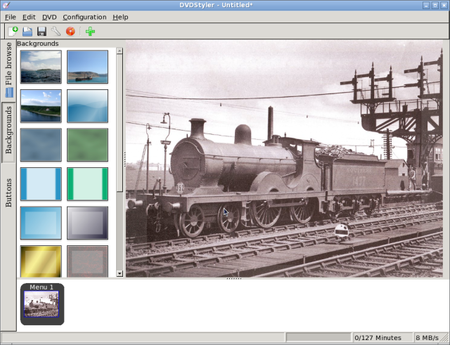
Press OK. On the left panel of our workspace, you see some backgrounds which can be used for your menu. You can also use one which you have created yourself, like I did. Choose the file browser tab and choose your picture. Main looks now like this:
Next, we add the video. We right click anywhere in the white space at the bottom next to the menu icon, and get the following menu:
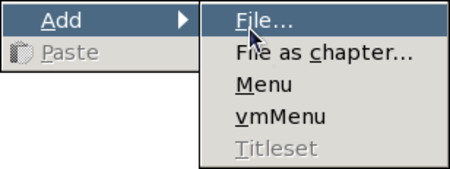
We choose “File” and … choose a file:
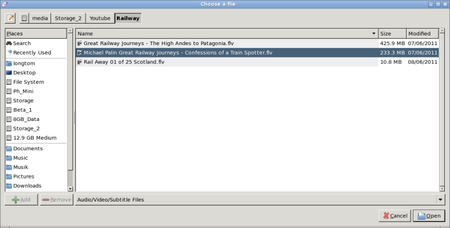
and our window now looks like this:
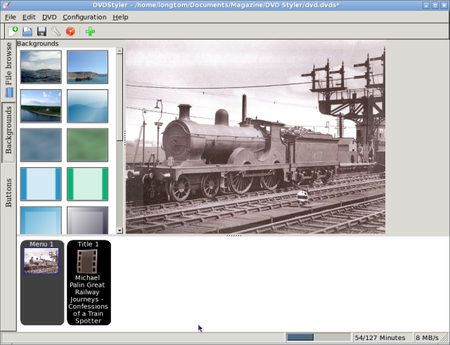
We see our video and we see at the bottom that it uses 54 of the 127 minutes available, so we are safe within the limits of a 4.7GB DVD. However, the menu is still quite bare. That's about to change. To start with we give the menu a title. Ours will be “Confessions of a Train Spotter with Michael Palin.”
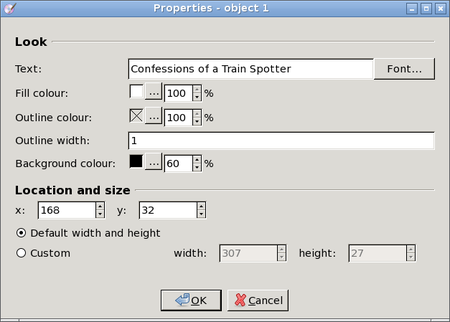
We right click on our background picture and choose Add > Text. Insert your text and press enter. In my case the text is white and hardly visible. Double click on the text and you will see the following menu:
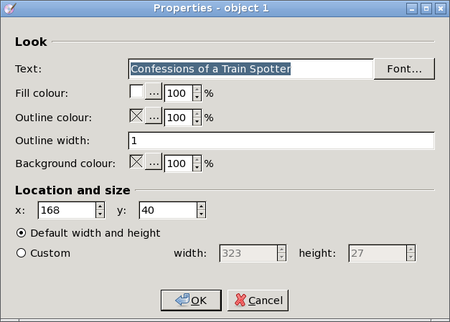
You see quite a few options to play around with. In my case I will leave my text white and give it a black, semi opaque, background. So I choose “Background colour” by clicking on the “…” button, and choose black on the colour wheel. After that, I change my opaque settings to 60%.
My menu now looks like this:
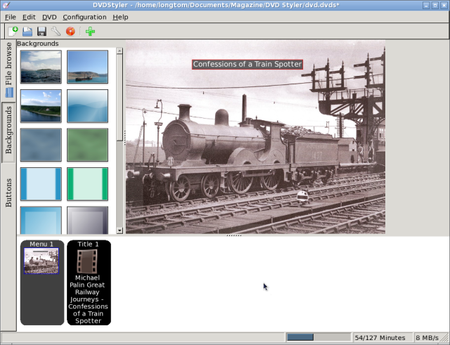
Now drag the video from the bottom into the menu. A menu item will be automatically created. You can change the size of that menu item by dragging the edges and change the properties by double-clicking on it to bring up the properties dialogue.
In the end, I did away with the border of the button and mine looks like this:

Nearly done. All we need to do now is to insert a DVD and click on the “Burn” icon at the top (the red DVD). This window appears:
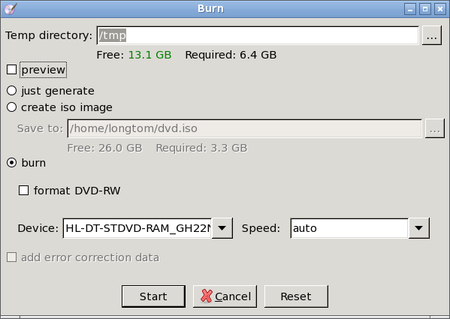
Make sure that your temporary directory is big enough, and I opted to deselect “preview.” Make sure “burn” is selected and click on the “Start” button. There she goes. The last message you will get, after some time, depending of the capabilities of your computer, is: “Burning was successful”
That's all I need to see – go enjoy your DVD.
I would like to stress the fact that the above method of creating DVDs is only for private use and not for redistribution or any other commercial venture.
Not sure what the next part will be but I would like to introduce you into creating and using chapters so we can use different videos on one DVD.
Until that time - thank you for keeping up with me.