LXDE: Meet The Heart & Soul — lxde-rc.xml
by Paul Arnote (parnote)
If you recall my original LXDE: An Overview article in the September 2010 issue of The NEW PCLinuxOS Magazine, you may remember me telling you that LXDE is not a desktop environment for beginning Linux users. This is because there is a significant lack of GUI configuration options for LXDE. Presumably, this is because of its relative youth. After all, it has only been out for four years.
To configure and tweak LXDE to your liking, you will most likely have to go in and edit configuration files by hand. If you've been following along with the LXDE articles thus far, then you will know how true that scenario is, as I have already shown how to hand edit various configuration files on your system. You will have to dig into subdirectories of subdirectories of subdirectories of top level directories, and get your hands dirty in the text editor of your choice.
With this article, we're going to take on one of the configuration files that helps control many aspects of how LXDE is displayed on your system. The information in this article will also apply to those users of the PCLinuxOS-OpenBox remaster, since LXDE uses OpenBox as its window manager.
Located in your ~/.config/openbox folder, the file is named lxde-rc.xml. This file controls your keybindings (a.k.a. keyboard shortcuts), menu text size, size of the text on your window title bars, some functions of your desktop pager plug in, desktop names, screen margins, mouse double click speed and sensitivity, and mouse button bindings, among other things. As you can see from this list, lxde-rc.xml is one of those configuration files that controls a lot of aspects of how LXDE behaves on your computer. On OpenBox, the file is named rc.xml, but the contents are virtually the same. While I'm not going to cover every section of the lxde-rc.xml file, I am going to go through some of the ones that I think you will be most interested in tweaking. I'll leave the rest of the sections for you to explore on your own.
Before we get too deep into the discussion of how to tweak and tune lxde-rc.xml, be forewarned that one misspelling or one missed command can make your additions or changes not work properly, and may have farther reaching ramifications by causing other working items to stop working. Also, when you open a command, you must also close it. Remember our previous discussions about the structure of an xml file. With this in mind, it would be an excellent idea to make a backup of your lxde-rc.xml file. I called mine old-lxde-rc.xml. Remember (or write down) where your backup file is stored, just in case you make a mess of things and find yourself having to restore the file from the command line.
Finally, before any of your changes or additions can be viewed, you must log out to the user sign in, and sign back in.
Menu Control
One of the things that lxde-rc.xml controls is the appearance of your window menus. Here is the section of the lxde-rc.xml file from my installation of LXDE that deals with the appearance of my window menus:
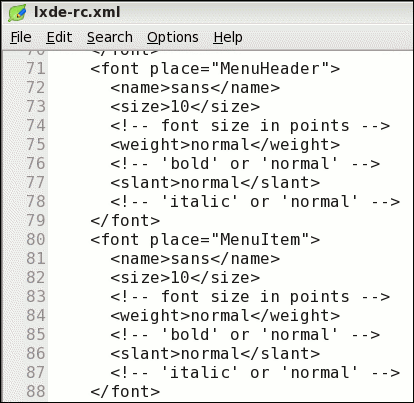
The menu appearance lines are under the <theme> section of the lxde-rc.xml file. There are only a few settings available, but these settings can have a dramatic effect on the appearance of your desktop. In the graphic above, "MenuHeader" represents the top level menus that appear directly on the menu bar, while "MenuItem" represents the items that appear under the top level menus. The <name> parameter is the name of the font to use to display the menu. The <size> setting is the size of the text to use, in points. The <weight> setting specifies whether the menu text is displayed in a bold or normal type face, while <slant> determines whether or not italic text is used. As you can see, it's fairly simple and straight forward.
Customize Your Window Theme
Just as we did above with our window menus, we can change other aspects of our window theme. Below is the <theme> section of the lxde-rc.xml file, which includes the menu section we just finished talking about.
  <theme>
    <name>oxygenminimalist</name>
    <titleLayout>NLSIMC</titleLayout>
    <!--
      available characters are NDSLIMC, each can occur at most once.
      N: window icon
      L: window label (AKA title).
      I: iconify
      M: maximize
      C: close
      S: shade (roll up/down)
      D: omnipresent (on all desktops).
  -->
    <keepBorder>yes</keepBorder>
    <animateIconify>yes</animateIconify>
    <font place="ActiveWindow">
      <name>sans</name>
      <size>10</size>
      <!-- font size in points -->
      <weight>bold</weight>
      <!-- 'bold' or 'normal' -->
      <slant>normal</slant>
      <!-- 'italic' or 'normal' -->
    </font>
    <font place="InactiveWindow">
      <name>sans</name>
      <size>10</size>
      <!-- font size in points -->
      <weight>bold</weight>
      <!-- 'bold' or 'normal' -->
      <slant>normal</slant>
      <!-- 'italic' or 'normal' -->
    </font>
    <font place="MenuHeader">
      <name>sans</name>
      <size>10</size>
      <!-- font size in points -->
      <weight>normal</weight>
      <!-- 'bold' or 'normal' -->
      <slant>normal</slant>
      <!-- 'italic' or 'normal' -->
    </font>
    <font place="MenuItem">
      <name>sans</name>
      <size>10</size>
      <!-- font size in points -->
      <weight>normal</weight>
      <!-- 'bold' or 'normal' -->
      <slant>normal</slant>
      <!-- 'italic' or 'normal' -->
    </font>
    <font place="OnScreenDisplay">
      <name>sans</name>
      <size>10</size>
      <!-- font size in points -->
      <weight>bold</weight>
      <!-- 'bold' or 'normal' -->
      <slant>normal</slant>
      <!-- 'italic' or 'normal' -->
    </font>
  </theme>
The first entry, right after the declaration of the <theme> section, is the <name> parameter. This specifies the name of the OpenBox window manager theme to use when displaying the windows. Next is the <titleLayout> setting, which determines the order of the elements that are displayed in the title bars of your windows. A legend is included, to let you know what each letter represents.
The <keepBorder> setting determines whether or not a window border is drawn when the windows are displayed. With the <animateIconify> setting, it determines if the window is animated when you minimize a window to the panel.
With the next two sections, <ActiveWindow> and <InactiveWindow>, there are exactly the same settings as we had when setting the appearance of our window menus. Here, we can set the font, font size, weight and slant of the text that is displayed on the respective window title bars (active or inactive windows). The last section, <OnScreenDisplay>, sets the font characteristics to use when you press the Alt + Tab key, and is formatted the same as the menu and window title bar text.
Desktop Pager Control
While there are settings for controlling your desktop pagers in the lxde-rc.xml file, they mirror the settings you can make using the graphical OpenBox configuration utility, ObConf. The settings in the lxde-rc.xml file are only used at startup. It's best to use the ObConf utility, since it will change your desktop pager settings "on the fly." Changes made to the lxde-rc.xml file require you to log out, then back in, before they take effect.
Customize Your Keyboard Shortcuts
Now comes the fun part, and the reason most users will want to edit lxde-rc.xml. I will admit that LXDE comes with a fairly full compliment of keyboard shortcuts, already installed and configured. But let me give you an example that happened to me. I installed PCLinuxOS-LXDE to my old IBM Thinkpad T23. It does NOT have a "Super" key (a.k.a. the "Windows" key). Some of the keyboard shortcuts are coupled to that very same "Super" key on the keyboard. Hence, they won't work on my copy of LXDE. I had to change them to a different key stroke combination.
The keybindings are located in the <keyboard> section of lxde-rc.xml. They look something like this:
  <!--keybindings for LXPanel -->
    <keybind key="W-r">
      <action name="Execute">
        <command>lxpanelctl run</command>
      </action>
    </keybind>
    <keybind key="A-F2">
      <action name="Execute">
        <command>lxpanelctl run</command>
      </action>
    </keybind>
The first line, <!--keybindings for LXPanel -->, is nothing more than a comment line, to help keep you oriented within the file. The second line, <keybind key="..."> specifies the key stroke combination to which to bind the action and command that follow. There are some reserved keys that are used here. The "W" key denotes the "Super" key. "S" specifies the Shift key, while "C" is reserved for the Control key. The "A" key is used to specify the Alt key. These reserved keys are combined with the additional key (with a dash between them) to use to execute the action and command that follows. In the second line, the "W-r" (Super key and "r" key pressed together) will run the "lxpanelctl run" command.
Starting on the seventh line, another keybinding is defined for the same command, giving the user a choice of whether to use "Super + r" or "Alt + F2" to execute the command to bring up the Run dialog box.
The entire <keyboard> section of the lxde-rc.xml file is filled with many keybindings, providing you with a fairly large number of predefined keyboard shortcuts. If some of them don't suit you, or the way you work with your computer, feel free to change them. Just be careful. Just as with any other XML file, one missed ", one misspelled command, or one command that is not closed after being opened, can cause some things to stop working. So double check your work, and always make a backup copy of the unaltered, working copy. This way, you have something to fall back on, should things really get messed up. If you want to really uncover the "magic" that can be accomplished with custom keybindings, then read on.
Advanced Keyboard Shortcuts
As you discovered in the last section of the article, LXDE has many keybindings predefined to give you a wide range of keyboard shortcuts. But the "fun" hasn't even begun. With a little imagination, you can make keybindings that take the place of specialized applications, and do things that you may have only just dreamed of. Let me show you one example I stumbled across while writing this article.
I found a real gem that illustrates a fantastic use of keybindings in LXDE, at The IgnorantGuru's Blog. His solution is to create keybindings to take screenshots of the entire screen, the active window only, or only the contents of the active window, without the interactive use of a separate and dedicated screen shot application.
Instead, his method uses ImageMagick, which is already installed in PCLinuxOS-LXDE by default, and xwd, the X-System window dump program. To make these keybindings work, you will need to install xwd from the PCLinuxOS repository.
  <keybind key="Print">
    <action name="Execute">
        <startupnotify>
            <enabled>false</enabled>
                <name>Snapshot</name>
        </startupnotify>
        <command>bash -c "xwd | convert - /tmp/screenshot-$(date +%s).png"</command>
    </action>
</keybind>
<keybind key="S-Print">
    <action name="Execute">
        <startupnotify>
            <enabled>false</enabled>
                <name>Snapshot with Frame</name>
        </startupnotify>
        <command>bash -c "xwd -frame | convert - /tmp/screenshot-$(date +%s).png"</command>
    </action>
</keybind>
<keybind key="C-Print">
    <action name="Execute">
        <startupnotify>
            <enabled>false</enabled>
                <name>Snapshot Fullscreen</name>
        </startupnotify>
<command>bash -c "xwd -root | convert - /tmp/screenshot-$(date +%s).png"</command>
</action>
</keybind>
His method uses xwd to grab the image, and he then pipes it out the ImageMagick's convert command, and stores it in the user's /tmp directory with the name "screenshot-" with the date tagged onto the end, as a PNG file. You can easily change the location where the screenshot is stored simply by changing the name of the directory from /tmp, to (perhaps?) /Pictures. I created the directory ~/Pictures/Screenshots to store my screen captures in. Just be sure that the directory actually exists and that the spelling is correct, or the command will fail.
All of the above keybindings are bound to the "PrtSc" (print screen) button on the keyboard. Pressing the PrtSc button by itself will capture just the contents of the active window. Pressing Shift + PrtSc together will capture the active window, with the window frame intact. Ctrl + PrtSc together will make a screen capture of your entire desktop.
You can just as easily change the commands to save your images as JPG files, rather than PNG files. All you have to do is change ".png" to ".jpg."
To enable the keybindings listed above, cut/copy/re-enter the above lines just before the </keyboard> line in lxde-rc.xml. Note that none of these new settings (nor any other changes you have made to lxde-rc.xml) will be available for your use until you log out and log back into LXDE.
Here is another keybinding customization you may find useful. First, here is the excerpt from the lxde-rc.xml file:
  <keybind key="C-A-Left">
      <action name="DesktopLeft">
        <dialog>no</dialog>
        <wrap>yes</wrap>
      </action>
    </keybind>
    <keybind key="C-A-Right">
      <action name="DesktopRight">
        <dialog>no</dialog>
        <wrap>yes</wrap>
      </action>
    </keybind>
These keybindings allow you to use Ctrl + Alt + Left (left arrow key) and Ctrl + Alt + Right (right arrow key) to move through your desktops. But by default, the <wrap> setting is set to a value of "no." This means when you use Ctrl + Alt + Right to move from desktop 1 to desktop 2 to desktop 3 to desktop 4, it stops after you get to desktop 4, since there is no desktop defined after desktop 4. By changing the <wrap> setting to "yes" (as I did above), once you get to desktop 4 and press Ctrl + Alt + Right, you will now go back to desktop 1. I also changed the <wrap> value for Ctrl + Alt + Left to do the same thing, but in the opposite direction.
Conclusion
As you look through the keybindings, along with all of the other settings in lxde-rc.xml, I'm sure you will find many other items to tweak and change to make LXDE work more like the way you work and interact with your computer. You have the chance to make your LXDE experience uniquely your own.
This article is only meant as a means to introduce you to the things that are possible by tweaking your lxde-rc.xml file. I have left much of lxde-rc.xml file for you to explore. I hope that as you find ways to tweak, tune and alter the lxde-rc.xml file, that you will share your customizations with the rest of the PCLinuxOS community. In this way, we can all learn from one another.