OpenOffice 4: Impress
by Meemaw
Presentations are good to use if you have to give a speech and need visual aids. You can also use a presentation as a slideshow of pictures you want people to see. For that, you need OpenOffice Impress.
This will be a very basic overview of Impress, but it should be enough to get you started.
When you first open Impress, you will get several screens asking you how you want your presentation set up:
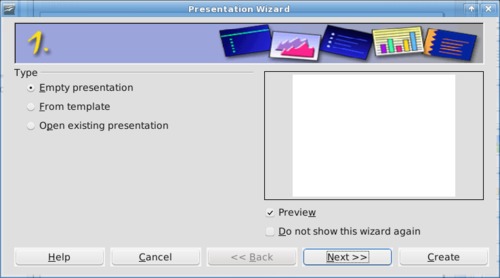
Screen 1 asks whether you want to start with a 'blank' presentation, open a template or open one that you already have. I chose blank.
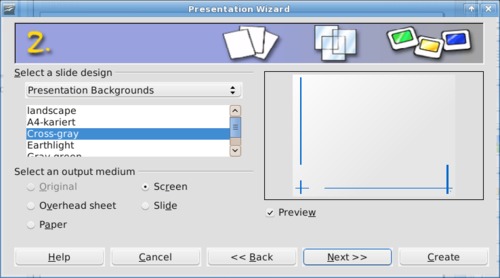
Screen 2 asks you to select a background for your slides, and also designate how it is to be displayed.
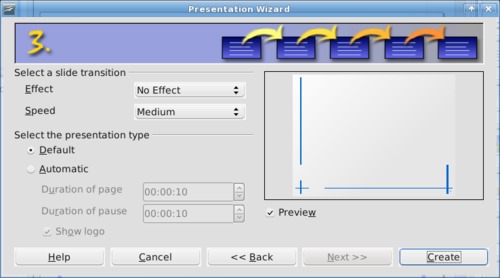
Screen 3 asks you to select the transition effect for your slideshow presentation, and also how you want the transitions to take place. (I think the defaults are as shown). From here you should click 'Create' and you will be presented with the standard Impress window, with your presentation already started for you.
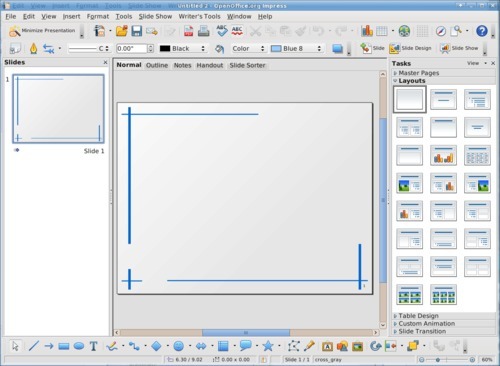
This screen is probably the one you will use most. The section at left will show a list of slide thumbnails, much like many of the pdf readers which have page thumbnails. You'll notice that right now there is only one slide. That's fine, because you can add them at any time with the Add Slide button on the toolbar.
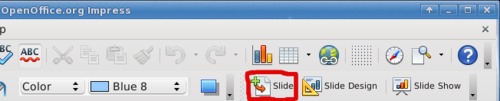
Also, in the left-hand column, you can right-click and choose 'Add Slide" from the menu that appears, or you can click Insert > Slide in the menu bar.
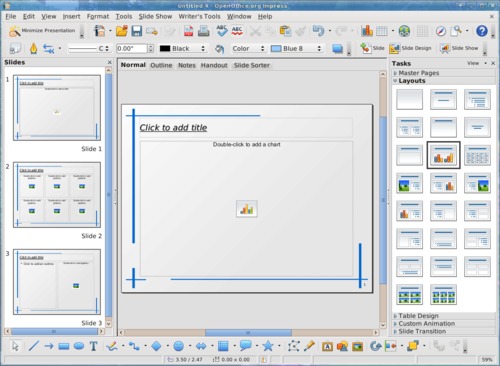
The center section displays the slide you are working on, with your background in place. The right section has most of the useful items you are going to need to design your presentation.
At the top of the center section, you will see tabs for Normal (View), Outline, Notes, Handout and Slide Sorter. Normal is the page that opened first, where you design each page of your presentation, putting in the text and illustrations for each slide.
In the Outline tab, you can type the text you want to appear on your slide. It is generally put in a text box at the top of the slide. However, you can also type information into your slide from Normal view, to make sure it goes into the text box you desire.
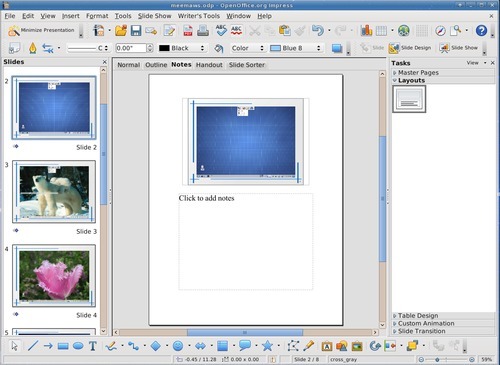
In the Notes tab, you can add any other pertinent information you want to tell your audience. This would be side comments that are not included in the slide layout. The notes can be printed out separately for you to use as reference. Each slide will be on a page, with the notes at the bottom, which you can use as reference while you give your speech.
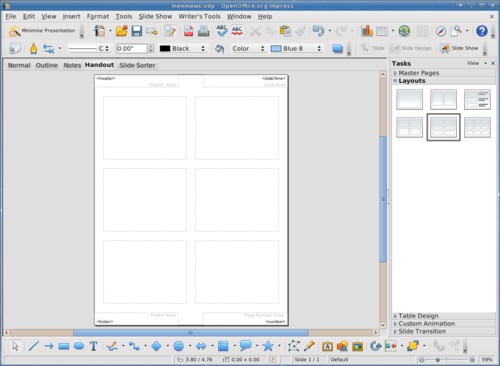
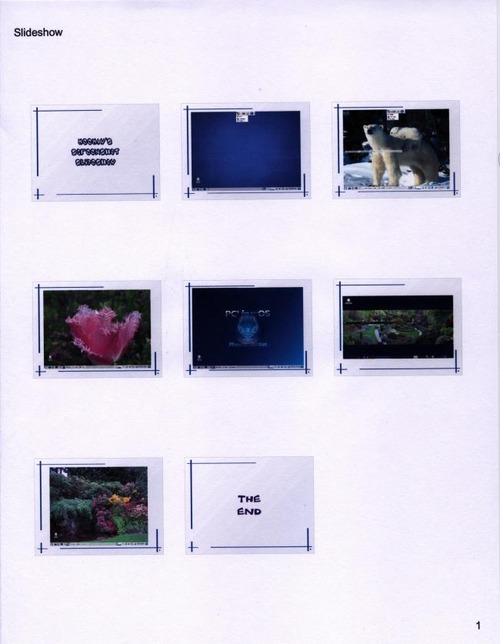
In the Handout tab, you can choose a layout for an arrangement of slides on paper which you can then give to your audience for their later reference. I have attended workshops where these handouts were used. I usually take extra notes on them so all the notes are together.
The final tab says Slide Sorter. If, in the middle of your presentation, you decide that slide 7 should really be slide 8, you can click and drag the slides to the order you want. Being the wonderful program it is, Impress will re-number them for you.
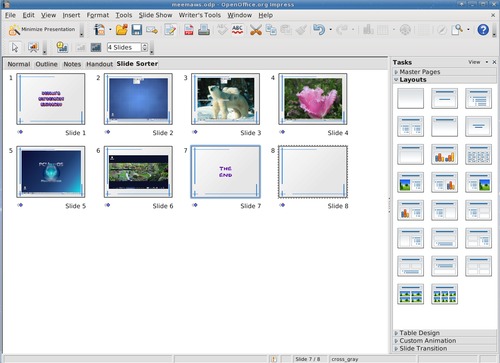
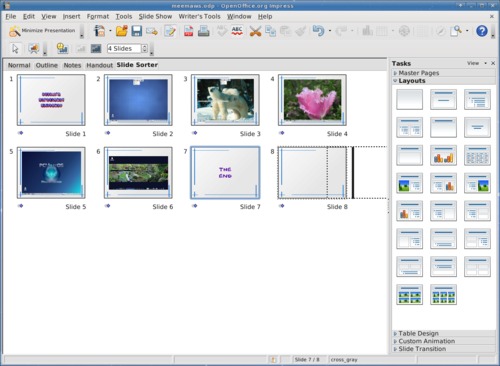
(Caption; Moving slide 7 to the end.)
On the right side you will see a list of formatting aids: Master Pages, Layouts, Table Design, Custom Animation, and Slide Transition.
Master Pages are the backgrounds available to use on your presentation, just in case you changed your mind when you set it up in the beginning.
Layouts are pre-designed templates for your slide. These are great if you have a certain form in mind and want each slide to be similar or exactly like each of the others. Each page of your presentation can have a heading or title at the top, graphic on the left side and explanation text on the right, or any other design you choose. Depending on your presentation, you may have a different layout on each page. But if each page needs a heading plus content, the layout pages have them already set up that way, and they are already spaced similarly, so the slide heading doesn't jump around during the presentation. Besides, with pre-designed layouts, that's less work for you!
The next tab is Table Design. You will see several grid thumbnails. When you click on one, the tables toolbar will open so you can configure your table the way it needs to be (number of rows, number of columns and so on.)
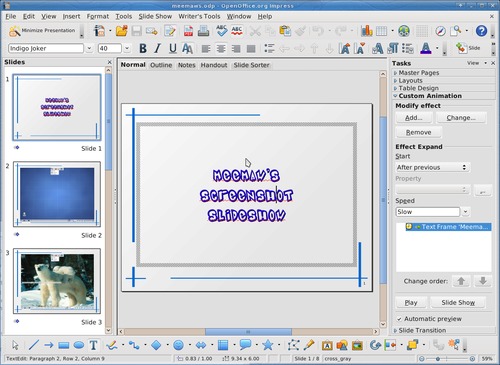
Custom Animation - Here is where you can add an effect to a certain object in your slideshow. In your slides panel, select the object on which you want the effect. (I chose to have my title appear and expand to start my slideshow. I chose slide 1 and selected the title). In Custom Animation, you click Add, then choose the animation desired from the box. (I chose Expand). Then you configure how you want it to start, and how fast you want it to go. Clicking the 'Play' button plays a sample, so if you don't like it, you can try something else.
As tempting as it may be to use lots of different animations in your presentation, you'll be much better off to resist the temptation. While the custom animations are all very cool and you'll want to use them all, doing so may make your presentation look amateurish. At the very least, it may make your presentation appear to lack direction, and may distract from the message you are attempting to deliver. The better practice is to limit yourself to one or two custom animations. Three should be the absolute limit, and may be pushing things, at that.
Slide Transition - Even though you set your preferred transition when you were setting up your presentation, you still need to configure the transitions. You can change back to transitioning on mouse click (maybe to practice your speech) or change the interval you want between slides.
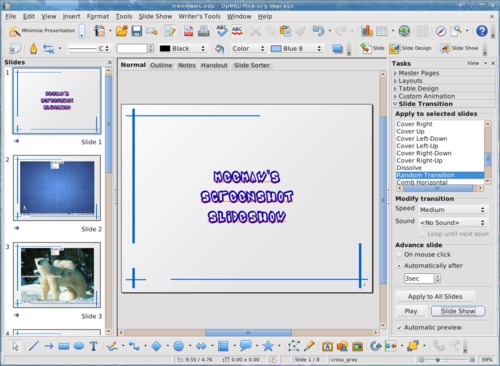
Just as with the custom animations, it's best to limit yourself to one or two slide transitions, and use them throughout your presentation. Again, using too many types of slide transitions can make your presentation appear amateurish, or may distract from the message you are trying to deliver.
It's especially important to consider the nature of your message. If your message is a serious one, or one you wish to be taken seriously, it's best to consider more modest, simple transitions and animations. Whimsical and "fun" transitions and animations will detract from the seriousness of your topic. This may cause your audience to not take your message seriously, make them discount the seriousness of your message, or cause your audience to question the validity of your message altogether.
At the bottom of the window, you will find the Drawing toolbar, along with some of the other formatting aids we've already seen, Gallery, Fontwork Gallery and Insert from File. Layer, alignment and rotation tools are also available and will display here.
While this presentation only has eight slides, your presentation can be as long as you wish. Have fun making your own!