A Guide to Multi-Disk Multi-booting for the Intermediate User
by Gary L. Ratliff Sr
As all of my computers since my first purchase of a Commodore PET* in 1978 have been able to use multi booting, I was very much interested in the article by Clare Oldie which appeared in the second issue of PCLinuxOS Magazine. While that article concentrated on using a single PATA drive for installing additional Linux distros this article will expand to using a second drive for the purpose of installing and booting many versions of Linux.
* Here multi-booting is used loosely. The PET would boot into BASIC or the tape could be used to force it into the mlm for 6502. Later versions had a built in machine language monitor. The SuperPET had 6502 mode and 6809 mode. It also had a suite of five different computer languages from Waterloo. My Atari 1040 would run 68000 code and could use PC Ditto to emulate an MS DOS machine. My first Windows machine came with Windows 95 and a gemulator to run software for the Atari. Even an old machine with 8 inch floppies had MSDOS 1.0 and another for CP/M 86.
The hardware I am using is the following: Dell Dimension 6100 which has 128 megs of memory, one DVD ROM drive and another drive which burns CDs. This also has four USB ports. Additionally I have purchased a 320 gig MyBook External hard drive and a USB card reader which reads SD cards. These are the type which are used in several versions of digital cameras. This system will be used to obtain and burn the various flavors of Linux which we will install. This system came with Windows ME and had PCLinuxOS 2007 installed once it was set up for multi booting. Even with only 128 megs of memory on this machine PCLinuxOS functions very well. Most modern Linux CDs seem not to want to install on any system which doesn't have at least 256 megs of ram. The second system to which many Linux distros will be installed is an HP a1253w. This has been enhanced to have 2 gigs of memory, as well as a more robust video card: an Nvidia FX 5500 3D Fuzion was installed and the onboard ATI card disabled. The 100 gig hard drive was partitioned to use 40 gigs for Linux and PCLinuxOS 2007 was installed on it.
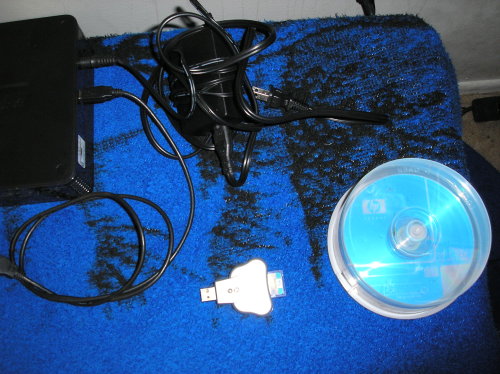
A Picture of items used in this project:
- Top Left MYBOOK USB 320 gig portable HDD.
- A USB Card Reader even works with older 1.1 USB ports.
- An ample supply of blank CDs enables rapid burning of downloaded iso images.
The first step will be to select and install an additional hard drive. To obtain the best price you may wish to check out the ads from the main computer and office supply stores in the Sunday newspaper. The time to buy is when you notice such items as all hard drives 25% off. I selected a 320 gig internal drive. To install you will want to load the install CD which comes with your new drive. Most will have videos and other instructions which will make installing the drive very easy. Mine even analyzed the system and prepared a detailed guide for my exact hardware. However, it is important to ensure that the jumpers on the drive are set correctly. The proper setup for most systems will be cable select. Then the location of the cable from the motherboard will determine if this is the master or the slave. If the jumpers are not set correctly you will immediately know as neither of your drives will function until the settings allow them to work.
Having installed the new drive you will want to format it. As almost all systems you purchase will have Windows pre-installed, we will first format the drive for use with Windows. Here, as the Windows XP Media Center Edition (which came with the HP a1253w) uses NTFS, the entire new drive is formatted to NTFS using the install CD that came with the new drive. Next, you will want to follow the advice in the previous article and create several 10 gig partitions to use for the Linux installs. Place the PCLinuxOS CD into the drive and start the install process. Run this to the partitioner and here select the Manual option. This will launch GParted and you will then break the 320 gig NTFS partition into several 10 gig partitions. These should all be made into ext3 types. However, you will first want to create a Linux swap partition. The recommendation is to have a swap partition which is two times the memory you have installed.
Next, where to find the Linux distros to install? The best idea is to have a broadband Internet connection. However, much of my collection of CDs and DVDs are from regular purchases of Linux magazines. Linux Format, Linux User and Developer, and Linux Pro Magazine each come with an install CD or DVD containing at least one, and sometimes as many as five new distros. They will usually be the current and most popular distributions. One may open Firefox in PCLinuxOS and use the Google search tool to look for Live Linux CDs. Here you will find any type of live CD, from a small system to a special distro for mastering lisp. Or you may search for Distrowatch and use the links provided. This also lists many interesting possibilities including a new distro to prepare a Linux user for the Linux Administrators' Exam. Clicking on one of the links will take you to the download mirror site. Select the save option and the image will soon appear on your desktop.
Firefox will report the status of the download. This should take 15 minutes to an half hour for the usual 650 to 700 meg distro size. (For a real surprise try downloading the newest distro on its release date. My attempt to get Gutsy Gibbon on October 18, 2007 revealed that I was downloading at the astounding rate of 16 Kbps whereas my usual rate is near 350 to 400!! I soon decided to just wait a couple of days.)
Next, having obtained a new distro in ISO format you will need to burn this to a CD. Placing a blank CD into the CD reader will create a window asking what you wish to do. Here you will need to select "create new data project." This will open up K3b, there will be an icon of the newly downloaded file on the desktop. Just drag and drop this into the K3b window. Another window will appear informing you that this image may be burned directly from the CD image on your desktop. So select this and the CD will begin burning. A window will appear at the top of the screen. Also you will want to click the verify data box on the K3b window to insure that your new CD is correct. Click the start box to begin burning the CD. The CD will begin to burn at the maximum speed allowed by your burner. (Note: you can also choose the burn speed prior to starting the burn. It is recommended that you choose a lower burn speed as it will insure a better burn. 8x-12x is a good choice.)
Once the CD has been burned we are ready to archive the file. Go to "My Computer" on your desktop and click this. Then go to "Storage Media" and click this; now click on the MYBOOK icon. Now exit from the windows created. You will now see a MyBook icon on your desktop. Drag the icon for the downloaded file to the MyBook icon and select the "move here" item on the dropdown menu which appears. A progress window will appear showing the file now being transferred from the desktop to the MYBOOK drive. Once this is complete the file icon will vanish from your desktop.
Using this method you will soon have a collection of CD images which you may use to install several flavors of Linux to your target machine. Make sure that this machine is set up to boot from the CD as the first option. This is obtained by pressing the setup key on the first splash screen you see after you start the machine. This item is usually found on the advanced options of the setup menu.
Open the CD drive and pop in a CD with the distro you wish to install. If this was a live CD, the system will load up and you will instantly know that all your hardware is usable with this version of Linux. Now select the install option and in each case you will want to select the manual partition option. Use a note pad to write down which partition you use for each install. As most modern systems have a set of slots on the front for reading cards, we will test the new install and save the file found in: /boot/grub/menu.lst to the SD card. If you do not have a card reader then a USB stick will work also. You will want to re-name this to indicate the distro it came from. An example command would be: cp /boot/grub/menu.lst disk/ubuntumenu.lst. An alternative would be to open GEdit in a distro which uses Gnome or open KWrite in one using KDE, as root of course. Then you would request an edit of the file /boot/grub/menu.lst and then save it to the SD card which will usually appear on the desktop.
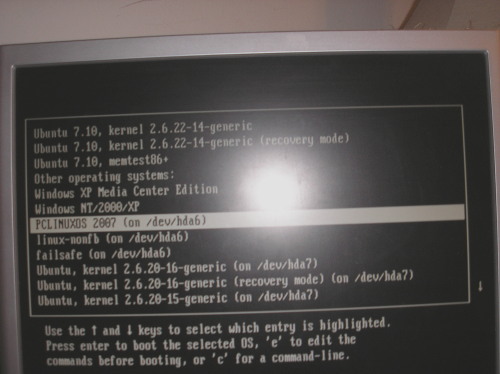
Now having installed one new distro you will proceed to install other distros and you will allow each to simply re-write the MBR. The distros will either 1) Setup the process for booting windows and themselves, 2) Change the boot loader to Lilo (The distros based on Slackware seem to do this. 3) Offer to find the other operating systems and set up a menu.lst file which will recognize all the distros you have currently installed. Here you will note which of the distros you have which fall into the third category. Once you have installed all the distros you want to, you will simply re-install a distro which recognizes the other Linuxes you have installed and let it take charge of the grub menu. Once this is done you will just edit the resulting /boot/grub/menu.lst file to correct the systems which were not correctly recognized.
Often the system will be identified as Linux on hdd12 while you will want to edit this line to read: Slackware 12.0 on hdd12. You will soon have a properly edited menu.lst file with all your systems correctly named and all bootable. One vital thing to remember while installing these systems is to use the same password for root and the same password for the user. Otherwise you will need to make extensive notes as to the set of passwords used and this will leave the notebook with all the notes of your passwords laying about for others to find. Also, a reminder to select only the manual partition option when installing each new system. For example, on the new Yoper distro, the manual partition option is not offered. At this point you will need to cancel the install and go on to the next distro. By default the systems will grab the entire drive and wipe out the system. You really don't want this to happen, so be extra careful.
With your newly installed hard drive you should also have enough partitions free that you may wish to try virtualization. In your selection of distros you will want to try some of each flavor: Debian, Red-Hat Fedora, Suse Novell, Gentoo, and Slackware. By trying these you will gain a broader understanding of Linux and you will also come to appreciate the power and simplicity of PCLinuxOS. Then if you find features on some of the other distros you can suggest that they be incorporated into the distro.
There are now several flavors of PCLinuxOS and each serves a different need. The distro is improving all the time. If you follow the list published at Distrowatch you will observe that PCLinuxOS has had the top spot for several months and the fact that the developers listen to suggestions for improvement is one of the main things keeping them at the top of the list.
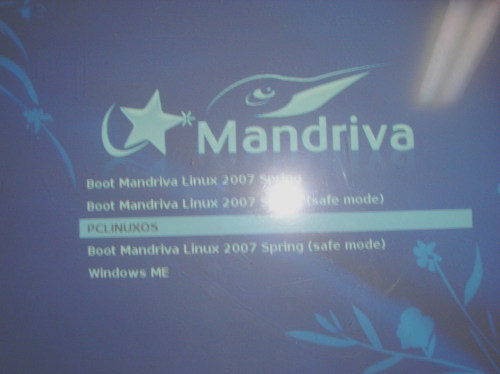
The first page of the grub boot menu on the HP a1253w ready to launch PCLinuxOS 2007 on this system.
Suggested reading: As in the original article it would benefit the reader to read:
http://www.pclinuxonline.com/wiki/BootloaderFAQ
Searching google for multibooting also yields many items of interest.